
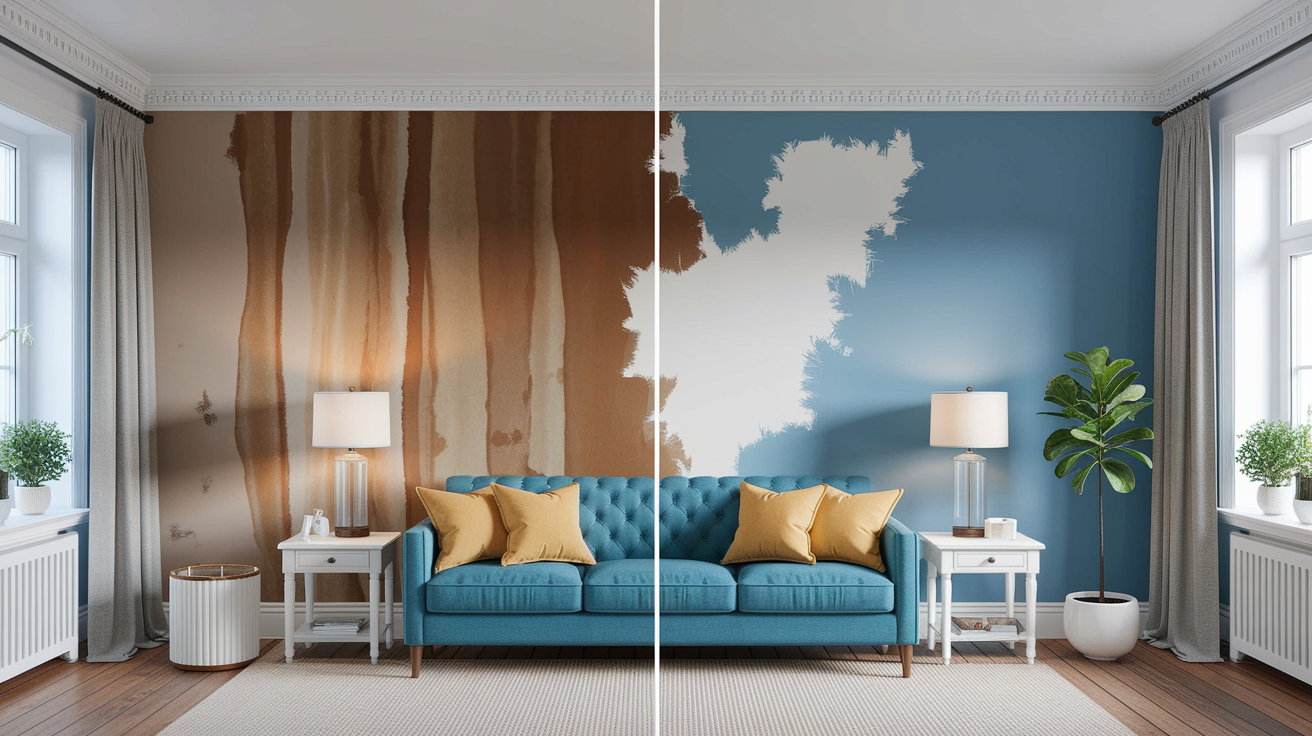
You can’t paint over wet drywall and pretend it didn’t happen. That stain will bleed through, the texture will crack, and you’ll be right back where you started in a few weeks. Wet drywall texture repair works only when you stop the water source, dry everything completely, cut out damaged sections, patch correctly, and match the texture before painting. Skip any step and you’re setting yourself up for mold growth, failed repairs, and wasted time. Here’s how to fix water damaged drywall texture the right way.
Complete Repair Process for Water-Damaged Drywall Texture

Water damaged drywall texture can be fixed if you follow the right steps. The process takes patience because proper drying time is critical and you can’t rush it without risking mold growth and repairs that fail.
Step 1: Stop the Water Source
You have to do this before any repair work starts. For plumbing leaks, shut off the water at the local valve under the sink or toilet, or turn off the main water supply if you can’t find the specific valve. Common sources that cause wet drywall include burst pipes, missing roof shingles, clogged gutters backing water under eaves, failed plumbing fixtures like toilet wax rings, HVAC condensation dripping from air handlers, and foundation cracks allowing groundwater seepage. You can learn more about identifying these issues in our guide on Common Water Leak Sources in Homes.
Safety comes first. Shut off power at the breaker if the leak is near light fixtures, outlets, or any wiring. Never handle wet wiring or try to hand dry electrical components. If wiring has been submerged for over 24 hours, call a licensed electrician to inspect before turning power back on.
Step 2: Assess the Damage Extent
Start with a visual inspection looking for brown or yellow stains, discoloration spreading across the surface, bubbling paint or texture, sagging sections, and peeling paint layers. Next, do the press test by gently pushing on damaged areas with your fingertips. If the drywall feels soft, spongy, or gives under light pressure, the gypsum core inside is compromised and that section needs full replacement.
Use a moisture meter to detect hidden damage you can’t see. Check both the drywall surface and the wood framing behind it. Readings above 15 to 17% in wood framing mean there’s still too much moisture and you need more drying time. Repairable damage shows slight bubbling, light staining, minor texture separation, and surface discoloration with firm core underneath. Damage requiring replacement includes significant browning or dark staining, sections that have fallen or are hanging loose, visible mold growth appearing as black or green spots, spreading watermarks getting larger instead of drying, and any area that fails the press test.
Step 3: Dry the Area Completely
This step isn’t optional. Skipping thorough drying invites mold growth, which can start forming in dark, damp wall cavities within 24 to 48 hours of water exposure. Open windows in the affected room to create cross ventilation. Position box fans or air movers aimed directly at the wet areas to keep air circulating constantly. Run a dehumidifier in the room with doors closed to pull moisture from the air.
Drying time depends on several variables. How saturated the materials got, current humidity levels in your area, and how much airflow you can maintain. Expect anywhere from 3 days for minor surface dampness up to several weeks for heavy saturation or during humid seasons. Use your moisture meter daily to track progress. Don’t move on to cutting or patching until readings consistently show below 15 to 17% in the wood framing.
Step 4: Cut Out Damaged Drywall
Mark your cut lines 6 to 12 inches beyond the visible damage or high moisture readings. Use a 4 foot level as a straightedge to draw perfectly straight, squared lines with a pencil. This creates clean edges that make patching easier and look better when finished. Score the face paper along your marked lines with a sharp utility knife, pressing firmly but not cutting all the way through yet. Switch to a drywall saw to cut completely through the drywall, following your scored lines.
Cut back to the nearest framing members, either wall studs or ceiling joists, so you have solid wood backing to attach your patch. Create squared openings with 90 degree corners rather than irregular shapes. After removing damaged sections, inspect everything behind them. Check wood studs and joists for dark staining, soft spots, or moisture. Pull back insulation to look for dampness or mold. Replace any insulation that got wet.
Step 5: Install Backing and Replacement Patch
Measure your opening carefully and cut replacement drywall to fit exactly. Match the thickness precisely because standard residential drywall comes in 1/2 inch and 5/8 inch thicknesses, and mixing them creates uneven surfaces. If your cuts don’t land perfectly on existing studs or joists, you’ll need backing supports. Cut 2×4 boards or furring strips long enough to extend several inches behind the existing drywall edges on both sides of the opening. Slide them into the cavity and screw them to the cut edges of the existing drywall, creating a solid surface to attach your patch.
Test fit your patch piece to confirm it fits without forcing. Once you’re satisfied, secure it with drywall screws spaced every 8 to 10 inches around the entire perimeter. Drive screws until heads sit slightly recessed below the surface, creating small dimples, but don’t break through the paper face. Broken paper reduces holding strength and creates loose spots.
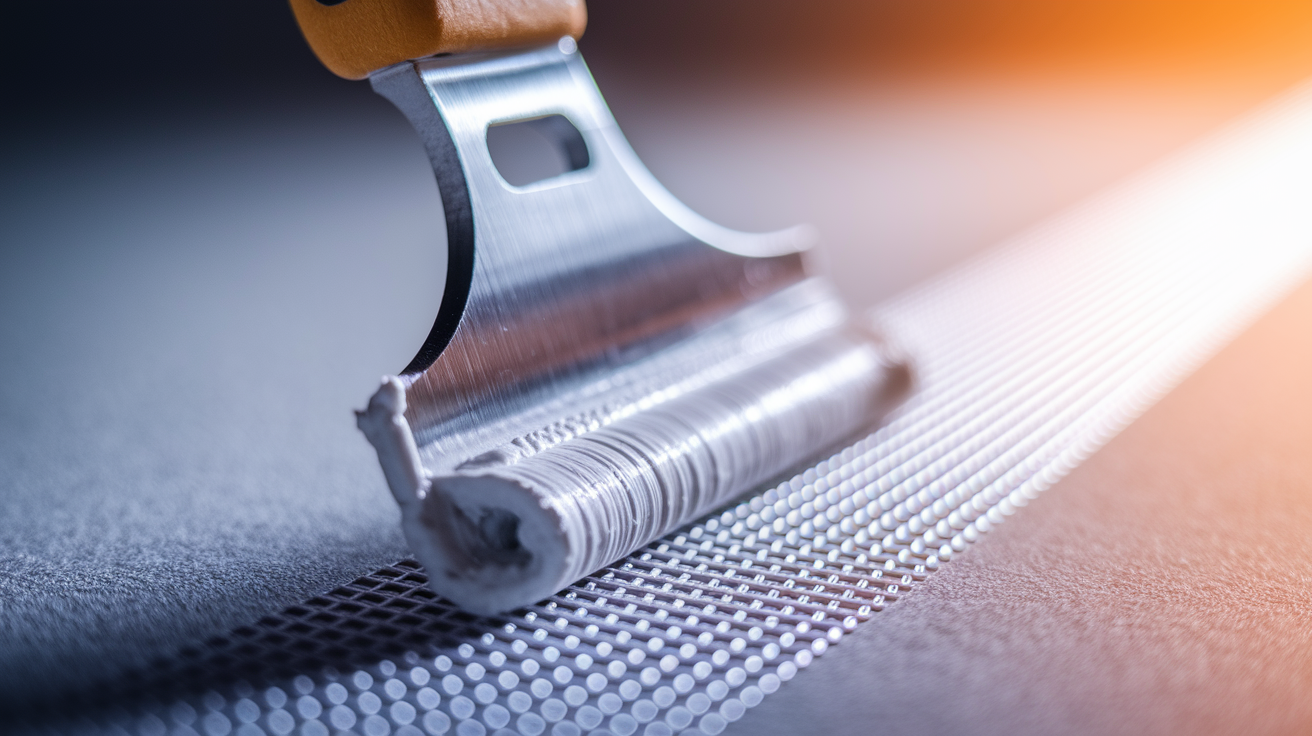
Step 6: Apply Tape to Seams
Choose between fiberglass mesh tape and paper tape. Fiberglass mesh tape has adhesive backing, sticks directly over seams, and works well for beginners because it’s more forgiving. Paper tape creates stronger joints but requires more skill because you embed it into wet joint compound and must squeeze out all air bubbles for proper bonding. For most repairs, apply fiberglass mesh tape over all seams first, pressing firmly so it sticks completely. Then apply a thin coat of joint compound over the tape, pressing it through the mesh openings with your knife. This embeds the tape and begins filling the seam.
Step 7: Apply Joint Compound in Layers
Follow a three coat system with full 24 hour drying between each layer. For the first coat, use a 4 to 6 inch taping knife to embed the tape and fill the seams. Load your knife with compound, hold it at a slight angle, and draw it smoothly across the seam while applying firm pressure to push compound into gaps. Scrape off excess. For the second coat after the first has dried completely, switch to an 8 to 10 inch knife to apply wider coverage that builds up the surface and begins smoothing transitions into the existing wall. For the third coat, use a 12 inch knife to feather the edges outward, creating smooth blending that makes the repair invisible.
Always apply thin coats. Thick applications take forever to dry completely, shrink as they cure, and crack from internal stresses. Build up gradually instead. Each layer should extend slightly wider than the previous one, progressively feathering outward for smooth transitions.
Step 8: Sand Between Coats
After each coat dries fully, sand gently using 120 grit sandpaper wrapped around a sanding block or a damp sanding sponge for dust control. Use light circular motions and focus on ridges, bumps, and transition areas where compound meets existing wall. Run your hand across the surface frequently to feel for smoothness because your fingers detect imperfections better than your eyes. Be careful not to over sand. Heavy sanding exposes the mesh tape underneath and creates low spots that need additional filling. Just smooth enough to get rid of obvious bumps and create gradual transitions.
After sanding each layer, wipe all surfaces with a slightly damp cloth to remove drywall dust. Dust left on the surface stops the next compound layer from bonding properly.
Step 9: Match the Texture
This step recreates the existing wall or ceiling texture pattern so your repair blends in. Before working on the actual repair, practice on a piece of cardboard or scrap drywall. For orange peel texture, which looks like a light bumpy surface resembling citrus skin, use an adjustable aerosol texture spray can for small repairs. Hold the can 18 to 24 inches from the surface and spray in overlapping passes. Adjust the nozzle setting to control how heavy or light the texture appears. For larger repairs, use a texture hopper attached to an air compressor. Start with lower air pressure and gradually increase until the pattern matches your existing texture.
For knockdown texture, which appears as flattened bumps with random directionality, you create it in two steps. First, spray texture onto the surface using either aerosol cans or a hopper gun. Let it sit for about 10 to 15 minutes until it becomes slightly firm but still workable. Timing matters here. Too wet and you’ll smear it flat, too dry and you won’t be able to knock it down. Run a clean taping knife lightly across the surface in random directions, gently flattening the peaks while leaving the texture base intact.
Step 10: Prime and Paint
Use shellac based or oil based stain blocking primer, not standard latex primer. This is important because water stains contain tannins that bleed through regular latex primer within days, making brown spots reappear through your fresh paint. Apply stain blocking primer to the entire repaired area after texture dries completely, extending slightly beyond the repair boundaries. Let it dry according to label directions, usually 30 minutes to an hour.
Match both the paint color and sheen level. Bring a paint chip or small sample of your existing wall color to the paint store for computer matching. Pay attention to sheen because matte, eggshell, satin, and semi gloss all reflect light differently. Even perfectly matched color looks wrong if the sheen doesn’t match, especially in angled light. Apply multiple thin paint coats, feathering well beyond the repair edges. For best results, particularly on older ceilings or walls where the existing paint has yellowed or faded, repaint the entire wall or ceiling section rather than just the patch area.
Typical timeline for the complete wet drywall texture repair process runs longer than most people expect. Drying alone can take anywhere from 3 days to several weeks depending on saturation levels and humidity conditions. The actual repair work typically requires 1 to 2 days of labor spread over a full week due to mandatory drying time between compound coats. Professional repairs typically cost $300 to $850 for standard water damaged drywall, with contractor labor running $60 to $90 per hour depending on your location. Patience throughout this process pays off. Rushing any step, especially drying, leads to failed repairs that require starting over.
Essential Tools and Materials for Drywall Texture Repair

Having everything ready before you start saves trips to the hardware store and keeps your repair moving forward.
Tools Needed:
Sharp utility knife with extra blades, drywall saw for cutting through panels, joint knives in three sizes (4 inch, 8 inch, and 12 inch for progressive feathering), putty knife for small detail work, sanding block or pole sander, 120 grit sandpaper or sanding sponges, texture spray gun or hopper gun for applying texture, air compressor if using hopper gun for texture, moisture meter to verify dryness before proceeding, dust mask or respirator for sanding, safety glasses to protect from falling debris, and 4 foot level for marking straight cut lines.
Materials Required:
Replacement drywall sheets matching your existing thickness, fiberglass mesh tape or paper tape for seams, all purpose joint compound or 20 minute setting compound, texture mix or aerosol texture spray, shellac based or oil based stain blocking primer, paint matching your wall color and sheen, 2×4 boards or furring strips for backing if needed, drywall screws (1 and 1/4 inch length), and heavy duty plastic sheeting to protect floors and furniture.
Investing in quality joint knives makes a noticeable difference in your results. Cheap knives flex too much and leave ridges that require extra sanding.
Taping and Mudding Wet Drywall Repairs
The taping and mudding process creates the foundation that your texture matching depends on. Get this right and the rest follows smoothly.
Choose your tape based on your comfort level. Fiberglass mesh tape works well for most repairs because it has adhesive backing that sticks directly over seams. You just press it on and you’re ready to apply compound. Paper tape creates stronger, more durable joints but requires more technique. You have to embed it into wet compound and carefully squeeze out all air bubbles by running your knife along its length with firm pressure.
The three coat system builds up your repair in stages. Each layer serves a specific purpose. The first coat embeds the tape and fills the seam depression using a 4 to 6 inch knife. Load compound onto your knife, hold it at about a 30 degree angle, and draw it firmly across the seam. Press hard enough to push compound through the mesh tape or under paper tape, then scrape off excess by increasing your knife angle. The second coat, applied after 24 hours of drying, uses an 8 to 10 inch knife to build up the surface and widen your coverage. This coat begins creating smooth transitions into the existing wall. The third coat uses a 12 inch knife to feather everything outward, blending the repair so you can’t tell where the patch ends and original wall begins.
Always apply thin coats. A common mistake is trying to fill everything in one thick pass. Thick compound takes days to dry completely, shrinks as it cures, and develops stress cracks. Thin layers dry faster, bond better, and stay smooth. Each layer should extend slightly wider than the one beneath it, progressively feathering outward. Load your knife with compound, spread it across the area, then make a final smoothing pass with an almost clean knife to get rid of ridges and trowel marks. Let each coat dry a full 24 hours before applying the next.
Sanding Drywall Compound Between Texture Coats

Sanding creates smooth transitions that make your repair invisible, but over sanding causes more problems than it solves.
Use 120 grit sandpaper for all your between coat sanding. Coarser grits like 80 or 100 cut too hard and create scratches that show through paint. Wrap sandpaper around a sanding block for flat walls or use a damp sanding sponge if you want to minimize dust. Work in gentle circular motions, focusing on ridges where your taping knife left edges and on transition zones where compound meets existing wall.
Check your progress constantly by running your hand across the surface. Your fingers detect bumps and depressions better than your eyes, especially before primer and paint reveal every imperfection. Sand just enough to smooth the surface. Over sanding exposes the mesh tape underneath, cuts through to the paper face of the drywall, or creates low spots that need filling with more compound.
Drywall dust spreads everywhere if you don’t control it. Seal doorways with plastic sheeting taped around the frame. Cover HVAC vents with plastic and tape to prevent dust from entering ductwork and spreading through your house. Wear a dust mask while sanding because breathing drywall dust irritates lungs. After sanding each layer, wipe all surfaces with a slightly damp cloth to remove dust before applying the next coat. Dust left on the surface prevents proper bonding.
The goal isn’t a perfectly smooth surface at this stage. You’re just getting rid of obvious ridges and bumps. The texture you apply later hides minor imperfections.
Matching Existing Drywall Texture on Repaired Areas

Texture matching makes the difference between a repair that disappears and one that announces itself from across the room.
Orange Peel Texture Application
Orange peel is the most common residential wall texture. It looks like a light, bumpy surface resembling the skin of an orange. For small repairs under two square feet, adjustable aerosol texture spray cans work well. Shake the can thoroughly for at least two minutes. Hold it 18 to 24 inches from the surface and spray in overlapping passes, building up coverage gradually. The nozzle adjusts to control how heavy or light the texture appears. Test spray on cardboard first, adjusting until the pattern matches your existing texture density.
For larger repairs, use a texture hopper connected to an air compressor. Mix texture compound to a consistency similar to thick pancake batter. Fill the hopper, adjust the air pressure starting at around 40 psi, and spray in steady, overlapping passes. Higher pressure creates finer texture, lower pressure creates heavier texture. Practice on cardboard until the pattern matches before spraying your actual repair.
Knockdown Texture Technique
Knockdown texture appears as flattened bumps with random directionality, creating a subtle pattern that hides imperfections well. Apply it in two steps. First, spray texture onto your surface using either aerosol cans or a hopper gun, applying it slightly heavier than orange peel. Let it sit for 10 to 15 minutes until it firms up but remains workable. Touch it lightly with your finger. It should feel slightly tacky but not wet.
Run a clean, wide taping knife lightly across the surface in random, overlapping directions. You’re gently flattening the peaks while leaving the texture base intact. Don’t press hard or you’ll smear it flat. Light, skimming passes work best. The timing here matters. Too wet and you’ll flatten it completely, too dry and you won’t be able to knock it down at all.
Smooth and Popcorn Ceiling Textures
Smooth finishes require additional skim coating to create perfectly flat surfaces. Apply a thin layer of joint compound across the entire repair area, feather it out extensively, let it dry, sand it smooth, and repeat until the surface feels glass smooth. This takes patience and practice.
Popcorn ceiling texture, common in older homes, typically gets applied with a hopper gun using specialized acoustic texture mix. Matching existing popcorn texture proves difficult for DIYers because the material, spray settings, and application technique must match precisely. Consider hiring a professional for popcorn ceiling repairs, especially if your home was built before 1980 when popcorn texture sometimes contained asbestos.
Before applying any texture to your actual repair, practice extensively on cardboard or scrap drywall. Adjust your spray gun settings, air pressure, and material consistency until the test pattern matches your existing texture. Apply several test sprays because the first attempt rarely matches perfectly. Once you get a good match on your test surface, you’re ready to texture the repair.
Priming Water-Stained Drywall Before Texture and Paint
Skipping proper priming causes water stains to bleed back through your fresh paint within days, wasting all your repair work.
Standard latex primer won’t prevent water stain bleed through. Water stains contain tannins and other compounds that soak through latex primers like they’re not even there. You’ll see brown or yellow spots reappearing within a week, sometimes within days. This is one of the most frustrating mistakes in drywall repair because you think you’re done, you’ve painted everything, and then the stains come back.
Use shellac based or oil based stain blocking primers specifically designed to seal water stains permanently. Shellac based primers like BIN or oil based primers like Kilz Original create barriers that lock stains in. These primers smell strong and require adequate ventilation, but they work. Apply stain blocking primer to the entire repaired area after your texture dries completely. Extend coverage slightly beyond the repair boundaries to ensure complete sealing.
Let the primer dry according to the label directions, typically 30 minutes to an hour for shellac based products. The surface should feel dry to touch and not tacky before you move on to painting. Some primers dry fast enough that you can paint the same day, making them good for repairs you want to finish quickly.
If you skip this step and use regular latex primer instead, you’ll watch your water stains reappear through the new paint like ghosts coming back. At that point, you’ll need to apply stain blocking primer over the painted surface and repaint again, doubling your work.
Painting and Color Matching Repaired Drywall Texture
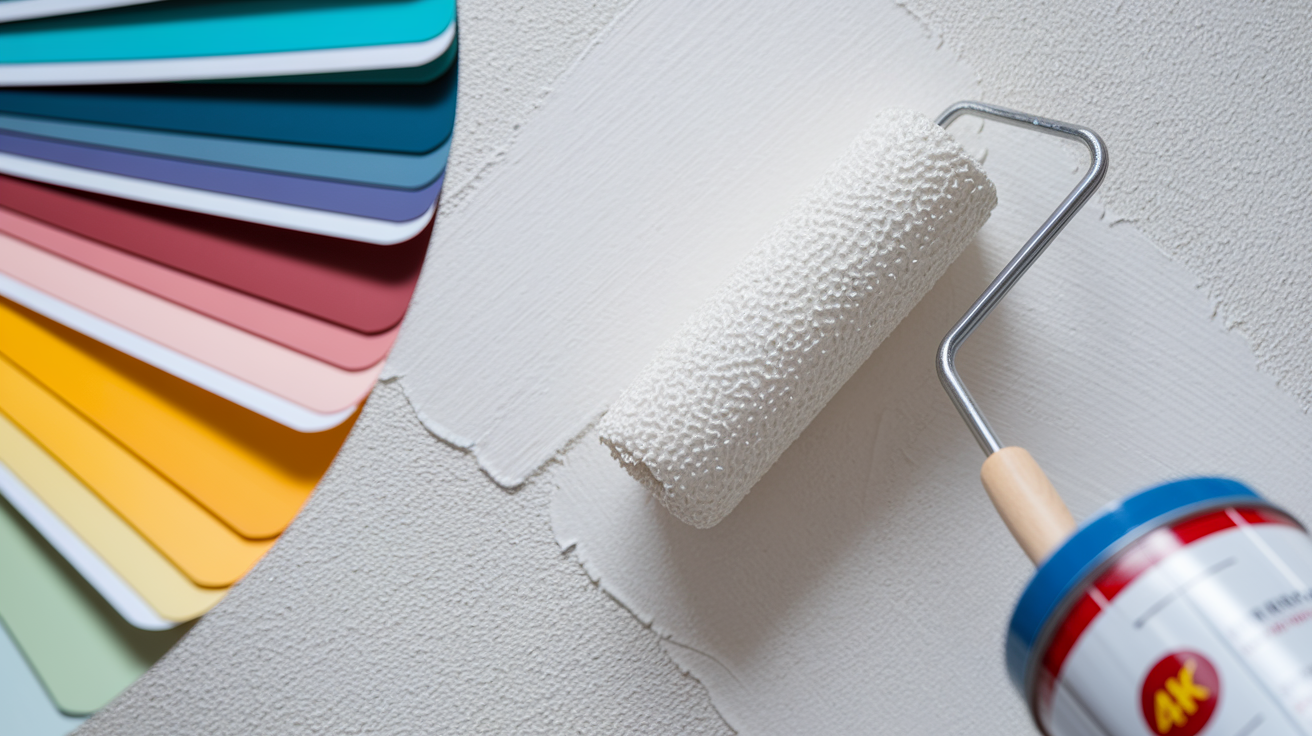
The final painting step makes your repair invisible by matching both color and sheen perfectly.
Matching both color and sheen matters equally. Even if the color matches perfectly, mismatched sheen creates obvious differences in how light reflects off the surface. Flat and matte finishes absorb light, eggshell reflects slightly, satin has noticeable sheen, and semi gloss looks shiny. These differences become obvious in angled light from windows or lamps.
Paint Matching Steps:
Take a paint chip sample from an inconspicuous area or bring your original paint can to the paint store for computer color matching. Note your existing paint sheen level by observing how much it reflects light (flat, eggshell, satin, semi gloss). Apply multiple thin paint coats rather than one thick coat, allowing each to dry completely before adding the next. Feather paint well beyond the repair edges, blending gradually into existing painted areas. Allow proper drying time between coats, typically 2 to 4 hours depending on humidity.
For the best results, particularly on older ceilings or walls where the existing paint has yellowed from age or faded from sunlight exposure, plan to repaint the entire wall or ceiling section rather than just the patch area. Paint ages and changes color over time. Fresh paint next to ten year old paint rarely matches perfectly, even with computer color matching. Repainting an entire wall from corner to corner or an entire ceiling gets rid of color variation.
Mismatched sheen becomes especially obvious in angled light. If your repair has satin sheen and the surrounding wall is eggshell, every time light hits that wall at an angle, your patch will stand out like a glossy rectangle. Match the sheen exactly.
Preventing Mold Growth During Drywall Texture Restoration

Mold transforms a straightforward drywall repair into a health problem requiring professional help.
Mold can begin growing within 24 to 48 hours of water exposure, especially in dark, damp wall cavities where air doesn’t circulate. Once established, mold spreads rapidly through microscopic spores that travel through the air, colonizing new damp areas. Some mold species produce allergens and irritants that cause breathing problems, allergic reactions, and other health issues.
Prevention starts with thorough drying before you close up walls. After removing damaged drywall, inspect everything in the cavity. Look at wood studs, floor plates, insulation, and the back side of adjacent drywall sections. If anything feels damp or shows dark staining, it needs more drying time. Run dehumidifiers in the room with doors closed to pull moisture from the air. Position fans to create airflow through wall cavities. Remove and replace any insulation that got wet because it never fully dries and becomes a mold breeding ground.
Warning signs that mold may already be present include persistent musty odors that smell like damp basement or old towels, visible growth appearing as black, green, or white fuzzy spots, surfaces that remain damp even with fans running, and health symptoms like persistent coughing, sneezing, or breathing difficulty that improve when you leave the room. If you notice any of these signs, stop work immediately. For more detailed prevention strategies, see our guide on Preventing Mold After Water Damage.
Call professionals immediately if you detect persistent musty odors that don’t improve with ventilation and drying, visible mold growth covering more than a few square feet, contaminated water damage from sewage backups or flooding which introduces bacteria and pathogens, or suspected hidden mold growth behind walls indicated by musty smells without visible source. Professional mold remediation companies have specialized equipment to test for mold species, contain affected areas during removal, and verify complete cleanup.
Common Mistakes in Wet Drywall Texture Repair
Learning what not to do prevents frustration and failed repairs that require starting over.
Common Mistakes to Avoid:
Starting repairs before completely stopping the water source, which allows continued damage and wasted repair effort. Insufficient drying time because you’re impatient, leading to mold growth inside sealed walls within weeks. Applying thick joint compound coats trying to finish faster, which causes shrinkage cracks and requires redoing. Over sanding between coats which exposes mesh tape, creates low spots, and damages drywall paper face. Skipping stain blocking primer and using standard latex primer instead, allowing water stains to bleed through new paint. Mismatching texture pattern by not practicing first or adjusting spray settings incorrectly. Painting too soon before joint compound dries completely, trapping moisture that causes bubbling and peeling. Not extending cuts far enough beyond visible damage, leaving damp drywall that deteriorates and requires repairing again. Ignoring mold warning signs like musty odors or dark spots, hoping they’ll go away on their own. Handling electrical fixtures or working near wiring without shutting off power at the breaker first.
The most expensive mistake is rushing through steps to finish quickly. Water damage repair requires patience at multiple stages. Drying the area completely, letting each compound coat dry fully, allowing primer and paint to cure. Cutting corners on any of these creates problems that force you to redo work.
Proper preparation and following the process in order produces repairs that last decades. Rushing produces repairs that fail within months.
When to Call a Professional for Wet Drywall Repairs

Some situations require professional expertise, specialized equipment, and licensing that DIY repairs can’t match.
Call professionals immediately for structural sagging where ceilings or walls visibly droop, indicating water damaged framing that may fail and collapse. Extensive damage covering multiple rooms or entire ceilings requires industrial drying equipment and crew efficiency that make professional repair faster and more cost effective. Contaminated water damage from sewage backups or flooding introduces Category 2 and Category 3 water containing harmful bacteria, viruses, and pathogens requiring specialized cleanup protocols. Visible mold growth, especially if it covers more than ten square feet or keeps returning after cleaning, requires professional testing to identify species and proper remediation to get rid of it completely. Persistent musty odors that don’t improve with ventilation indicate hidden mold growth inside walls requiring professional inspection equipment to locate and remove. Any electrical wiring involvement, particularly if fixtures got wet or wiring was submerged, requires licensed electrician inspection before proceeding. Ceiling damage exceeding four square feet becomes difficult for DIYers to manage due to awkward overhead positioning and weight of materials.
Standard water related drywall repairs typically cost $300 to $850 when handled by professional contractors. Labor rates run $60 to $90 per hour depending on your geographic location and the contractor’s experience level. Variables affecting total cost include extent of damage requiring more material and labor, accessibility of damaged areas with difficult ceiling repairs costing more, and texture complexity with smooth finishes and custom textures requiring more skilled labor.
If filing an insurance claim for water damage, document everything with timestamped photos and videos before starting any repairs. Insurance adjusters need to see the full extent of damage to approve claims. Take photos showing water source, all damaged areas from multiple angles, moisture meter readings, and removed materials. Keep receipts for all materials purchased and contractor invoices for labor.
| Situation | DIY Appropriate | Call Professional |
|---|---|---|
| Small localized damage under 4 square feet | Yes, if you have basic skills and proper drying | Optional for faster completion |
| Structural sagging or drooping ceilings/walls | No, indicates framing damage | Yes, immediately for safety inspection |
| Visible mold growth over 10 square feet | No, requires containment and testing | Yes, for proper remediation |
| Contaminated water from sewage or flooding | No, health hazard requiring protocols | Yes, for safe cleanup and disposal |
| Extensive damage across multiple rooms | Possible but inefficient | Yes, for efficiency and equipment |
Professional contractors complete standard repairs in 1 to 3 days compared to a week or more for DIYers learning as they go. That time savings often justifies the cost difference, especially when you factor in tool purchases and potential mistakes requiring material replacement.
Final Words
Wet drywall texture repair takes patience, but the results are worth it when done right. You’ve got the complete roadmap now. Stop the water first, dry everything thoroughly, cut clean, patch solid, and build up your compound in thin layers.
The texture matching takes practice. So does feathering those edges. But homeowners fix this stuff successfully all the time when they follow the steps and don’t rush the drying.
If you’re seeing structural sagging, mold, or damage that feels overwhelming, that’s when we step in. Either way, you’re protecting your home from worse problems down the road.
FAQ
Can you repair drywall that got wet?
You can repair drywall that got wet if you stop the water source immediately, dry the area completely within 48 hours, and the material remains structurally sound when pressed. Soft or spongy drywall requires full replacement, not repair.
Is drywall ruined if it gets wet?
Drywall is ruined if it gets wet when the gypsum core becomes soft, spongy, or crumbly, showing significant browning, sagging, or mold growth. Minor surface staining on firm drywall can typically be dried and repaired successfully.
Can a wet drywall ceiling be saved?
A wet drywall ceiling can be saved if you address the leak source immediately, dry it thoroughly within 48 hours, and it remains firm when pressed. Sagging, bulging, or soft spots indicate structural failure requiring replacement.
How quickly does mold grow on wet drywall?
Mold grows on wet drywall within 24 to 48 hours of water exposure, especially in dark, damp wall cavities with limited airflow. Complete drying within this window significantly reduces mold risk and preserves the material.
What moisture level indicates drywall is dry enough for repair?
Drywall is dry enough for repair when moisture meter readings drop below 15-17% in the wood framing behind it. This typically requires 3 days to several weeks depending on saturation level, humidity, and ventilation.
How many coats of joint compound do you need for drywall repair?
You need three coats of joint compound for drywall repair, allowing 24 hours drying between each layer. Use progressively wider taping knives for each coat to feather edges and blend seamlessly with existing surfaces.
What type of primer prevents water stains from bleeding through paint?
Shellac-based or oil-based stain-blocking primer prevents water stains from bleeding through paint on repaired drywall. Standard latex primer is insufficient and allows brown stains to reappear through new paint within days or weeks.
Should you use mesh tape or paper tape for drywall seams?
You should use fiberglass mesh tape for drywall seams if you’re a beginner, as it’s easier to apply. Paper tape provides stronger joints for flat seams and inside corners but requires skill to embed without air bubbles.
How far beyond visible damage should you cut wet drywall?
You should cut wet drywall 6 to 12 inches beyond visible damage or high moisture readings to ensure clean, dry edges. This prevents hidden moisture from causing future mold growth or repair failure.
What’s the difference between orange peel and knockdown texture?
Orange peel texture is a spray-applied bumpy finish left as-is, while knockdown texture is the same spray application with peaks lightly flattened using a taping knife after 10-15 minutes of partial drying.