
You probably think airing out a room will fix that wet drywall smell. It won’t. That musty odor means mold and bacteria are already feeding on moisture trapped inside your walls, not just sitting on the surface. Opening windows helps with surface dampness, but once water soaks into the gypsum core or hides behind baseboards, you need a real plan. This guide walks you through immediate containment, how to find the actual water source, when DIY drying works, and when you’re past that point and need professional equipment before the smell becomes a health problem.
Immediate Steps to Eliminate Wet Drywall Odors
The moment you notice a musty smell from wet drywall, these six steps can stop the problem from getting worse:
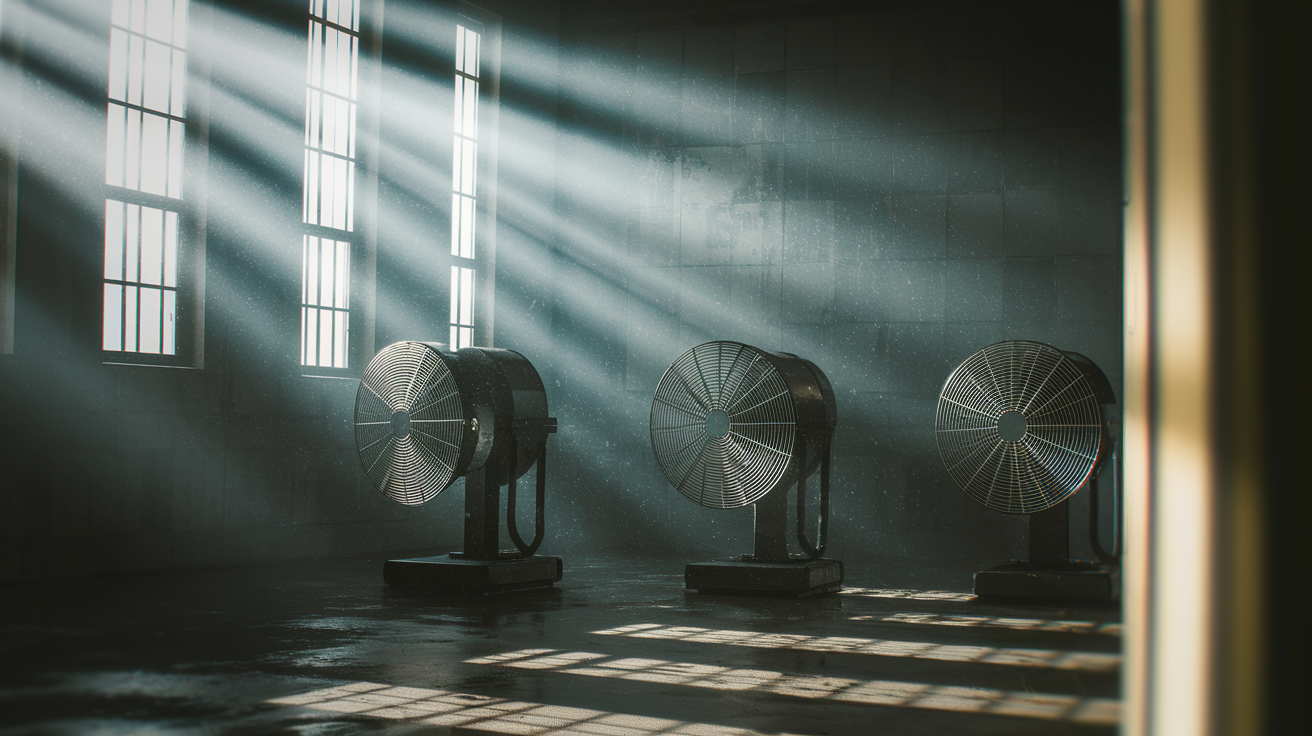
- Open all windows in the affected area to create cross ventilation and let humid air escape
- Position multiple fans directly toward wet walls to increase air movement across damp surfaces
- Run dehumidifiers continuously in enclosed spaces to pull moisture from the air
- Move furniture, boxes, and belongings away from wet walls to allow airflow on all sides
- Check drying progress every few hours by gently touching the wall surface. It should feel progressively drier and cooler to the touch
- Assess after 24 hours whether the smell is fading or if you’re dealing with deeper moisture that needs professional help
That musty smell comes from microbial volatile organic compounds, or MVOCs. These are gases released by mold colonies and bacteria as they feed on wet drywall materials. The smell itself is proof that microbes are actively growing inside your walls.
You’ve got a 24 to 48 hour window to handle surface level moisture on your own. If you catch it fast and the water didn’t soak deep into the gypsum core, ventilation and dehumidification can dry things out before mold takes hold.
But if that smell lingers past 48 hours despite your best efforts, you’re dealing with moisture that’s trapped inside the wall layers or hidden behind baseboards and trim. At that point, the situation has moved beyond what fans and open windows can fix. Surface dampness responds to immediate action. Deeply saturated gypsum board or water pooled inside wall cavities needs professional drying equipment and potentially material removal. The smell will tell you which situation you’re facing. If it’s fading within a day, you caught it early enough. If it’s holding steady or getting stronger, the moisture is embedded.
Understanding Odor Sources: Water Categories and Material Science
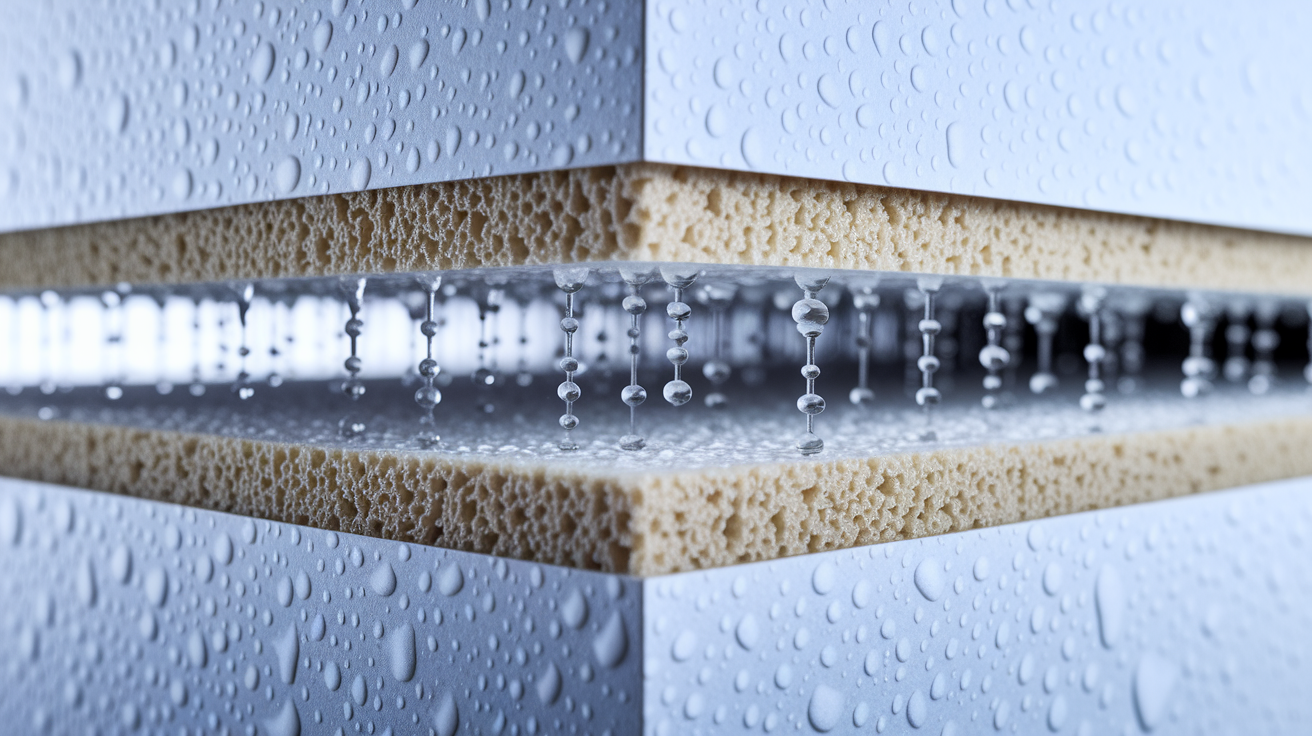
Drywall isn’t a solid barrier. It’s a sandwich of porous materials. Paper facing on both sides with a gypsum core in between. The paper facing absorbs water first, like a sponge. Once it’s saturated, moisture seeps into the chalky gypsum center and spreads through the entire panel. Both layers hold water, and neither dries quickly once they’re soaked.
This layered absorption creates the perfect environment for mold and bacteria. The damp paper provides food. The trapped moisture between layers creates humidity. Poor air circulation means the water has nowhere to go. Basements, crawl spaces, and bathrooms are especially vulnerable because they naturally have higher humidity and less airflow. When water gets into walls in these areas, it sits there, sometimes for days, while microbial growth accelerates. The organisms release those volatile organic compounds as they multiply, and that’s the smell working its way into your living space.
The type of water that soaked your drywall matters just as much as how much got in there. Clean water creates one kind of problem. Contaminated water creates a completely different situation with health risks and cleanup requirements.
Clean water (Category 1) comes from supply lines, rainwater that hasn’t touched contaminated surfaces, or condensation from HVAC systems. If you catch it right away, you’re mainly dealing with the potential for mold growth. The water itself isn’t carrying bacteria or sewage. The smell that develops is typically a mild musty odor from mold colonies feeding on the wet materials. “Before the storm hit, this was just a clean water line. Now it’s a race against mold before the smell sets in.”
Gray water (Category 2) comes from washing machines, dishwashers, toilet bowls with urine only, or sump pump failures. This water already contains contaminants: detergents, food particles, body waste, or dirt from groundwater. When it soaks into drywall, bacterial growth happens faster than with clean water, and the resulting smell is stronger and more unpleasant. You’re not just fighting mold anymore. You’re dealing with bacteria colonies releasing more aggressive compounds.
Black water (Category 3) comes from sewage backups, toilet overflows containing feces, or flooding that picked up groundwater and outdoor contaminants. This is the worst case scenario. The water carries dangerous pathogens, and the smell is immediately recognizable. That sewage or rotten odor that makes you want to leave the room. Drywall exposed to black water can’t just be cleaned and dried. It needs to be removed entirely, and anyone handling it needs full protective equipment. The health risks and odor intensity are both severe, and this category always requires professional remediation with antimicrobial treatment.
Identifying the Source of Water Damage and Smell

You can’t fix wet drywall smell without finding where the water came from. Treating the symptom while the leak continues just means you’ll be dealing with the same smell again in a few weeks.
Start with the obvious spots. Anyplace you can see water stains, feel dampness, or notice the smell is strongest. But don’t stop there. Water travels through wall cavities and along framing before it shows up on a surface. The visible damage might be three feet away from where water actually entered.
Common entry points where water reaches drywall:
- Pipe bursts inside walls or ceilings from frozen lines or age related failures
- Plumbing leaks under sinks where slow drips saturate the cabinet and drywall behind it
- Roof leaks that let rainwater into attics and down through ceiling drywall
- Flooding from storms, especially in basements where water seeps through foundation walls
- Sewage backups that push contaminated water into lower level walls and floors
- Basement seepage through foundation cracks or poor exterior drainage
- Bathroom or laundry room overflows from clogged drains or malfunctioning appliances
- HVAC condensation from drain line clogs or poor maintenance
Even after you’ve stopped the water source, moisture can hide for weeks. It pools behind baseboards, seeps under flooring, and gets trapped in wall cavities where air never reaches it. This is where homeowners run into trouble. They fix the obvious leak, dry the visible dampness, and assume they’re done. Then the smell comes back.
Professional water damage inspectors use thermal imaging cameras that show temperature differences in walls. Wet areas show up as cooler spots even when the surface looks dry. Moisture meters with pins that penetrate drywall measure water content inside the gypsum core, not just on the paper facing. Infrared detection locates hidden water without cutting into walls. These tools find moisture you’d never discover with visual inspection alone. If you’ve dried everything you can see and the smell persists, or if you’re seeing signs like peeling paint and soft spots in areas far from the obvious leak, professional detection equipment is worth the cost to avoid tearing into the wrong walls.
Health Risks of Musty Drywall Odors

That musty smell isn’t just unpleasant. It’s direct evidence that mold colonies and bacteria are actively growing and releasing compounds into your indoor air. You’re breathing in the same volatile organic compounds causing the odor, along with microscopic spores and particles.
Common symptoms from breathing mold contaminated air:
- Sneezing and runny nose that won’t quit
- Red, watery, or irritated eyes
- Asthma attacks or increased difficulty breathing
- Chronic coughing that started after the water damage
- Persistent headaches, especially worse when you’re home
- Unusual fatigue even after full nights of sleep
- Difficulty concentrating or brain fog
Children, elderly family members, and anyone with compromised immune systems feel these effects faster and more severely. Their bodies can’t filter out the compounds as efficiently, and exposure that causes mild irritation in a healthy adult can trigger serious respiratory distress in vulnerable people.
The smell tells you the microbial growth is ongoing. Not dormant, not contained, but actively spreading and releasing more compounds every day. Covering up the odor with air fresheners or candles doesn’t change what’s happening inside your walls. The mold is still growing. The bacteria are still multiplying. The health risk continues until you eliminate the moisture source, physically remove the contaminated materials, and treat the affected areas to prevent recurrence. As long as you can smell it, the problem is active.
Professional Mold Remediation and Drying Methods

Some situations require professional help from the start. If you’re seeing visible mold growth covering more than a few square feet, if the water was Category 2 or 3, if moisture has been sitting in walls for more than 48 hours, if your DIY drying attempts failed, or if anyone in the household is health vulnerable, call a professional water damage restoration company before you start tearing into walls yourself.
Professional Grade Drying Equipment and Techniques
A box fan from your garage and a portable dehumidifier from the hardware store work fine for minor surface moisture. They don’t have the power to pull water out of deeply saturated drywall before mold sets in. Professional restoration companies bring industrial air movers that push 2,000 to 3,000 cubic feet per minute. Enough force to create genuine air circulation through entire rooms and around furniture. High capacity dehumidifiers handle 150 to 200 pints per day, not the 30 to 50 pints your home unit manages.
Equipment positioning makes the difference between drying and just moving air around. Air movers get angled directly at wet walls, positioned two to three feet away to create maximum air movement across the damp surface. Multiple units create overlapping coverage so no section stays stagnant. Dehumidifiers run in enclosed spaces after the initial few hours of open window ventilation. Keeping doors and windows closed while dehumidifiers operate lets them pull moisture from the air more efficiently than fighting outdoor humidity.
Professionals track progress with moisture meters, checking readings every 12 hours. Drywall that measures above 17% moisture content is still too wet. Mold grows readily above 15 to 16%. The goal is getting readings consistently below 15% throughout the affected area, not just on the surface. Surface dampness might resolve in 24 hours with good airflow. Gypsum board saturated an inch deep takes 2 to 5 days of continuous drying even with professional equipment.
Humidity levels get monitored just as carefully. The target is keeping indoor humidity below 50% throughout the drying process. After the first few hours of cross ventilation, enclosed drying with commercial dehumidifiers pulls more water from materials than constant open windows, which let humid outdoor air compete with your drying efforts.
Complete Mold Remediation Process
Full professional remediation follows a systematic approach:
- Inspection and assessment using thermal cameras to map moisture behind walls, moisture meters to measure saturation depth, and visual examination to identify contamination extent
- Containment setup with heavy plastic sheeting sealing off affected areas, negative air pressure systems that pull air from the work zone and exhaust it outside, preventing spore spread to clean areas
- HEPA air scrubber operation throughout the entire project, capturing microscopic mold spores and particles before they circulate through your home
- Contaminated material removal where wet drywall, soaked insulation, and damaged framing get carefully removed, bagged in sealed 6 mil plastic, and disposed of following local regulations
- Antimicrobial treatment of all remaining surfaces using EPA approved agents that kill bacteria and mold spores on wood framing, studs, and any materials staying in place
- Verification testing and reconstruction with final moisture readings and sometimes air sampling to confirm the area is clean, followed by installation of new drywall, insulation, and finishing work
IICRC certification means technicians have completed standardized training in water damage restoration and mold remediation. They understand containment protocols, proper protective equipment, and safe material handling. Many restoration companies offer 24/7 emergency response because water damage doesn’t wait for business hours. The faster they start drying, the less material you’ll need to replace.
The key difference between professional and DIY approaches? Containment. When you scrape moldy drywall or pull down wet sections without containment, you release millions of spores into your home’s air. They settle on furniture, get pulled into HVAC ducts, and contaminate areas that were clean before you started. Professional containment with negative pressure means those spores get captured and exhausted outside instead of spreading through your house.
Surface Cleaning and Odor Neutralization for Wet Drywall

Surface cleaning only works after the drywall has dried completely. If you’re still seeing moisture readings above 15% or if the wall feels even slightly cool or damp to touch, hold off on cleaning. Adding liquid to materials that aren’t fully dry just extends the problem.
| Cleaning Agent | Application Method | Effectiveness | Cautions |
|---|---|---|---|
| White vinegar solution (equal parts vinegar and warm water) | Wipe with damp cloth, don’t saturate | Good for surface mold and mild odors on paper facing | Acidic smell lingers temporarily; test small area first |
| Baking soda paste (baking soda with small amount of water) | Apply thin layer, let dry, brush or vacuum off | Absorbs surface odors; mild abrasive for light stains | Takes hours to work; doesn’t penetrate gypsum core |
| Hydrogen peroxide (3% solution) | Spray lightly, let sit 10 minutes, wipe | Kills surface mold; less harsh than bleach | Can lighten paint or drywall color slightly |
| Diluted bleach (1 part bleach to 10 parts water) | Apply with sponge, rinse with clean water | Kills surface mold effectively | Pushes moisture deeper; harsh fumes; damages some finishes |
| EPA approved antimicrobial spray | Follow product instructions for coverage and dwell time | Professional grade surface treatment | More expensive; some require protective equipment |
Test any cleaning solution on a small hidden area first. Behind furniture or in a closet. Some solutions discolor paint or leave marks on certain finishes. Apply with a wrung out cloth or sponge that’s damp, not dripping. You want just enough moisture to transfer the cleaning agent without re wetting the drywall. Wipe gently in one direction rather than scrubbing in circles, which can rough up the paper facing. Let the area dry completely between applications if you need a second treatment.
These are surface treatments only. Drywall is porous. Picture how a sponge absorbs water all the way through, not just on the outer layer. Cleaning agents can’t penetrate deep into the gypsum core where mold roots embed themselves. They kill what’s visible on the paper facing, but the contamination underneath stays alive and continues growing.
Bleach creates an additional problem. It’s mostly water, and when you apply it to porous drywall, that water gets pushed deeper into the material. You might kill surface mold, but you’re also adding moisture to areas that were starting to dry out, potentially feeding mold colonies further inside the wall. That’s why professional remediators use EPA approved antimicrobials specifically formulated for porous materials instead of household bleach. If the smell persists after surface cleaning, or if you’re seeing discoloration that goes beyond light surface staining, the contamination has penetrated too deep for cleaning to solve.
Advanced Odor Removal Techniques for Persistent Smells
After drying and cleaning, some odors refuse to leave. That’s when supplementary odor control methods can help, though they work best alongside fixing the actual contamination, not as replacements for proper remediation.
Activated charcoal bags and buckets of baking soda work as passive odor absorbers. Place them throughout the affected room. On shelves, in closets, near the worst smelling areas. They pull odor compounds from the air continuously without needing power or monitoring. Replace them every few weeks as they become saturated. They’re handling airborne odors, not embedded contamination, so they reduce the smell you’re breathing without fixing the source inside the walls.
HEPA air purifiers capture mold spores and particles floating in your indoor air. They improve air quality and reduce what you’re breathing in, which matters for health even if the smell persists. Position them near affected areas and run them continuously during and after remediation. But understand their limitation. They filter air, not materials. A HEPA filter can’t pull odors out of drywall any more than it can dry wet walls. It’s addressing the symptom in your breathing space while the source in your building materials continues releasing compounds.
Thermal fogging reaches areas surface cleaning can’t touch. Professionals use heated equipment to vaporize deodorizing agents into a fog that penetrates wall cavities, gets behind baseboards, and treats hidden spaces where air circulation doesn’t reach. The fog particles are small enough to follow the same paths moisture took when it spread through your walls. This works for odors that have spread beyond the original wet area. When the smell seems to be coming from everywhere and nowhere at the same time.
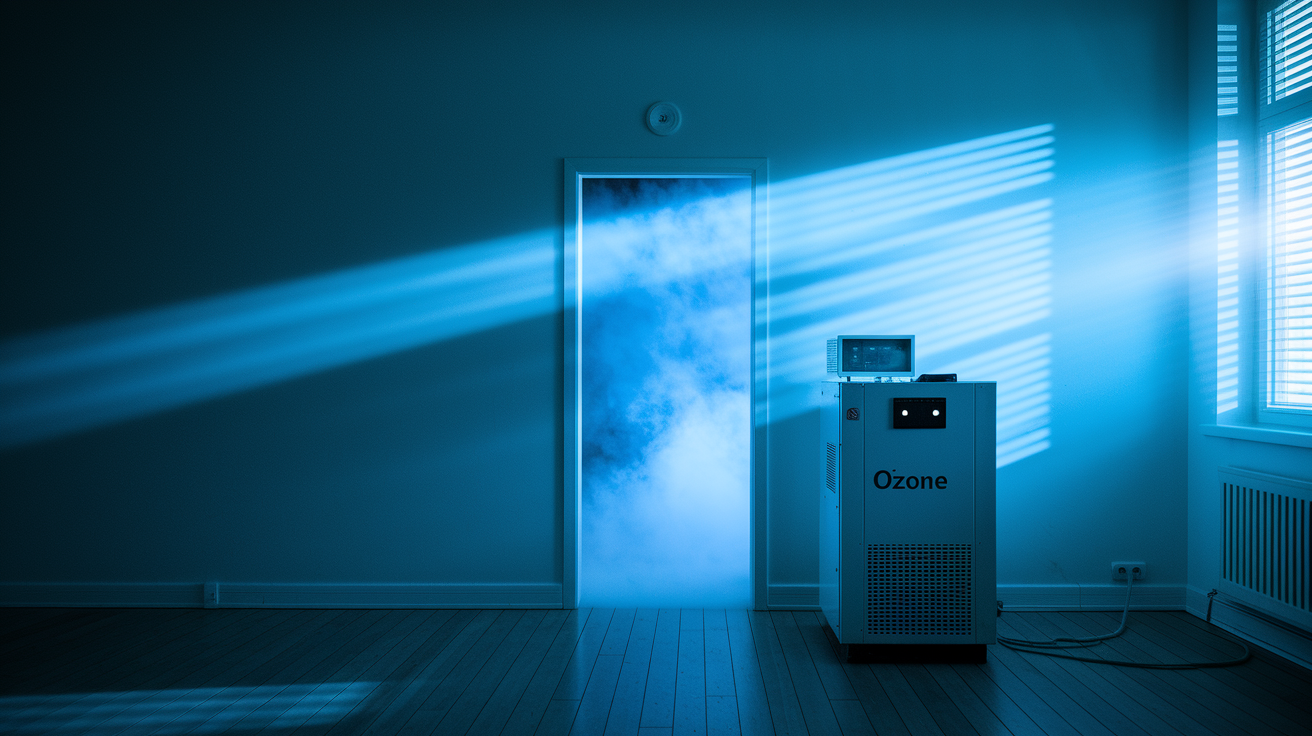
Ozone treatment and hydroxyl generation are powerful oxidizers that neutralize odor compounds at a molecular level. Ozone generators convert oxygen into ozone gas that reacts with odor molecules and breaks them down. Hydroxyl generators create hydroxyl radicals that do similar work without the occupancy restrictions ozone requires. Here’s the critical part: ozone is toxic to breathe. These treatments happen in unoccupied spaces only. You, your family, and your pets leave the house. The professionals seal the area, run the treatment for hours or sometimes days, then ventilate thoroughly before anyone returns. Never run an ozone generator while people are home. The professional application includes proper ventilation protocols and air testing to confirm it’s safe to re enter. Some homeowners rent ozone machines thinking they’ll save money, then create health hazards by not following proper safety procedures.
Enzymatic cleaners break down organic compounds. The proteins and oils that create odors. They work on contact, which means they need to reach the actual contamination. Spray them on accessible surfaces or use them after you’ve removed damaged drywall to treat the framing and subfloor underneath. They’re effective on biological odors but can’t penetrate through intact drywall to reach embedded contamination.
When to Replace Wet Drywall: Warning Signs and Indicators

Sometimes cleaning and drying aren’t enough. The decision to replace comes down to three factors: how saturated the drywall got, how long it stayed wet, and what’s happening to its structure now.
Signs requiring assessment or replacement:
- Soft spots or spongy texture when you press the wall. The gypsum core has lost structural integrity
- Visible warping or bowing where the panel has absorbed so much water it’s no longer flat
- Crumbling edges or corners when you touch them, showing the gypsum is breaking down
- Dark staining or discoloration that goes beyond surface dirt, indicating deep saturation
- Persistent bubbling or peeling paint even after the wall feels dry
- Black, green, or yellow mold growth visible on the surface
- Musty smell that doesn’t improve after thorough drying and cleaning attempts
- Ceiling drywall showing sagging or bulging from absorbed water weight
- Water stains on walls or ceilings with distinct boundaries showing where moisture spread
- Condensation appearing on walls or windows even after you’ve addressed humidity
- Rust forming on nails, screws, or metal corner bead
- Baseboards pulling away from walls or showing warping
These aren’t just cosmetic problems. Compromised drywall becomes a mold factory. The porous material stays damp longer than surrounding materials, the paper facing provides food for mold growth, and poor structural integrity means the panel could eventually fail. Especially concerning with ceilings where sagging drywall can come down unexpectedly. Health risks escalate when mold colonies have established deep inside the gypsum core. Surface cleaning can’t reach them, and they continue releasing spores into your indoor air.
Removal requires proper technique to minimize spore dispersal. The contaminated sections get sealed with plastic sheeting before cutting begins. Workers wear respirators and protective clothing. Cut panels come down in the largest manageable pieces rather than getting broken into smaller fragments that release more particles. Everything goes into 6 mil plastic bags, sealed with tape, and disposed of according to local regulations for contaminated materials. This isn’t DIY work unless you have remediation training. Attempting it without proper containment spreads the problem through air circulation and cross contamination.
Small repairs might involve cutting out a 2 foot by 2 foot section and patching with new drywall. Extensive saturation means removing everything from floor to ceiling between two studs, or entire wall sections. Severe flooding or long term moisture exposure can require complete room re drywalling. At that point you’re also replacing insulation, treating the framing with antimicrobial solutions, and potentially addressing moisture barriers before hanging new panels.
Catching these warning signs early changes the conversation entirely. If you notice the smell developing and address it within the first few days, you might get away with drying and cleaning. Wait until the paint is bubbling and the drywall is soft, and you’re looking at replacement. Monthly visual checks of basements, bathrooms, and other vulnerable areas take five minutes. Annual professional moisture assessments with meters and thermal cameras cost a couple hundred dollars. Compare that to the thousands you’ll spend on complete drywall replacement, and the math argues strongly for routine monitoring. A small plumbing leak caught early needs a pipe clamp and a weekend of drying. That same leak ignored for three months means cutting out walls and dealing with established mold colonies.
DIY Odor Removal Myths That Make Wet Drywall Smell Worse
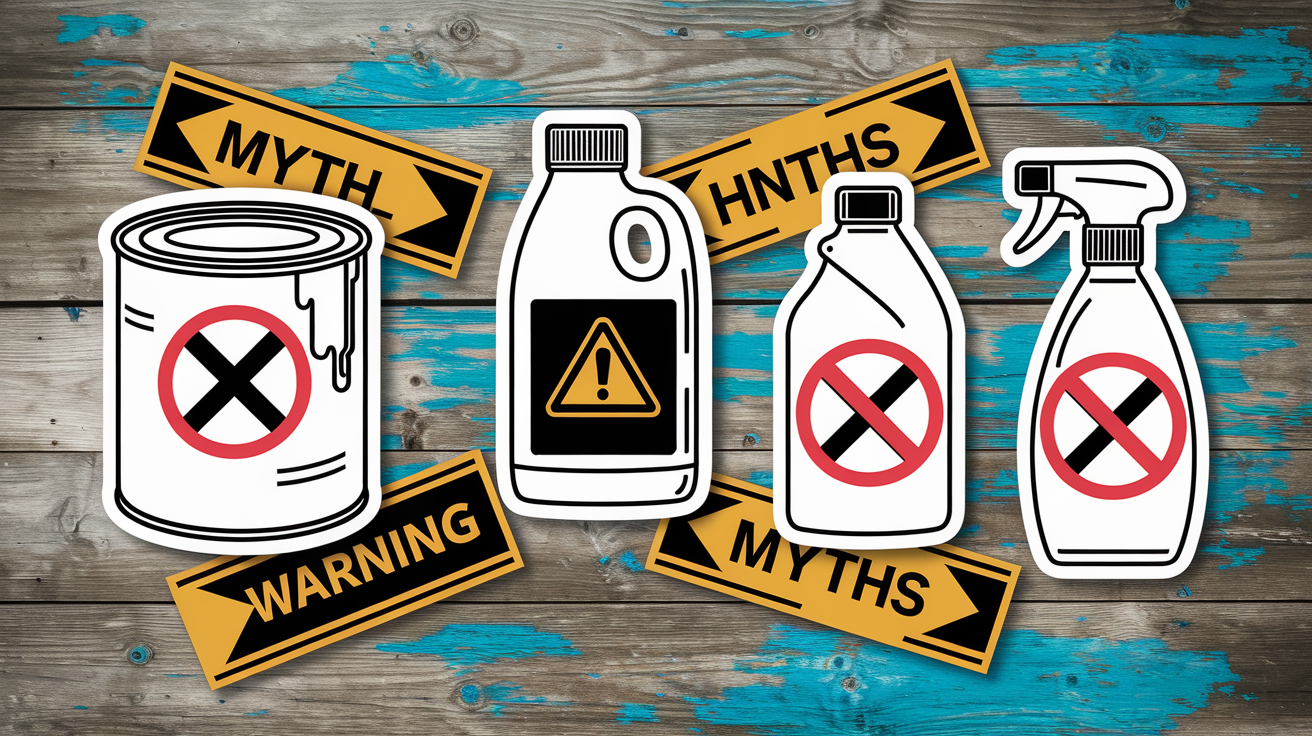
Online advice and well meaning neighbors often suggest quick fixes that sound logical until you understand how water damage and drywall actually work together.
Myth: Painting over the smell with odor blocking primer or sealant locks it in permanently. Reality check: primer and paint are surface coatings. They don’t stop moisture from being trapped behind them, and they can’t kill active mold colonies. What actually happens? You trap moisture and growing mold behind a thin paint film. The mold keeps spreading through the damp gypsum, releases gases that build up pressure, and eventually the paint bubbles and peels. You’ve made it harder to fix the real problem while giving the mold more time to grow. “Before I realized the mistake, I’d painted over that stain three times. The smell just got stronger.”
Myth: Bleach kills all mold permanently and solves the odor problem. Bleach kills surface mold on contact. That’s true. But drywall isn’t a surface. It’s porous material layers. Bleach can’t penetrate deep into gypsum board where mold roots establish. It kills what you can see on the paper facing while the contamination underneath continues growing. Worse, bleach is mostly water. Applying it to porous drywall pushes that water deeper into the material, potentially feeding mold colonies you’re trying to kill. Professional antimicrobials are formulated to penetrate porous materials without adding problematic moisture.
Myth: Air fresheners and deodorizers eliminate the odor problem if you use enough of them. They mask the smell. That’s all they do. The mold colonies producing the odor are still growing, still releasing compounds, still creating health risks. You’re just covering up the warning sign your nose is giving you. When the air freshener wears off in a few hours, the musty smell returns because the source hasn’t changed. This myth is particularly dangerous because it makes people think the problem is solved when they’re actually just ignoring it.
Myth: Once the area dries out completely, the smell disappears on its own. Drying prevents new mold growth. It doesn’t eliminate existing contamination. Mold goes dormant when conditions aren’t favorable, but the colonies remain inside your walls. The next time humidity rises (summer dampness, a rainy week, even just shower steam), dormant mold reactivates and starts growing again. The smell comes back. Drying is a necessary first step, not a complete solution. The odor source remains until you physically remove the contaminated material or treat it with professional antimicrobial agents that kill the embedded colonies.
Myth: Baking soda and vinegar can handle any odor if you use enough and wait long enough. These household products work on surface level issues. A slight musty smell on the paper facing, minor odors from brief dampness that dried quickly. They cannot penetrate saturated drywall or reach mold embedded in the gypsum core. Vinegar is acidic and can kill surface mold, but it doesn’t have the penetrating power or residual protection professional antimicrobials provide. Baking soda absorbs surface odors but does nothing for contamination deeper than a millimeter. If the water soaked through to the gypsum or if the material stayed wet long enough for mold to establish, household products give you false confidence while the real problem continues underneath.
Cost Estimates for Wet Drywall Smell Removal and Repair

The expense varies dramatically based on how severe the problem is and how quickly you caught it. Minor surface moisture you addressed in the first 24 hours costs almost nothing. Extensive mold remediation with reconstruction runs thousands.
Budget according to your situation. DIY approaches work for light dampness with no contamination. Moderate problems need professional drying but might not require material replacement. Severe contamination or structural damage means full remediation and reconstruction.
| Service Type | Typical Cost Range | Timeline | What’s Included |
|---|---|---|---|
| DIY supplies and equipment rental | $50 – $200 | 1-3 days | Fans, portable dehumidifier rental, cleaning supplies, moisture meter |
| Professional drying only | $500 – $1,500 | 2-5 days | Industrial air movers, commercial dehumidifiers, moisture monitoring, final verification |
| Odor removal with cleaning | $800 – $2,000 | 3-7 days | Drying equipment, surface cleaning, antimicrobial treatment, air scrubbing, odor neutralization |
| Drywall replacement per affected section | $300 – $800 per section | 1-2 days per section | Removal at $90/hour average, new drywall installation, taping, mudding, sanding, primer |
| Full mold remediation with reconstruction | $2,000 – $10,000+ | 5-14 days | Containment setup, HEPA filtration, material removal and disposal, antimicrobial treatment, drying, reconstruction, verification testing |
Many homeowners insurance policies cover water damage remediation when the damage resulted from a sudden event. Pipe burst, appliance failure, storm damage. The key is documenting everything immediately and filing the claim before you start repairs. Take photos of the wet areas, the moisture meter readings if you have them, and the source of water entry. Insurance typically doesn’t cover damage from long term neglect or maintenance issues like slow leaks you ignored for months.
Get at least three quotes from local professionals before committing to any work that costs more than a few hundred dollars. Check their online reviews carefully. Look for complaints about incomplete drying, odors returning, or problems with insurance coordination. Ask each company to provide a detailed breakdown of costs, not just a total figure. The cheapest bid often means corners get cut. Inadequate drying time, no moisture verification testing, or poor containment practices that spread contamination.
Addressing problems promptly saves serious money. Surface dampness dried within 24 hours might cost you nothing beyond your time and a rented fan. That same moisture ignored for three days leads to mold growth requiring professional cleaning and antimicrobial treatment. Now you’re spending a thousand dollars or more. Wait a week and you’re replacing drywall sections. Wait a month and you’re looking at full remediation with reconstruction. Every day moisture sits in your walls increases the final bill exponentially.
Preventing Wet Drywall Odors in High Risk Areas
Basements, bathrooms, kitchens, laundry rooms, and crawl spaces are where moisture problems start. These areas naturally have higher humidity, more plumbing connections, and often poorer ventilation than the rest of your home.
Prevention strategies that stop problems before they start:
- Install vapor barriers behind basement drywall during construction or remodeling to block moisture from foundation walls
- Ensure proper foundation waterproofing and exterior drainage so groundwater doesn’t seep through walls
- Run exhaust fans during and for 30 minutes after showers, baths, and cooking that produces steam
- Maintain dehumidifiers in basements and crawl spaces, keeping humidity below 50% year round
- Conduct annual moisture inspections with a basic meter, checking vulnerable areas like under sinks and around windows
- Change HVAC filters every 1 to 3 months and schedule professional duct cleaning every few years
- Install proper insulation between heated spaces and cold areas to prevent condensation on walls
- Fix plumbing leaks immediately when you notice dripping, dampness, or reduced pressure
- Improve drainage around your home’s exterior by extending downspouts and grading soil away from foundation
- Keep all vents open and unobstructed, including those in crawl spaces, attics, and behind appliances
Prevention costs far less than remediation. A quality vapor barrier installation during basement finishing runs a few hundred dollars. Professional waterproofing might cost a few thousand but protects your entire foundation. Compare that to full mold remediation at five to ten thousand dollars plus the weeks of disruption while work happens.
Routine monitoring catches small issues before they become odor problems. Check under sinks monthly for dampness. Look at basement walls after heavy rain. Feel along windows for condensation during winter. These quick checks take minutes but spot problems when they’re still manageable with a pipe tightening or a caulk repair instead of drywall replacement.
Addressing Persistent Wet Drywall Odors That Won’t Go Away
The most frustrating scenario: you’ve dried everything, cleaned every surface, run dehumidifiers for weeks, and that musty smell keeps coming back. This tells you something important. There’s an active moisture source you haven’t found yet, or contamination hidden where your cleaning efforts can’t reach it.
Persistent odors signal unresolved moisture sources. Not leftover dampness that’s slowly drying. Active water entry that’s happening right now, continuously, replacing the moisture you remove. Common hidden sources include groundwater seeping through foundation cracks so small you can’t see them, condensation forming inside wall cavities where warm indoor air meets cold exterior sheathing, plumbing leaks inside walls where connections slowly drip without showing surface evidence, and missing or damaged vapor barriers that let humidity pass through from crawl spaces or unconditioned areas.
The pattern tells you what you’re dealing with. If the smell disappears completely during dry winter months when humidity is low, then returns every spring and summer when outdoor humidity rises, you’re looking at dormant mold that reactivates when conditions favor growth. The colonies are embedded in your drywall’s gypsum core. They go dormant when dry air pulls moisture out of materials, then start growing again when humid air gives them the water they need. Drying isn’t solving your problem. It’s just making the mold wait.
Hidden contamination explains odors that persist despite visible surfaces looking clean and dry. Mold colonies can establish between wall layers, behind baseboards, inside HVAC ducts, under flooring, and in wall cavities where you can’t reach them with surface cleaning. Air sampling and thermal imaging become necessary at this point. You need professional tools to locate where the contamination actually lives versus where you’re smelling it.
Long term solutions require addressing root causes instead of treating symptoms. Foundation waterproofing with exterior excavation and membrane installation stops groundwater from reaching foundation walls. French drains and improved grading move water away from your home’s perimeter. Complete wall cavity remediation means removing drywall on both sides of affected walls, treating the framing and insulation, installing proper vapor barriers, and reconstructing with fresh materials. HVAC system modifications like balanced ventilation or upgraded duct insulation prevent condensation and improve air circulation. These solutions cost thousands but actually fix the underlying problem creating your recurring odors. Patching and repainting costs hundreds and fails again in six months.
The smell is information. When it returns despite your best efforts, it’s telling you the moisture source is still active or the contamination goes deeper than surface treatment can reach. Stop spending money on temporary fixes. Professional moisture mapping with thermal imaging and meters locates the true source. Then you can invest in repairs that actually work instead of repeatedly treating the same odor problem year after year.
Final Words
Wet drywall smell removal starts with fast action, proper drying, and finding the real moisture source.
Surface cleaning and deodorizers only work when the water’s actually gone and the material’s dry. If the odor comes back or never fully leaves, you’re dealing with hidden moisture or active mold that needs professional attention.
Don’t paint over it, mask it, or wait it out. Address the source, dry it completely, and test to make sure it’s fixed. That’s how you protect your home and your air quality for good.
FAQ
Q: What does wet drywall smell like?
A: Wet drywall smells musty, like damp basement air or old wet towels. The odor comes from microbial volatile organic compounds (MVOCs), gases released by active mold and bacteria growing in the saturated gypsum board and paper facing. The smell gets stronger as contamination spreads.
Q: Does damp smell go away after a leak?
A: A damp smell goes away after a leak only if the moisture source is completely eliminated and affected materials are thoroughly dried within 24 to 48 hours. If the musty odor persists beyond two days despite drying efforts, hidden moisture remains and requires professional assessment to locate and remove.
Q: How quickly can mold grow on wet drywall?
A: Mold can grow on wet drywall within 24 to 48 hours of saturation. The porous gypsum core and paper facing absorb and trap moisture, creating ideal conditions for rapid mold colonization. Poor ventilation in enclosed spaces like basements and bathrooms accelerates this growth by preventing evaporation.
Q: How to get rid of wet wall smell?
A: To get rid of wet wall smell, open windows for cross-ventilation, position multiple fans toward wet walls, run dehumidifiers continuously, and monitor drying progress by touch. Surface moisture may clear in 24 hours, but deeply saturated walls require 2 to 5 days of continuous drying with industrial-grade equipment.
Q: When should wet drywall be replaced instead of dried?
A: Wet drywall should be replaced when it shows soft spots, visible warping, crumbling edges, dark staining, or persistent mold growth after drying attempts. If the gypsum board stayed saturated for more than 48 hours or shows structural compromise, replacement is safer than attempting to salvage contaminated material.
Q: Can bleach remove wet drywall odors permanently?
A: Bleach cannot remove wet drywall odors permanently because it only kills surface mold without penetrating the porous gypsum core where mold roots remain embedded. Bleach can worsen the problem by pushing moisture deeper into the material, allowing mold to regrow and continue producing odors once the surface treatment fades.
Q: What professional equipment removes wet drywall smells?
A: Professional equipment that removes wet drywall smells includes industrial air movers for maximum air circulation, high-capacity dehumidifiers to extract trapped moisture, moisture meters to track drying progress, and HEPA air scrubbers to capture airborne mold spores. Thermal cameras locate hidden moisture behind walls without demolition.
Q: How much does professional wet drywall odor removal cost?
A: Professional wet drywall odor removal costs vary by severity. Drying services alone range from a few hundred dollars, while complete mold remediation with contaminated drywall replacement can reach several thousand dollars depending on affected square footage. Most homeowners insurance policies cover water damage-related odor removal when properly documented.
Q: Why does wet drywall smell return after drying?
A: Wet drywall smell returns after drying when hidden moisture remains in wall cavities, behind baseboards, or in structural components. Groundwater seepage, slow plumbing leaks, inadequate vapor barriers, or condensation in enclosed spaces create ongoing moisture that reactivates dormant mold, especially during humid weather when conditions favor new growth.
Q: Are DIY methods effective for removing wet drywall odors?
A: DIY methods are effective for removing wet drywall odors only when moisture is surface-level and caught within 24 hours. White vinegar solutions, fans, and dehumidifiers work for minor dampness, but deeply saturated walls, extensive mold growth, or contaminated water require professional remediation with containment systems and antimicrobial treatments.
Q: What health risks come from wet drywall odors?
A: Health risks from wet drywall odors include respiratory issues like sneezing and coughing, red or irritated eyes, asthma attacks, persistent headaches, fatigue, and difficulty concentrating. Children, elderly individuals, and immunocompromised people face higher vulnerability because the musty smell indicates active mold releasing airborne compounds into indoor air.
Q: How long does professional wet drywall odor removal take?
A: Professional wet drywall odor removal typically takes 2 to 5 days depending on moisture depth and contamination severity. Surface drying may complete in 24 hours, but deeply saturated gypsum board requires continuous industrial dehumidification. Complete remediation with material removal, antimicrobial treatment, and reconstruction extends the timeline based on affected area size.