
Most homeowners wait too long to deal with wet drywall, thinking it’ll dry out on its own. It won’t. And that delay is exactly how minor water damage turns into a serious mold problem. The truth is, you have about 24 to 48 hours before mold spores start setting up inside your walls. Once that happens, a simple repair becomes a full remediation job. This guide walks you through the real steps to dry, evaluate, and repair wet drywall the right way, so you stop the damage before it spreads and costs you thousands more.
Identifying and Addressing Water Damaged Drywall: Immediate Action Steps
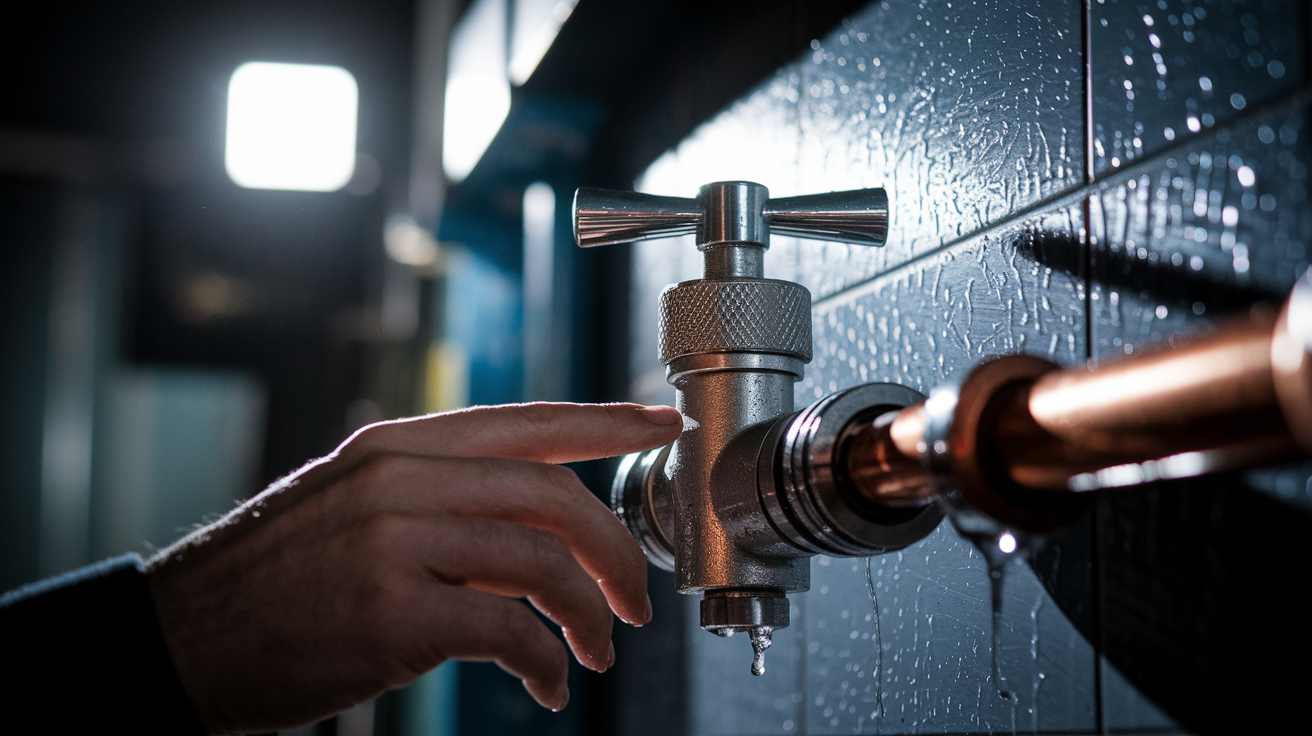
When you spot water damage on your drywall, the clock starts ticking. Before you touch anything or start planning repairs, you need to stop the water. Find the shut-off valve closest to the leak. Under sinks, there’s usually a valve on the supply lines. For toilets, look behind the base. If you can’t locate a local valve or the damage is coming from somewhere you can’t pinpoint, go straight to the main water supply and shut it down. No water source control means no point in repair work because the problem will just keep happening.
Once the water stops, start documenting. Pull out your phone and take photos and videos with timestamps turned on. Capture every angle of the damage, close-ups of problem areas, and wide shots showing the full scope. Your insurance company will want this evidence, and you’ll need it before you change anything about the scene.
Now check the actual damage. Press gently on the wet areas with your fingertips. Healthy drywall feels firm even when damp. If it feels soft, spongy, or starts crumbling under light pressure, the gypsum core inside has broken down. That section needs complete replacement, not just drying and repainting. Discoloration alone might be fixable, but structural compromise isn’t. Look for swelling where the paper facing has separated from the core, sagging sections that have absorbed too much water, or areas where the surface texture has changed completely.
The repair versus replacement decision comes down to what’s happening inside the wall. Surface dampness from a minor leak that you caught quickly might dry out fine with fans and time. But once water saturates the gypsum core, it loses its structural integrity permanently. Even after it dries, it stays weak and prone to crumbling. If pressing the damaged area leaves an indent or feels musty and soft, replacement is the only real fix. Minor discoloration on otherwise solid drywall can often be addressed with stain blocking primer and paint after proper drying.
Understanding the urgency here matters because mold can start growing inside damp wall cavities in as little as 24 to 48 hours. You’re not just dealing with cosmetic damage. You’re in a race to prevent a much bigger health and structural problem. Check how deep the moisture goes, assess whether the water was clean or contaminated, and decide quickly whether you’re drying and patching or cutting and replacing. Every hour counts.
Immediate visual inspection checkpoints when discovering wet drywall:
- Check for active dripping, pooling water, or ongoing moisture infiltration that indicates the source isn’t controlled yet
- Look for brown, yellow, or gray discoloration patterns that show where water traveled and pooled
- Identify any sagging, bulging, or warped sections that signal the drywall has absorbed significant water weight
- Press gently on affected areas to test for soft, spongy, or crumbling texture beneath the surface
- Inspect baseboards, trim, and flooring near the damaged drywall for additional water damage or wicking
- Look for paint bubbling, peeling, or texture changes that indicate moisture trapped under the finish layers
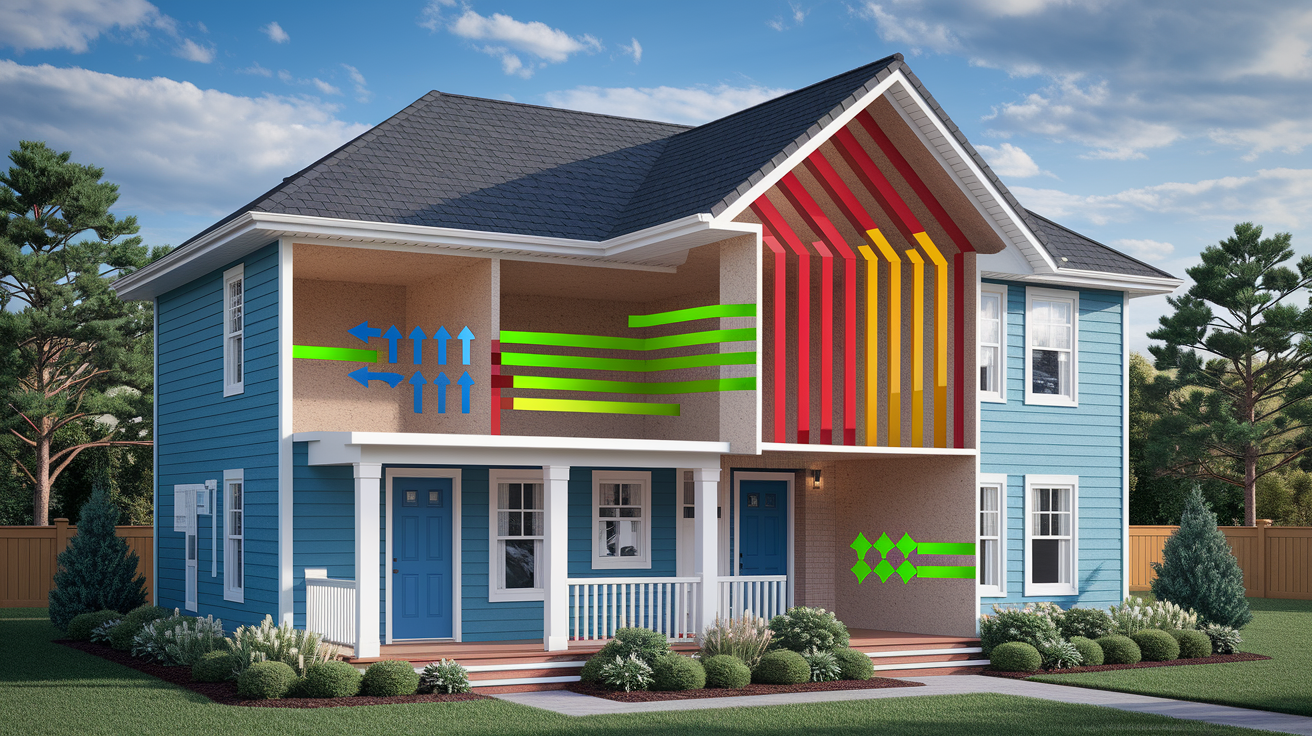
Drying Process and Severity Evaluation for Damaged Drywall
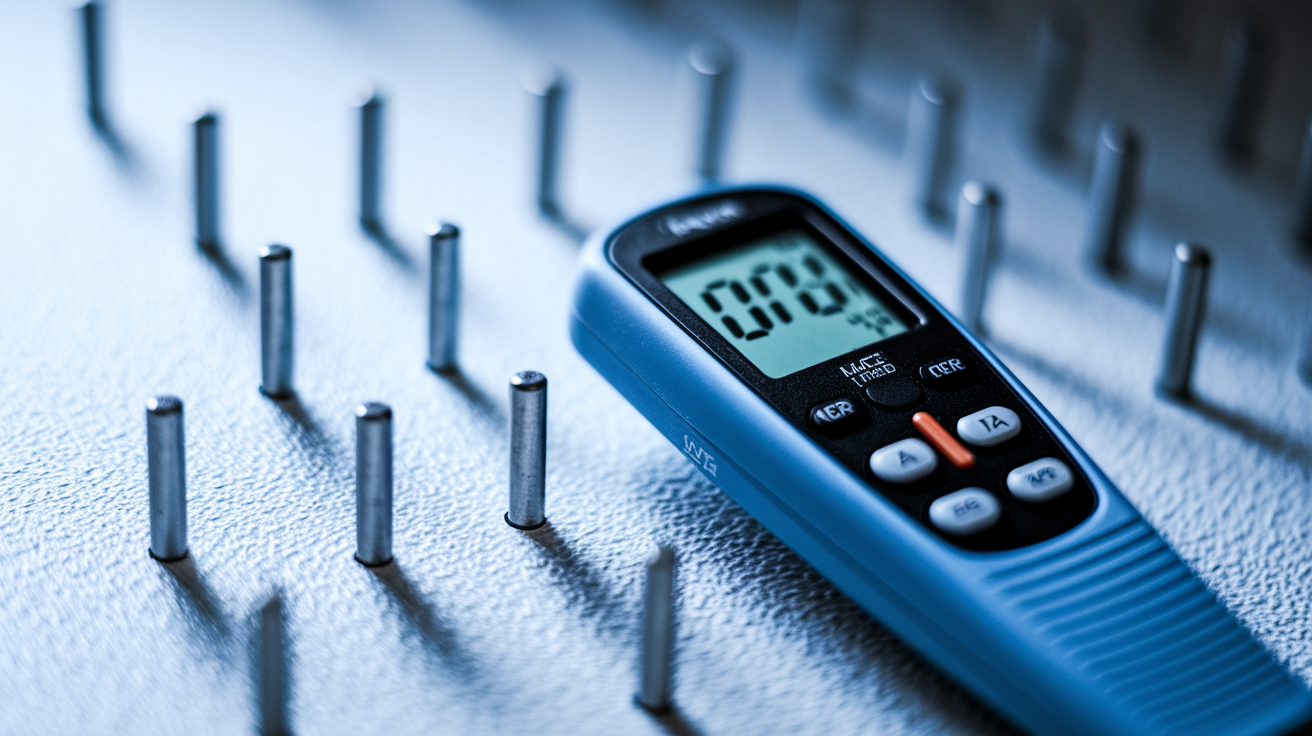
A moisture meter is your truth telling tool here. You can’t guess whether drywall or framing is dry enough to close up. Moisture meters cost around thirty to fifty dollars and give you actual readings instead of assumptions. Press the pins into the drywall and check the number. For wood framing behind the drywall, readings above 15 to 17 percent mean more drying time is absolutely necessary. Closing up a wall with trapped moisture just locks in a mold factory.
Drying time varies wildly based on how soaked things got and what your climate does. Light surface dampness might dry in three days with good airflow. Heavy saturation where water pooled or ran down inside the wall cavity can take several weeks. In areas with high humidity, you’ll need dehumidifiers running constantly alongside fans. Just opening windows won’t cut it when you’re fighting serious moisture. Set up box fans to create cross ventilation, point them directly at the damaged areas, and add a dehumidifier to pull moisture out of the air. Check the moisture meter daily and document the readings.
That 24 to 48 hour mold growth window is why you can’t take a wait and see approach. Once mold establishes itself inside a wall cavity, the repair scope explodes. What started as a simple patch job becomes a mold remediation project with containment barriers, protective equipment, and antimicrobial treatments. This is why aggressive drying starts immediately, not after you’ve thought about it for a few days or waited to see if it gets better on its own.
Drywall is salvageable when moisture only affected the surface and the core stayed mostly dry. If you caught a small leak fast, wiped down the surface water, and got fans on it within hours, the gypsum core might be fine. But when water sat long enough to soak through the paper facing and into the core, or came from a contaminated source like a sewage backup, removal and replacement is the only safe answer. Test by pressing firmly on the dried area after several days of drying. If it still feels soft, weak, or sounds hollow, it needs to come out.
| Damage Level | Moisture Reading | Drying Time | Action Required |
|---|---|---|---|
| Minor surface moisture from small leak | Below 15% in framing, surface damp only | 3 to 7 days with fans and ventilation | Dry thoroughly, monitor daily, prime and paint if core remains firm |
| Moderate saturation from extended leak | 15% to 20% in framing, gypsum core affected | 1 to 3 weeks with dehumidifiers and fans | Aggressive drying, moisture meter verification, likely replacement if core softened |
| Severe saturation from burst pipe or flooding | Above 20% in framing, visible water damage throughout | 3 to 6 weeks minimum, possible cavity drying needed | Remove damaged sections immediately, dry framing completely before installing new panels |
| Contaminated water from sewage or prolonged standing water | Varies, but contamination level more critical than reading | Not applicable, immediate removal required | Complete removal of affected materials, antimicrobial treatment, professional assessment for hidden contamination |
Essential Tools and Materials for Drywall Water Damage Restoration

Matching your drywall thickness matters more than you’d think. Standard residential drywall comes in 1/2 inch and 5/8 inch thicknesses. If you patch with the wrong thickness, you’ll spend hours trying to build up joint compound to make it flush, and it’ll never look quite right. Cut a small piece from the damaged section you’re removing and bring it to the lumberyard. They can match not just the thickness but also the type, whether it’s standard, moisture resistant, or fire rated.
Safety equipment isn’t optional here. Drywall dust gets everywhere and breathing it causes problems. At minimum you need a dust mask, safety glasses, and work gloves. If you’re dealing with mold or contaminated water, upgrade to an N95 respirator. Seal off the work area by covering doorways with plastic sheeting and taping HVAC vents shut. You don’t want drywall dust traveling through your whole house or mold spores spreading to clean areas.
Essential tools for wet drywall repair:
- Utility knife with fresh blades for scoring and cutting drywall paper facing cleanly
- Drywall saw or rotary cutting tool for making straight cuts through gypsum core
- Taping knives in three sizes: 4 to 6 inch for first coat, 8 to 10 inch for second coat, 12 inch for final feathering
- Cordless drill with Phillips bit for driving drywall screws quickly and accurately
- Stud finder to locate framing behind damaged drywall before cutting
- Sanding block or pole sander with 120 grit sandpaper for smoothing dried joint compound
- Moisture meter to verify drywall and framing are dry enough before closing up walls
- Bucket and mixing paddle if using powdered joint compound instead of pre mixed
Required materials for complete drywall water damage repair:
- Replacement drywall panels matching thickness and type of existing wall (bring sample to lumberyard)
- Paper tape for embedding in joint compound along all seams and corners
- Joint compound in sufficient quantity for three coat application (5 gallon bucket for larger repairs)
- Wood backing boards (1×3 or 1×4 furring strips) for areas where cut edges don’t land on studs
- Drywall screws (1 1/4 inch for 1/2 inch drywall, 1 5/8 inch for 5/8 inch panels)
- Stain blocking primer (shellac based or oil based) to permanently seal water stains and prevent bleed through
- Interior paint matched to existing wall color and sheen (bring paint chip or photo for color matching at paint store)
Step by Step Guide to Removing Water Damaged Drywall Sections

Clean, precise cuts make the difference between a patch that disappears and one that announces itself every time you walk past. When you cut damaged drywall, you’re creating the outline for your repair. Jagged edges, uneven cuts, or removal areas that don’t land on solid backing make the finishing work ten times harder. Take time to mark your cuts carefully and follow the steps in order.
Step by step surgical removal of water damaged drywall:
-
Contain your workspace completely. Tape plastic sheeting over doorways and cover HVAC vents with tape and cardboard. Drywall dust is fine like powder and travels everywhere air moves. Run a box fan in a window pointing outward if possible to create negative pressure that pulls dust outside instead of deeper into your home.
-
Locate studs with a stud finder. Mark the stud centers with a pencil. Your cut lines need to land on stud centers so you have solid wood backing for screwing the new patch panel. Studs run vertically, typically 16 inches on center in most homes, but verify each one.
-
Mark cut lines 6 to 12 inches beyond visible water damage. Measure and mark horizontal lines that intersect with the stud centers you located. Use a level or straight edge to ensure your lines are perfectly horizontal and vertical. Cutting beyond visible damage ensures you’re working with completely dry, undamaged drywall edges.
-
Score the paper facing deeply with a utility knife. Press hard and make multiple passes along your marked lines. The goal is to cut completely through the paper facing and slightly into the gypsum core. This prevents tearing and ragged edges when you make the full cut.
-
Cut completely through the drywall using a drywall saw. Follow your scored lines carefully. For the cleanest cuts, start at one corner and saw straight along the line. If you have a rotary cutting tool, it makes fast work of straight cuts, but a hand drywall saw works fine and gives you more control in tight spots.
-
Remove the damaged section carefully, pulling it away from the wall cavity. Work slowly near edges to avoid tearing the paper facing on the remaining good drywall. If you hit resistance, check for screws or nails you missed. Don’t yank sections out, because you might damage the good drywall surrounding your cut.
-
Inspect the entire wall cavity for hidden problems. Shine a flashlight into the opening and look at the framing, insulation, and back side of the remaining drywall. Check for mold growth, wet insulation that needs removal, or additional moisture damage you couldn’t see from the outside. Use your moisture meter on all wood framing members.
-
Bag damaged drywall and contaminated materials immediately. Double bag heavily damaged or mold contaminated materials in contractor bags. Seal them and remove them from your home right away. Don’t let debris sit around in your workspace where it can spread mold spores or create dust when you bump into it.
Check everything in that wall cavity before you move forward. Finding a second moisture problem or mold growth now saves you from having to tear out your brand new repair in a month. Look up. Look down. Check corners where water might have traveled along framing members. Feel the insulation. If it’s damp or compressed, pull it out. Wet insulation doesn’t dry properly and becomes a mold breeding ground.
Installing Replacement Drywall Panels and Backing Support

You need backing boards anywhere your cut edge doesn’t land directly on a stud. Without backing, you’ve got nothing to screw the edge of your patch panel into. Cut 1×3 or 1×4 furring strips a few inches longer than the opening height. Slide one half of the board behind the existing drywall edge and screw it to the back of the good drywall. Now you’ve got a solid surface for attaching the patch panel edge. Do this for any vertical edges that don’t hit studs.
Measure your opening carefully and transfer those measurements to your new drywall panel. Measure twice. Cut once. Use a straightedge and utility knife to score the face paper along your cut line, then snap the panel along the score. Flip it over and cut the back paper. Test fit the panel before you commit. It should slip into the opening with about 1/8 inch gap all around. If it’s too tight, trim it down slightly. You want a snug fit but not one that requires forcing. Bringing that sample piece to the lumberyard ensures you’re working with the exact same thickness and type as the original wall.
Attach the panel using drywall screws every 6 to 8 inches around the perimeter and along any studs that cross the middle of the panel. Drive screws straight in, not at an angle. Sink them just deep enough to create a slight dimple in the paper facing without breaking through. That dimple gives joint compound a place to settle flush with the surface. Screws that stick out create bumps. Screws driven too deep tear the paper and lose holding strength. If you strip one out, drive another screw an inch away.
Check that your patch sits perfectly flush with the surrounding wall surface. Run your hand across the seam. You shouldn’t feel a lip, ridge, or step. If the new panel sits proud (sticks out), you might have the wrong thickness or your backing boards are too thick. If it sits recessed, you’ll never feather it smooth with joint compound alone. Fix any flush issues now before you start taping and mudding.
Applying Joint Compound and Tape for Seamless Drywall Finishing
Paper tape creates the strongest, most crack resistant joints for flat seams and inside corners. It reinforces the joint and gives the compound something to bond to. Mesh tape might seem easier because it’s self adhesive, but it’s weaker and more prone to cracking over time. Paper tape embedded in joint compound forms a permanent, flexible bond that moves slightly with the building without breaking.
The three coat system isn’t a suggestion. It’s how you make seams disappear. First coat embeds the tape and fills the seam. Second coat builds width and starts feathering. Third coat feathers the edges so gradually that your eye can’t detect the transition. Allow at least 24 hours between coats for complete drying. Rushing this creates soft spots that sand poorly and crack later.
First Coat: Embedding the Tape
Load your 4 to 6 inch taping knife with joint compound and spread a thin, even layer directly over the seam. Press paper tape into the wet compound, centering it over the seam. Starting at one end, run your knife along the tape with firm pressure, squeezing out excess compound and bubbles. The tape should be fully embedded with compound visible through it, but not buried under a thick layer. Smooth out any wrinkles or bubbles immediately. Cover all screw dimples with a thin coat of compound as well. Let everything dry completely, which takes at least 24 hours depending on humidity and temperature.
Second Coat: Building and Widening
Once the first coat is rock hard, load your 8 to 10 inch knife and apply a second layer over the taped seams. Extend this coat 2 to 3 inches wider than the first coat on each side. Build up the center slightly to level any remaining depression over the seam. Keep edges thin and start feathering them out into the surrounding wall surface. Apply a second coat over all screw dimples. Let this coat dry completely for another 24 hours minimum. When dry, sand lightly with 120 grit sandpaper to knock down any ridges or high spots. Wipe away dust with a damp rag.
Third Coat: Feathering for Invisibility
Load your 12 inch knife and apply the final coat, extending it several inches beyond the second coat edges. This coat is all about making the transition invisible. Use very light pressure on the outer edges to spread the compound paper thin. The center can be built up slightly if needed, but your focus is on feathering those outer edges until they blend into the surrounding wall. Apply thin final coats to screw dimples if they still show any depression. After 24 hours of drying, sand the entire area lightly with 120 grit sandpaper using circular motions. Sand until you can’t feel any ridges or texture changes when you run your hand across the repair.
Priming, Texture Matching, and Painting Water Damaged Wall Repairs

Shellac based or oil based stain blocking primers permanently lock in water stains and prevent them from bleeding through your new paint. Never skip this step and never use regular primer on water damage repairs. Water stains contain minerals and contaminants that bleed through standard latex primers and paints no matter how many coats you apply. The stain will ghost right through and ruin your work. Stain blocking primer seals everything in one coat. Brush or roll it over the entire repaired area, extending a few inches beyond onto the surrounding original wall. Never paint over water stains without proper primer because you’re trapping moisture and creating a perfect environment for mold growth between the paint and drywall.
If your wall has texture, you need to replicate it before priming. Aerosol spray texture works well for orange peel texture. Hold the can 18 to 24 inches from the wall and apply light, even coats. Let each coat dry before adding more, building up gradually until the texture matches. For knockdown texture, spray heavier than orange peel, wait a few minutes until the texture starts to firm up, then lightly flatten the high points with a wide taping knife. Practice on cardboard first if you’re not sure about the timing.
Apply paint in two thin coats rather than one thick coat. Color match is only half the equation. Sheen matters just as much. If your existing wall has eggshell finish and you paint the repair with satin, the difference will be obvious in certain lighting even with perfect color matching. Bring a paint chip or photo to the paint store and have them match both color and sheen. Stir the paint thoroughly before using it.
Test your paint match in an inconspicuous area first. The corner behind a door or near the baseboard works well. Paint a small test spot, let it dry completely, and check it in different lighting conditions. Morning light, afternoon light, and evening artificial light all affect how color looks. Once you’re confident the match is right, paint the entire repair area. Feather the edges of your paint into the surrounding original wall to avoid hard paint lines. When both coats are completely dry, the repair should be invisible unless you know exactly where to look.
Mold Prevention and Antimicrobial Treatment After Water Exposure
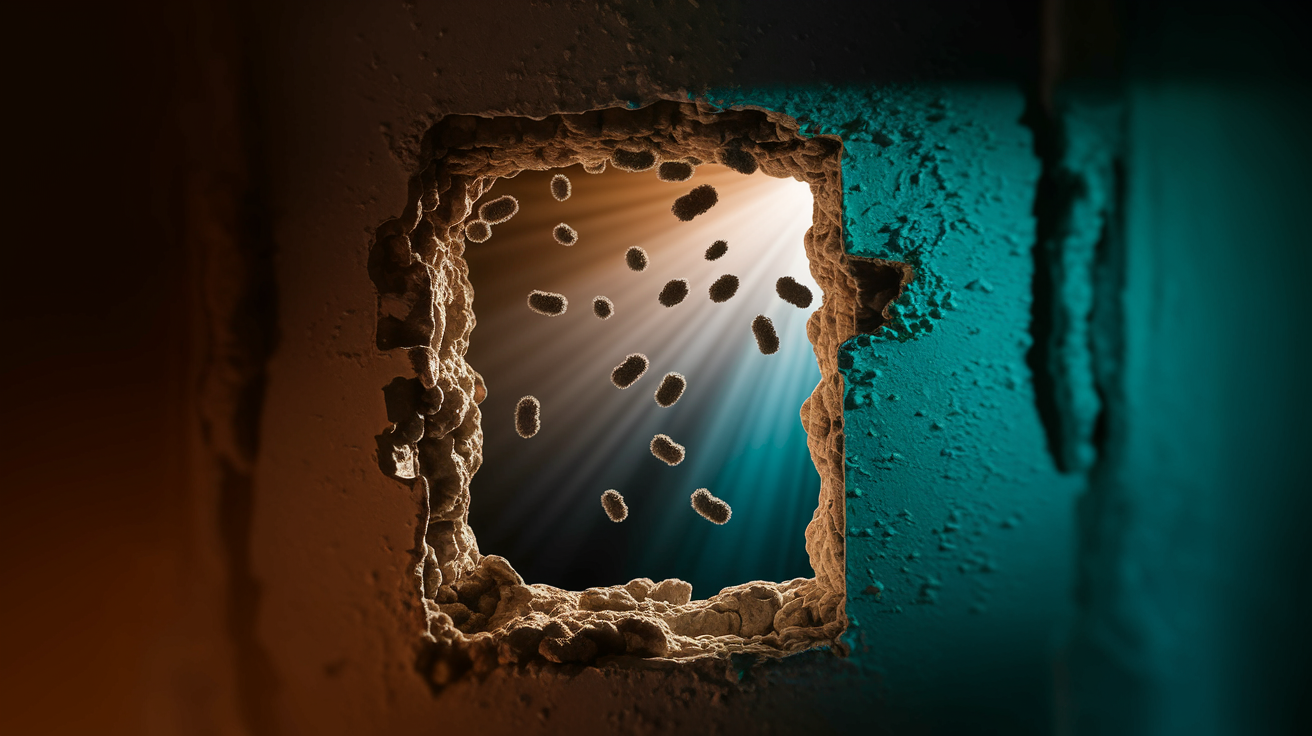
Speed prevents mold. Once water enters your walls, you’re in a race against biology. Mold spores exist everywhere, floating in the air all the time. They only become a problem when they land on damp surfaces with organic material to feed on. Drywall’s paper facing is food. The gypsum core holds moisture. Together they create perfect conditions for mold colonies to establish and spread rapidly through wall cavities where you can’t see them growing until health problems start appearing.
Water damage comes in three categories. Category 1 is clean water from supply lines, like a burst pipe or leaking water heater. Category 2 is grey water containing some contamination, like washing machine overflow or dishwasher leaks. Category 3 is black water heavily contaminated with sewage, chemicals, or biological matter from toilet backups, sewer line failures, or long standing flood water. Category 1 might be manageable with aggressive drying and monitoring if you act immediately. Category 2 needs antimicrobial treatment. Category 3 requires professional sanitation protocols, biohazard equipment, and complete removal of all contaminated materials. Don’t attempt sewage cleanup yourself because the health risks are serious.
Preventative measures start with complete drying and continue with antimicrobial spray application on all exposed wood framing and the back of remaining drywall before you install new panels. Let the antimicrobial treatment dry according to product directions before closing up the wall. Monitor the area after completing repairs by checking for musty odors during humid weather and watching for any discoloration appearing on the new drywall. Even after proper repairs, ongoing vigilance catches problems before they become major issues.
Signs requiring professional mold remediation services:
- Visible mold growth spreading beyond a small surface area (more than 10 square feet typically triggers professional protocols)
- Persistent musty, earthy, or sour smell that doesn’t go away after repairs and drying
- Respiratory symptoms, eye irritation, or allergy like reactions that worsen when spending time near the affected area
- Mold growth behind walls discovered during repair work, indicating extensive hidden contamination in cavities
- Multiple areas of water damage throughout the home suggesting widespread moisture problems and possible systemic mold issues
- Health conditions like asthma or immune system compromise in household members making mold exposure particularly dangerous
Common Water Sources Behind Ceiling and Wall Damage
Identifying the exact water source before starting repairs prevents you from patching a symptom while the problem keeps happening. You fix the leak or water intrusion point first, confirm it’s completely stopped, and only then repair the drywall damage. Otherwise you’re wasting time and materials on a repair that’ll be ruined in days or weeks.
Some water sources are obvious. A puddle under a dripping pipe points right to the problem. Others are sneaky. Water travels along framing members, soaks through insulation, and appears on drywall far from the actual entry point. Ceiling stains might come from roof leaks but they could also be from plumbing vents, HVAC condensation, or bathroom fixtures on the floor above. Professional leak detection equipment like thermal imaging cameras can find hidden sources that aren’t visible, especially important when water stains keep appearing after you thought you fixed the problem.
| Water Source | Common Location | Warning Signs | Urgency Level |
|---|---|---|---|
| Roof leaks from damaged shingles, flashing, or valleys | Ceiling drywall, exterior walls near roofline, attic spaces | Stains appearing or worsening during rain, dripping only in storms, attic dampness after weather events | High, worsens rapidly with each rain event and causes progressive structural damage |
| Burst supply pipes or fitting failures | Walls containing plumbing runs, ceiling below bathrooms or kitchens, mechanical rooms | Sudden large water volume, active spraying or streaming, water meter running when all fixtures off | Critical, shut off immediately to prevent catastrophic flooding |
| Plumbing fixture leaks from toilets, sinks, showers, or tubs | Bathroom walls and floors, kitchen cabinet areas, ceiling below upper floor bathrooms | Water pooling near fixtures, soft flooring around toilets, stains on ceiling directly below bathrooms | Moderate to high, slow leaks cause hidden damage over time if unaddressed |
| HVAC condensation from clogged drain lines or frozen coils | Walls or ceiling near air handlers, mechanical closets, return air pathways | Seasonal appearance during cooling season, dripping near HVAC equipment, water in drain pan | Moderate, causes recurring damage but typically manageable once drain cleared |
| Sewage backup from clogged main lines or septic failures | Basement walls, lower level bathrooms, foundation walls, floor drains | Foul odor, discolored water, multiple drains backing up simultaneously, toilet gurgling | Critical, health hazard requiring immediate professional remediation and sanitation |
| Flooding from heavy rain, storm surge, or poor drainage | Basement walls, foundation walls, lower portions of first floor walls, crawl spaces | Water entering during heavy rain, dampness along baseboards, efflorescence on concrete, recurrence with weather | High, indicates exterior drainage problems requiring grading or waterproofing solutions |
| Chronic condensation from humidity or poor ventilation | Exterior walls in bathrooms or kitchens, cold walls near windows, poorly ventilated spaces | Persistent dampness without obvious water source, worse in cold weather, mildew growth, musty smell | Moderate, long term problem requiring ventilation improvements and humidity control |
DIY Repair Versus Hiring Professional Contractors for Water Damage

DIY makes sense for small, straightforward repairs when the water source was clean, the damage is limited, and you’ve got basic home repair skills. A patch under two square feet with no structural concerns, caught quickly after a minor supply line leak, falls into manageable DIY territory. You need the time to do it right, the patience to wait for proper drying between steps, and comfort working with hand tools. If all those factors line up and the moisture didn’t spread into areas you can’t access, handling it yourself saves money and gives you control over the timeline.
Professional help becomes essential when you see red flags that indicate bigger problems than a simple patch job. Sagging ceilings mean the drywall has absorbed so much water that it’s pulling away from the framing and could collapse. That’s a safety issue requiring immediate professional assessment. Walls that feel spongy to the touch signal that moisture has compromised framing members, not just drywall. Persistent musty odors after drying efforts mean mold is growing somewhere you can’t see, often inside wall cavities or under flooring. Contaminated water from sewage backups requires professional sanitation protocols you can’t safely replicate yourself. Extensive damage across multiple rooms, suspected structural issues, or visible mold beyond small surface spots all demand professional equipment, expertise, and safety measures.
Cost expectations help you make informed decisions. Contractors typically charge $60 to $90 per hour for water damage drywall repair because of the extra steps involved compared to standard drywall work. Small projects might run $300 to $500, while typical water damage repairs average $300 to $850 depending on how much drywall needs replacement and how extensive the moisture mitigation work is. Severe cases with mold remediation, structural repairs, and large areas of replacement easily exceed $2,000 to $5,000.
Professional services bring value beyond just labor. They have commercial grade moisture meters and thermal imaging cameras to find hidden wet spots you’d miss. They can test for mold presence and type, not just guess based on smell. They understand structural concerns and know when damage requires more than just drywall replacement. They document everything properly for insurance claims with detailed reports, photos, and moisture readings that strengthen your case with adjusters. They guarantee their workmanship and carry insurance if something goes wrong. When the scope is uncertain, structural safety is a concern, or insurance coverage is involved, professional assessment provides clarity worth the cost.
Insurance Claims and Documentation for Water Damaged Drywall
Document everything before you touch anything. The moment you discover water damage, pull out your phone and start recording. Take photos from multiple angles showing the full extent of damage. Get wide shots that show the entire room and where the damage is located. Take close-ups of every stain, soft spot, and problem area. Record video walkthroughs narrating what you’re seeing. Make sure timestamps are enabled on your camera so the documentation proves when you discovered the damage. Move methodically through each affected area. This evidence supports your insurance claim and protects you if questions arise later about the scope or timing of damage.
Insurance adjusters need clear documentation to evaluate claims accurately. They want to see the damage progression, understand what caused it, and verify that you took reasonable steps to prevent additional damage once you discovered the problem. Professional assessment documentation strengthens your position because contractors provide detailed reports with moisture readings, scope of necessary work, and itemized estimates. Third party documentation carries more weight than homeowner descriptions alone.
Realistic cost expectations help you evaluate whether filing a claim makes financial sense given your deductible. Average drywall repairs run around $609 for typical projects. But water damage adds complications. Moisture testing, mold prevention, additional drying time, structural verification, and contamination concerns all increase costs. Minor water damage caught early might stay under $1,000. Serious cases involving multiple rooms, mold remediation, structural repairs, or contaminated water easily climb into $5,000 to $15,000 range. Compare repair estimates against your insurance deductible to decide whether filing a claim is worthwhile.
Essential documentation items for successful insurance claims:
- Photos from multiple angles showing full extent of damage before any cleanup or repairs begin
- Video walkthroughs with narration explaining what you’re seeing and where water entered
- Written timeline documenting when you discovered damage, what immediate actions you took, and when professionals were contacted
- Professional estimates from licensed contractors detailing repair scope and costs
- Receipts and invoices for any emergency services like water extraction or temporary repairs to prevent additional damage
- Moisture meter readings documented with dates showing saturation levels in affected materials
- All correspondence with insurance company including claim number, adjuster contact information, and documented phone conversations or emails
Long Term Prevention Strategies for Protecting Drywall from Moisture
Water resistant drywall isn’t as waterproof as the name suggests. Green board has moisture repellent facing that resists surface dampness better than standard drywall, but underneath that facing is the same gypsum core that breaks down with prolonged water contact. It’s appropriate for high humidity areas like bathrooms under normal conditions, but it’s not a solution for repeated or prolonged water exposure. When water saturates even moisture resistant drywall, the gypsum core still fails. For truly wet areas like shower surrounds, use cement board or other waterproof backer materials.
Climate matters significantly in how you prevent moisture problems. Humid regions need active dehumidification and strong ventilation systems. Running bathroom exhaust fans during showers and for 20 minutes afterward removes moisture before it penetrates walls and ceilings. Whole house dehumidifiers maintain consistent indoor humidity levels year round. Areas prone to exterior moisture need proper grading that slopes away from the foundation, functioning gutters that direct water well away from the building, and possibly exterior waterproofing or drainage systems.
Long term preventive maintenance strategies:
-
Schedule annual roof inspections before rainy seasons to catch damaged or missing shingles, failed flashing, and clogged valleys before leaks develop. Pay special attention to areas around chimneys, vents, and skylights where flashing commonly fails.
-
Clean gutters and downspouts twice yearly and verify water discharges at least 6 feet away from your foundation. Clogged gutters overflow and pour water directly down exterior walls and into foundations.
-
Check plumbing fixtures quarterly for small leaks by inspecting supply lines, shutoff valves, drain connections, and toilet base seals. Catching pinhole leaks early prevents major damage later.
-
Run bathroom and kitchen exhaust fans during water use and for 20 minutes afterward to remove humidity that otherwise penetrates drywall and insulation. Replace inadequate fans with properly sized units that move at least 50 cubic feet per minute.
-
Maintain indoor humidity levels between 30 and 50 percent using dehumidifiers in humid climates and humidifiers in dry climates. High humidity promotes condensation and mold growth. Low humidity causes materials to dry excessively and crack.
-
Install water leak detectors near water heaters, washing machines, dishwashers, and under sinks to provide early warning before small leaks become flooding events. Smart detectors send alerts to your phone when they detect moisture.
-
Upgrade to water resistant or cement board materials in high risk areas during renovations including bathroom walls and ceilings, kitchen backsplash areas, laundry room walls, and basement spaces prone to occasional dampness.
-
Verify landscape grading slopes away from your foundation with a minimum 6 inch drop over the first 10 feet. Add soil and regrade if needed to prevent water from pooling against foundation walls during rain.
-
Conduct annual whole home inspections with attention to hidden areas including attics, crawl spaces, and basement corners where moisture damage often starts but goes unnoticed until problems become severe.
Timeline Expectations and Common Mistakes in Wet Drywall Restoration
Wet drywall repair takes time. You’re not patching a hole in an afternoon. Drying alone ranges from 3 days for minor surface dampness to several weeks for heavy saturation, depending on how much water soaked into the materials and what your climate is doing. After drying comes removal and installation, which might be a day or two depending on the size of the damaged area. Then joint compound application follows the mandatory 24 hour rule between each coat. First coat needs 24 hours minimum to dry completely. Second coat needs another 24 hours. Third coat needs yet another 24 hours. That’s three to five days just for proper taping and mudding.
Final Words
Wet drywall repair isn’t about covering up the problem. It’s about stopping the water, removing what’s compromised, drying it right, and rebuilding it to last.
The timeline matters. The moisture readings matter. The primer you choose matters.
Cut beyond the damage. Test before you close it up. Don’t skip the stain blocker.
If you’re unsure about the source or the extent, we’re here. We’ll find it, fix it, and make sure it stays fixed.
FAQ
Is drywall ruined if it gets wet?
Drywall is ruined if it gets wet when the gypsum core becomes soft, spongy, or crumbles when pressed. Surface dampness without structural compromise may be salvageable through proper drying, but compromised core material requires complete replacement.
How long can drywall be wet before mold?
Drywall can be wet for 24 to 48 hours before mold starts growing inside damp wall cavities. This tight timeline drives the urgency of stopping the water source, removing saturated materials, and accelerating the drying process with fans and dehumidifiers.
Can a wet drywall ceiling be saved?
A wet drywall ceiling can be saved if the gypsum core remains firm when gently pressed and moisture readings drop below 15-17% within the safe drying window. Sagging, spongy texture, or prolonged saturation requires complete removal and replacement.
How to dry a wall after water damage?
To dry a wall after water damage, use moisture meters to track readings, run dehumidifiers and fans for air circulation, and allow 3 days to several weeks depending on saturation levels. Stop when wood framing reads below 15-17% moisture content.