
You probably think that puddle under your toilet tank is no big deal. Actually, a toilet fill valve leaking at the base can waste hundreds of gallons of water and cause serious floor damage if you ignore it. The good news is most base leaks take less than an hour to fix yourself without calling a plumber. We’ll walk you through the quick tightening fix that works in 60 seconds, show you how to replace a failed gasket, and help you tell the difference between a simple loose connection and a problem that needs professional help.
Quick Fixes and Common Causes of Base Leaks

Most fill valve base leaks can be stopped in about 60 seconds by tightening the locknut underneath the tank. Some situations require replacing the rubber gasket instead.
Quick Tightening Fix:
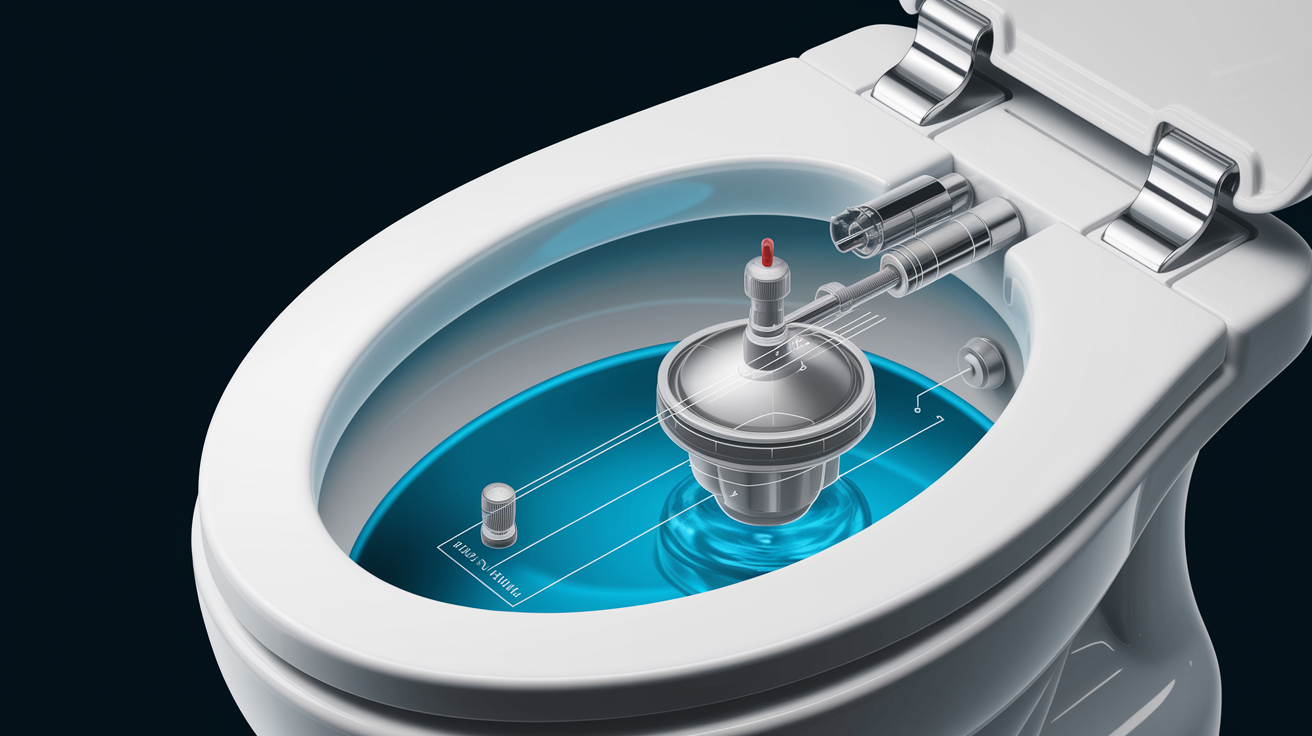
- Locate the plastic locknut underneath the tank where the fill valve connects to the tank bottom
- Hand tighten the nut clockwise without using a wrench initially
- Check for moisture after 10 minutes. If the area stays dry, the leak is fixed
This quick fix works well for connections that have loosened over time from normal toilet use and vibration. When the leak continues after tightening, the gasket has likely failed and needs replacement. Be careful not to overtighten the locknut. Plastic threads strip easily, and excessive force can crack porcelain or break the valve shank.
Root causes requiring gasket replacement:
Deteriorated rubber gasket or O-ring after 5 to 7 years of normal use. Hardened shank washer from mineral deposits and calcium buildup. Calcium buildup from hard water damaging seal integrity and flexibility. Cracked or compressed gasket from previous overtightening during installation. Warped mounting surface preventing the gasket from creating a proper seal.
To check what you’re dealing with, get underneath the tank and look closely at the connection point where the fill valve passes through. Water droplets, white mineral staining, or rust colored corrosion around the base connection confirm an active leak. If you see persistent moisture after tightening the locknut hand tight, you’ll need to replace the gasket or the entire fill valve assembly.
Complete Fill Valve Replacement Guide

The full repair takes 15 to 20 minutes and costs under $20 when you do it yourself. This is a beginner friendly repair that only requires basic hand tools you probably already have.
| Item | Purpose | Estimated Cost |
|---|---|---|
| Adjustable wrench | Removing supply line and locknut | $10-15 (if needed) |
| Bucket | Catching water from disconnected supply line | Use what you have |
| Towels or rags | Mopping up residual tank water | Use what you have |
| Replacement fill valve | New valve assembly with gasket included | $10-15 |
| Rubber gasket kit | Backup gaskets (often included with valve) | $3-5 if separate |
| Plumber’s tape | Sealing supply line threads if needed | $2-3 |
| Pliers | Gripping supply line connection | $8-12 (if needed) |
| Sponge | Absorbing remaining tank water | Use what you have |
Fluidmaster and Korky make reliable replacement fill valves that work in most standard toilets. Most replacement valves are labeled “universal fit,” but check your current valve model before buying to make sure the shank diameter matches your tank’s mounting hole. Bringing your old valve to the hardware store helps confirm compatibility.
Complete installation steps:
Shut off the water at the shutoff valve behind the toilet by turning the oval handle clockwise. Flush the toilet to drain most of the water from the tank. Use a sponge or towel to soak up the remaining water from the tank bottom.
Disconnect the water supply line at the base of the fill valve with an adjustable wrench. Have your bucket positioned underneath to catch drips. Reach under the tank and unscrew the plastic locknut counterclockwise to release the fill valve. Lift the old fill valve straight up and out from inside the tank.
Inspect the tank bottom around the mounting hole and clean away any mineral deposits or old gasket material. Wipe the area with a damp cloth to remove debris and calcium buildup.
Place the new rubber gasket onto the threaded shank of your replacement valve. Insert the valve through the tank hole from inside, making sure the rubber gasket seats flat against the tank bottom without gaps. Hand tighten the locknut from underneath. Turn it hand tight, then add just a quarter turn more using light wrench pressure. Reconnect the supply line and wrap the threads with plumber’s tape if you notice any worn threading.
Do not overtighten that plastic locknut. Porcelain cracks easily under pressure, and plastic threads strip if you force them. The seal comes from the gasket compressing properly against the tank bottom, not from cranking down hard on the nut. Always check the manufacturer’s instructions included with your replacement valve, since some models have specific torque requirements or installation details.
Adjusting and Testing Your Repaired Fill Valve
The small refill tube clips into the top of the overflow pipe inside the tank. This tube sends a small stream of water down into the bowl during each fill cycle to restore the water seal in the trap. Make sure the tube end sits inside the overflow pipe opening but doesn’t go down more than an inch or two.
Water level adjustment happens through the float cup or an adjustment screw on the side of the fill valve. The correct water level sits about 1 inch below the top of the overflow tube. If your valve has a float cup, pinch the adjustment clip and slide the cup up or down the valve shaft. If it has a screw adjustment, turn the screw clockwise to lower the water level or counterclockwise to raise it. Set it so the fill cycle stops with water sitting clearly below the overflow tube opening.
Turn the water supply back on slowly and let the tank fill completely. Watch the base connection underneath the tank for any signs of moisture while the tank fills. Wait at least 30 minutes, then check the floor around the base of the toilet for water.
Flush the toilet 3 to 4 times in a row to test whether the seal holds under the pressure and movement of repeated fill cycles. If you see any dampness or drips at the base connection, the locknut may need a slight additional tightening or the gasket might not be seated correctly.
Diagnosing and Fixing Persistent Leak Issues

Sometimes water keeps appearing at the fill valve base even after you’ve replaced the gasket and tightened everything properly. That usually means the real problem is somewhere else.
Misidentified Leak Source
The food coloring test helps figure out if water is actually leaking from the flush valve instead of the fill valve. Add 10 drops of food coloring to the tank water without flushing. Wait 10 to 15 minutes and check the bowl water. If the bowl water changes color, your flush valve or flapper is leaking, not the fill valve base.
Water from the tank bolts can also drip down and pool near the fill valve base, making it look like the fill valve is leaking when it’s not. Condensation on the outside of a cold tank can drip down and collect in the same spot, especially in humid weather.
Damaged Tank or Mounting Hole
Hairline cracks around the mounting hole sometimes develop from previous overtightening or from the tank settling unevenly on the bowl. These tiny cracks let water seep out even with a brand new gasket installed correctly. Use a flashlight to inspect the porcelain around the mounting hole from inside the tank. Press a dry paper towel against the area and wait a few minutes. If the towel gets damp, you’ve found a crack.
Damaged porcelain can’t be repaired reliably. Once the tank itself is cracked, replacement is the only permanent fix.
Compatibility and Installation Errors
Universal fill valves work in most toilets, but not all of them. Some older toilet tanks have non-standard mounting holes that need specific valve sizes. If the valve shank diameter is smaller than the mounting hole, the gasket can’t seal properly no matter how tight you make it.
The gasket also needs to sit completely flat against the tank bottom without any wrinkles, folds, or debris underneath it. Even a small piece of old gasket material or a mineral chip prevents full contact and creates a leak path.
You’ll want to call a professional plumber if the leak continues after two DIY repair attempts, if you see visible cracks in the tank or bowl, if multiple toilet problems are happening at once, or if water pressure is low throughout your whole home. Professional diagnosis costs money up front but prevents the much larger expense of water damage to your floor, subfloor, and ceiling below.
Emergency situations like rapidly worsening leaks, water running constantly, or signs of structural damage like soft flooring or ceiling stains below the bathroom need immediate professional attention.
Preventing Future Fill Valve Base Leaks

Check your fill valve connections every 6 to 12 months as part of regular home maintenance. A quick visual inspection from underneath the tank takes 30 seconds and catches problems before they become leaks. Look for moisture, mineral deposits building up around the base, or any white crusty material that signals hard water damage to the rubber gasket.
Preventive measures that extend fill valve life:
Clean mineral deposits annually using white vinegar on a toothbrush to scrub around the valve base and gasket. Test your home’s water pressure and install a pressure reducing valve if it measures over 80 PSI. Replace the entire fill valve every 5 to 7 years even if it’s still working without visible problems. Never overtighten plastic nuts during any toilet repair work. Hand tight plus a quarter turn is the standard.
Consider installing a water softener if you live in an area with hard water and see frequent mineral buildup. Check all base connections after any plumbing work or water main shutoffs that cause pressure changes.
Replacing a fill valve before it fails costs $15 and takes 20 minutes. Repairing water damage to the bathroom floor, subfloor, and the ceiling below runs anywhere from $500 to $3,000 depending on how long the leak went unnoticed. Modern fill valves use better rubber compounds and corrosion resistant materials than older models, but they still wear out from constant water exposure and pressure cycles.
Cost Analysis: DIY Repair vs. Professional Service vs. Ignoring the Problem

Here’s what each option actually costs when you factor in parts, time, and the consequences of waiting.
| Scenario | Parts Cost | Labor Cost | Total Cost | Time Required |
|---|---|---|---|---|
| DIY gasket replacement only | $3-5 | $0 | $3-5 | 15 minutes |
| DIY complete valve replacement | $10-15 | $0 | $10-15 | 20 minutes |
| Professional repair service | Included | $120-180 | $120-180 | 1 hour (includes travel) |
| Professional diagnosis and repair | Included | $150-250 | $150-250 | 1-2 hours |
| Ignoring leak for 3 months | $0 | $0 | $90-225 (water waste only) | Ongoing damage risk |
Going the DIY route saves you $105 to $235 compared to professional service for a straightforward valve replacement. A slow leak at the fill valve base typically wastes 20 to 50 gallons of water daily, which adds $30 to $75 to your monthly water bill depending on your local rates. Let that run for three months and you’ve spent more on wasted water than a professional repair would have cost. That calculation doesn’t include any water damage to your flooring or the bathroom below.
Professional diagnosis makes sense when you’ve tried the DIY fix and the leak keeps coming back, when you’re not sure where the water is actually coming from, or when you’re seeing multiple toilet problems at the same time. Floor damage repairs start around $500 for minor water staining and run up to $3,000 or more if water soaks through to ceiling drywall below or damages floor joists.
Those repair bills make a $150 plumber visit look like the smart choice. WaterFixCentral.com provides transparent quotes before any work starts and guarantees all repairs, which takes the guesswork out of the process if you’d rather have a professional handle it from the start.
Final Words
A toilet fill valve leaking at base usually needs nothing more than a quick locknut tightening or a fresh rubber gasket.
Both fixes are fast, cheap, and well within reach for most homeowners.
If you catch it early and follow the steps we covered, you’ll stop the leak, protect your floor, and avoid the kind of water waste that sneaks onto your bill every month.
And if the problem turns out to be something else, at least you’ll know what you’re dealing with and can make the call that fits your comfort level.
FAQ
How much does a plumber charge to replace a toilet fill valve?
A plumber typically charges between $150 and $250 to replace a toilet fill valve, which includes the cost of parts and labor. DIY replacement costs only $10 to $20 for the valve and gasket, making it one of the most cost-effective home repairs you can do yourself.
What is the lifespan of a toilet fill valve?
A toilet fill valve typically lasts 5 to 7 years under normal conditions before requiring replacement. Hard water areas and high water pressure can shorten this lifespan, while regular maintenance like annual vinegar cleaning can extend it beyond the typical range.
Why is my toilet leaking from the base but there’s no visible leak?
Your toilet may be leaking from the base due to a deteriorated fill valve gasket or loose locknut underneath the tank that’s allowing water to seep down slowly. This type of leak often starts as minor moisture that evaporates quickly, making it hard to spot until it worsens or leaves mineral staining.
Why is my toilet leaking from under the base when I plunge?
Your toilet leaks from under the base when plunging because the pressure forces water past a compromised wax ring seal or loose toilet bolts at the base. Plunging creates hydraulic pressure that reveals seal failures that might not leak during normal flushing, indicating the wax ring or mounting bolts need replacement.
Can I just tighten the fill valve nut instead of replacing it?
You can stop many fill valve base leaks by simply hand-tightening the plastic locknut underneath the tank clockwise, which takes about 60 seconds to try. If moisture continues after tightening and waiting 10 minutes, the rubber gasket has deteriorated and needs replacement rather than further tightening.
How do I know if my fill valve gasket needs replacement?
Your fill valve gasket needs replacement if you notice persistent moisture underneath the tank after tightening the locknut, visible mineral staining around the base connection, or water droplets forming at the valve shank. Gaskets typically fail after 5 to 7 years due to age deterioration and mineral buildup from hard water.
What tools do I need to replace a toilet fill valve?
You need an adjustable wrench, bucket, towels, replacement fill valve with gasket, plumber’s tape, pliers, and a sponge for a complete fill valve replacement. These basic tools and a $10 to $15 replacement valve allow you to complete the repair in 15 to 20 minutes without specialized equipment.
How tight should the fill valve locknut be?
The fill valve locknut should be hand-tight plus a quarter turn only, as the rubber gasket creates the seal through compression rather than excessive force. Overtightening can crack the porcelain tank, strip the plastic threads, or compress the gasket unevenly, actually causing leaks instead of preventing them.
How do I test if my fill valve repair worked?
Test your fill valve repair by turning on the water, letting the tank fill completely, then checking underneath the tank for moisture after 30 minutes. Flush the toilet 3 to 4 times to verify the seal holds under pressure, and check the floor around the base for any water pooling.
When should I call a plumber instead of fixing it myself?
You should call a plumber if leaks persist after DIY repair attempts, you notice visible cracks in the tank or around the mounting hole, or you’re experiencing multiple toilet problems simultaneously. Professional diagnosis prevents costly water damage and is essential when you see rapidly worsening leaks or structural damage signs like soft flooring.
Can hard water cause fill valve base leaks?
Hard water causes fill valve base leaks by creating mineral deposits and calcium buildup that deteriorate rubber gaskets and O-rings faster than normal. Areas with hard water conditions require more frequent inspections every 6 months and benefit from annual vinegar cleaning to remove mineral accumulation around seals.
How much water does a leaking fill valve waste?
A leaking fill valve base can waste 20 to 50 gallons of water daily, adding $30 to $75 to your monthly water bill if left unrepaired. Over three months, this wasted water costs more than hiring a professional plumber, not counting potential floor damage from prolonged moisture exposure.