
You’d be shocked how often homeowners spend hundreds fixing grout and caulk, only to watch water stains reappear a month later. The real problem isn’t at the surface. It’s the shower pan liner underneath your tile, quietly failing and sending water straight into your subfloor, walls, and ceiling below. A proper shower pan leak detection test takes about an hour and shows you exactly what’s happening before small moisture problems turn into rotted joists, ruined drywall, or mold remediation bills. We’ll walk you through the flood test method pros use, how to tell plumbing leaks from pan leaks, and what those damp spots really mean.
The Flood Test Method for Shower Pan Leak Detection

The flood test is what professionals rely on when they need to know for certain whether a shower pan is leaking. This test forces water to stay in the pan long enough to reveal compromised spots in the waterproofing membrane or liner sitting underneath your tile. It works by sealing the drain and filling the shower base, then watching for water showing up where it shouldn’t.
Step by step flood test procedure:
-
Pull the drain cover and clean out any debris, hair, or soap buildup from the drain opening. Look for weird sealants or silicone that might mess with getting a good seal.
-
Insert an inflatable test ball into the drain opening. Most shower drains need either a 1.5 inch or 2 inch test ball, which you inflate using a hand pump or bike pump. Inflate it until it feels snug in the drain. Pour a little water around the plug and watch for bubbles, which means the seal isn’t tight enough.
-
Fill the shower pan with water until it reaches the threshold level. Don’t overfill past this point. You’re testing the pan itself, not the door seals or curb.
-
Wipe down the bathroom floor outside the shower right away to establish a clean baseline. Makes any fresh water way easier to spot.
-
Let the water sit undisturbed. Minimum 15 minutes for basic detection, though 30 to 60 minutes gives you better results. Some pros recommend letting it stand for a full 24 hours to catch very slow leaks that won’t show up immediately.
-
Inspect below and around the shower for signs of water. Check multiple times during the waiting period, not just at the end.
During the test, check these areas for water or dampness: the bathroom floor right outside the shower enclosure, baseboards along walls next to the shower, crawl spaces or basements directly beneath the bathroom, any ceiling below the shower if it’s on an upper floor, and the exterior brick ledge if your home sits on a slab foundation. On pier and beam homes, access to the crawl space makes inspection straightforward.
The test ball needs to plug the drain below the weep holes, not just at the surface. This forces water to test the actual liner rather than simply draining away through the weep hole system. If no water appears outside the shower after your chosen waiting period, your shower pan is working correctly. Minor dampness showing up after 30 to 60 minutes suggests a small leak that may get worse over time and should be monitored or repaired soon. Significant water appearing quickly means an active failure that needs prompt attention to prevent structural damage.
Signs You Have a Shower Pan Leak

A leaking shower pan is a failure of the waterproofing layer beneath your tile or shower floor surface. When water penetrates through grout or tile and isn’t properly contained by the pan liner underneath, it escapes into the subfloor, walls, or ceiling below. Early detection matters because a small leak caught early might only need minor repairs, while an undetected leak can warp subfloors, rot wooden framing, ruin drywall in rooms below, and in bad cases compromise your home’s foundation.
Common warning signs of shower pan leaks:
- Water stains or discoloration on the ceiling directly below the bathroom, often showing up as yellowish brown rings or patches
- Damp spots on the bathroom floor outside the shower that appear after someone showers and don’t dry quickly
- Soft or spongy flooring near the shower, which means water damage to the subfloor beneath the tile or vinyl
- Baseboards that show water stains, warping, or separation from the wall
- A persistent musty smell in the bathroom that doesn’t improve even with thorough cleaning and ventilation
- Visible mold growth on walls, ceilings, or floors next to the shower, particularly in corners or along baseboards
- Paint bubbling or peeling on walls or ceilings near or below the bathroom
- Standing water that stays in the shower pan longer than a few minutes after use, suggesting improper drainage slope
The actual location of visible damage might not match up with where the leak starts. Water follows the path of least resistance through floor joists, subfloor layers, and wall cavities, sometimes traveling several feet before appearing as a stain or damp spot. Catching these early warning signs and doing proper testing helps you deal with the problem before minor moisture issues turn into major structural repairs needing new subfloors, ceiling replacement, or mold remediation.
Checking for Plumbing vs. Shower Pan Leaks

Understanding whether water is escaping from your shower pan or from the plumbing system itself changes everything about how you approach the repair. Shower pan leaks happen when water pools in the shower base and seeps through a compromised waterproofing membrane. Plumbing leaks happen when pipes, connections, or fixtures develop cracks or loose fittings that let water escape whenever the system is active. Confusing one for the other can lead to unnecessary pan replacement when you actually need a pipe repair, or surface level caulking when the real problem sits in a failed liner.
Running water pipe leak test:
-
Run the shower at normal water pressure for several minutes, keeping the water flowing continuously. Don’t let water pool in the pan during this test.
-
Visually inspect every accessible pipe connection, valve, and wall penetration point for active dripping or moisture buildup. Pay particular attention to the shower valve body and the connection where pipes enter walls.
-
Use a flashlight and small mirror to look at hard to see areas behind access panels, around the shower valve, and anywhere pipes are visible in crawl spaces or unfinished ceilings below.
-
If you’ve got access to the space below the shower (crawl space or ceiling from the room underneath), watch carefully for active dripping during the time water is running. Have someone operate the shower while you observe from below if possible.
Plumbing leaks show up immediately when water starts flowing and stop appearing when you shut the water off. The connection between cause and effect is direct. Shower pan leaks appear during the flood test when water sits in the pan, and they may continue to worsen for minutes or hours after the water is turned off as trapped moisture works its way through the compromised liner.
Both types of leaks can exist at the same time. An aging bathroom might have a deteriorated shower valve gasket and a cracked pan membrane. Testing for both makes sure you identify and fix all water escape points rather than solving only part of the problem.
Using Dye Testing to Pinpoint Leak Locations

Dye testing enhances the flood test by making water leaks visible and traceable. Instead of just detecting dampness, you can watch colored water appear in specific locations, confirming both that you have a leak and showing you exactly where the water is traveling.
The procedure is straightforward. Add red food coloring to the water before or during the filling process for your flood test. A few drops are sufficient. You want the water visibly tinted but not opaque. Then proceed with the standard flood test procedure and observe your inspection points.
What different dye test results indicate:
- Red tinted water appearing quickly (within 15 minutes) signals a significant leak requiring prompt repair to prevent structural damage
- Slow dampness showing red color after 30 to 60 minutes suggests a minor leak that may worsen over time and should be addressed soon
- Damp spots appearing without any red coloring may indicate a different moisture source such as pipe connections, shower door leaks, or condensation rather than pan failure
- No colored water or dampness after the full test period means your shower pan liner is intact and working properly
Dye testing is particularly valuable when you’re dealing with multiple potential water sources in the same bathroom. If you see red tinted water on the baseboard but clear dampness near the toilet, you know the shower pan is leaking while something else is causing the moisture near the toilet. This precision helps contractors quote accurate repairs and prevents guessing about which component needs replacement.
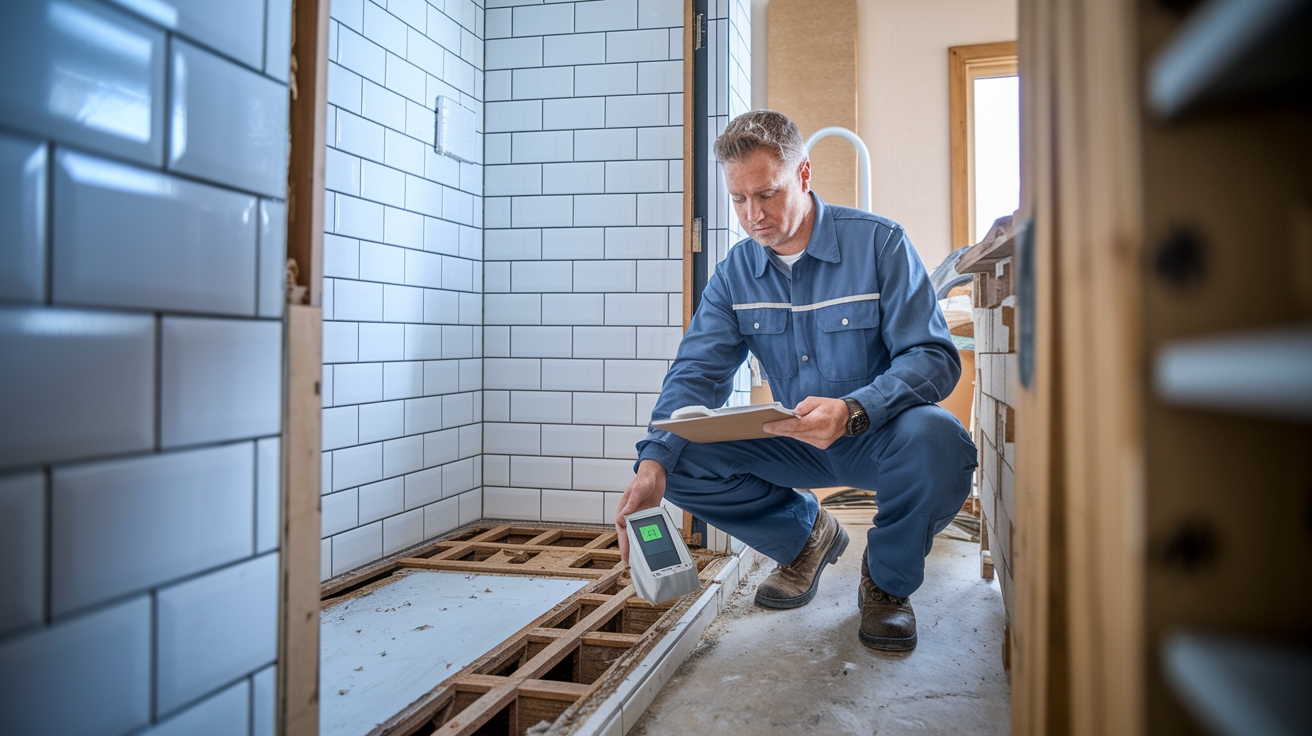
Moisture Meters and Thermal Imaging for Leak Detection

These advanced detection tools reveal hidden moisture and temperature variations that point to water damage behind walls, under floors, and in other areas you can’t see with visual inspection alone. They’re particularly useful when you know moisture is present but can’t pinpoint where water is entering or accumulating.
Moisture Meters
Moisture meters measure the water content in building materials by either inserting pins into the surface or scanning without contact. Pin type meters give precise readings at specific depths, while pinless models scan larger surface areas quickly. Use these meters on the subfloor areas directly below and around your shower, on wall surfaces next to the shower enclosure, on baseboards and trim, and on ceiling materials in rooms below bathrooms.
Normal moisture content for wood ranges from 6 to 12 percent depending on your climate. Readings above 15 percent indicate a moisture problem. Above 20 percent, you’re looking at conditions that support mold growth and wood rot. The meter won’t tell you where the leak starts, but it maps where water has traveled and accumulated.
Thermal Imaging and Infrared Cameras
Thermal imaging cameras detect temperature differences across surfaces. When water evaporates from a material, it creates a cooling effect that shows up as a color variation on the thermal image. Wet areas behind walls appear cooler than dry surrounding areas. These cameras reveal the extent of moisture damage without removing drywall or tile, which makes them invaluable before starting invasive repairs.
Most homeowners don’t own thermal imaging equipment, but many tool rental centers now offer these cameras. Professionals use them routinely during leak investigations. The images help determine whether damage is localized or widespread, which directly impacts repair scope and cost.
These tools are most valuable when you need to confirm leak location before opening walls, when damage is suspected in inaccessible areas like inside wall cavities, or when multiple moisture sources might be contributing to visible damage. They turn detective work into documented evidence.
Critical Inspection Points and Common Causes

Showers use a layered waterproofing approach. The tile, grout, and caulk form the primary water barrier, but they’re not expected to be perfect. Water that penetrates these surface materials should drain down to the shower pan or waterproofing membrane underneath, which acts as the true barrier preventing moisture from reaching the structure. The pan then directs water toward the drain through a pre-slope layer, and weep holes allow any water that gets under the tile to exit. When any part of this system fails, leaks develop.
| Location | Why It Fails | Warning Signs |
|---|---|---|
| Drain connection/flange | Improper installation, gasket deterioration, incorrect fastening allowing movement between pan and drain | Water appears directly below drain, damp spots centered under shower, drain wobbles slightly when touched |
| Shower curb/threshold | Missing or inadequate pre-slope, waterproofing membrane not extended properly over curb, no dam created at edge | Water escapes at bathroom floor immediately outside shower door, threshold feels damp on top, tiles loose at curb edge |
| Pan corners | Membrane punctures during installation, stress from settling or movement, improper folding technique creating thin spots | Leaks appear at specific corners, diagonal cracks in tile at corners, moisture at corner baseboards |
| Wall-to-floor seams | Inadequate membrane overlap between wall and floor, building movement separating materials, missing waterproofing tape | Water stains along bottom of walls adjacent to shower, baseboards rotted, paint bubbling at floor level |
| Mortar bed | No pre-slope layer installed beneath membrane, improper slope preventing drainage, mortar too thick preventing proper curing | Standing water remains in pan after shower, musty smell that won’t clear, efflorescence (white mineral deposits) on grout |
| Grout lines | Natural cracking from building movement or age, wrong grout type used, deterioration from cleaning chemicals | Visible hairline cracks in floor grout, grout crumbles when touched, grout darkened or discolored |
| Caulk joints | Aging and shrinkage, wrong product used (grout instead of flexible caulk), never resealed during shower lifetime | Gaps visible where caulk meets tile or fixtures, caulk feels hard and brittle, mildew that reappears quickly after cleaning |
| Weep holes | Clogged with mortar during installation, no pea gravel installed around holes, blocked by tile adhesive or debris | Water stays under tile creating spongy feeling, mold appears along bottom tile edges, tile corners stay damp |
In a properly built shower, the pre-slope beneath the liner creates a gentle angle directing any water that penetrates past the tile toward the drain area. Small weep holes around the drain’s base allow this water to exit without pooling. Pea gravel surrounds these holes, letting water flow while preventing mortar or debris from blocking the openings. The waterproofing membrane sits on top of this pre-slope, installed carefully to avoid punctures. When tile and mortar are added on top, water that gets through should hit the membrane, flow down the pre-slope, exit through weep holes, and drain away. Each failure point in the table represents a breakdown in this intended water management system.
Several components outside the actual shower pan can produce symptoms that look identical to pan leaks. Shower door seals deteriorate over time, letting water escape onto the bathroom floor where it can seep through flooring and appear as ceiling stains below. Installing a door sweep on slider edges or replacing worn gaskets often solves this. If a toilet sits near the shower and rocks even slightly, the wax seal can fail, causing water to leak through the floor. Plumbing connections behind shower walls can drip slowly for months, with water following framing down to where it appears at baseboards or ceilings.
The spot where damage appears may be several feet from where water actually enters. Water travels along joists, down wall studs, and across subfloor surfaces until it finds an exit point. A ceiling stain 30 inches from the bathroom wall might trace back to a shower door leak, not the drain or pan area directly above the stain.
When to Call a Professional for Shower Pan Issues
Detecting a leak is often something a homeowner can do with basic tools and patience. Repairing the leak correctly, particularly when it involves the shower pan liner or waterproofing membrane, requires different expertise. The repair needs to be permanent and complete, or you’ll face the same problem again within months.
Situations where professional help is strongly recommended:
- Confirmed liner or waterproofing membrane failure requiring access beneath the tile or shower surface
- Visible structural damage such as soft or sagging subfloor, rotted floor joists, or compromised framing members
- Widespread mold growth covering more than a few square feet, which means long term moisture problems
- Leak detected through testing but source remains unclear even after thorough inspection
- Shower system is older than 15 to 20 years with multiple signs of deterioration or previous patch repairs
- Water damage affects rooms below the bathroom, including ceiling collapse risk, electrical fixtures, or finished living spaces
Professionals bring specialized tools like thermal imaging cameras and deep penetration moisture meters that map exactly how far damage extends. They’ve seen hundreds of leak patterns and can identify complex scenarios where multiple factors contribute, like a failed pan and a deteriorated valve working together. Most importantly, proper remediation follows specific sequences. Fixing a leak without addressing mold that’s already growing, or replacing a pan without repairing damaged framing, leaves problems that will reappear. Professional repairs typically include warranties covering both materials and workmanship for one to several years.
Repair approaches for confirmed pan failures vary by severity. Minor membrane damage in accessible areas might be repairable with specialized sealants and patches. More extensive liner failure, particularly in older mortar bed installations, usually requires complete pan replacement because patches become temporary fixes rather than permanent solutions. The decision between repair and replacement factors in the shower’s age, the extent of damage, whether structural repairs are needed at the same time, and whether you’re planning other bathroom updates that would involve the same areas. Quality materials and experienced installation during repairs prevent the same failures from happening again. For bathrooms with significant water damage discovered during leak detection, professional water damage restoration services address both the leak source and the resulting structural issues in a coordinated approach.
Repair Options After Detecting a Shower Pan Leak
Once you’ve confirmed a shower pan leak through testing, the repair strategy depends on where the leak is located, how severe the damage is, and how old the shower system is. A small leak in an otherwise sound shower might need only targeted sealing. An older shower with multiple problem areas often makes more sense to replace completely rather than attempt partial fixes that might not hold.
Minor Repairs and Resealing
Surface level repairs work when your testing shows a small leak and you’ve confirmed the underlying pan liner is still intact. This approach addresses failures in the tile, grout, or caulk rather than the waterproofing membrane itself. Remove old caulk completely using a utility knife or caulk removal tool, then clean the joint thoroughly. Replace it with flexible silicone or urethane caulk designed specifically for wet areas.
Grout lines that have cracked can be sealed with penetrating sealers, or in some cases, carefully removed and replaced in sections. Some specialized products like two part resin sealants can be applied over existing grout to create a waterproof surface layer. Focus on high stress areas like corners, changes in plane where walls meet floors, and around fixtures. This strategy buys time and prevents minor leaks from becoming major failures, but it’s most effective when the shower is relatively new and the infrastructure underneath remains sound.
Partial Pan Replacement
This middle ground approach applies when damage is localized but too extensive for surface sealing. A section of the pan liner might be accessible and repairable without tearing out the entire shower. The drain assembly can be replaced if that’s where the leak starts. Areas where the membrane has torn or separated can sometimes be patched with compatible materials if you can access them.
Partial replacement is more invasive than resealing because it typically requires removing some tile and the mortar bed in affected areas. The work needs to tie into existing waterproofing correctly, creating overlaps and sealed transitions. This approach is less common than either minor repairs or full replacement because the labor involved in doing partial work well often approaches the cost of complete replacement, and results can be less reliable than starting fresh.
Complete Shower Pan Replacement
Full replacement makes sense when leak testing and inspection reveal widespread liner failure, when the shower is more than 20 years old with multiple issues, when you’ve discovered extensive structural damage that requires opening everything anyway, or when you’re updating the bathroom and want reliability going forward. Modern shower pan options include pre-formed foam pans that are lightweight and easy to install, acrylic or fiberglass bases that come as complete units, and custom tiled installations using modern waterproofing membranes that are more reliable than older methods.
Replacement involves demolition down to the subfloor, inspection and repair of any damaged framing or subfloor, installation of a new pan or waterproofing system with proper slope and drainage, and rebuilding the tile or surface layer. It’s the most expensive option initially, but it provides decades of reliable service when done correctly with quality materials. For comprehensive shower pan issues that require professional intervention, professional shower pan repair services evaluate your specific situation and recommend the most cost effective long term solution.
Regardless of which level of pan repair you need, addressing secondary damage is equally important. If water has leaked through to the ceiling below, that ceiling needs repair. Cutting out damaged drywall, installing a replacement piece, taping and mudding the seams, and repainting to match. If the subfloor shows soft spots or rot, those sections need replacement before any new pan goes in. Active mold growth requires proper remediation following containment procedures, not just wiping it away. Treating the leak and the damage it caused as one complete project prevents leaving problems that affect your home’s structure and indoor air quality.
Preventing Future Shower Pan Leaks

Preventing shower pan leaks costs far less than repairing them. A well maintained shower where you address small issues promptly can work reliably for 20 to 30 years or more. Prevention starts with understanding that the tile and grout are not actually waterproof. They’re protective layers over the real waterproofing underneath. Your maintenance focuses on keeping those surface materials intact so excessive water doesn’t challenge the membrane below.
| Task | Frequency | Purpose |
|---|---|---|
| Inspect and reseal grout and caulk joints | Annually | Prevent water penetration through cracks, maintain flexibility at movement joints |
| Check drain for clogs and debris | Quarterly | Ensure proper drainage, prevent water standing in pan longer than necessary |
| Verify proper drainage and no standing water | Monthly | Confirm pan slope is working, catch drainage problems early |
| Inspect for tile cracks or movement | Annually | Detect structural issues or settling before they cause membrane damage |
| Test shower door seals and gaskets | Semi-annually | Prevent water escaping onto bathroom floor where it can penetrate through |
| Run water and check below for moisture | Annually | Early detection of new leaks before they cause significant damage |
| Professional inspection | Every 3 to 5 years | Expert evaluation of overall system condition, identify issues you might miss |
Installation quality and material selection matter significantly when building or remodeling a shower. Proper slope installation can’t be added later. It has to be built in from the beginning, with the pre-slope layer beneath the membrane directing water toward the drain even if water penetrates the tile. Weep holes need to remain open and functional, surrounded by pea gravel or similar material that allows drainage. Quality waterproofing membranes from established manufacturers provide better long term reliability than bargain products.
If you’re building new or doing a complete bathroom remodel, choose experienced contractors who understand modern waterproofing practices and are willing to explain their process. Trying to save money on installation almost always costs more in the long run through premature failures and water damage. The shower pan and waterproofing work is hidden once tile goes on, so you need confidence it was done right the first time.
Environmental factors inside your bathroom affect how long shower components last. Proper ventilation controls humidity levels that would otherwise degrade caulk, promote mold growth, and stress waterproofing materials. Run your exhaust fan during every shower and for 20 to 30 minutes afterward to remove moisture laden air. If your bathroom doesn’t have a fan or the existing one is inadequate, installing proper ventilation is one of the best investments you can make for preventing all types of moisture damage, not just shower pan leaks. Address any plumbing leaks elsewhere in the bathroom immediately, because chronic humidity from other sources creates an environment where everything deteriorates faster.
Final Words
Shower pan leak detection comes down to taking your time and testing the right way.
The flood test gives you the clearest answer, especially when you let the water sit for 30 minutes or more and check all the spots below your shower.
If you’re seeing stains, soft floors, or that musty smell, don’t wait. Run the test, look for the source, and decide whether it’s something you can seal or if it needs a pro.
Catching it early means smaller repairs and less damage to your home.
FAQ
Does insurance cover a leaking shower pan?
Insurance coverage for a leaking shower pan depends on what caused the leak and how quickly you noticed it. Standard homeowners insurance typically covers sudden, unexpected shower pan failures (like a cracked pan from a heavy dropped object), but it usually won’t cover damage from gradual deterioration, poor maintenance, or wear and tear over time. If the leak caused secondary damage to walls, ceilings, or floors, that damage might be covered even if the pan repair itself isn’t. The key is documenting the problem quickly and filing a claim right away if you discover sudden damage. Review your specific policy or talk to your agent, since coverage varies widely between insurers and policy types.
What is the life expectancy of a shower pan?
A properly installed shower pan typically lasts 15 to 20 years, though quality materials and regular maintenance can extend that lifespan considerably. Traditional mortar bed pans with PVC or CPE liners often last the longest when installed correctly with proper slope and functioning weep holes. Modern alternatives like acrylic, fiberglass, and foam-based pans generally have similar lifespans but can fail sooner if the installation skips critical waterproofing steps. Factors that shorten shower pan life include poor drainage slope, clogged weep holes, cracked grout or caulk that’s never resealed, and high bathroom humidity without proper ventilation.
How do plumbers find hidden leaks?
Plumbers use a combination of visual inspection, water testing, and specialized detection tools to locate hidden leaks behind walls and under floors. They start by running water through fixtures and checking visible connections for moisture, then move to flood testing (filling the shower pan and watching for water appearing in unexpected places like ceilings or crawl spaces below). For leaks that don’t show up during basic tests, professionals use moisture meters to measure water content in walls and subfloors, and thermal imaging cameras to spot temperature differences caused by evaporating water. These tools let them pinpoint leak locations without tearing into walls randomly, which saves time and reduces repair costs.
How do you tell if your shower is leaking from the bottom?
You can tell your shower is leaking from the bottom by checking for water damage in areas below and around the shower pan. Look for water stains or soft spots on the ceiling directly below the bathroom, damp areas on the bathroom floor just outside the shower threshold, discolored or warped baseboards near the shower, and musty odors that suggest hidden moisture. If you have crawl space or basement access, inspect the area under the shower during and after use for active dripping or dampness. Standing water that pools in corners of the shower pan instead of draining, along with grout or caulk that’s cracked and deteriorated, are early warning signs the pan may be failing.