
You turn on your kitchen faucet and get a sad trickle while every other tap in the house runs strong. Here’s the good news: this almost always means a simple 10 minute fix, not a major plumbing disaster. About 70% of single faucet pressure problems trace back to a clogged aerator, that little mesh screen at the tip of your faucet. We’ll walk you through checking the aerator first, then move to the other common culprits like partially closed valves, worn cartridges, and debris in the supply lines. Most of these fixes take less than an hour and require basic tools you already own.
Diagnosing and Fixing Your Low Pressure Faucet: Quick Start Guide

Most single faucet pressure problems solve in 10 minutes with aerator cleaning. It’s the fastest DIY check before investigating other causes.
- Test other faucets throughout your home (bathroom sinks, kitchen, shower) to confirm normal pressure elsewhere. This confirms the problem is isolated to one fixture.
- Remove the aerator from the affected faucet by unscrewing counterclockwise. Wrap with a cloth first to protect the finish.
- Turn the faucet on without the aerator. If pressure is strong, the aerator is clogged. If still weak, the problem is elsewhere in the fixture.
Isolated pressure loss points to a problem with that specific fixture or its immediate supply components, not your entire plumbing system. Mineral deposits and sediment clog aerators, especially in hard water areas. This is the most common cause, accounting for 70% or more of cases. You’ll notice visible signs: a weak stream, sputtering water, or an uneven spray pattern instead of a smooth flow.
If the aerator isn’t the issue, other primary causes include partially closed shut off valves under the sink, which can happen after maintenance work and take only 5 minutes to check. Cartridge wear in modern single handle faucets causes stiff handles or sudden pressure drops. Supply line kinks and debris act as secondary causes. Sediment buildup in the lines serving that fixture gradually restricts flow over time.
Most causes are simple fixes requiring basic tools and 10 to 60 minutes of your time. Use a systematic approach: start with the easiest fix (aerator), move to valves, then tackle the cartridge if needed. About 85% of single faucet pressure issues resolve with aerator cleaning or valve adjustment.
Tools and Materials You’ll Need for Faucet Pressure Repairs

Most faucet pressure repairs require only basic household tools you probably already own. The total investment runs under 30 dollars for tools and supplies if you need to purchase anything.
| Item | Purpose | Estimated Cost |
|---|---|---|
| Adjustable pliers | Remove aerator and fittings | 10 to 15 dollars |
| Cloth or tape | Protect fixture finish | Already owned |
| Small bowl | Soak parts in vinegar | Already owned |
| White vinegar | Dissolve mineral deposits | 3 to 5 dollars |
| Old toothbrush | Scrub deposits | Already owned |
| Screwdriver set | Remove handles | 10 to 15 dollars |
| Allen wrench set | Remove certain handle types | 8 to 12 dollars |
| Bucket | Catch water during repairs | Already owned |
| Replacement cartridge | Replace worn valve | 15 to 40 dollars |
| Replacement supply lines | Replace damaged lines | 5 to 15 dollars each |
Most repairs use items already in your home toolbox. Specialized parts like cartridges must match your faucet manufacturer and model exactly, so bring the old part with you when shopping.
Clogged Aerator: The Number One Faucet Pressure Problem

The aerator is the small mesh screen attachment at the very tip of your faucet that adds air to the water flow. Its purpose is to reduce splashing, conserve water, and create an even stream.
Calcium, limescale, rust particles, and sediment collect in the tiny mesh openings over time. Hard water accelerates mineral accumulation significantly. This affects kitchen sinks and bathroom sinks equally, though kitchens often experience faster buildup due to heavier use.
Visible signs that indicate a clogged aerator:
- Weak stream or reduced flow compared to other faucets in your home
- Uneven or sputtering water pattern instead of smooth flow
- Visible white or greenish deposits on the aerator screen
- Water spraying sideways instead of straight down
- Gradual pressure decrease over weeks or months
This is by far the most common culprit, and it’s the easiest fix to start with. No special skills required, no water shut off needed, and results are immediate.
How to Clean Your Faucet Aerator in 10 Minutes

You’ll need adjustable pliers or a small wrench, cloth or tape, a small bowl, white vinegar, and an old toothbrush. Active cleaning takes about 10 minutes, plus a 30 minute vinegar soak. No water shut off is required for this task.
- Wrap the aerator threads with cloth or tape to protect the finish from scratches.
- Unscrew the aerator counterclockwise using pliers. Try hand tight first if possible.
- Disassemble the aerator components and note their order for reassembly. Take a photo if helpful.
- Place the screen and parts in a bowl with white vinegar for 30 minutes to dissolve deposits.
- Scrub loosened deposits with an old toothbrush under running water.
- Rinse all components thoroughly to remove vinegar residue.
- Reassemble parts in their original order and screw the aerator back onto the faucet clockwise.
Turn on the faucet to test water pressure improvement. If pressure is fully restored, the aerator was your problem and you’re done. If pressure remains low, move to the next troubleshooting step.
Checking and Adjusting Your Faucet Shut Off Valves
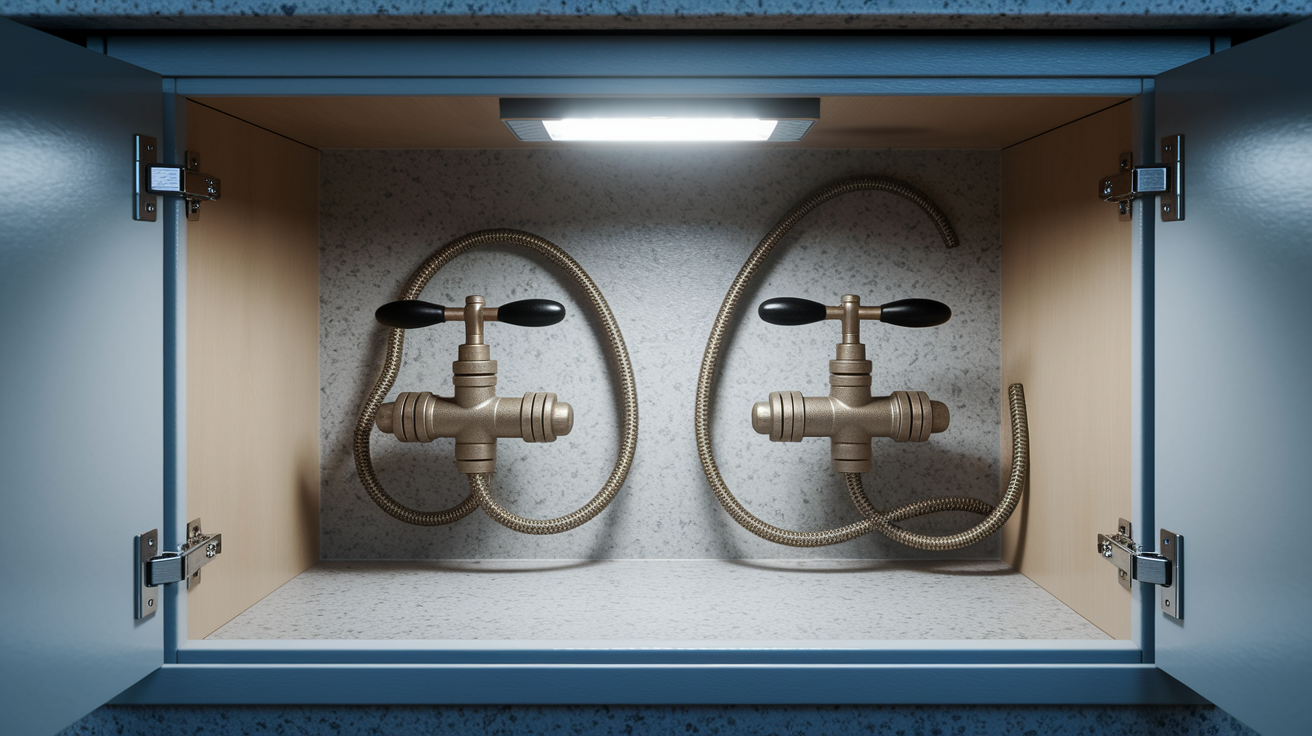
Shut off valves are located in the cabinet beneath your sink. You’ll typically see two small oval handled valves connecting to supply lines, one for hot water and one for cold. Valves are often partially closed after repairs or maintenance work, and this simple issue takes only 5 minutes to check and fix.
Check the valve position by looking at how the handle sits. When the handle is perpendicular to the pipe, the valve is closed. When parallel to the pipe, it’s open. Turn both valve handles counterclockwise until they stop. Both your hot and cold valves should be fully open for proper pressure. Test the faucet after making this adjustment.
If a valve handle is stuck, corroded, or leaking when you try to adjust it, replacement may be needed. Call a professional if the valve appears damaged or won’t turn without excessive force.
Flushing Your Faucet Lines to Clear Debris

Debris and sediment can accumulate in the supply lines leading directly to your faucet. Airlocks, which are pockets of trapped air, can occur after plumbing work or water shut offs, causing pressure problems.
The flushing process is simple. Remove the aerator, then turn both the hot and cold handles fully open for 20 to 30 seconds. Let water run at full blast into the sink. Expect sputtering or discolored water initially as debris clears out of the lines. Reinstall the aerator and test pressure again.
This technique is especially effective after recent plumbing maintenance, water service interruptions, or in new construction. It’s a 2 minute fix worth trying before moving to more complex repairs.
When Hot Water Pressure Is Low But Cold Is Normal
Test both hot and cold handles separately at the affected faucet. Turn each one on individually and compare the pressure. Temperature specific pressure loss points to different underlying problems.
If only hot water pressure is low, check for sediment buildup in your water heater tank, a partially closed water heater supply valve, or a faulty tempering or mixing valve. This is more common in older tank style water heaters where sediment collects at the bottom over years of use.
Cold water issues typically relate to the faucet cartridge, aerator, or cold supply line problems. These are fixture specific rather than system wide.
Hot side problems may affect multiple fixtures throughout your home if the issue is water heater related. Check other hot water faucets to see if they’re also experiencing reduced pressure. Recommend water heater flushing for sediment issues, or call a professional for valve problems that require replacement.
Replacing a Faulty Faucet Cartridge

Cartridges are internal valve mechanisms in modern single handle faucets that control both flow volume and temperature mixing. They wear out or clog with sediment after years of use, typically 5 to 10 years depending on water quality.
Signs of cartridge failure include stiff or difficult to turn handle operation, sudden pressure drops with no other identifiable cause, temperature mixing problems where you can’t get the right blend of hot and cold, visible sediment when the cartridge is removed, and pressure loss that persists after cleaning the aerator and checking valves.
- Turn off both shut off valves under the sink completely.
- Remove the faucet handle using a screwdriver or Allen wrench. The screw is usually hidden under a decorative cap.
- Extract the old cartridge. The method varies by manufacturer, sometimes requiring a special cartridge puller tool.
- Take the old cartridge to a hardware store for an exact replacement match. Bring your faucet brand and model information if available.
- Install the new cartridge in the same orientation as the old one. Alignment matters for proper hot and cold function.
- Reassemble the handle and turn the water supply back on slowly.
This is a 30 to 60 minute project for most homeowners. Getting the exact manufacturer replacement part is critical. Delta cartridges don’t fit Moen faucets, and vice versa. Consult your faucet manual or the manufacturer website for model specific instructions if you’re unsure about any step.
Supply Line Problems That Restrict Single Faucet Flow

Supply lines are the flexible tubes connecting shut off valves to the faucet inlet threads. They’re visible under the sink, usually made of braided stainless steel or plastic. They can fail or become obstructed over time.
Common supply line problems:
- Kinked or bent lines restricting internal water passage
- Collapsed or deteriorated inner lining in older braided lines
- Sediment accumulation inside the line itself
- Compression fittings overtightened or improperly seated at connections
Turn off the water and disconnect the supply line at the faucet end. Visually inspect for kinks, cracks, or obvious damage to the outer covering. Attempt to run water through the line into a bucket to test if flow is restricted. Check the compression fittings at both ends for proper seating. Sometimes fittings are overtightened, which can collapse the inner tubing.
Supply lines are inexpensive at 5 to 15 dollars and easy to replace in about 15 minutes. Match the length and fitting size when purchasing a replacement. Consider upgrading to stainless steel braided lines for better durability if your current lines are older plastic models.
Pipe Corrosion and Mineral Buildup in Older Homes

Pipes develop internal restrictions over decades of service. The pressure loss is gradual, worsening over months or years rather than appearing suddenly. This is different from aerator clogs, which cause more rapid pressure changes.
Galvanized steel pipes corrode internally, creating rust buildup that narrows the water passage. The corrosion is worst at connection points and elbows where water flow creates turbulence. Homes built before the 1960s commonly have galvanized plumbing that’s now reaching the end of its functional life.
Hard water deposits calcium and magnesium inside pipes regardless of pipe material. The accumulation is worst at bends and near faucet connections where water slows down and minerals have more time to adhere to pipe walls.
These issues require professional diagnosis because the problem is hidden inside walls. You may need pipe replacement or whole house water treatment to address the root cause. Call a plumber if your home is 20 years or older and other fixes haven’t worked. Camera inspection can identify internal pipe condition without tearing into walls, giving you a clear picture of what needs attention.
When to Call a Professional Plumber
Some pressure issues exceed DIY capability. Knowing when to call a professional prevents further damage and saves wasted effort on fixes that won’t work.
Scenarios requiring professional help:
- Pressure remains low after cleaning the aerator, checking valves, and flushing lines
- Visible pipe corrosion or deterioration under the sink
- Your home has galvanized pipes, especially if built before the 1960s
- Multiple faucets are affected in one area of your home
- Suspected sediment buildup in your water heater tank
- Shut off valves are stuck, leaking, or damaged when you try to adjust them
Typical service call costs run from 75 to 200 dollars depending on the diagnosis and what repair is needed. Professionals have specialized tools like camera inspection equipment and pressure testing devices that pinpoint problems accurately. There’s preventative value in getting a professional assessment for older homes, even if you’re not experiencing major issues yet. Schedule yearly plumbing checkups if your home is 20 years or older. Get quotes from multiple licensed plumbers for major repairs. For more information on common plumbing problems that may require professional attention, understanding the full scope helps you make better decisions.
Preventative Maintenance to Avoid Future Pressure Problems
Simple maintenance prevents most faucet pressure issues before they start. A preventative approach saves money and eliminates the stress of emergency repairs.
Prevention strategies:
- Clean faucet aerators every 3 to 6 months with a vinegar soak, even if pressure seems normal
- Flush faucets for 30 seconds after any plumbing work or water service interruption to clear trapped air and debris
- Verify shut off valves are fully open during routine under sink inspections
- Install a water softener in hard water areas to prevent mineral accumulation throughout your plumbing system
- Add a sediment filter to your main water line to trap particles before they reach fixtures
- Schedule annual plumbing inspection for homes 20 years or older to catch problems early
Aerator cleaning is the simplest high impact maintenance task you can do. Water softeners address the root cause of mineral buildup, protecting not just faucets but water heaters, appliances, and pipes. Sediment filters require regular replacement every 3 to 6 months depending on your water quality. Professional annual inspections catch problems before they cause noticeable pressure loss or expensive damage. Keep a simple record of when you last cleaned aerators and changed filters. For comprehensive guidance on how to prevent water damage in your home, preventative plumbing care is one of the most effective strategies.
Kitchen Versus Bathroom Faucet Pressure Issues
Different fixtures face different contamination sources, which affects what’s likely causing pressure problems. Location matters in your diagnosis.
Kitchen faucets encounter food particles, grease, and heavy mineral exposure from frequent use throughout the day. Pull down spray faucets have additional internal screens that can clog beyond just the aerator. Garbage disposal backpressure can sometimes affect kitchen sink pressure if the disposal drain connection isn’t properly vented.
Bathroom sinks primarily deal with soap scum, toothpaste residue, and mineral deposits. Lower usage compared to kitchens means slower accumulation, but it also means less frequent detection until the problem becomes noticeable.
Shower heads and tub faucets face similar mineral issues but have different aerator and flow restrictor designs. Some shower heads have removable flow restrictors that can be cleaned or replaced separately from the main shower head body. The same vinegar soaking method works for shower head screens.
Understanding Water Pressure Measurements and Normal Ranges
PSI stands for pounds per square inch and measures water pressure. Normal residential water pressure ranges from 40 to 60 PSI, with 45 to 55 PSI considered ideal for most homes.
Pressures below 40 PSI feel weak at fixtures throughout your home. Pressures above 80 PSI can damage fixtures, cause leaks, and shorten the life of appliances like washing machines and dishwashers. Use a pressure gauge, available at hardware stores for 10 to 15 dollars, to test your system. Attach the gauge to an outdoor hose bib or washing machine connection. Test at a time of day when no water is running anywhere in your home for an accurate reading.
Pressure regulators control incoming water pressure from the municipal supply. They’re usually installed where the main water line enters your home. Failing regulators can cause fluctuating pressure that affects some fixtures before others. This might explain why one faucet has low pressure even though the problem isn’t with the faucet itself. Regulator issues require professional diagnosis and replacement. If whole house pressure tests low at the gauge, single faucet fixes like cleaning aerators won’t solve your underlying problem.
Common Mistakes to Avoid During DIY Repairs
DIY enthusiasm can lead to avoidable mistakes. Simple precautions prevent fixture damage and flooding.
Mistakes to avoid:
- Forgetting to turn off shut off valves before removing cartridges or supply lines, which causes instant flooding
- Using pliers directly on the aerator or fixture without a protective cloth, causing scratches and finish damage that can’t be buffed out
- Over tightening the aerator or supply connections, leading to cracked threads and leaks
- Forcing stuck valves or cartridges instead of using penetrating oil and patience
- Mixing up aerator component order during reassembly, which blocks flow even though parts look clean
- Installing the wrong cartridge model for your faucet brand, which won’t seat properly and causes leaks
- Ignoring low pressure issues long term, allowing sediment and corrosion to worsen until simple fixes no longer work
Take photos during disassembly to help with reassembly later. Your memory isn’t as reliable as you think when small parts are involved. Patience and proper tools prevent most DIY repair problems. Stop and call a professional if the repair becomes more complex than you’re comfortable handling.
Final Words
A single faucet with low water pressure usually means a clogged aerator, partially closed valve, or worn cartridge. Most of these fixes take under an hour with basic tools.
Start with the aerator. Clean it with vinegar. Check your shut-off valves. Flush the lines. If pressure comes back, you’re done.
If the problem sticks around after those steps, you’re likely dealing with supply line issues, internal pipe buildup, or cartridge wear. That’s when a pro can save you time and prevent guesswork.
Keep aerators clean every few months and you’ll avoid most low water pressure in one faucet problems down the road.
FAQ
Why is barely any water coming out of my faucet?
Barely any water coming out of a faucet is usually caused by a clogged aerator, where mineral deposits and sediment block the mesh screen at the faucet tip. Remove the aerator and check if water flows normally without it. If pressure improves, clean the aerator in vinegar for 30 minutes, scrub it, and reinstall.
Why do I have good water pressure in one bathroom but not the other?
Good water pressure in one bathroom but not the other indicates an isolated problem with the low-pressure fixture, such as a clogged aerator, partially closed shut-off valve, or sediment in the supply line serving that specific bathroom. Test both hot and cold handles at the affected fixture to narrow the cause. This is rarely a whole-house pressure issue.
How do I fix low water pressure on one side of my house?
Low water pressure on one side of the house suggests a restriction in the plumbing branch serving that area, possibly from a partially closed valve, sediment buildup in pipes, or corrosion in older galvanized lines. Check all shut-off valves in that zone to ensure they’re fully open. If the issue persists after checking valves and cleaning aerators, call a professional to inspect the supply branch.
Why would a faucet suddenly lose pressure?
A faucet suddenly loses pressure when debris dislodges and blocks the aerator, a shut-off valve gets accidentally bumped closed, or a cartridge fails after years of use. Start by removing and cleaning the aerator, then verify both shut-off valves under the sink are fully open. If pressure doesn’t return, the faucet cartridge may need replacement.
What tools do I need to fix low faucet pressure?
To fix low faucet pressure, you need adjustable pliers, a cloth to protect finishes, white vinegar, a small bowl, and an old toothbrush for aerator cleaning. For cartridge replacement, add a screwdriver set and Allen wrenches. Most items are already in a typical household toolbox, with specialty parts costing 15 to 40 dollars.
How long does it take to clean a clogged aerator?
Cleaning a clogged aerator takes about 10 minutes of active work plus a 30-minute vinegar soak to dissolve mineral deposits. Unscrew the aerator, disassemble the parts, soak them in white vinegar, scrub with a toothbrush, and reassemble. No water shut-off is required for this simple task.
How do I know if my faucet cartridge needs replacing?
A faucet cartridge needs replacing when the handle becomes stiff to turn, pressure drops suddenly without other cause, or temperature mixing fails even after cleaning the aerator and checking valves. Visible sediment on the old cartridge when removed also confirms wear. Modern single-handle faucets commonly experience cartridge wear after years of use.
Can hard water cause low pressure in one faucet?
Hard water can cause low pressure in one faucet by depositing calcium and magnesium minerals inside the aerator mesh, cartridge, and supply lines over time. Kitchen faucets and frequently used bathroom sinks accumulate buildup faster. Cleaning aerators every 3 to 6 months and installing a water softener prevents mineral-related pressure loss.
When should I call a plumber for low faucet pressure?
Call a plumber for low faucet pressure when cleaning the aerator, checking valves, and flushing lines don’t restore flow, or when you see pipe corrosion, stuck shut-off valves, or have galvanized plumbing. Professional diagnosis typically costs 75 to 200 dollars and prevents further damage. Homes 20-plus years old benefit from annual plumbing inspections.
Why is only my hot water pressure low?
Only hot water pressure being low indicates sediment buildup in the water heater tank, a partially closed water heater supply valve, or a faulty tempering valve. This is more common in older tank-style water heaters. Test hot water at other faucets to confirm if the issue affects multiple fixtures, which points to the water heater rather than the faucet.
How often should I clean my faucet aerators?
You should clean faucet aerators every 3 to 6 months to prevent mineral deposits and sediment from restricting water flow. Homes with hard water need more frequent cleaning. Soak aerators in white vinegar for 30 minutes, scrub with an old toothbrush, and reinstall to maintain consistent pressure and prevent sudden clogs.
What is the difference between kitchen and bathroom faucet pressure problems?
Kitchen faucet pressure problems often involve food particles, grease, and heavy mineral buildup from frequent use, especially in pull-down spray models with extra internal screens. Bathroom sink issues primarily stem from soap scum, toothpaste residue, and mineral deposits with slower accumulation. Both benefit from regular aerator cleaning but face different contamination sources.