
You can’t just slap new mud on wet drywall and hope it holds. It won’t. Moisture trapped behind your patch will grow mold within days, crack your finish coat, and leave you repeating the whole job in a few weeks. The real fix starts with stopping the leak, drying everything completely, and cutting out damage that’s too far gone to save. This guide walks you through each step so you fix it once and it actually stays fixed.
Identifying Water Damage and Locating the Leak Source
Fixing drywall before you stop the leak is like mopping while the faucet’s still running. You’re wasting time, burning through materials, and you’ll end up right back here when the water comes back. First step is finding and killing the source before you even think about touching that damaged wall. Skip this and you’re basically setting yourself up to do the whole job twice.
Water damage leaves pretty obvious clues:
- Paint that bubbles up and cracks, peeling away from the surface
- Discoloration or stains that show up yellowish, brown, or rust colored
- Soft spots that dent when you press with your finger
- Sagging sections where the drywall bows in or hangs lower than it should
- That musty smell telling you mold’s already growing
- Material that crumbles when you touch it because the gypsum core’s breaking down
- Cool, damp feeling even after visible water’s dried
Common leak sources hide in predictable spots. Roof leaks usually show up as ceiling stains with damage in the attic right below the problem area. Plumbing issues behind walls typically appear below bathrooms and kitchens. Check the wall directly under sinks, toilets, showers. Bathroom fixture leaks pop up around toilet bases, along tub edges, near shower surrounds where the caulking’s failed. Basement flooding traces back to foundation cracks, dead sump pumps, floor drains backing up when it rains hard. Ceiling leaks from upper floors point to appliances like washing machines, dishwashers, water heaters on the floor above. Condensation develops in poorly ventilated spaces where warm, moist air hits cold surfaces.
Test for active moisture by pressing paper towels against suspected areas and checking for dampness. Run your hand along pipes and fixtures. If you can’t figure out where water’s coming from, that’s normal. Leak detection sometimes needs specialized equipment to trace hidden sources inside walls or under floors.
Recognizing Mold During Initial Assessment
Mold shows up as black, green, or brown spots. Fuzzy growth spreading across surfaces. It can start developing within 24 to 48 hours after water exposure if conditions are warm and damp. Small areas under 10 square feet might be manageable for DIY treatment using proper protective gear and EPA approved cleaning methods. But larger mold growth needs professional remediation, especially if it’s spread into HVAC systems, if there’s sewage contamination, or if anyone in your household has respiratory issues or a compromised immune system.
Here’s the thing with moldy drywall. You can’t just wipe down the surface and call it done. Mold sends roots deep into the porous gypsum core where surface cleaners can’t reach. That means moldy drywall usually needs complete removal and replacement, not patching.
All leak sources have to be completely fixed and verified before you move to drying. Test the repair by watching the area for 24 to 48 hours. No new moisture should show up. If it’s plumbing, run water through the system and look for drips. Roof leak? Wait for the next rain to make sure the repair holds. Only then should you start drying and repair work.
Drying Wet Drywall Completely Before Repairs

Trying to repair damp drywall sets you up for failure. Trapped moisture grows mold within days. It makes repair materials separate and crack. It damages the paper facing and gypsum core from the inside out. And it wastes your time and money on work that won’t hold. Proper drying isn’t optional. This step determines whether your repair lasts for years or fails within weeks.
The drying process follows specific steps:
- Get rid of standing water immediately using absorbent towels or a wet vacuum designed for water extraction
- Increase air circulation by positioning multiple fans to blow directly at affected areas from different angles, not just one fan sitting in the center
- Run a dehumidifier in enclosed spaces to pull moisture from the air and speed up evaporation
- Open windows for cross ventilation when outdoor humidity is lower than indoors and weather cooperates
- Pull off baseboards if water pooled at floor level so air can circulate behind walls where moisture hides
- Monitor drying progress by touch testing drywall firmness every 12 to 24 hours
- Use a moisture meter if you’ve got one to confirm readings below 15 percent before you start repairs
- Check wall cavities if damage was severe because moisture can hide inside even after the surface feels dry
Drying times vary based on how saturated everything got. Minor moisture or small water stains need 24 to 48 hours minimum with good air circulation. Moderate saturation from steady leaks needs 3 to 5 days of continuous drying with fans and dehumidifiers running. Severe flooding or water that got into wall cavities requires 5 to 7 days or longer, sometimes up to two weeks if humidity’s high or air circulation’s limited.
You’ll know drywall’s dry enough when it returns to normal hardness when you press it firmly, shows no cool or damp feeling when you run your hand across it, displays no visible moisture or darkened areas, and hits moisture meter readings consistently below 15 percent. Check multiple spots across the damaged area, not just one location. Moisture can concentrate in pockets where air circulation’s blocked.
Rushing this phase is the most common cause of repair failure and recurring problems. Give it the time it needs. The repair work will go faster and last longer when you start with completely dry material.
Deciding Between Repair, Replacement, and Professional Help
The decision between patching and replacing depends on how much damage you’re dealing with and where it’s located. Some situations call for full replacement rather than trying to salvage what’s left.
Replace drywall rather than patching when you see:
- Sagging drywall showing the gypsum core’s lost structural integrity
- Severe discoloration that’s penetrated through the entire thickness
- Crumbling material that falls apart when you touch it or apply light pressure
- Soft spots covering large areas, more than 2 to 3 square feet of compromised material
- Damage exceeding 2 to 3 square feet where patching costs approach replacement cost
- Compromised paper facing over large areas where the paper’s separated or peeled away
- Mold growth embedded in the gypsum core rather than just surface contamination
Professional help becomes mandatory in specific scenarios: damage exceeding 20 to 30 square feet where DIY becomes impractical, sagging ceiling drywall that poses collapse risk and works against gravity, structural damage to studs or joists requiring carpentry work, mold growth exceeding 10 square feet requiring specialized remediation, can’t locate the leak source after checking common areas, electrical wiring exposed in the damaged area creating safety hazards, repairs to load bearing walls where mistakes could compromise structural integrity, work requiring building permits and inspections, and insurance claims requiring documented repairs by licensed contractors.
| Repair Scope | DIY Material Cost | Professional Cost | DIY Appropriate? |
|---|---|---|---|
| Small patch under 1 sq ft | $15-30 | $150-300 | Yes |
| Medium repair 1-4 sq ft | $40-75 | $300-600 | Yes if experienced |
| Large repair 4-12 sq ft | $100-180 | $600-1200 | Consider professional |
| Extensive damage over 12 sq ft | $200-400 | $1200-3000+ | Professional recommended |
Ceiling repairs present particular challenges. You’re working overhead against gravity, making compound application and sanding more difficult and messier. Sagging ceiling drywall poses real collapse risk. A 4 foot by 8 foot section of half inch drywall weighs around 50 pounds and can cause serious injury if it falls while you’re working beneath it. Professional repairs ensure code compliance, proper load distribution, and warranty protection. Costs increase significantly if you need mold remediation running $500 to $3000 or more depending on extent, or structural repairs to damaged framing that can add thousands to the project cost.
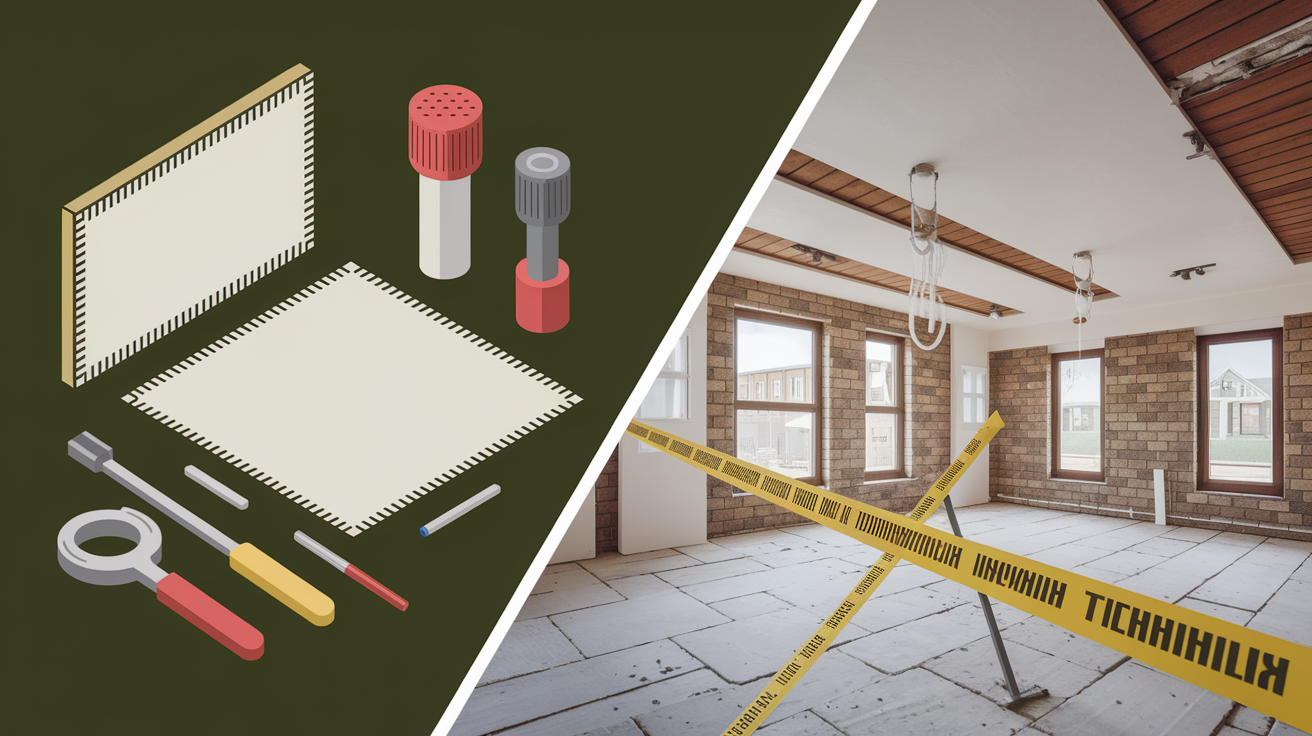
Complete Step-By-Step Repair Process: Tools, Cutting, Installing, Finishing

Successful repair requires having all materials ready before you start and following each step carefully without rushing. Trying to make supply runs mid project leads to drying compound, mismatched materials, and unnecessary delays.
Gathering Essential Tools and Materials
| Tool/Material | Purpose | Approximate Cost |
|---|---|---|
| Utility knife | Cutting damaged sections | $8-15 |
| Drywall saw | Cutting straight edges | $10-18 |
| Measuring tape | Measuring replacement panels | $8-12 |
| Replacement drywall panel | Filling cutout | $12-20 |
| Drywall screws 1-1/4 inch | Securing panel | $6-10 |
| Power drill/driver | Driving screws | $30-80 or owned |
| Premixed joint compound | Filling seams | $4-15 |
| Drywall tape paper or mesh | Reinforcing seams | $4-8 |
| Putty knife 3-5 inch | Detail work | $5-8 |
| Putty knife 10-12 inch | Feathering edges | $8-12 |
| Sandpaper 80-150 grit | Rough sanding | $5-8 |
| Sandpaper 180-220 grit | Finish sanding | $5-8 |
| Stain-blocking primer | Sealing repair | $15-25 |
| Paint matching existing | Final finish | $20-40 |
| Dust mask | Safety during sanding | $8-15 |
| Drop cloth | Floor protection | $10-20 |
Total cost typically runs $100 to $200 depending on damage size and whether you already own basic tools. Premixed all purpose joint compound costs less than $5 for a small container covering minor repairs.
Cutting Out Damaged Drywall
- Mark cutting lines in a rectangular shape extending 2 to 4 inches beyond visible damage using measuring tape and a level to ensure straight edges
- Align cuts with stud centers when possible for easier securing of the replacement panel. Use a stud finder or knock along the wall listening for the solid sound indicating framing
- Score cutting lines deeply with a utility knife guided by a straightedge. Make 3 to 4 passes to cut completely through the paper facing
- Use a drywall saw to cut through the gypsum core following your scored lines
- Remove the damaged section carefully, pull it away from the wall and dispose of water damaged material
- Inspect studs and insulation behind the opening for moisture or mold. Remove any wet insulation and allow framing to dry completely
- Clean edges of remaining drywall with a utility knife for smooth, straight cuts that’ll fit snugly against the replacement panel
Installing Replacement Panel
- Measure the opening precisely in both directions, width and height to the nearest 1/8 inch
- Transfer measurements to a replacement panel matching the thickness of surrounding drywall, typically 1/2 inch for walls, 5/8 inch for ceilings
- Score the panel face deeply with a utility knife guided along a straightedge
- Snap the panel along the score line by bending it back away from the scored side
- Cut the paper backing on the reverse side with your utility knife
- Test fit the panel in the opening. It should fit snugly without forcing but not so tight that you damage edges trying to insert it
- Position the panel perfectly flush with the surrounding drywall surface, no higher or lower than adjacent sections
- Drive drywall screws every 8 to 10 inches into studs, keeping screw heads slightly countersunk below the surface without breaking through the paper facing
Applying Joint Compound and Tape
Multiple thin coats produce better results than trying to fill everything in one thick application.
First coat:
- Load a 3 to 5 inch putty knife with premixed joint compound
- Apply a thin layer over all seams where the new panel meets existing drywall
- Embed drywall tape into the wet compound, centering it directly over the seam
- Smooth the tape with your knife, pressing firmly to remove air bubbles and excess compound
- Allow to dry completely, 4 to 6 hours minimum or overnight if you applied it thick
Second coat:
- Load a 10 to 12 inch knife with compound
- Apply a thin layer extending 6 inches beyond the tape on each side
- Feather the edges in gradually thinner layers using long, sweeping motions
- Eliminate knife marks without overworking the compound. Too much smoothing can create more problems
- Allow to dry overnight
Third coat:
- Use your 10 to 12 inch knife again
- Extend coverage 8 to 10 inches beyond the previous coat
- Feather edges to paper thin at the outermost areas
- Create a smooth transition that blends invisibly into the surrounding wall
- Allow to dry overnight
Apply an optional skim coat if any imperfections remain visible after the third coat dries. This thin final layer can eliminate minor ridges or valleys you missed earlier.
Sanding for Smooth Finish
- Always wear a dust mask during sanding. Drywall dust is fine and irritating to lungs
- Start with 80 to 150 grit sandpaper for initial coats if heavy ridges exist from knife marks
- Use 180 to 220 grit sandpaper for final coats and finish sanding before priming
- Sand in circular motions on the patched area with light to medium pressure
- Feather edges with very light pressure to blend seamlessly into surrounding drywall
- Use a sanding block for flat, consistent pressure that prevents gouges
- Check the surface frequently by touch, feeling for ridges or valleys your eyes might miss
- Shine a work light at an angle across the surface to reveal any remaining imperfections through shadows
- Vacuum dust thoroughly and wipe with a damp cloth before priming. Dust prevents proper adhesion
Priming and Painting
- Apply stain blocking primer with a roller in a thin, even coat over the entire repaired area. This seals the new compound and prevents color differences
- Allow primer to dry per manufacturer instructions, typically 1 to 3 hours
- Apply the first paint coat matching existing wall color using the same application method as surrounding area, roller or brush depending on original texture
- Feather paint edges into the surrounding area for an invisible transition
- Apply a second paint coat for uniform coverage and exact color match
- Allow full cure time, 24 to 48 hours before exposing the area to moisture, especially important in bathrooms
Taking time for proper drying between coats, applying thin layers instead of thick ones, thorough sanding with progressively finer grits, and adequate feathering extending well beyond the repair area produces professional quality invisible repairs. The goal is making the transition from old drywall to new compound virtually undetectable.
Using Moisture-Resistant Drywall for Wet-Prone Areas
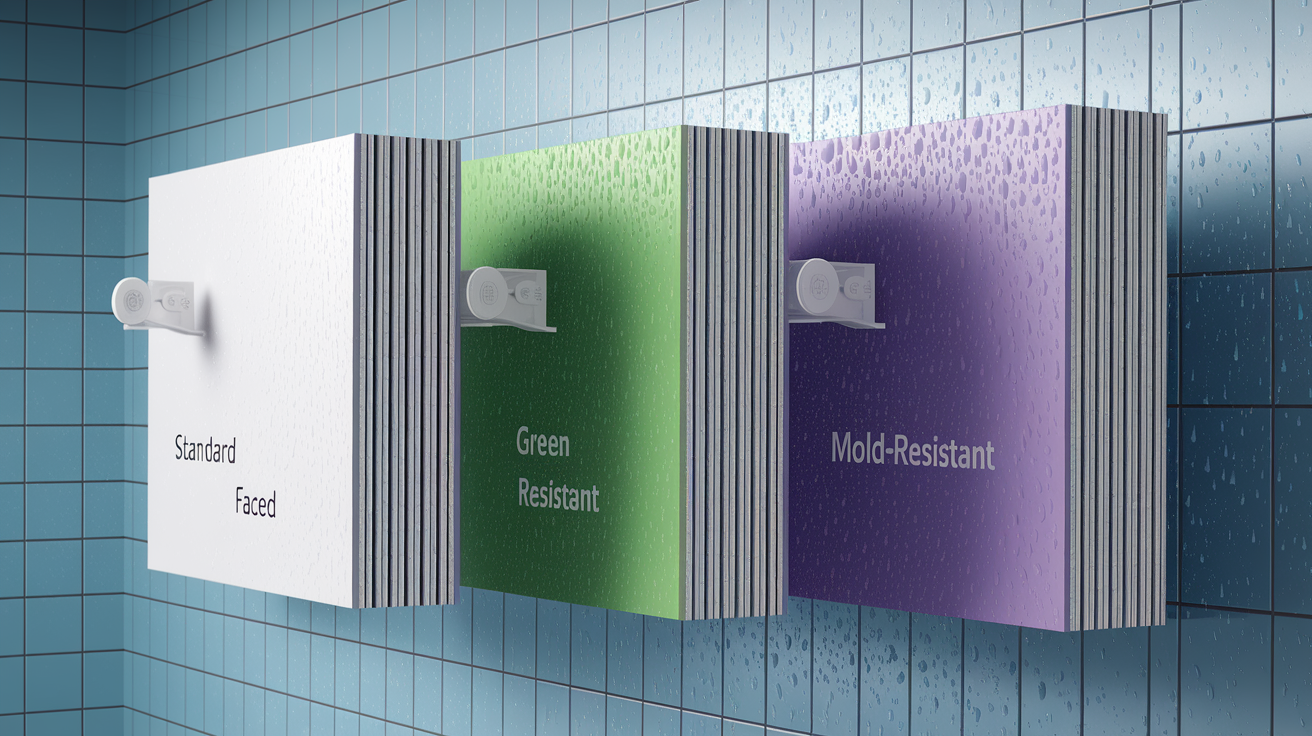
Standard drywall has paper facing that absorbs moisture like a sponge and feeds mold growth. The gypsum core breaks down when wet, turning soft and crumbly. That makes regular drywall completely wrong for areas with regular moisture exposure like bathrooms, basements, and laundry rooms.
| Drywall Type | Features | Best Uses | Cost Comparison |
|---|---|---|---|
| Standard drywall | Paper-faced gypsum core | Dry interior areas only | Baseline cost |
| Green board | Water-resistant paper facing | Moderate moisture areas like bathroom walls away from shower | 10-20% more expensive |
| Purple board | Enhanced mold and moisture resistance | High-moisture areas including shower surrounds and basement walls | 20-30% more expensive |
Moisture resistant drywall should be used when replacing water damaged sections in bathrooms, basements subject to condensation or occasional seepage, laundry rooms where humidity runs high, and areas prone to condensation like exterior walls in cold climates. The extra cost is minimal compared to dealing with repeated water damage and mold growth. Green board works well for bathroom walls that don’t receive direct water contact. Purple board is the better choice for areas directly exposed to moisture or where mold prevention is critical.
Even moisture resistant drywall requires proper waterproofing membranes in direct contact water areas like shower enclosures and tub surrounds. The water damage prevention approach includes using appropriate materials plus proper waterproofing systems, not just better drywall.
Common Wet Drywall Repair Mistakes to Avoid
Most repair failures result from rushing the process or skipping critical steps that seem optional but aren’t. Understanding what goes wrong helps you avoid wasting time and materials on work that won’t last.
- Beginning repairs before the area is completely dry, trapped moisture guarantees failure
- Not fixing the leak source first, repairing drywall while water still intrudes is pointless
- Cutting the replacement panel too small, creating gaps that are difficult to fill with compound
- Driving screws too deep and breaking through the paper facing, which eliminates holding power
- Applying joint compound too thick in single coats, which leads to cracking as it dries and shrinks
- Skipping primer, leading to color differences and texture mismatches that announce the repair
- Insufficient sanding that leaves visible ridges, bumps, and knife marks
- Painting before compound fully dries, causing bubbling and separation
- Not extending feathering far enough beyond the patch, stopping too soon creates a visible border
- Attempting repairs on mold contaminated drywall without proper remediation, spreading spores throughout the house
The most critical mistake is inadequate drying time. Homeowners eager to finish the project start patching while moisture remains in the drywall or wall cavity. That trapped moisture leads to recurring water damage showing up weeks or months later, mold growth behind the new repair, bubbling paint as moisture tries to escape, and crumbling material as the gypsum core continues breaking down. You can’t see trapped moisture, but it’s there working against your repair.
Taking extra time for proper drying with fans and dehumidifiers running continuously, applying multiple thin compound coats with full drying between each one, and thorough sanding with progressively finer grits produces professional quality results that last for years. The repair itself takes only a few hours of actual work. Most of the time is waiting for materials to dry. Don’t rush that.
Preventing Future Water Damage to Drywall
Prevention costs far less and causes far less disruption than repeated repairs. A small leak caught early requires minor patching. The same leak ignored for months leads to extensive replacement, mold remediation, and possible structural repairs running into thousands of dollars.
Effective prevention measures include:
- Inspect your roof annually and after major storms for missing shingles, damaged flashing, and compromised seals
- Clean gutters twice yearly to prevent overflow that runs down exterior walls
- Seal around windows and doors with caulk, replacing deteriorated seals before water penetrates
- Maintain caulking in bathrooms and kitchens where fixtures meet walls and countertops
- Fix plumbing leaks immediately when detected. Even small drips add up to significant moisture over time
- Insulate pipes in cold areas to prevent freezing and bursting during winter
- Use bathroom exhaust fans during showers and for 20 to 30 minutes afterward
- Monitor your basement for moisture after heavy rain, checking walls and floors for dampness
- Keep indoor humidity below 50 percent using dehumidifiers in humid climates
- Service HVAC systems annually to maintain proper drainage and prevent condensation leaks
- Install water leak detectors near water heaters, washing machines, dishwashers, and under sinks
- Consider whole house water shut off systems for vacation homes or properties left unattended for extended periods
Conduct seasonal inspections of vulnerable areas. Check behind toilets for signs of seal failure at the base. Look under sinks for drips from supply lines or drain connections. Inspect the area around your water heater for rust stains or moisture. Examine basement walls for efflorescence, that white powdery substance indicating water seepage through foundation. Check ceiling areas directly below bathrooms on upper floors for any discoloration.
Early leak detection and immediate response prevent minor drips from becoming major water damage. A small supply line leak caught within hours causes minimal damage requiring a few hours of drying. The same leak running for days while you’re on vacation can destroy drywall across multiple rooms, damage flooring, and create mold conditions that require professional remediation. Regular inspections protect your home value and save thousands in repair costs by catching problems when they’re still small and manageable.
Final Words
Wet drywall won’t fix itself, and covering it up just postpones bigger problems.
Stop the leak first. Dry everything completely. Then decide if you’re patching it yourself or calling in help.
The actual repair—cutting, taping, mudding, sanding—takes patience, but it’s doable if you take your time and don’t skip the drying phases.
If you’re dealing with sagging ceilings, mold covering large areas, or damage you can’t trace back to a source, that’s when you bring in a pro.
Knowing how to repair wet drywall the right way protects your home and keeps small problems from turning into expensive ones.
FAQ
Can wet drywall be repaired?
Wet drywall can be repaired if the moisture hasn’t caused severe structural damage, extensive mold growth, or complete saturation that makes the material crumble. Minor water stains and small damaged areas are usually repairable once completely dried, but sagging sections or material that disintegrates when touched requires full replacement.
How long can drywall be wet before mold?
Drywall can be wet for 24 to 48 hours before mold starts developing in the porous gypsum core and on the paper facing. This short timeframe makes immediate drying critical after any water exposure. Areas with poor ventilation, warm temperatures, or complete saturation may develop mold even faster than this 24-hour window.
How to repair a wall with water damage?
To repair a wall with water damage, first fix the leak source completely, then dry the area for 24 hours to several days depending on saturation level. Cut out damaged sections in rectangular shapes, install replacement drywall secured to studs, apply joint compound and tape in multiple thin coats, sand smooth, and finish with primer and paint.
How to dry a wall after water damage?
To dry a wall after water damage, remove standing water immediately with towels or a wet vacuum, then position multiple fans directly at the affected area from different angles. Use a dehumidifier in enclosed spaces, open windows for cross-ventilation when outdoor humidity is low, and monitor progress by testing firmness and using a moisture meter until readings drop below 15 percent.