
You might think a shower pan leak is just surface damage. Actually, most shower pan problems are hiding underneath where you can’t see them. By the time you spot a ceiling stain or soft floor, water has already been working its way through the pan, into your subfloor, and possibly down your walls. The good news is you can stop a shower pan leak with the right approach. We’ll walk you through temporary fixes for minor seepage, show you how to locate the real source, and explain step-by-step repairs that actually hold.
Quick Temporary Fixes for Active Shower Pan Leaks
Active leaks that are causing visible ceiling damage, water pooling through light fixtures, or rapid flooding? You need a professional emergency response, not DIY band-aids. But for minor seepage showing up as small ceiling stains or occasional dampness around the shower base, temporary fixes can stop water migration while you plan permanent repairs over the next few weeks.
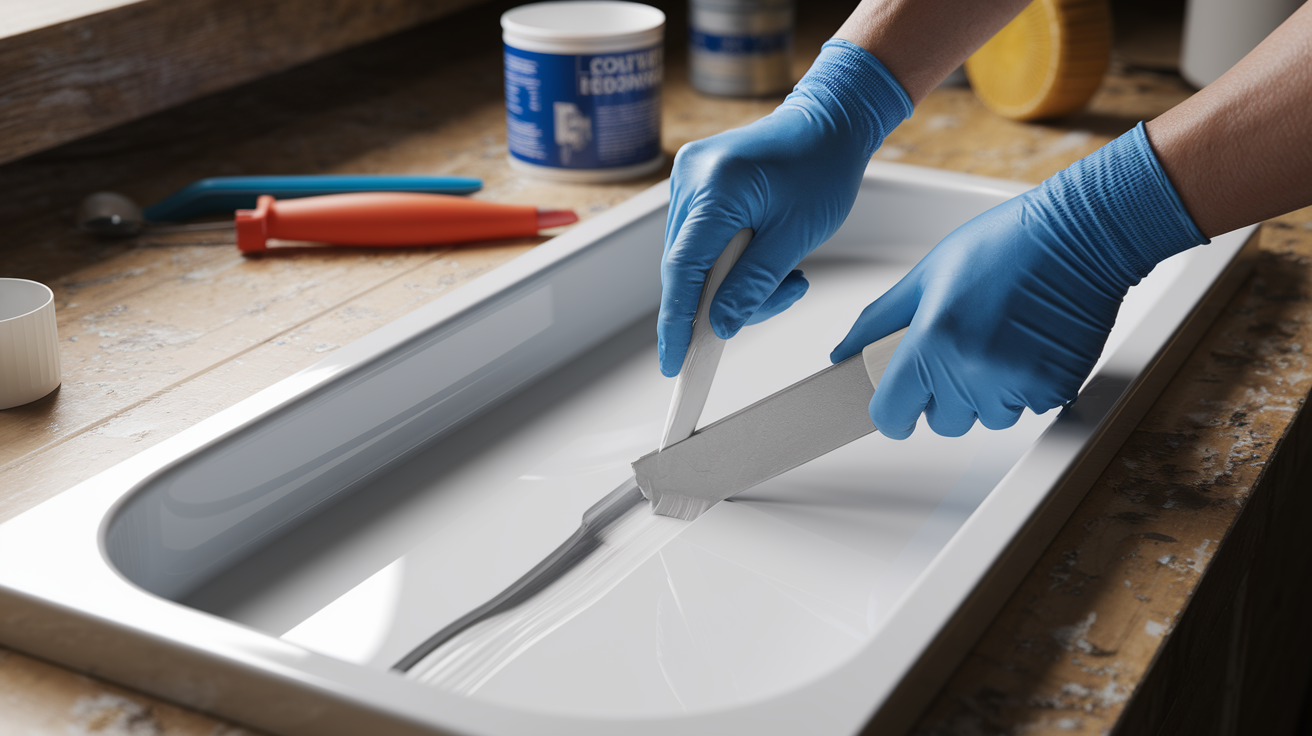
Resealing perimeter joints gives you the most effective temporary solution for minor leaks from failed seals between pan and walls. Remove all old caulk with a utility knife and caulk removal tool. Scrape thoroughly until the surface is completely clean with no residue left behind. Clean surfaces with denatured alcohol using a lint free rag to remove soap film and oils that prevent proper adhesion. Let surfaces dry completely, which takes 24 hours in humid conditions or when moisture has gotten behind the old caulk. Cut the silicone tube tip at a 45 degree angle for a 3/16 inch bead width. Apply a continuous bead in one smooth motion while maintaining consistent pressure on the caulk gun. Tool the bead smooth within 5 to 10 minutes using a wet finger or caulk finishing tool before skinning begins.
Pay special attention to inside corners where two walls meet, outside corners where the pan meets the threshold or curb, horizontal ledges or built in seats where water pools rather than draining, and any visible gaps or separations between pan edge and wall surface. These areas experience the highest water pressure and see the most frequent seal failures. Water always finds the path of least resistance, which is usually a corner you didn’t check carefully enough.
Small visible cracks in fiberglass or acrylic pans can be temporarily sealed with marine grade epoxy. Clean the crack thoroughly with acetone to remove all contaminants. Use a utility knife to V groove the crack at a slight angle, creating better surface area for adhesion rather than a tight hairline gap. Mix the two part epoxy exactly per manufacturer ratios, typically 1:1 but always verify on package instructions. Apply thin layers with a putty knife, slightly overfilling the crack to allow for finish sanding. Allow 24 to 48 hours cure time before any water contact.
Temporary perimeter resealing typically lasts 3 to 6 months maximum before water works behind the seal and problems return. Only 100% silicone sealant provides adequate flexibility and water resistance for continuous submersion conditions. Not acrylic, not latex, not silicone blend products. Water must not contact repair areas for a minimum 48 hours curing time, regardless of what shorter time claims appear on product labels. Full adhesion requires complete chemical cure, not just surface dry.
Diagnosing and Locating Your Shower Pan Leak Source

Accurate leak source identification prevents wasted effort resealing perimeter joints when the actual problem is a cracked pan bottom or failed drain assembly. Proper diagnosis determines whether temporary surface repairs will work or if you’re facing full pan replacement. It also reveals whether you can handle the repair yourself or need professional help for plumbing modifications or structural work.
Examine the ceiling directly below the shower for water stains or discoloration indicating active moisture migration. Inspect the pan surface systematically starting at the threshold and working toward the back corners, looking for visible cracks, crazing (fine spider web patterns), or color changes indicating damage. Check all corner seams and the threshold area where the pan meets the bathroom floor. Run your finger along these junctions feeling for gaps or separation. Look behind the shower walls if an access panel exists in an adjacent room or closet, checking for dampness on wall framing or insulation.
Watch for these specific warning signs:
- Water stains on ceiling or walls in the room directly below your bathroom, appearing as brown or yellow discoloration often with darker edges
- Soft or spongy flooring near the shower base when you press down firmly with your foot, indicating subfloor water damage
- Mold growth in the bathroom corners or on the room’s ceiling below, appearing as black, green, or brown spots
- Persistent musty odors despite regular cleaning, especially noticeable when entering the bathroom after it’s been closed up
- Unexplained water bill increases over several months with no change in household usage patterns
- Visible cracks or flexing in the pan surface when you stand in different locations. The pan shouldn’t move or feel unstable
The flood test provides the most reliable diagnostic method for isolating shower pan problems from valve or supply line issues. Plug the drain opening with a test plug (available at hardware stores) or a rag tightly wrapped in a plastic bag. Push it firmly to create a complete seal. Fill the pan with 2 to 3 inches of water using a bucket rather than the shower head so you’re not testing valve connections. Mark the water level with a piece of tape or a marker on the shower wall. Wait 15 to 30 minutes without touching the shower or walking near it since vibration can give false readings. Check whether the water level has dropped, indicating water escaping through the pan. Inspect the ceiling below and surrounding floor areas for moisture migration. Water may travel along framing or subflooring before becoming visible.
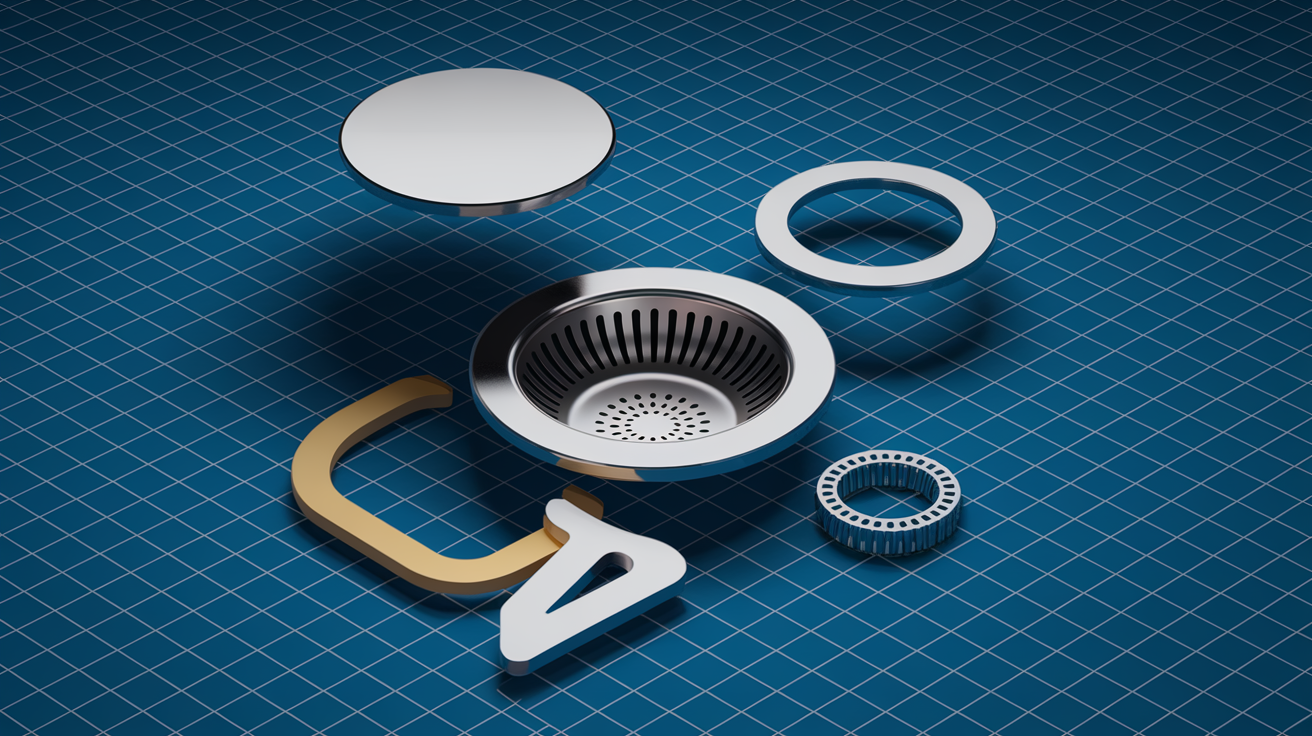
Check the drain assembly and connections by removing the drain cover (typically unscrew or carefully pry up depending on style) and inspecting the visible gasket condition for cracks or compression. Look for cracks in the drain flange itself where it contacts the pan. Check for gaps between the drain body and the pan opening, which indicate improper sealing or gasket failure.
Step By Step Shower Pan Crack Repair for Fiberglass and Acrylic
This repair method works for cracks up to 6 inches long in fiberglass or acrylic pans, requires intermediate DIY skills including careful mixing and surface preparation, and takes 2 to 3 days including full cure time before returning the shower to service.
Prepare the Damaged Area
Clean the crack thoroughly with acetone or denatured alcohol to remove soap residue, body oils, and any cleaning product buildup that prevents proper bonding. Use a utility knife to V groove the crack at a 45 degree angle along its entire length, creating a wider opening that allows epoxy to key into the material rather than just sitting on the surface. Sand the surrounding area with 80 grit sandpaper within a 2 inch radius of the crack to roughen the smooth pan surface. Vacuum all dust particles using a shop vacuum with brush attachment. Ensure complete drying. Use a fan or hairdryer if needed since even slight moisture prevents proper epoxy adhesion. The surface must be bone dry before proceeding.
Apply Bonding Agent and Backing
Cut fiberglass mesh or backing material slightly larger than the crack area, extending at least 1 inch beyond the crack on all sides. Apply bonding agent or resin to the crack from the topside, working it into the V groove with a small brush. Position backing material from underneath if an access panel exists in the room below, pressing it firmly against the wet resin. If no access exists, apply an additional layer from the top instead. Press firmly with a roller or your palm to eliminate air bubbles between backing and pan material, which create weak spots that fail under flexing.
Mix and Apply Epoxy or Patch Compound
Mix two part epoxy per manufacturer ratios. Typically 1:1 but always verify the instructions printed on the package since ratios vary by product. Stir thoroughly for 2 to 3 minutes until you achieve uniform color throughout with no streaks of unmixed hardener or resin. Apply the epoxy in thin layers with a putty knife, working from the center of the crack outward toward the edges. Slightly overfill the crack to allow for sanding flush later. Work quickly within the product’s working time, typically 5 to 10 minutes before setup begins and the material becomes too stiff to tool properly. Feather the edges with light pressure to blend the repair with the surrounding surface.
Sand and Finish the Repair
Wait the full cure time specified in the product instructions. 24 to 48 hours is typical but verify on your specific package since some formulations require longer. Wet sand with 220 grit sandpaper until the repair is level with the surrounding surface, using circular motions and frequently dipping the paper in water. Progress to 400 grit sandpaper for a smoother finish that’s less noticeable. Clean all dust residue with a damp cloth. Allow the surface to dry completely before proceeding.
Seal and Test the Repair
Apply waterproof sealant over the repair area, extending coverage 1 inch beyond the repair on all sides to create a barrier against water penetration at the edges. Wait an additional 24 hours for sealant cure before testing. Perform a flood test to verify repair integrity. Plug the drain, fill the pan with 2 to 3 inches of water, and wait 30 minutes. Check the ceiling below and surrounding areas for any moisture. Avoid shower use for a minimum 48 hours total cure time before regular use, even if the repair appears dry.
Repairing Shower Pan Drain Assembly Leaks
Drain leaks occur at two primary locations: the compression seal between the pan bottom and drain body, or at the drain flange connection to the waterproof membrane liner in traditional mortar bed systems. These require different repair approaches, though both can often be completed from above without cutting into the ceiling below.
Access and inspect the drain by removing the drain cover. Unscrew it or carefully pry it up depending on the attachment method. Unscrew the drain basket using a drain removal tool or gripping the crossbars with pliers and turning counterclockwise. Inspect the rubber gasket for cracking, compression set (permanent flattening), or deterioration. Examine the plumber’s putty seal for gaps or complete deterioration where it’s dried out and crumbled away. Check for visible cracks in the drain flange itself where metal or plastic has failed.
Replace the gasket by cleaning all old plumber’s putty from the drain body and pan opening using a putty knife and mineral spirits. Apply a new plumber’s putty rope about 1/4 inch diameter around the drain underside perimeter, creating a continuous seal without breaks or thin spots. Position the new rubber gasket ensuring proper orientation. The tapered side typically faces down toward the pan. Hand tighten the compression ring evenly in a star pattern to avoid warping the drain or pan material. Final tighten to manufacturer specifications, typically 1/4 turn past hand tight but verify for your specific drain model since overtightening causes problems.
Mortar bed systems use a two part clamping ring that must properly compress the membrane liner between the upper and lower drain components, creating a watertight seal. Weep holes around the drain perimeter must remain clear, allowing water that penetrates the tile and grout to drain into the pan rather than pooling under the tile. Over tightening can crack the drain flange or pan material, while under tightening allows water to bypass the seal. The correct tightness creates firm compression without material distortion. When you look at the clamping ring edge, you should see slight gasket compression but no bulging or squeezing out beyond the ring edges.
Drain issues that persist after seal replacement, or visible cracking in the drain body itself, require accessing plumbing from below or cutting ceiling access in the room below the shower. Signs you need this deeper access include water continuing to leak during flood tests even with new gaskets, visible movement of the drain assembly when you twist it, or the drain sitting at the wrong height relative to the pan bottom.
Complete Shower Pan Replacement Process
Replacement becomes necessary when the pan has multiple cracks exceeding 6 inches in length, extensive perimeter failure spanning more than 2 feet of separation between pan edge and wall, visible flexing or movement when you stand in different areas indicating structural failure of the pan material, subfloor damage from long term water infiltration showing as soft spots or discoloration, or widespread membrane liner failure in mortar bed systems where water has compromised the underlying layers.
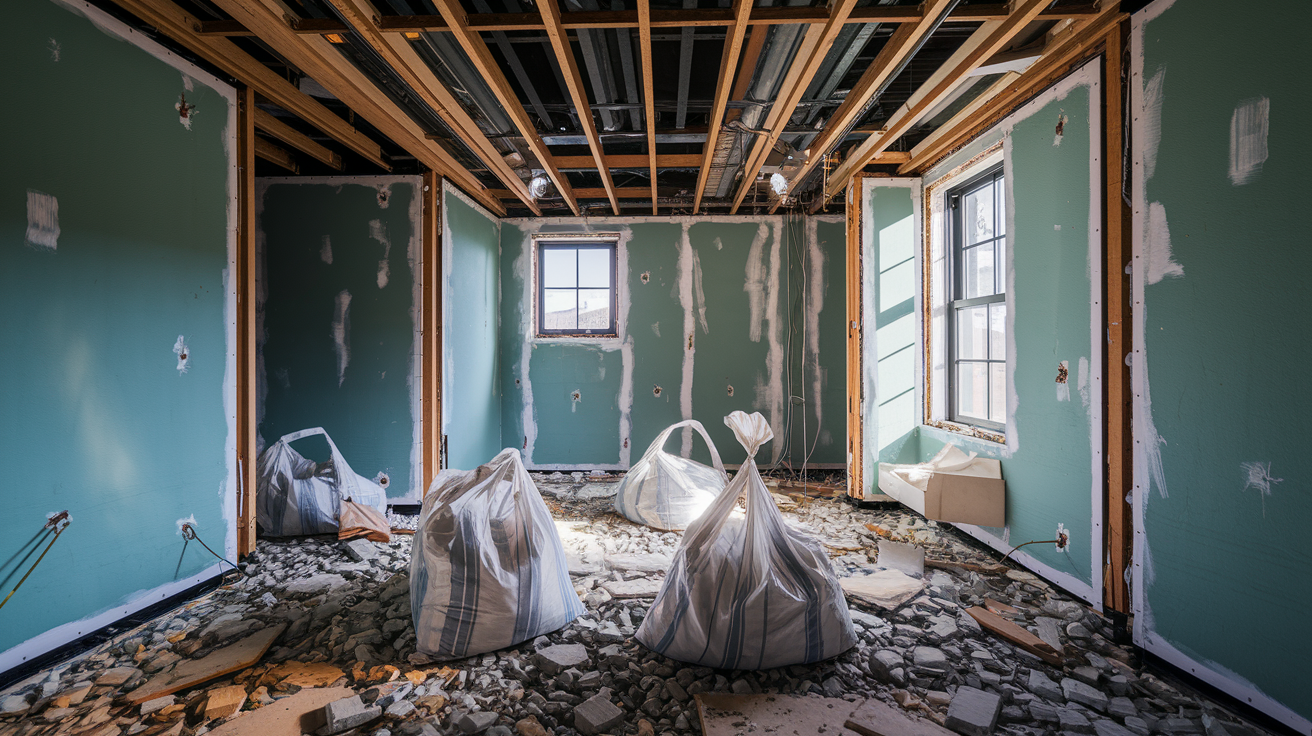
Demo and Damage Assessment
Remove tile systematically starting from the top and working downward to control debris and reduce the risk of falling material. Break a standard shower area into manageable sections. Typically 6 to 8 sections for a 60×32 inch shower, with more sections for larger custom showers. Use a hammer and chisel for controlled removal in small pieces, or an oscillating multi tool with a grout blade for faster work with less physical effort. Remove all tile and backer board down to the wall studs and subfloor, clearing the area completely. Inspect the subfloor thoroughly for rot or water damage requiring replacement. Look for soft spots that compress when you press firmly, dark discoloration, delamination where plywood layers separate, or a sour smell indicating active decay. Check whether drain plumbing is accessible from below or through an access panel, which affects your repair approach. Document all damage with photos for future reference if you need to make insurance claims or apply for permits.
Subfloor Preparation and Leveling
Replace damaged subfloor sections with exterior grade plywood matching the existing thickness, typically 3/4 inch. Use a 4 foot level to identify high and low spots across the entire shower footprint. Shim floor joists to achieve proper slope toward the drain. Building codes require 1/4 inch per foot minimum, but 1/2 inch per foot provides more reliable drainage and insurance against problems. Verify slope in multiple directions, checking from each wall toward the drain to confirm water will flow to the drain from all points rather than pooling in corners. Create a solid flat surface without voids or unsupported areas that allow flexing. Ensure the drain height allows proper pan installation. Prefabricated pans typically require the drain sitting 1 to 2 inches below the subfloor surface, but always verify manufacturer specifications for your specific pan model since requirements vary.
Installing Waterproof Foundation
You have two main options for pan installation. Setting a prefabricated fiberglass or acrylic base requires a thinset mortar bed underneath for continuous support, eliminating voids that allow flexing and eventually lead to cracking. Mix thinset to a thick peanut butter consistency and trowel it across the prepared subfloor. Set the pan into the wet mortar, pressing firmly to achieve full contact. Verify level in multiple directions and check proper drain alignment before the mortar begins setting. You have about 20 minutes of working time with most thinset products.
Building a traditional mortar bed system starts with a pre slope layer providing 1/4 inch per foot minimum pitch toward the drain. Install the membrane liner (PVC or CPE sheet material) over the cured pre slope, extending minimum 3 inches up all walls. Fold the liner carefully at corners using proper origami like folds rather than cutting, which creates seams and potential leak points. Secure the liner with approved fasteners only above the flood level. Never penetrate the liner below the pan curb height. Clamp the liner at the drain connection per manufacturer specifications, ensuring proper compression of the clamping ring. Apply the final mortar bed on top of the liner, maintaining proper slope toward the drain. For help understanding related plumbing concerns during renovation work, see our guide on Water Heater Leaking From Overflow Pipe: Quick Fix.
Connecting Drain and Testing
Dry fit the drain assembly to ensure proper height relative to the new pan bottom before applying any sealant. Apply plumber’s putty and position the gasket following the earlier drain repair instructions. Tighten the compression seal evenly to manufacturer specifications. Don’t just crank it down as tight as possible. Perform a flood test before any wall finishing work. Fill the pan 2 inches deep, wait 60 minutes, and inspect the area below for any moisture. Verify proper drainage by observing the water flow pattern when you remove the drain plug. Allow 24 to 48 hours cure time for mortar based installations before proceeding with wall finishing. Confirm no movement or flexing by standing in different areas of the pan and shifting your weight.
Full replacement typically requires 2 to 4 days elapsed time: 1 day for demolition and preparation, 1 to 2 days for installation and cure time, and 1 day for testing and finishing work. The project requires intermediate to advanced DIY skills depending on pan type. Professional installation is strongly recommended for mortar bed systems due to the complexity and high failure rate when improperly installed by homeowners without specialized training.
Fixing Mortar Bed Shower Pan and Liner Issues

Traditional mortar bed systems with membrane liners appear commonly in older homes built before the 1990s and in custom tile showers built by traditional methods. The system consists of three distinct layers working together as a waterproofing system, not just surface protection.
The three layer construction includes a bottom pre slope mortar layer (1/4 inch per foot minimum) that directs any water reaching the liner toward the drain opening. The middle membrane liner made from PVC or CPE sheet material provides the primary waterproofing barrier. The top mortar bed supports the tile installation while allowing water to pass through to the liner surface below. Leaks prove difficult to locate because water penetrating the tile and grout travels along the liner surface following the pre slope until it finds a weakness. Puncture, seam failure, or improper drain connection. Water then exits at the lowest point, which may be 4 to 6 feet away from the actual damage location.
Identifying liner damage typically requires removing tile and the top mortar bed to expose the liner for visual inspection and flood testing. The liner sits beneath several inches of mortar, making external diagnosis nearly impossible without invasive investigation. You can’t see it, test it, or repair it without removing the layers above.
Common liner failure causes include:
Nail or screw punctures during installation. The most common failure mode, often from attaching backer board or tile to wall studs and accidentally penetrating the liner that extends up the wall. Improper drain clamping ring installation that doesn’t achieve adequate compression, allowing water to bypass the seal between liner and drain body. Inadequate wall height extension where liner ends below the pan curb, allowing water to overflow behind the liner during shower use or flood testing. Pre slope settlement or improper initial slope creating reverse pitch areas where water pools instead of draining, eventually finding the nearest liner weakness. Age related liner degradation and cracking, particularly in PVC material that becomes brittle after 25 to 30 years of exposure to temperature cycling and cleaning chemicals.
Liner repair usually means full replacement rather than patching for several practical reasons. Accessing one damaged area often reveals multiple compromise points throughout the aging liner. Patches rarely hold long term under constant hydrostatic pressure and temperature cycling between hot and cold water exposure. Proper repair requires removing all top mortar anyway, eliminating any cost advantage of attempting patches. Liner age matters. When failures occur typically at 20 to 30 years, they indicate systemic deterioration throughout the material rather than isolated damage in one spot.
Modern alternatives to traditional hot mop or sheet membrane installation include liquid applied membranes like RedGard and Aquadefense, and newer sheet membrane systems including Schluter KERDI and Laticrete Hydro Ban. Some professionals prefer these for reliability and easier installation, though they still require proper substrate preparation and pre slope beneath the waterproofing layer.
Addressing Drainage Problems and Standing Water
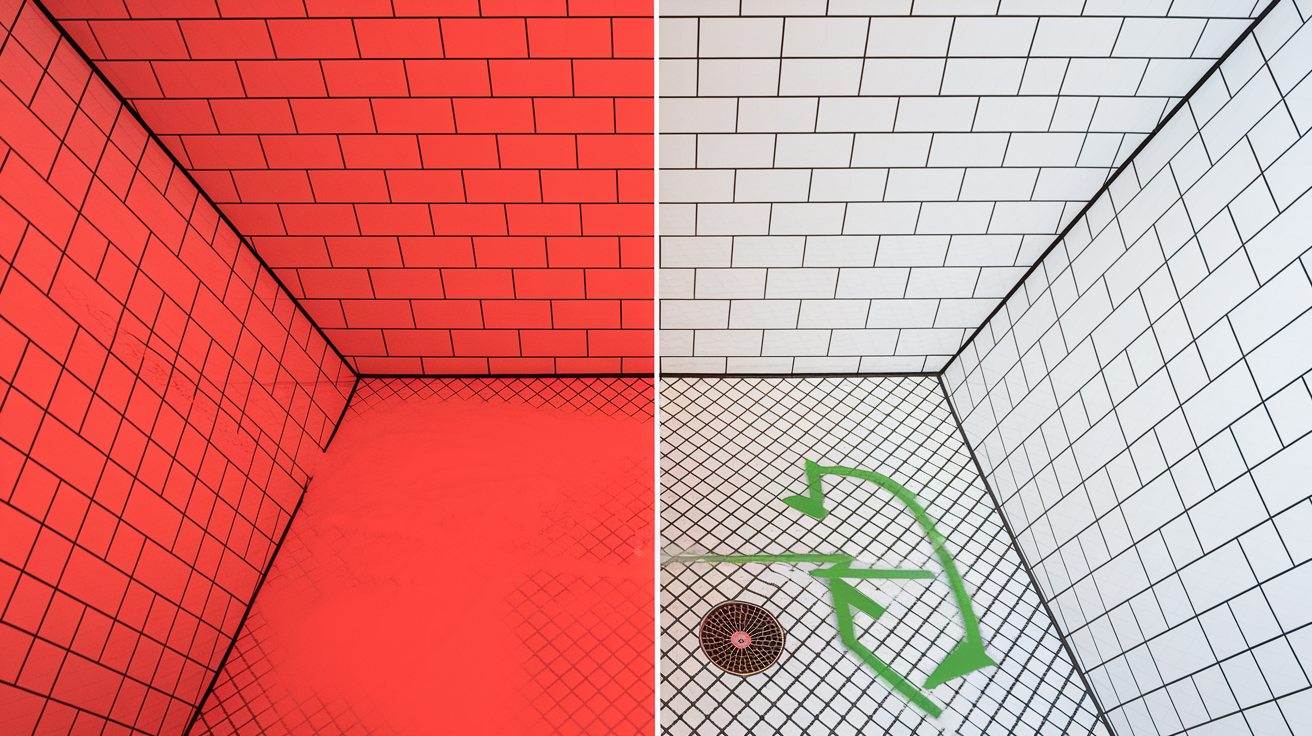
Water pooling in corners or away from the drain indicates pitch problems that will eventually cause leaks even with intact waterproofing. Standing water increases hydrostatic pressure, forcing water through microscopic gaps in caulk, grout, or pan material that would otherwise remain watertight under flowing conditions.
Check slope by placing a 4 foot level in multiple directions across the pan floor. Measure the gap between the level and pan surface at the drain end. You should see a 1 inch drop over 4 feet for proper 1/4 inch per foot slope. Identify specific low spots where water pools by observing the floor after shower use. Test drainage by pouring a cup of water at various locations and watching the flow pattern toward the drain. Water should move steadily without hesitation or pooling.
Minor pitch problems (less than 1/4 inch variance) can sometimes be addressed by building up isolated low areas with self leveling compound or thinset, creating a gentle slope toward the drain. Major pitch problems including reverse slope or variances greater than 1/2 inch require complete pan replacement. Attempting surface correction for significant pitch issues adds substantial weight (typically 10 to 20 pounds of material), usually fails within 6 to 12 months as the material delaminates from the pan surface, and doesn’t address the underlying structural issue of improper pan installation or subfloor settling. Building codes require minimum 1/4 inch per foot pitch, but 1/2 inch per foot provides better insurance against drainage issues and compensates for minor settling over time.
Check drain flow by removing the cover and flushing water directly down the drain opening to rule out partial clogs from hair, soap scum, or mineral buildup that mimic slope problems by slowing drainage. If water drains slowly when poured directly into the drain opening, the problem is the drain line rather than pan pitch. Use a drain snake or enzyme cleaner to clear the blockage before concluding you have pitch problems.
Estimated Repair Time, Difficulty Level, and Cost Breakdown

Accurate estimates depend on the leak source, pan type (prefabricated vs. mortar bed), extent of related damage including subfloor rot, ceiling damage, or mold growth, and whether work requires permits or code compliance modifications for older installations.
| Repair Type | Difficulty | Time Required | DIY Cost | Professional Cost |
|---|---|---|---|---|
| Perimeter resealing | Easy | 2 to 3 hours plus 48hr cure | $15 to 30 | $150 to 300 |
| Small crack patching | Moderate | 3 to 4 hours plus 48hr cure | $30 to 60 | $200 to 400 |
| Drain gasket replacement | Moderate | 1 to 2 hours | $20 to 40 | $175 to 350 |
| Prefab pan replacement | Advanced | 2 to 3 days with cure time | $300 to 600 | $1200 to 2500 |
| Mortar bed rebuild | Advanced | 3 to 5 days with cure time | $400 to 800 | $2000 to 4000 |
| Complete tile and waterproofing | Advanced | 5 to 7 days with cure time | $800 to 1500 | $3500 to 6000 |
Several factors increase complexity and cost beyond basic repair scope. Subfloor damage requiring plywood replacement adds $200 to 500 in additional materials and 4 to 8 hours of work. Tile matching for partial repairs presents challenges when original tiles are discontinued, potentially requiring complete retile if you can’t find acceptable matches. Plumbing access limitations requiring ceiling opening or wall removal in the room below add $300 to 800 to create and repair access points. Code compliance requirements for older installations including proper venting, water resistant backer board instead of standard drywall, and required permits add $400 to 1200 depending on jurisdiction. Mold remediation when growth exceeds 10 square feet requires professional service costing $500 to 3000 depending on extent and location.
Hidden costs often get overlooked in initial planning. Related repairs include damaged drywall or ceiling below the shower requiring patching, taping, and painting at $300 to 600. Tool purchases for one time DIY use including specialty items like drain wrenches, tile saws, and quality levels add $100 to 300 to project cost. Time value for DIY approaches requiring multiple weekends matters, especially if the first attempt fails and requires starting over. Disposal fees for tile and pan debris run $75 to 150 depending on local dump fees. Temporary shower alternatives during multi day repairs including gym memberships or staying elsewhere add costs not immediately apparent.
Safety Precautions and Ventilation Requirements
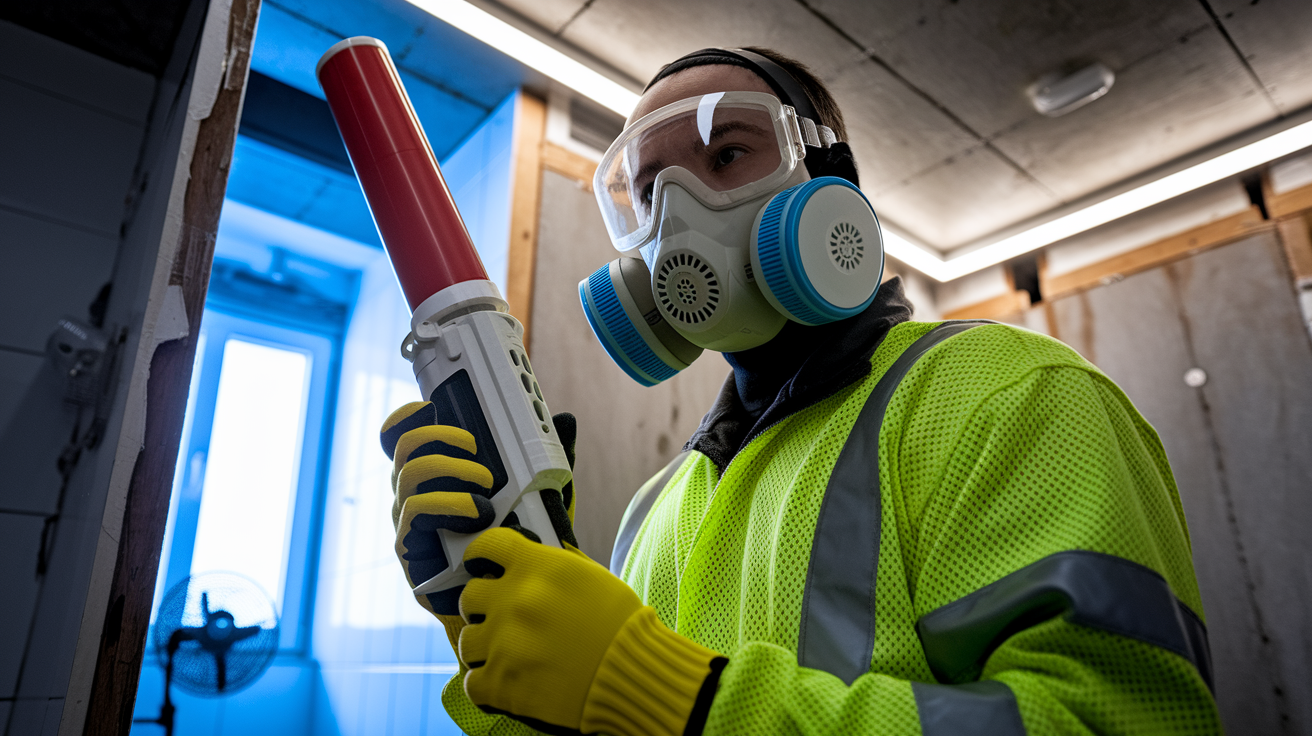
Proper ventilation is critical when using waterproofing materials that release fumes. Silicone releases acetic acid vapors that irritate eyes and lungs. Solvents including acetone, denatured alcohol, and mineral spirits produce volatile organic compounds. Adhesives including epoxy and construction adhesive emit fumes in enclosed bathroom spaces with limited natural air circulation.
Respiratory protection requirements vary by task. Use N95 or N99 masks for dust during demolition and sanding, providing filtration of particulates including tile dust and dried mortar. Respirators with organic vapor cartridges (not simple dust masks) protect against chemical fumes from sealants and solvents, filtering volatile organic compounds that pass through standard dust masks. Eye protection including safety glasses at minimum or goggles preferably protect during demolition from flying tile shards and during chemical use from splashes. Wear nitrile gloves for chemical resistance when handling solvents and adhesives. Heavy duty work gloves protect against sharp edges during demolition work. Open windows and use a box fan in the doorway blowing outward to create negative pressure pulling fresh air through the bathroom. Maintain ventilation for minimum 30 minutes after applying chemical products even if you can’t smell fumes anymore.
Electrical safety starts with shutting off bathroom circuits at the breaker panel before demolition, especially near the shower valve location and light fixtures. Use GFCI protected outlets or battery powered tools when electricity is required during repair work. Keep extension cords and power tools away from wet areas and any standing water. Verify circuits are completely dead with a voltage tester before cutting into walls or removing fixtures.
Physical safety includes using kneeling pads or knee protection for extended floor work, preventing joint damage during multi hour repair sessions. Practice proper lifting techniques when removing or installing pans. Bend your knees, keep your back straight, and get a helper for pans over 50 pounds since fiberglass weighs 60 to 100 pounds, acrylic 40 to 80 pounds, and cast iron 150 to 300 pounds. Dispose of sharp tile and fiberglass debris in puncture resistant contractor bags or sturdy boxes to prevent injury during handling and transport. Work in well lit conditions using supplemental work lights to see detailed work clearly. Note that older homes built before 1980 may contain asbestos in backing materials, floor tiles, or mastic requiring professional testing before any demolition or disturbance.
When to Call a Professional Plumber or Contractor

Simple perimeter resealing and minor crack repairs are DIY friendly for homeowners with basic skills and patience. Many shower pan leak situations involve complications, structural issues, or code requirements best handled by licensed professionals with specialized knowledge, proper insurance coverage, and warranty backing for their work.
These scenarios require professional help:
Extensive subfloor water damage or rot affecting multiple joists or spanning more than 4 square feet. Structural integrity concerns require engineering assessment and proper material selection to ensure adequate support. Improper repairs can lead to floor collapse or continued deterioration that compromises your home’s structure.
Active mold growth beyond surface cleaning, visible colonies larger than 3 square feet, or musty odors indicating hidden growth. Health risks from mold exposure require proper containment and remediation protocols following EPA guidelines. Professionals have specialized equipment including negative air machines and training for safe removal without spreading spores throughout your home.
Leaks originating within walls or floor cavities rather than the visible pan surface. This requires opening walls to access plumbing, potentially rerouting drain or supply lines, and installing proper waterproofing behind wall surfaces during closure. Wall work involves carpentry and plumbing skills beyond typical homeowner experience.
Mortar bed and membrane liner installation for traditional tile shower construction. Specialized skills in proper pre slope creation, liner folding and fastening techniques without punctures, and final mortar bed application determine long term success. These systems have high failure rates when attempted without training and hands on experience.
Code compliance and permit requirements for bathroom renovations exceeding simple repairs. Legal requirements vary significantly by jurisdiction. Permitted work requires inspections at multiple stages including rough plumbing, waterproofing, and final. Improper unpermitted work can affect home insurance coverage and create problems during resale.
Drain plumbing modifications including changing drain location, adding or correcting a p trap, or addressing vent pipe issues. Licensed plumbers are legally required for permanent plumbing changes in most jurisdictions. Improper venting causes slow drains, gurgling sounds, and allows sewer gas entry into your home. For guidance on related plumbing repair costs, see How Much Does It Cost To Fix A Leaking Pipe.
Matching existing custom tile work in partial repairs where the shower remains partially intact. This requires tile setting expertise for proper layout, precise cutting, and blending new work with existing installation. Discontinued tile patterns may require creative solutions including accent bands or complete retile.
Situations where previous DIY repairs failed or the leak returns within 6 months of repair attempt. This indicates underlying complexity not apparent during homeowner inspection, multiple contributing factors working together, or improper repair technique that appears correct but fails under actual use conditions.
Professional diagnostics often reveal multiple contributing factors not apparent during initial homeowner inspection. A visible ceiling stain might result from combined pan perimeter failure, improper drain installation, and inadequate pre slope. Fixing just one issue won’t solve the problem. Licensed contractors carry liability insurance protecting you from damage during repair work, which matters when cutting into walls or working with plumbing. Permitted professional work creates documentation for future home sales, providing assurance to buyers that bathroom work was completed correctly and inspected.
Preventing Future Shower Pan Leaks Through Maintenance
Annual shower inspections catch developing problems before they cause water damage or require major repairs. Regular maintenance including resealing joints and checking for wear signs extends pan life and prevents the cascade of problems that follow water infiltration.
Perform quarterly visual inspections of all perimeter caulking looking for gaps, cracks, or areas where caulk has separated from wall or pan surfaces. Check corner seams carefully where two planes meet. These experience the most stress and fail first. Test caulk flexibility by pressing gently with your fingernail. It should compress slightly and spring back rather than feeling hard and brittle. Look for tile grout cracks or missing sections allowing water penetration behind the tile surface. Inspect the pan surface for new cracks, crazing patterns, or discoloration indicating problems developing beneath the surface.
Reseal perimeter joints every 2 to 3 years as preventive maintenance even if caulk appears intact. Silicone degrades from UV exposure through windows, temperature cycling between hot showers and cold air, and chemical exposure from cleaning products. Remove all existing caulk completely. Partial removal causes poor adhesion of new material. Clean surfaces thoroughly with denatured alcohol. Apply 100% silicone (not acrylic or latex blends) designed specifically for kitchen and bath use with mildew resistance.
Keep drains clear by removing the cover monthly and pulling out accumulated hair and soap buildup before it creates blockages. Use enzyme based drain cleaners quarterly rather than caustic chemical cleaners that can damage gaskets and seals over time. Pour a gallon of hot water down the drain after each shower several times weekly to flush soap residue before it hardens.
Address small problems immediately when you first notice them. A tiny gap in corner caulking takes 5 minutes and $3 in materials to fix. Ignoring it for six months allows water behind the wall, creating $2000 in water damage and mold growth. Tighten a slightly loose drain cover when you notice it rather than waiting until the gasket fails completely. Replace worn caulking when it starts separating rather than waiting for obvious leaks.
Test for hidden leaks annually even without visible problems by performing a simple flood test. Plug the drain, fill the pan with 2 to 3 inches of water, and wait 30 minutes. Check for water level drop and inspect the ceiling below for any dampness. This catches liner problems or small cracks before they cause extensive damage. Check for soft spots in flooring around the shower perimeter monthly by pressing firmly with your foot in multiple locations. Soft spots indicate water has reached the subfloor and requires immediate investigation before rot spreads.
Final Words
Knowing how to repair shower pan leak issues gives you control over one of the most common sources of home water damage. Whether you’re resealing a perimeter joint, patching a small crack, or facing a complete replacement, the right approach stops the water and protects everything beneath your shower.
Start with accurate diagnosis. That flood test tells you what you’re really dealing with.
Temporary fixes buy you time, but don’t skip the permanent solution. Minor perimeter gaps and surface cracks respond well to careful DIY work. Structural failures, mortar bed issues, and subfloor damage need professional help.
Set realistic expectations about time, cost, and your skill level. A weekend project can turn into a month-long ordeal if the damage runs deeper than expected.
Stay safe, ventilate well, and don’t rush the cure times. Water will wait. Your repair materials need every hour you give them.
When you’re done, a properly fixed shower pan drains clean, stays dry underneath, and gives you one less thing to worry about. That’s the whole point.
FAQ
Can a leaking shower pan be fixed?
A leaking shower pan can be fixed depending on the damage extent and leak source. Minor perimeter seal failures and small surface cracks (under 6 inches) respond well to resealing or epoxy patching, while extensive structural damage, multiple cracks, or widespread membrane liner failure require complete pan replacement for reliable long-term results.
How much does it cost to fix a leaking shower pan?
The cost to fix a leaking shower pan ranges from $15-50 for DIY perimeter resealing using silicone caulk, $100-300 for small crack repairs with epoxy kits, $75-200 for drain gasket replacement, $800-2,500 for professional prefabricated pan replacement including labor, and $2,000-5,000 for complete mortar bed and tile reconstruction depending on shower size and complications.
Does homeowners insurance cover a shower pan leak?
Homeowners insurance typically covers shower pan leak damage if the leak was sudden and accidental, such as from a cracked pan or failed drain connection. Insurance generally excludes damage from gradual deterioration, lack of maintenance, or long-term seepage that should have been discovered through routine inspection, making prompt leak detection and repair important.
Does Flex Seal work on shower pans?
Flex Seal does not work reliably on shower pans for permanent repairs because it doesn’t withstand constant water exposure, foot traffic, and temperature cycling in shower environments. The product fails to bond properly to wet surfaces, doesn’t flex with pan movement, and typically separates within weeks. Use marine-grade 100% silicone or two-part epoxy designed specifically for continuous water immersion instead.