
Ever wonder if weak shower pressure is just annoying or a sign your plumbing’s silently failing? Testing your water pressure takes fifteen minutes and costs about fifteen bucks, but the information reveals whether you’re dealing with a simple adjustment or headed toward pipe damage and surprise leaks. Most homeowners have no idea what their pressure actually measures until something goes wrong. This guide walks you through the complete measurement process, what your PSI reading really means, and when those numbers signal it’s time to act before a small issue turns expensive.
Water Pressure Testing Tools and Step-by-Step Measurement Guide

Testing your home’s water pressure takes about fifteen minutes and doesn’t require specialized knowledge. You probably won’t need expensive tools either.
For accurate testing, you’ll need:
Pressure gauge with female hose threads, rubber gasket, and 0 to 300 PSI measurement range
Thread adapter if your outdoor faucet has non-standard threading
Teflon tape for creating watertight seal on threaded connections
Timer or stopwatch for tracking measurement duration
Notepad and pen for recording pressure readings with date and time
Optional: analog versus digital gauge. Analog gauges are more affordable and don’t require batteries. Digital models offer easier reading for quick reference.
You can find a basic pressure gauge at any hardware store or home improvement center for $10 to $30. An analog brass gauge in the $15 to $20 range handles most residential testing needs. Digital gauges run slightly higher at $25 to $40 but aren’t necessary for simple home measurements.
The jug method offers a no cost alternative requiring only a 1 litre measuring container and stopwatch. This approach measures flow rate rather than static pressure. It’s helpful for understanding how your plumbing performs during actual use.
Here’s the complete measurement process:
- Prepare your home by shutting off every water using fixture and appliance. Faucets, showerheads, dishwashers, washing machines, refrigerator ice makers, and sprinkler systems.
- Locate the correct outdoor faucet closest to your water meter if you have municipal water, or near the pressure tank if you’re on a well system.
- Attach the pressure gauge by threading it onto the outdoor faucet or hose bib, hand tightening only.
- Open the faucet completely to full flow position.
- Wait fifteen to twenty seconds for the needle to stabilize on the gauge face.
- Read the PSI measurement shown on the gauge dial.
- Close the faucet before removing the gauge to prevent water spray.
- Record your results with current date, time of day, and any weather conditions that might affect supply.
When attaching the pressure gauge, hand tightening provides adequate seal without risking damage to brass fittings. The rubber gasket inside creates the watertight connection. Over tightening with tools can crack the gauge body or strip faucet threads.
The jug method works like this: turn off all water fixtures, position your 1 litre container under a fully opened tap, and time how long it takes to fill. If you’re testing with a smaller container, run the water for exactly six seconds, then multiply the collected volume in litres by 10 to get your flow rate in litres per minute. A 500ml collection in six seconds equals 5 litres per minute (0.5 × 10 = 5). Acceptable household flow sits between 10 and 15 litres per minute. Below 10 means you’re dealing with frustratingly slow water delivery.
Recording measurements throughout the day reveals how municipal supply pressure fluctuates with neighborhood demand. Test once during morning peak hours and again during afternoon off peak for a complete picture. The jug method measures dynamic flow performance. That’s actual water delivery under use conditions, rather than static pressure when nothing’s running.
Understanding Normal Water Pressure Ranges and PSI Readings
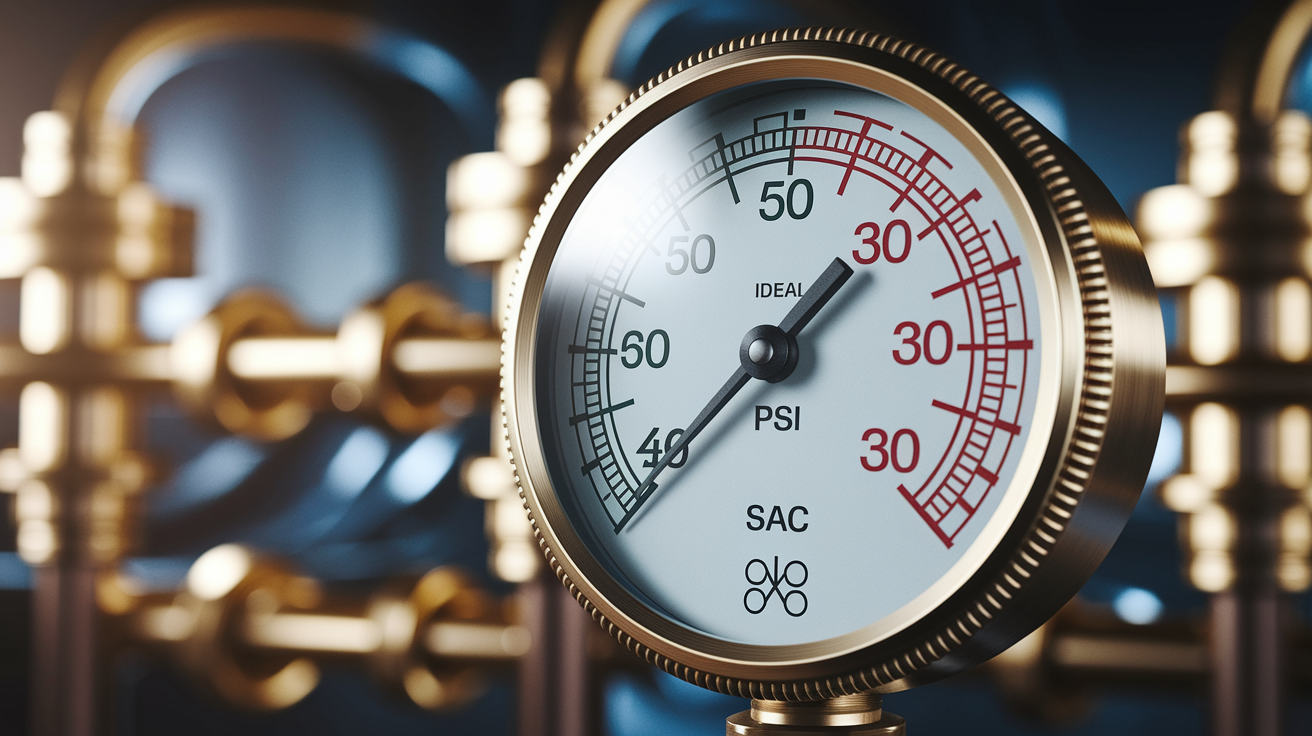
PSI stands for “pounds per square inch.” Think of it as the force pushing water through your pipes. Higher numbers mean stronger push, but too much force damages plumbing components.
| Pressure Range (PSI) | Performance Classification | Household Impact |
|---|---|---|
| Below 30 PSI | Critically Low | Likely leak, weak flow, appliances won’t function properly |
| 30-40 PSI | Low | Poor shower pressure, slow filling toilets, washing machine struggles |
| 40-60 PSI | Ideal | Optimal fixture performance, efficient appliance operation, comfortable water flow |
| 60-80 PSI | High | Potential appliance stress, increased wear on connections, water hammer risk |
| Above 80 PSI | Excessive | Requires immediate action, high risk of pipe damage and catastrophic leaks |
The 45 to 55 PSI range represents the sweet spot where everything works well without stressing your plumbing. Showers feel satisfying, dishwashers clean effectively, and washing machines fill at a reasonable pace. You get good performance without the silent damage high pressure causes over time.
PSI directly affects how your fixtures and appliances function. Low pressure makes simple tasks frustrating. Long waits for bathtubs to fill, weak rinse cycles, showers that barely wet your hair. High pressure creates hidden problems you won’t notice until a supply line bursts or your water heater develops a leak. Your plumbing system works best when pressure stays steady within the recommended range.
Testing Water Pressure at Different Locations Throughout Your Home

Testing at a single outdoor faucet gives you one data point, but it doesn’t show the complete picture. Pressure can vary between floors, drop at distant fixtures, or reveal problems isolated to specific areas. A single reading might hide issues affecting parts of your home.
Check pressure at these key locations:
Outdoor hose bib near water main for baseline municipal supply reading
Basement utility sink to measure pressure closest to water entry point
First floor bathroom faucet for ground level fixture performance
Washing machine hookup where supply lines connect to appliances
Upper floor bathroom to check how gravity affects elevated fixtures
Kitchen sink as a frequently used reference point
Pressure differences between locations tell you whether you’re dealing with a whole house problem or something localized. If your outdoor faucet reads 50 PSI but your upstairs shower reads 30 PSI, you’ve got restriction somewhere between those points. Likely old pipes, a partially closed valve, or sediment buildup. When all locations show similar low readings, the issue traces back to municipal supply or your pressure regulator.
Multi story homes naturally lose pressure as water climbs against gravity. A 10 to 15 PSI difference between basement and second floor falls within normal range. Each vertical foot of elevation costs about 0.43 PSI. If you’re seeing drops larger than 15 PSI between floors, something’s restricting flow beyond normal gravity effects.
Understanding Pressure Regulators and PRV Valves in Measurement

A pressure regulator (also called a PRV valve or reducing valve) acts like a gatekeeper on your water main. It takes whatever pressure the municipal supply delivers and steps it down to a safe, consistent level for your home. Without one, you’re at the mercy of city water pressure that can swing from 80 PSI to 150 PSI depending on time of day and location.
Your regulator typically sits near where the water main enters your home. Often in the basement, crawl space, or garage near the water meter. It looks like a bell shaped brass fitting with a screw adjustment on top. Not every home has one. If your municipal supply stays consistently below 80 PSI, you might not need a regulator.
Testing before and after the regulator shows whether it’s doing its job. Attach your gauge to an outdoor faucet before the regulator (closer to the street) and record that reading. Then test an indoor faucet after the regulator. The indoor reading should be lower. Ideally around 50 PSI, even if the street pressure sits higher. If both readings match and exceed 60 PSI, your regulator either failed or isn’t installed.
When readings throughout your home run low but municipal pressure is fine, the regulator might be set too conservatively or clogged with sediment. That adjustment screw on top lets you increase pressure. Turn it clockwise in small increments, then retest. Target approximately 50 PSI. If adjusting does nothing or if the regulator leaks, replacement is needed.
Regulators fail without warning. A perfectly functioning valve can suddenly stick open, flooding your home with excessive street pressure. Check your regulator during annual pressure testing, even when everything seems fine.
When to Measure Water Pressure for Most Accurate Results

Time of day dramatically affects what your pressure gauge reads, especially on municipal water systems. Test only during afternoon off peak hours and you’ll miss the low pressure reality your family experiences during morning showers.
Test pressure during these different scenarios:
Early morning peak hours (7 to 8am) when neighborhood demand hits maximum
Midday off peak (10am to 2pm) when pressure usually runs highest
Evening demand times (5 to 7pm) during dinner prep and after work usage
Weekend versus weekday to catch usage pattern differences
Summer versus winter as outdoor irrigation affects supply
During versus after irrigation cycles if you have automatic sprinklers
Test at minimum twice. Once during peak demand and once during off peak. The gap between these readings shows how municipal supply fluctuates under load. A 10 PSI drop during peak hours is common. Larger swings suggest infrastructure problems you can report to your water utility.
Annual testing catches developing problems before they cause damage. Mark a calendar reminder to test every spring as part of routine home maintenance. If you notice sudden changes (shower pressure dropping, faucets sputtering) test immediately rather than waiting for your annual check.
Troubleshooting Water Pressure Issues and Solutions by Pressure Range
Your test results point directly to specific problems and solutions. Readings outside the 40 to 60 PSI range need attention. The further from ideal, the more urgent the fix.
Critically Low Pressure (Below 30 PSI)
Readings below 30 PSI likely mean you have a leak somewhere in the system. This isn’t a “wait and see” situation.
Test multiple fixtures throughout your home. If every location shows critically low pressure, the problem sits near your water main entry point. Possibly a leak on your side of the meter or a failing municipal connection. If only certain areas read low, you’ve isolated the leak to that section of plumbing.
This is when you need professional leak detection and repair. A hidden leak won’t fix itself. The water damage accumulating behind walls or under floors far exceeds the cost of proper detection and repair.
Low Pressure Issues (30 to 40 PSI)
Start by determining whether you have whole house low pressure or localized problems. Testing at multiple points shows the pattern. Whole house issues trace back to supply or pressure regulator problems. Localized low pressure points to restrictions in specific pipe runs or fixtures.
Common solutions, from simplest to most involved:
Clean aerators and shower heads every few months with a vinegar and baking soda solution to dissolve limescale buildup that chokes flow.
Check shut off valves under sinks and behind toilets. A partially closed valve mimics system wide pressure loss.
Test during different hours to rule out peak time demand (7 to 8am) as the cause.
Flush water heater annually to clear sediment that restricts hot water flow.
Inspect for narrow pipes in older properties where 1/2 inch supply lines can’t deliver adequate flow.
Adjust existing pressure regulators to approximately 50 PSI using the screw adjustment on top.
Address pipe blockages from limescale, dirt, rust, or ice depending on your water quality and climate.
Install a booster pump for persistent municipal supply issues where adjustment and cleaning don’t resolve low pressure.
Cleaning fixtures and checking valves qualifies as DIY appropriate. Pipe replacement, pressure regulator adjustment beyond simple screw turns, and booster pump installation need a licensed plumber. Don’t guess on regulator adjustments. Over correction into high pressure territory creates new problems.
High and Excessive Pressure (Above 60 PSI)
Pressure between 60 and 80 PSI slowly damages your plumbing. Above 80 PSI, you’re risking catastrophic failure. The difference between chronic wear and sudden rupture.
Warning signs of dangerous high pressure include banging sounds in pipes (called water hammer), toilets that run continuously for no clear reason, faucets that drip even when fully closed, and running out of hot water faster than normal. These symptoms mean pressure is already harming your system. High pressure shortens the lifespan of fixtures and appliances, stresses connection points, and dramatically increases the risk of supply line blowouts. Especially the flexible lines running to your washing machine and dishwasher.
Uncontrolled high pressure causes leaks at connection points, premature water heater failure, and appliance damage that leads to extensive water damage inside walls and floors. The force literally pushes connections apart over time.
The primary solution is installing a pressure regulator on your water main or adjusting an existing one. Target a maximum of 75 PSI restriction. If you already have a regulator and pressure runs high, it has failed. Regulators don’t last forever. Internal components wear out, diaphragms crack, and springs lose tension. Regular testing catches this before the failure causes damage.
Address high pressure immediately. This isn’t a maintenance task to postpone. Call a professional plumber for pressure regulator installation or valve replacement. The installation cost is minimal compared to replacing burst supply lines, water damaged drywall, or appliances killed by excessive pressure.
Monitor performance after implementing any solution. Retest one week later, then again after one month. If pressure issues return, you’ve treated a symptom rather than the root cause. Well water systems need additional attention to pressure tank maintenance. Checking air charge and inspecting the bladder prevents pressure swings.
Safety Precautions and Best Practices During Water Pressure Measurement

Proper preparation prevents measurement errors and protects your plumbing during testing. Rushing through setup gives unreliable readings or damages equipment.
Follow these safety practices:
Turn off all water using appliances and fixtures before attaching the gauge. Running appliances create pressure fluctuations that skew readings.
Hand tighten only when connecting the gauge to faucet threads. Brass fittings crack easily when forced with pliers or wrenches.
Check for existing leaks at the test location before pressurizing. Adding a gauge to a compromised connection can worsen the leak.
Avoid over tightening connections even when you’re concerned about leaks. The rubber gasket seals properly with hand pressure alone.
Ensure complete faucet closure after finishing your test before removing the gauge to prevent water spray.
Store the pressure gauge in a dry location protected from freezing to preserve the rubber gasket and internal mechanism.
Protect outdoor faucet threads by checking for corrosion or damage before threading on the gauge. If threads look rough, wrap them with Teflon tape once clockwise to prevent cross threading. The tape fills minor imperfections and helps create a better seal.
Recognize when your measurement reveals immediate action items versus situations you can monitor. Readings above 80 PSI or below 30 PSI need professional attention now, not next month. Readings slightly outside the ideal range (say 38 PSI or 65 PSI) warrant monitoring and adjustment but don’t constitute emergencies. Trust what the gauge tells you, then respond proportionally.
Cost and Time Expectations for Home Water Pressure Testing

A single point pressure test takes 10 to 15 minutes from gathering your equipment to recording the final reading. Comprehensive multi point testing throughout your home requires 30 to 45 minutes including walking between locations and documenting results.
Equipment costs run minimal. A basic analog pressure gauge sells for $10 to $15 at any hardware store. Mid range brass gauges with better durability cost $15 to $25. Digital gauges with backlit displays and memory functions run $25 to $40 but aren’t necessary for straightforward home testing. Thread adapters for non standard faucets add $5 to $10 if your outdoor faucet doesn’t accept standard hose threading.
Professional plumber inspection services charge $75 to $150 for comprehensive pressure testing, usually included as part of broader plumbing system evaluation. That cost makes sense if you need diagnostic expertise to isolate complex problems or if you’re combining pressure testing with other plumbing work. For routine monitoring, DIY testing with a $15 gauge gives you the same data for a fraction of the price.
Testing water pressure a few times a year prevents plumbing damage and ensures proper water flow through your system. Catching pressure problems early (before a supply line bursts or your water heater fails) saves thousands in emergency repairs and water damage restoration. A $20 pressure gauge and 15 minutes twice annually represents excellent value when measured against the cost of fixing preventable failures. Regular testing fits naturally into preventative home maintenance checks that protect your home and avoid expensive surprises.
Final Words
Testing your home’s water pressure takes less than 15 minutes and costs under $30 for a basic gauge.
Learning how to measure water pressure at home gives you the information you need to protect your plumbing, keep appliances running smoothly, and catch problems before they turn into expensive repairs.
Check your pressure a couple times a year. It’s one of the easiest ways to stay ahead of leaks, worn fixtures, and potential water damage.
If your readings fall outside the 40-60 PSI range or you’re seeing pressure that won’t stabilize, we’re here to help you figure out what’s going on and get it fixed right.
FAQ
How can I check the water pressure in my house?
You can check the water pressure in your house by attaching a pressure gauge to an outdoor faucet or hose bib. Turn off all water fixtures, screw the gauge onto the faucet by hand, open the valve completely, and read the PSI measurement displayed on the gauge.
What is the normal water pressure for a house?
The normal water pressure for a house ranges from 40 to 60 PSI, with 45 to 55 PSI being the preferred range. Readings below 40 PSI indicate low pressure issues, while anything above 60 PSI can stress fixtures and appliances, requiring corrective action.
How to tell if water pressure is low?
You can tell if water pressure is low when showers feel weak, faucets produce thin streams, washing machines fill slowly, or multiple fixtures struggle simultaneously. Testing with a pressure gauge will confirm low pressure if readings fall below 40 PSI.
How do I adjust my water pressure in my house?
You adjust your water pressure in your house by locating the pressure regulator valve near your water main and turning the adjustment screw on top. Turning clockwise increases pressure while counterclockwise decreases it, targeting around 50 PSI for optimal performance.
What tools do I need to measure water pressure at home?
To measure water pressure at home, you need a basic pressure gauge with female hose threads that reads 0-300 PSI. Optional items include thread adapters for different faucet types, Teflon tape for secure connections, and a notepad for recording results.
Where should I test water pressure in my home?
You should test water pressure at the outdoor faucet closest to your water meter for municipal systems or near the pressure tank for well systems. Testing at multiple locations including basement sinks, washing machine hookups, and upper floor bathrooms reveals system-wide versus localized issues.
What does a pressure reading below 30 PSI mean?
A pressure reading below 30 PSI means you likely have a leak somewhere in your plumbing system requiring immediate attention. Test multiple fixtures to isolate the problem location and contact a professional for leak detection and system inspection.
When is the best time to test water pressure?
The best time to test water pressure is at least twice: once during peak demand hours (7-8am) and once during off-peak times. This approach reveals your pressure range under different conditions and helps identify whether municipal supply fluctuations affect your home.
How often should I check my home’s water pressure?
You should check your home’s water pressure a few times a year as part of routine maintenance. Annual testing helps catch problems early, prevents plumbing damage, ensures proper fixtures and appliances function, and avoids expensive emergency repairs.
What causes high water pressure in a house?
High water pressure in a house is typically caused by municipal supply delivering excessive pressure or a failed pressure regulator valve. Warning signs include banging pipes, constantly running toilets, dripping faucets when closed, and rapid hot water depletion.
Can I test water pressure without a gauge?
You can test water pressure without a gauge using the jug method. Turn off all fixtures, position a 1-liter container under a fully-opened tap, time the fill, and calculate flow rate by multiplying volume by 10 if testing for 6 seconds to estimate liters per minute.
What is a water pressure regulator and do I need one?
A water pressure regulator is a valve that controls maximum flow from the municipal supply to protect your plumbing system. You need one if your pressure exceeds 60-80 PSI, as uncontrolled high pressure damages pipe connections, water heaters, and appliances.
Why is pressure different on upper floors?
Pressure is different on upper floors because gravity reduces water pressure as it travels vertically through your plumbing system. A 10-15 PSI difference between your basement and second floor is normal and expected in multi-story homes.
How much does water pressure testing cost?
Water pressure testing costs $10-30 for basic equipment if you do it yourself, while professional plumber inspection services run $75-150. The minimal investment in a gauge and 10-15 minutes of testing time can prevent expensive repairs by catching problems early.
What should I do if my pressure is above 80 PSI?
If your pressure is above 80 PSI, you should immediately install or adjust a pressure regulator to restrict maximum flow to 75 PSI. Excessive pressure increases risk of supply line blowouts, connection failures, and extensive water damage requiring urgent professional attention.