
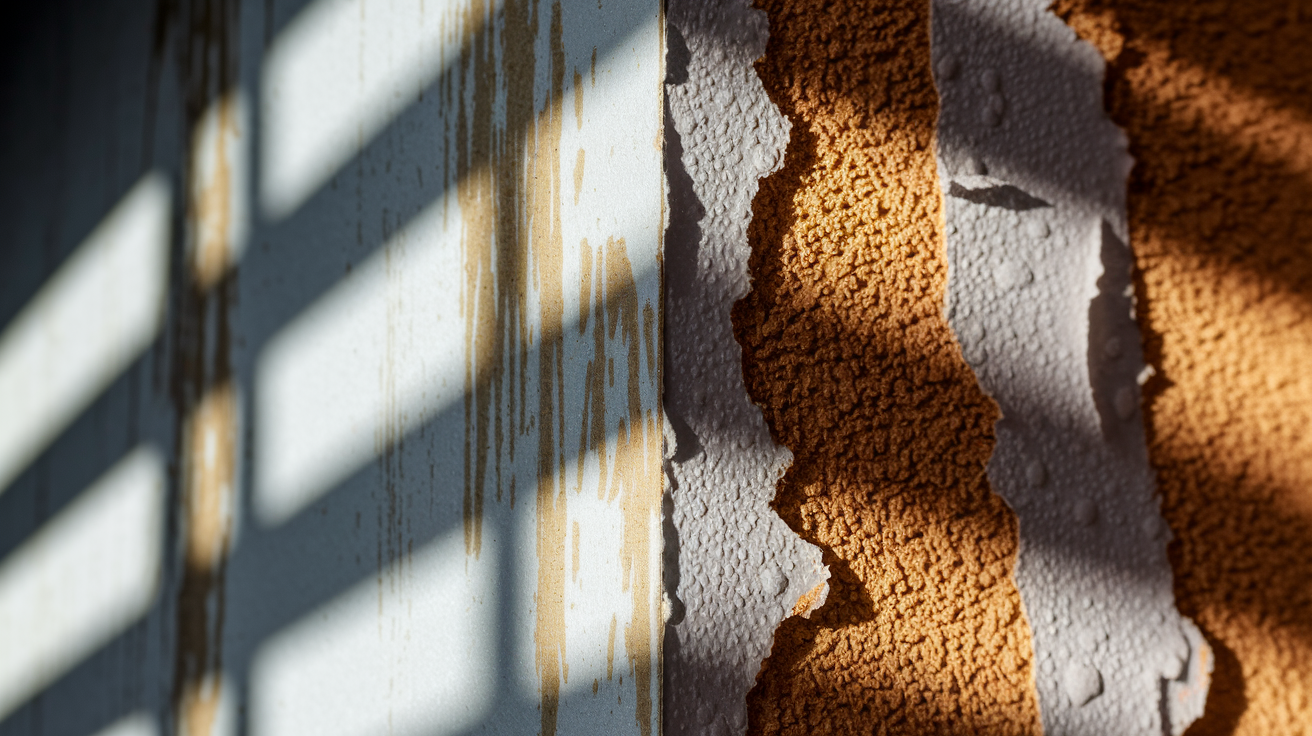
You know that soft, squishy feeling when you press a water damaged corner and your finger sinks right in? That’s your drywall telling you it needs help fast. Most people waste days trying to patch corners that should’ve been replaced from the start, or worse, they seal active moisture inside and create a perfect mold factory. The key is knowing whether you’re dealing with surface staining you can fix in an afternoon or structural damage that needs actual replacement. Here’s how to tell the difference and get it done right.
Assessing Water Damage Severity in Drywall Corners
You need to assess the damage properly or you’ll waste time patching corners that should’ve been replaced. Worse, you might seal active moisture inside the wall.
Surface damage and structural compromise aren’t the same thing. Surface damage shows up as light staining or minor paper peeling. Press the corner and it feels solid. Structural compromise is different. Press the corner and your finger sinks in like damp cardboard. The gypsum core feels soft or spongy instead of firm. You might see the paper face separating from the gypsum underneath, lifting away in sheets. Staining patterns tell a story too. Fresh water damage usually shows darker at the source and fades outward. Old damage looks brown or yellow with crisp edges.
Corner locations make certain leak sources more likely. Exterior corners near the roofline often point to roof flashing problems or ice dam damage. Corners below bathrooms suggest plumbing leaks or shower pan failures. Inside corners where walls meet ceilings can indicate HVAC condensation drip or pipe sweating behind the wall. Window corners usually mean failed seals or missing caulk.
Any repair will fail if active moisture remains. Confirming the area is fully dry takes patience but saves the entire project. Most corners need 48 to 72 hours after the leak stops, depending on temperature and humidity. A moisture meter removes the guesswork.
Warning signs that indicate replacement, not patching:
- Moisture meter readings above 17% after proper drying time
- Active mold growth (black, green, or white fuzzy patches)
- Visible structural bowing or sagging where the corner pulls away from framing
- Extensive cardboard separation (paper face detached from gypsum core over large areas)
- Musty or sour odors that persist after drying
- Bulging or sagging corners that look swollen or deformed
- Soft spots that don’t spring back when pressed (permanent compression damage)
- Dark brown discoloration extending 12 inches or more beyond the corner itself
Drying and Mold Safety Protocol for Damaged Corners

Thorough drying is critical before repair begins. It prevents mold growth and ensures joint compound actually sticks instead of peeling off weeks later.
Set up air circulation properly. Position fans to move air across the damaged area, not directly at it. Blowing air straight at wet drywall can drive moisture deeper into the wall cavity. Better to set up airflow that pulls moisture away from the surface. Place one fan pointing toward the corner from about six feet away. If possible, position another to pull air away from the area. In humid climates or during damp seasons, add a dehumidifier in the room. It removes moisture from the air that fans alone just recirculate. Keep windows closed while dehumidifiers run.
Mold scares people, and that’s understandable. Small amounts of surface mold on dried drywall aren’t an automatic health crisis for most people, but they do need to be addressed before sealing them behind joint compound. The difference between manageable and serious is mostly about size and what’s growing.
The EPA’s guideline is straightforward. Mold areas smaller than 10 square feet can be handled by homeowners using proper safety protocols. Beyond that size, or if you’re dealing with sewage contaminated water, professional remediation makes sense. For small mold remediation, wear an N95 respirator, not a basic dust mask. Disposable nitrile gloves protect your hands. Seal off the work area from the rest of the house using plastic sheeting and tape. Scrub visible mold with detergent and water, let it dry completely, then apply a fungicide spray designed for drywall. Let that dry too. Put all contaminated materials, including cleaning rags and gloves, into sealed plastic bags before disposal. This keeps spores from spreading through your house during cleanup.
Target moisture levels below 17% before beginning repair. Most corners reach safe levels in three to five days with proper ventilation. Cold or humid conditions extend that timeline.
Essential Tools and Materials for Corner Repair
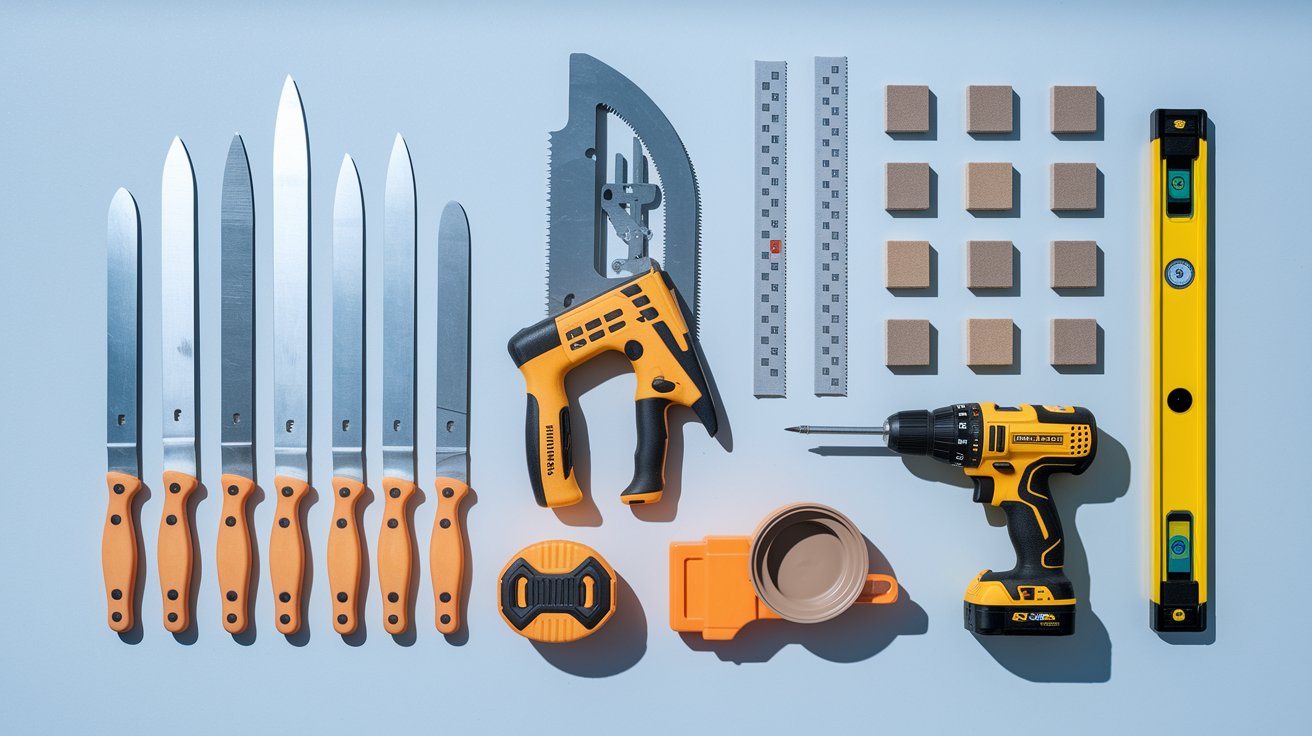
Having proper tools and materials assembled beforehand prevents mid project delays and improves results. Nothing’s worse than realizing you need a specific knife width when compound is already mixed.
The difference between patching materials and replacement materials matters. Minor damage limited to the corner surface needs patching supplies: joint compound, corner bead, and finishing tools. Extensive damage that goes through the drywall paper into the gypsum core requires replacement materials: new drywall pieces, structural fasteners, and all the finishing supplies. Joint compound types include lightweight and all purpose versions. Lightweight compound sands easier but shrinks more during drying. All purpose compound is heavier, harder to sand, but more durable. Premixed compound stays workable longer and sands more smoothly than powder you mix yourself.
| Item | Type/Specification | Purpose | Selection Notes |
|---|---|---|---|
| Utility knife | Retractable with sharp blades | Scoring and cutting drywall paper | Keep extra blades on hand; dull blades tear instead of cut |
| Drywall saw | Jab saw or keyhole saw | Cutting out damaged sections | Pointed tip allows starting cuts without drilling pilot holes |
| Putty knife (small) | 6-inch flexible blade | Applying first compound coat and tight spaces | Flexible blade conforms to corner angles |
| Finishing knife (large) | 10-inch or 12-inch rigid blade | Feathering edges and finish coats | Wider blade creates smoother transitions beyond repair area |
| Sanding block | 120, 150, and 220-grit paper | Smoothing between coats and final finish | Use progressively finer grits; skipping creates visible scratches |
| Drill | Cordless with Phillips bit | Installing corner bead fasteners | Variable speed prevents overdriving screws |
| Measuring tape | 16-foot minimum | Measuring corner bead and replacement drywall | Locking mechanism helps with solo work |
| Level (4-foot) | Magnetic edges helpful | Checking corner bead alignment | Longer level catches alignment errors shorter ones miss |
| Drywall pieces | Match existing thickness (usually ½-inch) | Replacing damaged sections | Bring sample to store to confirm thickness match |
| Corner bead | Vinyl or composite for moisture areas | Reinforcing and straightening corners | Metal rusts in humid locations; vinyl and composite resist moisture |
| Joint compound | Premixed all-purpose or lightweight | Filling, coating, and finishing | Premixed offers better workability than powder mix |
| Primer and paint | Drywall primer plus matching paint | Sealing and finishing repair | Always prime first; compound absorbs paint differently than paper |
Removing Damaged Drywall and Old Corner Bead

Safety equipment and floor protection come first. Put on your dust mask and safety glasses before making any cuts. Lay drop cloths to catch debris.
The scoring technique matters more than cutting power. Make multiple shallow passes with your utility knife instead of trying to cut through in one stroke. The first pass scores the paper surface. The second pass cuts deeper into the gypsum core. Three or four passes usually cut completely through. Cutting geometry affects how easily you can patch later. Straight lines and right angles are easier to work with than following the irregular edges of cracked or crumbled areas. Cut a clean rectangle or square around the damaged zone rather than trying to trace the exact damage shape.
Corner bead removal requires a specific sequence. First, locate every fastener holding the bead in place, usually spaced about eight inches apart. Remove each screw or nail. If the fasteners are painted over, scrape paint away to find the heads. Once all fasteners are out, gently pry the bead away from the corner. Work slowly. Pulling too hard damages surrounding drywall that’s still good. For water damaged material, disposal matters. Seal contaminated drywall pieces in plastic bags before taking them out. This prevents spreading mold spores or wet dust through your house.
Selecting and Installing Corner Bead for Water-Prone Areas
Choosing moisture appropriate materials for corners with water damage history prevents you from repairing the same spot twice.
Metal Corner Bead for High-Traffic Areas
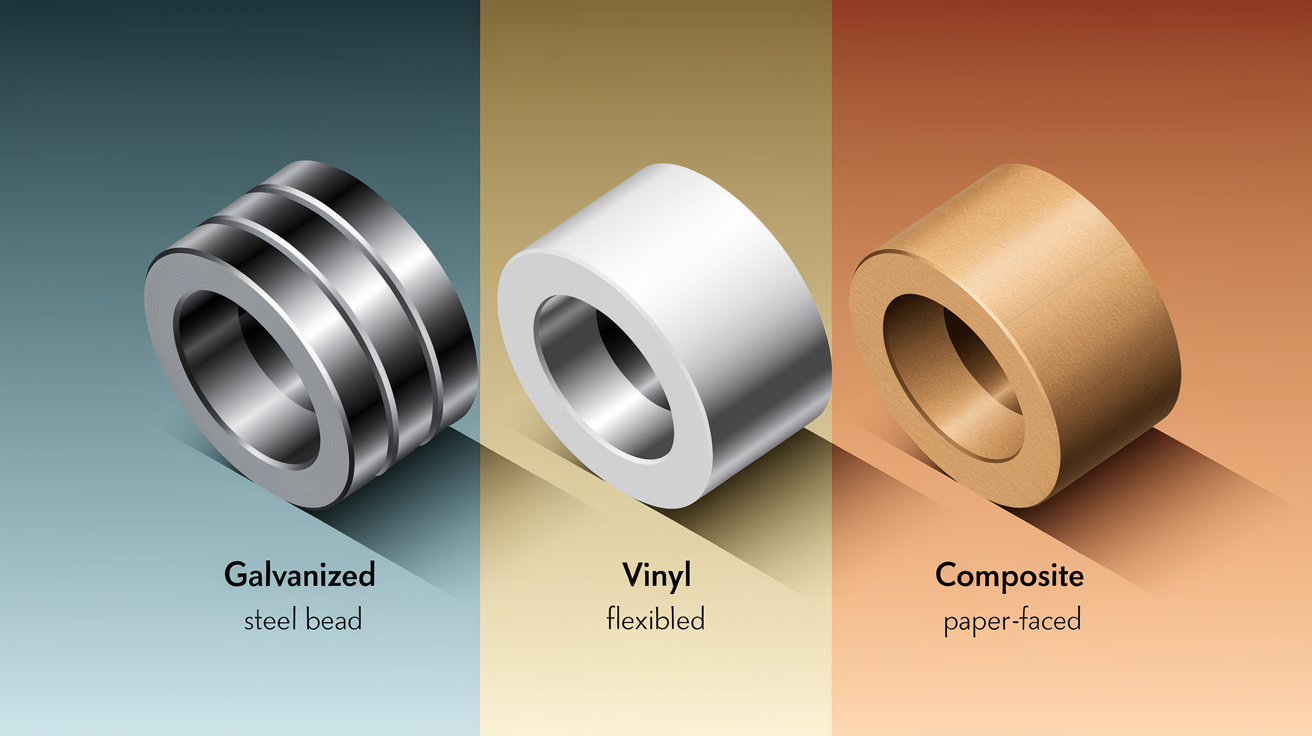
Metal corner bead offers superior durability and protection in locations that take regular impact. It creates crisp, razor sharp edges that hold up when furniture gets moved or kids bang toys against the wall. The metal nose is nearly impossible to dent once it’s buried in joint compound. But metal has one major drawback in water prone areas. It rusts. Even galvanized metal will eventually corrode when exposed to repeated moisture cycles. Best applications for metal bead include high traffic hallway corners, garage entryways, and commercial spaces where impact resistance matters more than moisture exposure.
Vinyl and Composite Corner Bead for Moisture-Prone Zones
Vinyl and composite beads resist rust completely. They’re made from plastic polymers or paper faced composite materials that moisture can’t corrode. Vinyl bead flexes slightly on impact instead of denting, then springs back to shape. Composite beads combine paper facing with a rigid core, making them easy to embed in joint compound. Installation is simpler than metal because you can cut them with scissors or a utility knife instead of tin snips. Ideal locations include bathroom corners near showers, basement corners where foundation dampness occurs, ceiling corners below roof penetrations, laundry room corners near washers and dryers, and any corner that previously suffered water damage.
Paper-Faced Corner Bead for Inside Corners
Inside corners where two walls meet or where walls meet ceilings sometimes need more reinforcement than paper tape alone provides. Paper faced corner bead gives inside corners extra strength, especially in areas with previous cracking. The paper face embeds in joint compound just like tape, but the rigid core behind it prevents the corner from flexing and cracking again. This works particularly well in corners where settling caused the original damage or where corners flex slightly when doors slam.
Proper bead alignment is critical because a crooked bead creates a permanently crooked corner. No amount of compound can fix a bead that’s not straight. Measure corner height precisely, then cut the bead about 1/8 inch shorter to prevent binding at top or bottom.
Installation steps for moisture-resistant corner bead:
- Measure the corner height from floor to ceiling (or damaged area length) and cut bead 1/8 inch shorter than the measurement
- Hold the bead against the corner and check alignment with a 4-foot level on both sides
- Start fastening at the center of the bead, placing the first screw or nail through the bead flange into the drywall
- Work outward toward both ends, alternating sides to prevent the bead from bowing
- Maintain 8 inch spacing between fasteners, keeping them about 1/2 inch from the corner edge
- Verify the bead sits flush against the drywall surface with no gaps (gaps telegraph through compound)
- Run your level along the corner nose one final time to confirm it’s straight before applying compound
- For composite beads installed with compound, apply compound to both wall surfaces first, press bead into place centered on the corner, then smooth excess compound away with your taping knife
Corner type and moisture risk determine which bead works best. Outside corners in water prone areas need vinyl or composite. Inside corners with cracking history benefit from paper faced bead. High traffic dry areas can use metal.
Applying Joint Compound to Repaired Corners

Multiple thin coats always outperform thick single coats. Thick compound cracks as it dries and shrinks. Thin coats dry evenly and build smooth surfaces.
Proper knife angle changes with each coat. Hold your 6 inch putty knife at approximately 45 degrees for the first embedding coat. This angle presses compound firmly into the corner and against the bead. For the second and third coats, flatten your knife angle progressively, closer to 20 or 30 degrees. The flatter angle spreads compound wider and feathers edges more gradually. Feathering technique means each coat extends slightly farther than the previous one, typically six inches beyond the corner for the first coat and up to twelve inches for final coats. The gradual thinning makes the repair area disappear into the surrounding wall.
| Coat Number | Knife Width | Coverage Area | Purpose | Drying Time |
|---|---|---|---|---|
| First (embedding coat) | 6-inch putty knife | 6 inches beyond corner on each side | Fill corner gap and embed bead in compound | 24 hours minimum |
| Second (fill coat) | 8-inch or 10-inch knife | 8 to 10 inches beyond corner on each side | Build up level with surrounding surface, fill fastener dimples | 24 hours minimum |
| Third (finish coat) | 10-inch or 12-inch knife | 10 to 12 inches beyond corner on each side | Create smooth transition with feathered edges | 24 hours minimum |
| Fourth (optional skim coat) | 10-inch or 12-inch knife | 12 inches beyond corner on each side | Final smoothing if imperfections remain after third coat | 24 hours before final sanding |
Sanding Techniques for Smooth Drywall Corner Repairs

Grit progression matters because skipping steps creates visible scratches under paint. Start with 120 grit sandpaper to knock down high ridges and shape the general profile. This coarser grit removes material quickly but leaves noticeable scratches. Move to 150 grit for general smoothing. This middle grit removes the scratches from 120 grit while continuing to level the surface. Finish with 220 grit for final smoothing. This fine grit creates a surface smooth enough that paint won’t highlight imperfections. Skipping straight from 120 to 220 looks fine until primer goes on, then every scratch shows.
Proper lighting reveals imperfections that shadows hide. Set up a work light positioned to create raking light across the corner. Raking light means holding the light close to the wall surface at a sharp angle so it highlights even tiny ridges and valleys. Overhead room lighting hides these same flaws. Check your work from multiple angles as you sand.
Dust control keeps your house cleaner and sometimes works better for touch ups. Dry sanding with sandpaper creates clouds of fine white dust that settles everywhere. Wear your dust mask. A damp sponge technique works as an alternative for small areas or final smoothing. Wet a sponge, wring it nearly dry, then gently rub the compound surface in circular motions. The slightly damp surface smooths without creating airborne dust. This works best for minor imperfections. For heavy sanding, you still need traditional dry sandpaper and proper respiratory protection.
Texture Matching for Invisible Corner Repairs

Smooth repairs stand out on textured walls like patches of different paint color. Identifying your existing texture type before repair determines which tools you’ll need to match it afterward.
Practice technique saves you from learning on your actual repair. Grab a piece of scrap cardboard or an inconspicuous closet wall. Apply your texture material using the method you plan to use on the corner. Let it dry completely. Does it match? The practice run shows you if you need more or less material, different tool pressure, or a different application pattern.
Common wall textures and how to match them:
- Smooth finish (no texture added): Simply sand the final coat of joint compound perfectly smooth with 220 grit paper
- Orange peel texture: Use a spray texture gun or roll diluted joint compound with a paint roller, creating small bumps across the surface
- Knockdown texture: Spray or trowel compound onto the surface, wait 5 to 10 minutes for partial drying, then lightly flatten the peaks with a drywall knife dragged across the surface
- Skip trowel texture: Load joint compound onto a trowel and apply in random sweeping motions, leaving irregular raised areas that mimic hand troweled plaster
- Stomp or crow’s foot texture: Press a texture brush, sponge, or special stomp tool into wet joint compound to create repeating patterns
Priming and Painting Repaired Drywall Corners
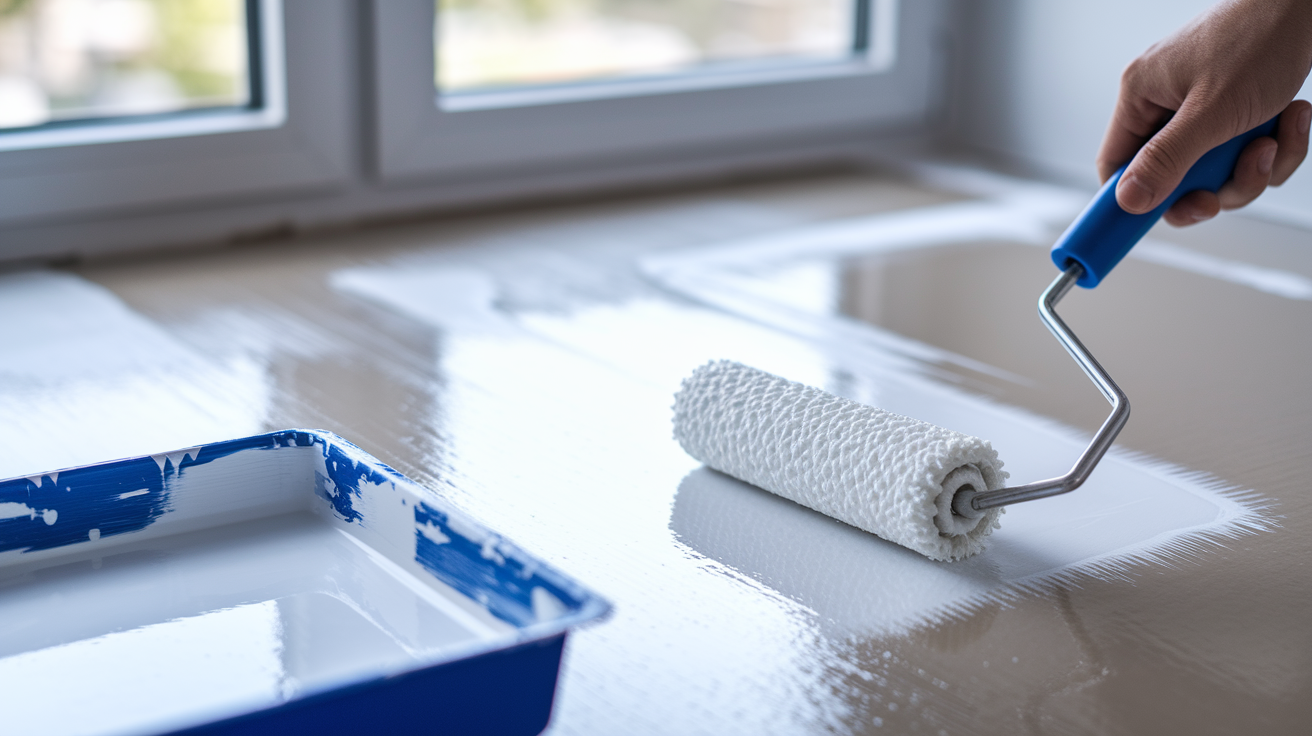
Primer is mandatory, not optional. Joint compound is porous and absorbs paint like a sponge. Drywall paper isn’t. When you skip primer and go straight to paint, the repaired areas look dull compared to surrounding wall. This difference is called flashing.
Paint matching requires attention to both color and sheen. Bring a paint chip from your wall to the paint retailer if you have one. Many homes used builder grade paint that’s tough to match precisely without a sample. Test your matched paint in an inconspicuous corner first. Paint appearance changes based on lighting conditions, so check it in both daylight and evening artificial light before committing to the visible repair. Sheen matching matters as much as color. Flat paint next to satin sheen stands out even when the colors match perfectly.
Application technique affects final appearance. Feather your paint beyond the repair area instead of stopping at the compound edges. Use the same application method as the original wall used. If the wall was rollered, roller your repair. If it was brushed, brush your repair. Different application tools leave different textures that show through the final coat. Apply multiple thin coats of paint rather than one heavy coat. Thin coats dry evenly without runs or drips and build color gradually for better blending.
Cost Breakdown for DIY Water-Damaged Corner Repair

DIY repair runs significantly less than professional services while acknowledging the tool investment if you’re starting from nothing.
| Item Category | Estimated Cost Range | Notes |
|---|---|---|
| Essential materials | $15 to $40 | Joint compound, corner bead, sandpaper, primer (paint separate if not already owned) |
| Basic tools if purchasing | $30 to $60 | Putty knives, utility knife, sanding block, drop cloth (many homeowners already own these) |
| Optional specialty tools | $20 to $50 | 4-foot level, drywall saw, moisture meter (helpful but not strictly required for simple repairs) |
| Primer and paint | $15 to $35 | Quart of primer and quart of matched paint sufficient for most corner repairs |
| Total DIY cost | $80 to $185 | Higher end assumes purchasing all tools; lower end assumes owning basic tools already |
| Professional repair comparison | $200 to $600 | Varies significantly based on damage extent, ceiling height, complexity, and regional labor rates |
Timeline Expectations for Corner Repair Projects
Day by day timeline helps set realistic expectations. Day 1 covers demolition and corner bead installation. You’ll remove damaged material, install new bead, and apply the first embedding coat of compound. Days 2 through 4 involve applying additional coats of joint compound with 24 hour drying periods between each coat. Most repairs need three coats total. Day 5 is for sanding, applying matching texture if needed, and priming. Day 6 handles final painting.
Several factors extend this basic timeline. Humidity slows drying significantly. Compound that dries in 24 hours during dry weather might need 36 hours in humid conditions. Large repairs often require an extra coat of compound to build sufficient thickness. Texture matching sometimes needs experimentation if you’ve never matched your specific texture before. Paint needs cure time before you can consider the project truly complete. Most paints dry to the touch in a few hours but need several days to fully cure and harden. Avoid scrubbing or heavy contact with the repaired corner for at least a week after final painting.
Common Mistakes That Cause Corner Repair Failures
Corner repairs fail more often from technique errors than lack of skill. Knowing what goes wrong helps you avoid repeating common problems.
Specific mistakes and their consequences:
- Skipping primer leads to flashing where repaired areas look duller than surrounding walls, and paint absorbs unevenly creating blotchy appearance
- Applying compound too thick causes cracking as the thick layer dries and shrinks, plus creates excessive sanding work to level the surface
- Not feathering edges leaves visible ridges where compound meets original wall, creating lines you can see and feel even under paint
- Insufficient drying time between coats causes delamination where layers separate, and cracking as trapped moisture tries to escape
- Improper corner bead alignment creates a permanently crooked corner that no amount of compound will straighten
- Repairing before the area is fully dry leads to recurring water damage, mold growth under new compound, and peeling that requires redoing the entire repair
- Using wrong sandpaper grit leaves visible scratches that telegraph through primer and paint
- Skipping texture matching makes repairs obvious as smooth patches on textured walls stand out immediately
- Inadequate lighting during finishing means you miss imperfections until after painting when they’re much harder to fix
Patience and proper technique matter more than expensive tools or premium products. A homeowner using basic tools carefully gets better results than someone rushing with professional equipment.
When to Call a Professional for Corner Water Damage
Most corner repairs are DIY friendly but certain conditions require professional expertise and specialized equipment. Knowing the line between manageable and over your head saves time and prevents making damage worse.
Insurance considerations sometimes determine who does the work. Some policies require licensed contractors for water damage repairs to maintain coverage. Others need detailed documentation and estimates before authorizing work. Check your policy requirements before starting repairs if you’re planning to file a claim. Keep receipts for all materials and take photos at every stage of the repair process.
Situations requiring professional help:
- Mold growth exceeding 10 square feet indicates widespread contamination needing professional remediation equipment and containment procedures
- Structural framing damage behind the drywall where studs or ceiling joists show rot, warping, or weakness
- Active leaks of unknown origin require diagnostic tools to trace water paths through walls and identify hidden sources
- Recurring moisture problems that reappear despite repairs suggest underlying issues like poor drainage, foundation problems, or building envelope failures
- Ceiling corners on second story or higher involve fall risks and may require scaffolding for safe access
- Corners near electrical boxes with water exposure create shock hazards and often need electrical inspection and repair before drywall work
- Extensive damage affecting multiple wall to ceiling intersections or entire rooms exceeds DIY scope for materials handling and finishing consistency
Preventing Future Water Damage in Drywall Corners
Prevention protects both the repair work you just completed and your home’s overall condition. Most water damage is preventable with regular attention.
Regular visual inspections catch small problems before they become expensive repairs. Check previously damaged corners quarterly, especially after heavy rain or temperature extremes. Look for new staining, soft spots, or paint bubbling. Catching moisture intrusion early means simple fixes instead of full reconstruction.
Prevention strategies that protect drywall corners:
- Maintain roof flashing and gutters by cleaning debris twice yearly and checking flashing seals around chimneys, vents, and roof to wall transitions
- Seal window and door perimeters with quality caulk, replacing it every three to five years as it cracks or pulls away
- Insulate pipes in exterior walls to prevent condensation dripping inside wall cavities during temperature swings
- Control indoor humidity below 50 percent using exhaust fans, dehumidifiers, and proper ventilation
- Ensure proper bathroom and kitchen ventilation by running exhaust fans during showers and cooking, venting to exterior (not attic)
- Address plumbing leaks immediately rather than waiting, since even small drips cause significant damage over weeks
- Install water leak detectors in vulnerable areas like under sinks, near water heaters, and below washing machines
- Maintain caulk and grout in bathrooms by recaulking tub and shower edges annually and regrouting tile when gaps appear
Final Words
Water-damaged drywall corners look challenging, but the repair follows a clear path: assess the damage honestly, dry everything completely, remove what’s compromised, and rebuild in careful layers.
The difference between a repair that lasts and one that fails comes down to patience between coats and fixing the moisture source first.
Take your time with drying, use the right corner bead for your location, and don’t skip primer.
When you learn how to fix water damaged drywall corner problems correctly, you’re protecting your home and preventing bigger headaches down the road.
FAQ
How do you repair a water damaged drywall corner?
You repair a water damaged drywall corner by first stopping the leak and drying the area completely, then removing damaged sections, installing appropriate corner bead, applying multiple thin coats of joint compound, sanding smooth, matching texture, and priming before painting.
Can water damaged drywall be repaired?
Water damaged drywall can be repaired when damage is limited to surface staining or minor paper delamination, but sections with soft spots, structural sagging, active mold growth, or extensive cardboard separation require complete removal and replacement rather than patching.
How do you fix a chipped corner of a wall?
You fix a chipped corner of a wall by cleaning loose material, applying joint compound to fill the damaged area, feathering edges outward approximately six inches, allowing 24 hours drying time, sanding smooth with 220-grit paper, then priming and painting to match.
How do you cover bad drywall corners?
You cover bad drywall corners by installing new corner bead over the damaged area if structure is sound, or by cutting out compromised sections and replacing with fresh drywall and properly aligned bead, then applying multiple compound coats for seamless blending.
How long does drywall corner repair take?
Drywall corner repair takes three to five days for most projects, including initial drying verification, bead installation, multiple compound coats with 24-hour drying between applications, sanding, texture matching, priming, and final paint application with proper cure time.
What tools are needed for corner drywall repair?
Corner drywall repair needs a utility knife, drywall saw, 6-inch and 10-inch putty knives, sanding block with various grits, measuring tape, level, drill, appropriate corner bead, premixed joint compound, primer, and matching paint for complete restoration.
When should you replace drywall corner instead of patching?
You should replace drywall corner instead of patching when moisture readings exceed 17 percent, soft spots don’t spring back when pressed, dark brown discoloration extends beyond the corner, structural bowing appears, or musty odors indicate hidden mold growth.
What type of corner bead is best for moisture prone areas?
Vinyl and composite corner beads are best for moisture prone areas because they resist rust completely, maintain flexibility in humid conditions, and perform reliably in bathrooms, basements, and ceiling corners near roof penetrations where metal beads would corrode.
How many coats of joint compound do corners need?
Corners need three to four coats of joint compound for professional results, starting with a 6-inch embedding coat, followed by progressively wider fill and finish coats extending 8 to 12 inches from the corner, with 24 hours drying between applications.
Do you need primer before painting repaired drywall?
You need primer before painting repaired drywall even when using paint-and-primer products because joint compound absorbs paint differently than drywall paper, causing visible flashing and uneven sheen without proper sealing from dedicated drywall primer.
How do you prevent water damage in drywall corners?
You prevent water damage in drywall corners by maintaining roof flashing and gutters, sealing window perimeters, controlling indoor humidity below 50 percent, ensuring proper ventilation, addressing plumbing leaks immediately, and conducting quarterly visual inspections of vulnerable areas.
What moisture level is safe before repairing drywall?
A moisture level below 17 percent is safe before repairing drywall, typically requiring 48 to 72 hours of drying after the leak stops, confirmed with a moisture meter, and supplemented with fans and dehumidifiers in humid climates.