
You turn on the shower, and the water barely trickles out. Frustrating. Low water pressure makes everything harder, from rinsing shampoo to filling a pot for dinner. But here’s the good part: most pressure problems have straightforward fixes you can handle yourself. We’re talking clogged aerators, partially closed valves, or a simple regulator adjustment. This guide walks you through the most common causes and exactly how to fix them, step by step, so you can get your water flowing strong again.
Quick Fixes: Cleaning Aerators and Showerheads to Restore Water Pressure

If you’re dealing with weak flow from a specific faucet or shower, there’s a good chance the problem is sitting right at the end of the fixture. A clogged aerator or showerhead packed with mineral deposits. These small screens and spray plates catch sediment, rust, and calcium buildup over time, especially if you have hard water.
Start with the faucet aerator. That’s the small screened piece screwed onto the tip of your faucet spout. Try unscrewing it by hand first, turning counterclockwise. If it won’t budge, wrap a cloth around it and use adjustable pliers to grip it gently. Before you remove it, take a quick look at how it’s oriented so you can put it back the same way. Once it’s off, you’ll probably see white or orange crusty buildup on the screen. That’s limestone and rust restricting your water flow.
Drop the aerator into a small bowl filled with white vinegar and let it soak for at least two to four hours. For heavy buildup, leave it overnight. After soaking, scrub the screen and interior threads with an old toothbrush to knock loose any remaining deposits. Rinse it under running water, then screw it back onto the faucet. Turn the water on to see if flow has improved. If the aerator is cracked, corroded beyond cleaning, or still clogged after soaking, replace it. Replacement aerators cost a few dollars at any hardware store. Just bring the old one to match the size and thread type.
Tools and materials you’ll need:
- Adjustable wrench
- White vinegar (at least one cup)
- Small bowl for soaking
- Old toothbrush for scrubbing
- Replacement aerators if originals are damaged
- Cloth or plumber’s tape to protect fixture finish when using pliers
For showerheads, the process is nearly identical. Unscrew the showerhead from the shower arm by turning counterclockwise, soak it in vinegar, scrub with a toothbrush, and reinstall. If you’d rather not remove it, fill a plastic bag with vinegar, pull it up around the showerhead so the spray plate is submerged, and secure it with a rubber band or twist tie. Let it sit for several hours, then remove the bag and run hot water to flush out loosened deposits. Replace the showerhead entirely if you see cracks in the housing, worn rubber gaskets that leak, or buildup so severe that soaking and scrubbing don’t bring back normal pressure.
Checking and Adjusting Your Home’s Water Valves and Pressure Regulator
When low water pressure affects every faucet, shower, and appliance in your home, the problem often traces back to valves that control water entering your plumbing system. Partially closed shut-off valves are surprisingly common, especially in homes that recently had plumbing work done or were just purchased. Someone turned a valve partway during a repair and never fully reopened it.
| Valve Type | Fully Open Position | Common Location |
|---|---|---|
| Ball Valve | Handle parallel to pipe | Main shut-off where city line enters home |
| Gate Valve | Wheel turned fully counterclockwise | Water meter location near street or basement |
Your home has two main shut-off points to check. The first is the water meter valve, usually located near the property line, in a basement utility area, or in an exterior meter box. The second is the main shut-off valve where the municipal water line enters your house. Often in a basement, crawl space, or utility closet. Look for ball valves with a lever-style handle or gate valves with a round wheel handle. Ball valves should sit parallel to the pipe when fully open. If the handle is perpendicular or at an angle, turn it so it lines up with the pipe. Gate valves should turn counterclockwise with no resistance until they stop. If you feel resistance or can turn the wheel more, keep going until it won’t turn any further. Check both valves. A gate valve that’s only three-quarters open can cut your pressure noticeably, and the restriction worsens gradually as mineral deposits form around the partially closed valve disc.
Pressure regulators are bell-shaped or cylindrical devices installed on your main water line, usually near the shut-off valve. They step down high municipal pressure to a safe level for your home’s plumbing. When a regulator fails, it can stick in a reduced-pressure position or lose its calibration entirely. This causes whole-house low pressure that affects all fixtures equally. The symptoms develop over time as internal springs and diaphragms wear out. You might notice pressure dropping slowly over weeks or months, or you might wake up one day to weak flow throughout the house.
Some pressure regulators have an adjustment screw on top. If yours does, and you’ve already confirmed your current PSI with a pressure gauge, you can try a careful adjustment. Turn the screw clockwise in small quarter-turn increments to increase pressure. After each adjustment, close the valve, open a faucet to relieve pressure, then retest with your gauge. Make tiny changes. Over-tightening can push pressure too high and stress your pipes.
Call a professional plumber when your regulator doesn’t have an accessible adjustment screw, when the unit is older than 10 to 15 years, when adjustment doesn’t improve pressure, or when your gauge readings jump around wildly without explanation. A failing regulator’s internal components can’t be repaired. It needs replacement. This isn’t a DIY job for most homeowners because it involves cutting into the main water line, soldering or threading new fittings, and setting the correct output pressure. Regulators themselves cost $50 to $200 depending on size, but labor and proper installation typically bring the total to $300 to $500.
Diagnosing Your Water Pressure Problem: Fixture or Whole-House Issue

After you’ve cleaned aerators and checked obvious valves, and pressure still isn’t right, proper diagnosis helps you figure out whether you’re dealing with a clogged fixture or a bigger problem in your plumbing system. Normal residential water pressure should range between 40 and 80 PSI. Anything below 40 PSI makes everyday tasks like showering and dishwashing noticeably difficult.
Follow these steps to systematically test your fixtures and identify the pattern:
- Start with cold water at the kitchen sink. Let it run for 30 seconds and note the pressure.
- Check cold water at a bathroom faucet. Compare the flow to what you felt at the kitchen sink.
- Test the shower. Turn on cold water only and see if it matches the pressure you got at the faucets.
- Check an outdoor spigot or hose connection. Outdoor fixtures usually show true supply pressure since they connect directly to the main line.
- Repeat the process with hot water at each location. Kitchen sink, bathroom sink, shower.
What these results tell you: If only one fixture has low pressure, you’re dealing with a localized clog. Probably in that fixture’s aerator, showerhead, or internal valve cartridge. If cold water pressure is weak at every fixture throughout the house, the problem is in your supply line, main shut-off valves, pressure regulator, or pipes themselves. If hot water pressure is weak everywhere but cold water is fine, your water heater has a problem. Likely sediment buildup in the tank or a failing outlet valve.
Now test capacity. Turn on two or three faucets at the same time. Kitchen sink, bathroom sink, and shower all running together. If pressure drops noticeably when multiple fixtures run, your home’s pipes might be undersized for your current demand, or you might have a restriction somewhere in the main supply line. Homes built before 1960 often have smaller-diameter pipes that weren’t designed for modern water usage with multiple bathrooms, washing machines, and dishwashers running simultaneously. If pressure holds steady even with several fixtures running, that confirms your supply capacity is adequate. The problem is somewhere in the delivery system, not the volume of water available.
Testing Water Pressure with a Gauge: Measuring Your Home’s PSI

A water pressure gauge gives you an objective measurement that takes the guesswork out of diagnosing pressure problems. These gauges cost between $10 and $20 at any hardware store and screw onto a standard hose connection. Pick one with a dial that reads from 0 to at least 100 PSI.
Here’s how to test your home’s water pressure accurately:
- Locate an outdoor spigot or hose connection as close as possible to where your main water line enters the house. This gives you the truest reading of your system’s supply pressure.
- Make sure all water fixtures inside the house are turned off. No faucets running, no toilets refilling, no washing machine or dishwasher in a cycle.
- Screw the pressure gauge onto the outdoor spigot by hand until it’s snug. You don’t need tools, hand-tight is enough to get a seal.
- Open the spigot valve fully and let water flow into the gauge until the needle stops climbing. This usually takes just a few seconds.
Now read your number. The ideal range is 45 to 55 PSI. This gives you plenty of flow for showers and appliances without putting excessive stress on pipes and fixture connections. Readings between 40 and 80 PSI are generally acceptable, though you’ll notice weaker performance on the low end of that range, especially if you run multiple fixtures at once. If your gauge shows below 40 PSI, you have a problem that needs fixing. Pressure this low makes showers unsatisfying and appliances inefficient. Below 30 PSI is severe. Fixtures barely function, toilets may not refill properly, and washing machines take forever to fill. On the other end, readings above 80 PSI indicate dangerously high pressure that can damage water heaters, burst supply lines, cause leaks at fixture connections, and wear out appliance valves prematurely. High pressure needs immediate attention. Install or adjust a pressure regulator to bring it into the safe range.
Addressing Mineral Buildup and Sediment in Your Plumbing System

Mineral deposits accumulate gradually inside pipes, fixture connections, and water heater tanks, especially in areas with hard water that’s loaded with calcium and magnesium. Over the course of years, this buildup can shrink a pipe’s interior diameter from three-quarters of an inch down to a quarter inch or less. Like trying to drink a milkshake through a coffee stirrer.
You can usually tell when mineral buildup is your problem rather than a valve issue or leak. The pressure decline happens slowly over months or years, not suddenly overnight. Both hot and cold water are affected roughly equally, though hot water often shows more restriction because heat accelerates mineral precipitation. Older homes are more susceptible, particularly those built before 1970 with original galvanized steel pipes. When you first turn on a faucet, the water might run discolored for a few seconds before clearing. That’s loosened rust and sediment flushing out. You’ll find yourself cleaning aerators and showerheads more frequently because they clog faster than they used to.
For moderate buildup in accessible pipes, professional plumbers use several methods. Pipe snaking involves feeding a flexible auger through the line to scrape deposits off interior walls. Hydro-jetting uses high-pressure water, typically 3,000 to 4,000 PSI, to blast away mineral accumulation, grease, and sediment, essentially scouring the pipe interior clean. Chemical descaling agents can be applied in some cases, though this requires professional assessment to ensure the chemicals won’t damage pipe materials or create new problems. Water heater tanks need periodic flushing to remove sediment that settles at the bottom. This involves connecting a garden hose to the drain valve, running water out until it flows clear, then refilling the tank. Most manufacturers recommend flushing annually, but many homeowners go years without doing it.
Watch for these signs your system has significant mineral buildup:
- Water pressure that’s declined noticeably over the past year or two
- Discolored water when you first turn on faucets, especially in the morning
- Visible white, orange, or greenish scale on exposed pipes or inside aerators
- Aerators and shower screens that clog every few months even after cleaning
- Home is 30 years old or more with original plumbing that’s never been replaced
Eventually, severe buildup reaches a point where cleaning won’t restore proper flow. The pipe interior is too compromised and the structural integrity is questionable. That’s when repiping becomes the right long-term solution. Galvanized steel pipes with heavy internal corrosion need replacement, not patching. If your pipe’s interior diameter has narrowed by more than half due to mineral encrustation, cleaning provides only temporary improvement before buildup returns. Recurring clogs despite professional cleaning every year or two indicate pipes at the end of their useful life. Water heater tanks with compacted sediment layers that won’t flush out need replacement. At that point the tank’s capacity is reduced and the heating element is likely damaged. Age alone is a factor: homes with original plumbing that’s 40 years old or more usually benefit from replacement even if pressure seems adequate, because failure is increasingly likely and new leaks create expensive water damage.
Water Heater Issues Affecting Hot Water Pressure

When cold water flows normally but hot water comes out weak, you’re looking at a water heater problem, not an issue with your main plumbing system. Test this by turning on any faucet and comparing cold versus hot water flow. If cold is strong and hot is a trickle, the problem is in your water heating system.
Tank-style water heaters accumulate sediment at the bottom over time. This sediment is mostly calcium carbonate, magnesium deposits, and sand or grit that enters through the municipal supply or well water. Every time the water heater cycles and heats water, these minerals precipitate out and settle. Year after year, the layer grows thicker. First a thin dusting, then a crusty half-inch layer, eventually several inches of compacted sediment. When it builds up high enough, it blocks or partially blocks the outlet pipe where hot water exits the tank. You’ll notice hot water pressure dropping throughout your whole house. Every hot water faucet, the shower, the dishwasher, and washing machine all show reduced flow.
You can try flushing the tank yourself if the sediment isn’t too severe. Turn off the power to the water heater. Flip the breaker for an electric unit or turn the gas valve to the pilot position for a gas heater. Let the water cool for at least two hours. Attach a garden hose to the drain valve at the bottom of the tank and run it to a floor drain, sump pit, or outside where draining hot water won’t damage anything. Open the drain valve and let several gallons flow out. Watch the water. If it runs cloudy or gritty for the first few gallons then clears up, you’ve successfully flushed out loose sediment. Close the drain valve, turn the cold water supply back on to refill the tank, and restore power. If water drains extremely slowly, comes out muddy for more than five gallons, or the drain valve won’t close properly after flushing, call a professional plumber. You might be dealing with compacted sediment that needs professional equipment to remove, a corroded drain valve that leaks after you touch it, or a tank old enough that flushing causes more problems than it solves. Tanks older than 10 years with no history of regular flushing often have sediment so hardened that flushing won’t clear it. At that point, if hot water pressure doesn’t improve after flushing, replacement is usually the next step. For professional water heater troubleshooting and repair coordination, especially if you’re seeing recurring pressure problems or your tank is approaching the end of its typical 8 to 12 year lifespan, an experienced plumber can assess whether repair or replacement makes more sense.
Detecting Leaking Pipes and Hidden Water Loss

A leak anywhere in your plumbing system steals water before it reaches your fixtures, reducing pressure throughout the house while potentially soaking insulation, rotting framing, or creating conditions for mold growth behind walls, under floors, or in crawl spaces you never see.
You can test for hidden leaks using your water meter. A simple check that takes less than three hours and costs nothing:
- Find your water meter. It’s usually in a basement utility area, exterior meter box near the street, or crawl space.
- Turn off every fixture and appliance that uses water. Faucets, showers, toilets, washing machine, dishwasher, ice maker, irrigation systems.
- Write down the exact meter reading or take a clear photo of the numbers showing on the meter dial.
- Wait two to three hours without using any water. Don’t flush toilets, wash hands, run appliances, or water plants.
- Check the meter again and compare the reading to your starting number.
If the meter has moved even slightly, you have a leak somewhere. Even a small movement represents water flowing through your system when it shouldn’t be. A toilet with a faulty flapper can leak hundreds of gallons per day without making a sound. A pinhole leak in a copper pipe behind drywall drips slowly into wall cavities. A failing seal on a water heater tank weeps water down the exterior. Slab leaks, breaks in pipes running under a concrete foundation, can leak for months before anyone notices.
Beyond meter movement, watch for these leak symptoms: unexplained increases in your water bill even though usage hasn’t changed, damp spots on walls or ceilings that appear and disappear, musty smells in closets or bathrooms, visible water stains spreading on drywall or ceiling tiles, and the sound of running water when every fixture is off. Warm spots on floors can indicate a hot water line leak. Soft or spongy areas on wood floors or discolored carpet backing suggest moisture underneath. Cracks in your home’s foundation might be related to ongoing leaks eroding soil around the footings.
Call a professional plumber immediately if you experience a sudden pressure drop paired with any of these leak indicators. Main line breaks and significant leaks escalate fast. What starts as a minor pressure issue can become thousands of dollars in water damage, destroyed drywall, ruined flooring, and mold remediation. The cost to locate and repair a leak, even one hidden behind walls that requires opening drywall, is almost always less than the cost of fixing water damage after weeks of undetected leaking. For professional leak detection and repair using acoustic listening equipment, thermal imaging, or video pipe inspection, plumbers can pinpoint leak locations without tearing up your whole house. The sooner you address a suspected leak, the less damage it causes and the lower your total repair bill.
Municipal Supply and Neighborhood Water Pressure Issues

Sometimes the low pressure problem isn’t in your house at all. It’s in the city water system or shared neighborhood supply lines. Municipal issues affect multiple homes at the same time, and the symptoms come and go based on system demand and maintenance schedules.
Peak usage times are the most common cause of temporary neighborhood pressure drops. Between 6 a.m. and 9 a.m., dozens of families on the same water main are showering, making coffee, and running washing machines. From 5 p.m. to 8 p.m., people are home from work cooking dinner, doing dishes, and running sprinkler systems. Homes at the end of the supply line, farthest from where the main connects to the larger distribution system, feel these pressure drops most noticeably. Your shower might be fine at 2 p.m. but weak at 7 a.m. simply because there’s more demand on the line.
Rule out municipal causes before assuming your home’s plumbing is the problem. Walk next door and ask your neighbors if they’re experiencing low pressure too. If they are, it’s likely a supply issue. Call your water utility and ask if there’s maintenance work happening in your area, a main break under repair, or known pressure regulation issues. Utilities track this information and can tell you whether your address is on a line with ongoing problems.
Temporary municipal disruptions usually resolve within a day or two. Construction crews replace old mains, repair breaks, or adjust pressure zones, and service returns to normal. But chronic issues need different solutions. Neighborhoods with aged infrastructure, shared service lines from decades past, or homes at the far end of long supply runs sometimes experience ongoing pressure fluctuations that utilities can’t or won’t fix with available budgets.
| Situation | Likely Cause | Action Needed |
|---|---|---|
| Municipal maintenance or main break | Temporary work or repair affecting supply | Wait 24-48 hours for utility to restore service |
| Peak usage hours only | High neighborhood demand overwhelming shared lines | Adjust usage patterns or consider booster pump if chronic |
| Chronic low supply | Home at end of line or undersized municipal infrastructure | Request utility pressure evaluation or install booster system |
Fixture-Specific Components That Restrict Water Pressure
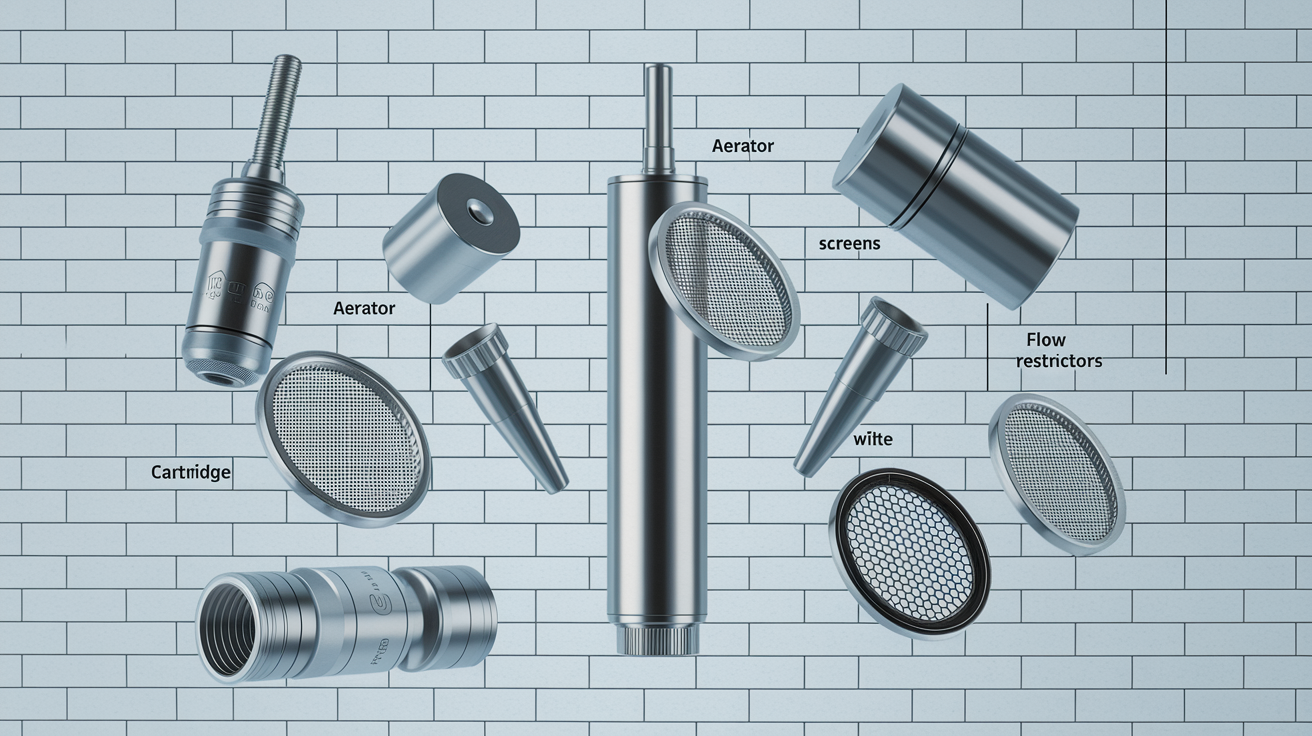
Beyond aerators and showerheads, several other fixture-level components trap debris and restrict water flow in ways most homeowners never think to check.
Appliance Inlet Screens
Washing machines and dishwashers have small mesh screens where the supply hoses connect to the appliance. These screens catch sediment, rust flakes, and mineral particles to protect internal valves and pumps. Over time, usually several years, they become partially clogged, reducing the water flow into the appliance. Your dishwasher takes longer to fill. Your washing machine fills slowly or displays error codes. To clean them, turn off the water supply valves behind the appliance, disconnect the inlet hoses, and look inside the threaded connection on the appliance. You’ll see a small cylindrical screen you can pull out with needle-nose pliers. Rinse it under running water, scrub with a toothbrush if needed, and push it back into place before reconnecting hoses.
Faucet Cartridges and Valves
Single-handle faucets have an internal cartridge. A replaceable valve assembly that controls both water temperature and flow. These cartridges have small ports and chambers that can accumulate mineral deposits and debris over time. When a cartridge gets clogged, water flow becomes restricted even after you’ve cleaned the aerator. You’ll notice weak pressure from one handle position but better flow from another, or reduced flow when the handle is in certain positions. Replacing a faucet cartridge requires shutting off the water, removing the handle and trim, pulling out the old cartridge (sometimes requiring a special tool), and installing a new one. Cartridges are model-specific, so you need to identify your faucet brand and series to buy the right replacement part.
Toilet Fill Valve Screens
Inside the fill valve at the bottom of your toilet tank, there’s a small filter screen designed to catch debris before it reaches the valve mechanism. When this screen clogs, the toilet tank fills slowly after flushing or stops filling partway. Turn off the water supply to the toilet using the shut-off valve below the tank, flush to empty the tank, then lift the fill valve cap. On most models it twists counterclockwise or has clips you can release. Pull out the small cone-shaped screen, rinse it thoroughly, and reassemble the valve. Turn the water back on and check if the tank fills at normal speed.
Flow Restrictors
Modern faucets and showerheads often include intentional flow restrictors. Small plastic inserts or washers with reduced openings that limit water consumption for conservation purposes. Federal standards require maximum flow rates of 2.5 gallons per minute for showerheads and 2.2 gallons per minute for bathroom faucets. If you’re getting adequate pressure everywhere else in your house but one recently installed fixture feels weak, it might just be an efficient low-flow design doing exactly what it’s supposed to do. Removing flow restrictors can increase flow but also increases water usage and might violate local plumbing codes or void fixture warranties. Check your local regulations before removing restrictors permanently.
Advanced Pressure Solutions: Regulators, Boosters, and System Upgrades

When you’ve exhausted basic fixes, cleaned every aerator, checked every valve, tested for leaks, confirmed the municipal supply is adequate, and pressure is still chronically low throughout your home, it’s time to consider professional-level solutions that address systemic capacity or supply problems.
Booster pumps actively increase water pressure throughout your entire plumbing system by pumping water from the main supply line into your home at higher pressure. These systems are appropriate when you’ve confirmed through pressure gauge testing that your municipal supply is consistently below 40 PSI, you’ve verified that your home’s plumbing has no leaks or restrictions, and the water utility can’t or won’t increase supply pressure in your neighborhood. A booster pump installation includes the pump itself, a pressure tank to maintain consistent pressure and reduce pump cycling, a pressure switch to control operation, and proper electrical connections. The system mounts on the main water line after the meter and before it branches to your home’s fixtures. Professional installation ensures proper sizing for your home’s demand. Undersized pumps run constantly and wear out fast, while oversized pumps waste energy and create pressure surges.
For homes on private well systems, pressure tanks serve a different but related purpose. The well pump pushes water up from underground into a pressure tank, which maintains steady pressure as you use water throughout the day. A functioning pressure tank has an internal bladder or air cushion that compresses as water enters, then pushes water out when you open a faucet. When pressure tanks fail, the bladder ruptures, the air charge leaks out, or the tank becomes waterlogged, pressure fluctuates wildly, the pump cycles on and off rapidly, and overall pressure drops. You’ll hear the well pump running more frequently or notice pressure that starts strong then fades while you’re showering. Pressure switch problems cause similar symptoms. If the switch fails to signal the pump to run, pressure never builds properly. Well systems require plumbers experienced with well pumps, pressure tanks, and pressure switches for accurate diagnosis and repair.
Whole-house or partial repiping is the permanent solution when your existing pipes are corroded, undersized, or made from materials that accumulate excessive buildup. Galvanized steel pipes installed before 1970 typically need replacement by the time they’re 50 to 60 years old. Corrosion and restriction have reached the point where cleaning won’t restore proper function. Undersized plumbing, half-inch supply lines in homes with multiple bathrooms and modern appliances, can’t deliver adequate pressure when several fixtures run simultaneously. Repiping involves replacing old lines with modern materials like PEX tubing or copper pipe, properly sized for your home’s current and future water demand. Whole-house repipes replace all supply lines from the main shut-off to every fixture. Partial repipes target problem areas. Replacing just the corroded section feeding a specific bathroom, or upsizing the main line feeding a new addition. The project scope depends on where your problems are concentrated and what your home’s layout allows for new pipe routing.
Estimated costs for major pressure solutions:
- Booster pump system with pressure tank and installation: $800 to $2,500 depending on capacity and complexity
- Pressure tank replacement for well systems: $500 to $1,500 including labor and pressure switch service
- Partial home repipe for one bathroom or specific problem area: $1,500 to $5,000 depending on accessibility and pipe length
- Whole-house repipe in a single-story home: $4,000 to $15,000+ depending on home size, number of fixtures, pipe materials chosen, and wall access difficulty
Recognizing When to Call a Professional Plumber
Plenty of pressure issues respond well to DIY troubleshooting. You can clean aerators, check valve positions, test for leaks, and replace showerheads without specialized skills. But certain situations require professional diagnosis and repair to avoid making problems worse or missing serious underlying damage.
Emergency situations that need immediate professional help:
- Sudden severe pressure drop throughout the entire house that happened within hours
- Visible water pooling on floors, ceilings sagging or showing brown stains, or water running down walls
- Sound of rushing or running water inside walls when all fixtures are turned off
- Complete loss of water pressure with no obvious explanation like a shut-off valve being turned off
- Suspicion of a main line break based on soggy ground, unexplained puddles near the foundation, or water meter spinning when nothing is running
- Pressure issues happening at the same time as a gas smell, discolored water, or contaminated water that looks or smells wrong
Non-emergency situations where professional service makes sense:
- Whole-house pressure consistently tests below 40 PSI even after checking and fully opening all shut-off valves
- No improvement after you’ve cleaned every aerator, every showerhead, and checked accessible valves
- Your home has galvanized steel pipes that are 40 years old or more with signs of corrosion
- Pressure problems that keep coming back within weeks or months after you fix them temporarily
- You can’t locate your home’s pressure regulator, or it’s installed in a location you can’t safely access
When you call a plumber for a pressure issue, here’s what to expect. The plumber will start with a diagnostic assessment. Testing pressure at multiple fixtures and at the main line using professional-grade gauges, checking valve positions and regulator function, and asking about when the problem started and which fixtures are affected. For suspected pipe problems, many plumbers use video pipe inspection. Feeding a small camera on a flexible cable through your drain or supply lines to see blockages, corrosion, or damage from the inside. You’ll receive a written estimate explaining what they found, what needs fixing, and how much it’ll cost before any work begins. Most common pressure repairs, regulator replacement, valve adjustment, pipe section replacement, can be completed the same day or the next business day. Costs for straightforward pressure repairs typically range from $150 for simple valve service to $500 for pressure regulator replacement, with more complex work like partial repiping or booster pump installation priced as separate projects with detailed estimates.
Final Words
Low water pressure doesn’t have to stay a mystery. Start with the quick wins—clean those aerators, check your valves, and test your PSI. Most pressure problems trace back to mineral buildup, a stuck valve, or a clogged fixture you can fix yourself.
But if you’ve worked through the list and pressure’s still weak, or if you spot signs of a leak, that’s when it’s time to call in a pro. We’ll track down the real source, fix it correctly, and make sure it holds.
You’ve got a clear path now on how to fix low water pressure. Take it one step at a time, and you’ll get your flow back.
FAQ
Q: How do you fix low water pressure in your home?
A: To fix low water pressure in your home, start by cleaning clogged faucet aerators and showerheads, checking that shut-off valves are fully open, and testing pressure at multiple fixtures to determine if the issue affects one fixture or your entire house.
Q: How do you get your water pressure back up?
A: You get your water pressure back up by identifying the source—cleaning mineral deposits from aerators and showerheads, fully opening partially closed valves, flushing sediment from your water heater, or adjusting your pressure regulator to increase PSI within the safe range.
Q: Do you need a plumber for low pressure?
A: You need a plumber for low pressure when the issue affects your entire house, persists after cleaning fixtures and checking valves, involves suspected leaks or pipe corrosion, or when pressure suddenly drops below 40 PSI indicating a serious plumbing system problem.
Q: How can you increase your low water pressure?
A: You can increase your low water pressure by removing mineral buildup from aerators and showerheads, ensuring all shut-off valves are fully open, adjusting your pressure regulator clockwise in small increments, or installing a booster pump if municipal supply is consistently low.
Q: What PSI is considered low water pressure?
A: Water pressure below 40 PSI is considered low, with readings under 30 PSI being far too low for normal home use. The ideal pressure range is 45-55 PSI, with acceptable pressure ranging up to 80 PSI for residential plumbing systems.
Q: How do you test water pressure with a gauge?
A: You test water pressure with a gauge by screwing it onto an outdoor spigot nearest your water main, turning off all indoor fixtures, opening the outdoor valve fully, and reading the PSI measurement once water stops flowing through the gauge.
Q: What causes low hot water pressure but normal cold water pressure?
A: Low hot water pressure with normal cold water pressure is caused by sediment buildup in your water heater tank that blocks the outlet pipe and restricts hot water flow, requiring tank flushing or professional cleaning to restore pressure.
Q: How do you know if low pressure is from a leak?
A: You know if low pressure is from a leak by turning off all fixtures, checking your water meter reading, waiting two to three hours without using water, then rechecking the meter—any movement indicates a hidden leak diverting water flow.
Q: Can you adjust a water pressure regulator yourself?
A: You can adjust a water pressure regulator yourself if it has an accessible adjustment screw by turning clockwise in small quarter-turn increments, testing PSI after each adjustment, though regulators without adjustment capability or showing internal failure need professional replacement.
Q: When should you replace galvanized pipes causing low pressure?
A: You should replace galvanized pipes causing low pressure when they’re over 40 years old with severe corrosion, interior diameter is reduced by more than 50 percent, recurring clogs persist despite professional cleaning, or discolored water appears when first turned on.
Q: How do you clean a clogged faucet aerator?
A: You clean a clogged faucet aerator by unscrewing it from the faucet spout, soaking it in white vinegar for two to four hours to dissolve mineral deposits, scrubbing with an old toothbrush, and reinstalling or replacing if permanently clogged.
Q: What causes whole-house low water pressure?
A: Whole-house low water pressure is caused by partially closed shut-off valves, failing pressure regulators, mineral buildup narrowing pipe diameter, hidden leaks in the main line, or low municipal supply pressure affecting the entire distribution system.
Q: Can municipal water supply cause low pressure?
A: Municipal water supply can cause low pressure during maintenance work, main breaks, peak demand hours when neighbors use water simultaneously, or if your home sits at the end of the supply line experiencing chronic distribution pressure drops.
Q: How much does a pressure booster pump cost?
A: A pressure booster pump costs between 800 and 2,500 dollars installed, though you should only install one after confirming municipal supply is consistently low and your plumbing system has no leaks that boosting pressure could worsen.
Q: What are signs of mineral buildup in pipes?
A: Signs of mineral buildup in pipes include gradual pressure decline over months, discolored water when first turned on, visible scale on exposed pipes, frequent aerator clogging, and homes over 30 years old with original plumbing experiencing worsening flow.