
You just noticed a puddle outside your shower or a ceiling stain in the room below. Here’s what plumbers won’t tell you up front: most shower pan leaks happen because there’s no waterproofing membrane under the tile, not because the pan itself is broken. That changes everything about how you fix it. You might not need full replacement. We’ll walk you through diagnosis tests you can do yourself, temporary fixes that actually work, and when a permanent repair is worth the investment versus when you’re just delaying the inevitable.
Identifying Your Shower Pan Leak: Diagnosis and Testing
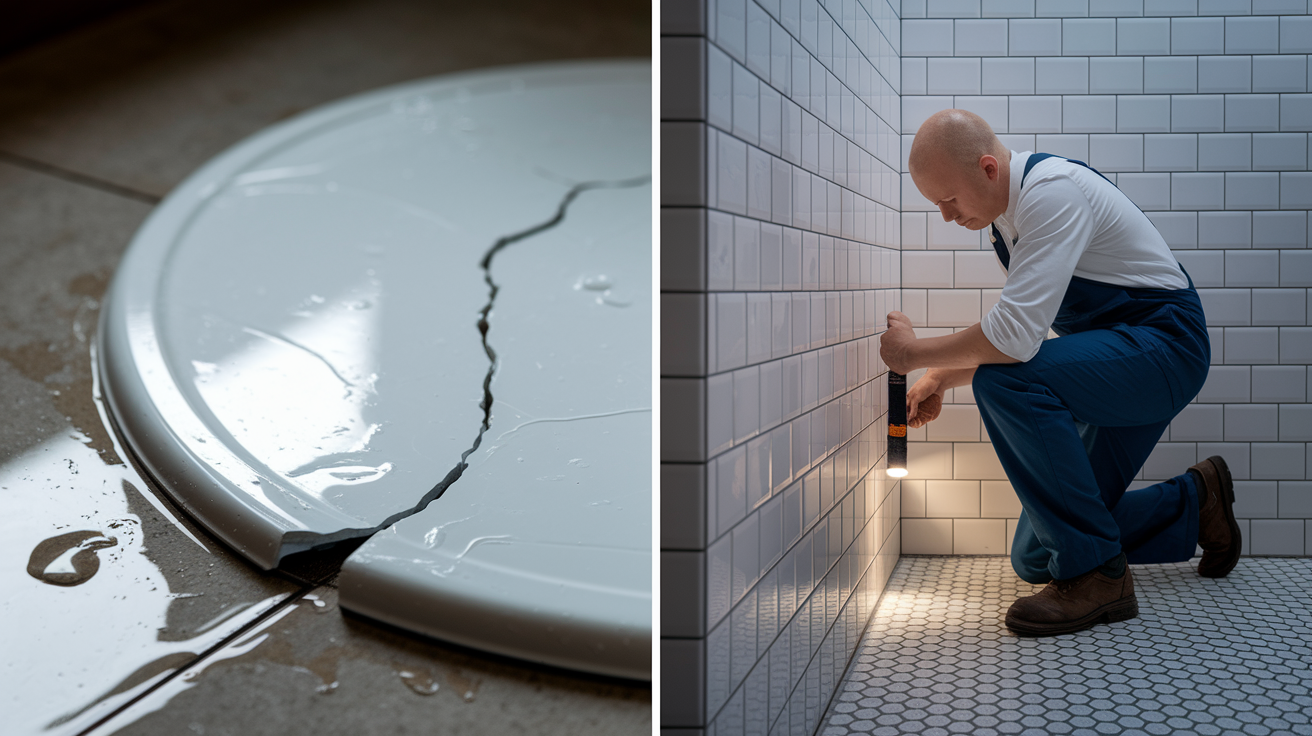
Before you start ripping apart your shower or buying materials, confirm you’ve actually got a shower pan leak and figure out where it’s coming from. Saves you from fixing the wrong thing or wasting money on a problem that doesn’t exist.
Three physical signs point to shower pan trouble. First is movement or flexing when you step in. A properly installed pan should feel solid because it’s secured with concrete, sealant, and bolts. If it gives under your weight, something’s loosened up. Second is deflection or weird sloping. If the floor feels like it’s sagging or the slope changed, that usually means the subfloor underneath has water damage. Safety hazard territory. Third is visible cracks or splintering in the pan material. Any cracks in plastic pans mean total failure. Cracks in porcelain signal serious problems too.
But leaks don’t always show up right where the problem is. Check areas around your shower. Moisture wicking into baseboards next to the curb is common. You might smell musty or moldy odors in the bathroom or a nearby closet. Look at the ceiling in the room below for water stains or discoloration. Check the bathroom floor near the shower for soft spots or color changes. These signs of water damage in your home often appear before you notice anything wrong with the pan itself.
Warning signs that point to a shower pan leak:
- Pan movement or flexing when you step on it
- Deflection, sagging, or slope changes
- Visible cracks or splintering in pan material
- Moisture in baseboards next to the curb
- Musty or moldy smells in bathroom or nearby closets
- Water stains on ceiling below
- Discoloration or soft spots on bathroom floor near shower
How to do an 8 hour flood test to confirm the leak:
- Clean the shower floor thoroughly and let it dry completely
- Seal the drain opening using a test plug or heavy plastic bag secured with tape
- Pour 2 inches of standing water into the pan
- Mark the water level with tape, marker, or by taking a photo
- Wait 8 hours without messing with the water
- Check for water level drops and inspect surrounding areas (baseboards, ceiling below) for new moisture or stains
Shower Pan Leak Repair Solutions: From Simple Fixes to Complete Replacement
Shower pan fixes range from quick surface repairs under $100 to full liner replacement running thousands. Which approach you take depends on what caused the leak, how bad the damage is, and whether you need a temporary patch to buy time or a permanent solution that’ll last decades.
Surface fixes work when you’ve caught deterioration early. Regrouting worn joints or sealing small cracks can stop minor leaks. But if the pan itself is cracked throughout, if there’s no waterproofing membrane underneath, or if the subfloor is damaged, surface repairs just delay the inevitable. Those situations need liner replacement or professional help to fix the root cause.
Temporary and Emergency Fixes ($30 to $500)
Think of these as stopgaps. They buy you time to save up for permanent repairs or schedule a contractor, but they won’t prevent long term damage if the underlying problem is serious.
Four temporary methods to slow or stop leaks:
- Grout repair or replacement in deteriorated areas using waterproof grout
- Epoxy or masonry sealer application to visible cracks and holes (allow proper drying time per manufacturer specs)
- Silicone caulk application to all seams, gaps, and horizontal surfaces using quality products designed for wet areas
- Waterproofing paint application (HydroBan or RedGard) over existing tile surface as emergency moisture barrier
The waterproofing paint option gives you a temporary moisture barrier right over your existing tile. It’s not the same as proper underlayment waterproofing, but it slows water penetration while you arrange for the real fix.
Permanent Repair and Replacement Solutions
Permanent repair means addressing what actually causes shower pan leaks. The work involves selective demolition where you remove the floor tile, curb, and first two rows of wall tile down to the plywood subfloor. You inspect and repair the subfloor if it’s got water damage. Then you install a proper waterproofing membrane, which is the critical layer that actually stops water. Tile and grout are decorative only.
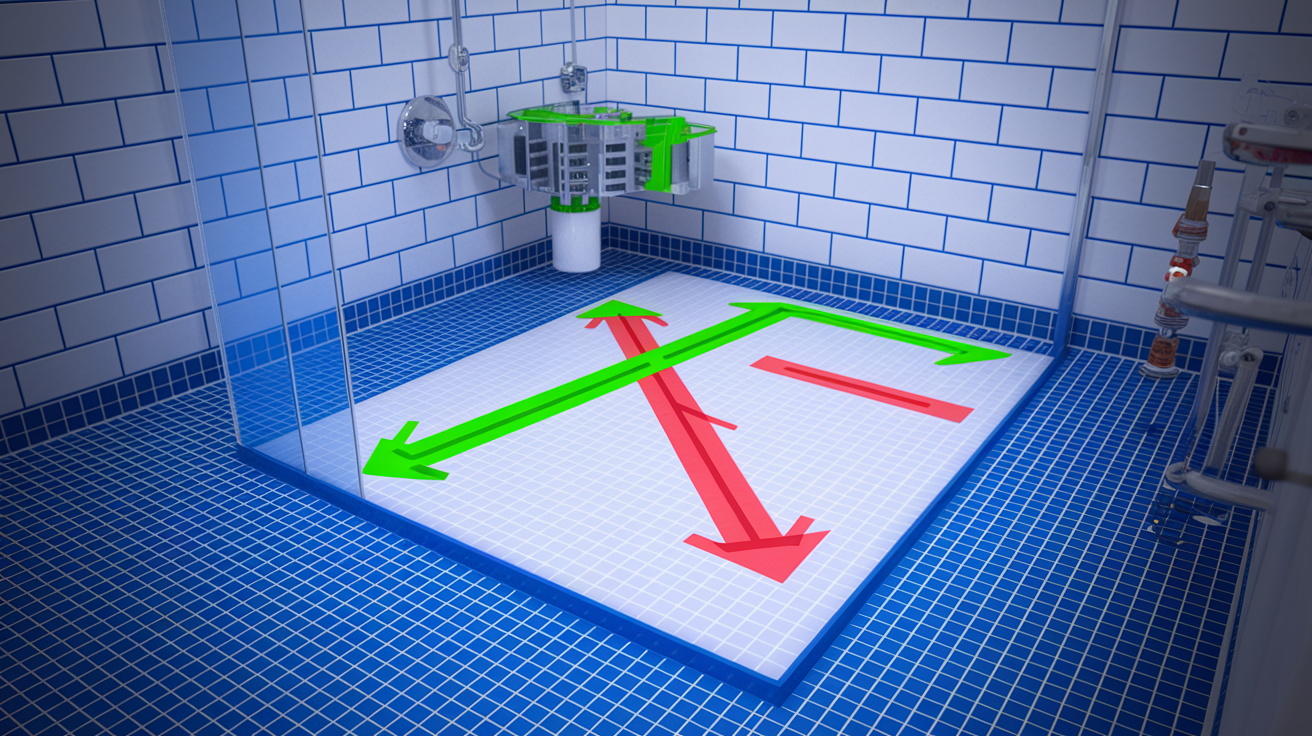
Next comes a sloped mortar bed that directs water toward the drain at a quarter inch per foot slope. You upgrade the drain assembly to code compliant 2 inch pipe if needed. Finally you reinstall tile over the properly waterproofed and sloped base. This approach fixes the root cause and gives you a shower base that should last 20 plus years.
Understanding Why Shower Pans Fail

Here’s what most homeowners don’t realize. Tile and grout look solid, but they’re porous. Water passes right through them. They’re decorative surfaces, not waterproof barriers. The real waterproofing happens in a membrane layer installed underneath the tile. When that layer is missing or fails, you get leaks. That’s the root cause behind most shower pan problems.
Improper installation is the number one reason pans fail. Contractors sometimes skip the waterproofing membrane entirely. They’ll install concrete backerboard, add a mortar layer, then tile directly on top with zero moisture barrier. The shower might look fine, but water’s soaking into the subfloor from day one. Other installation mistakes include not sloping the mortar bed correctly toward the drain, connecting the drain assembly wrong, or damaging the moisture barrier during construction.
Secondary failures happen over time even when installation was done right. Caulking deteriorates. Grout breaks down. Liner material cracks from age or flexing. Structural problems stress the pan too. If the subfloor deflects because it wasn’t supported properly, or if the building settles, that movement can crack even a well installed liner. These wear related issues are why maintenance matters, but they’re fixable if you catch them before major water damage sets in.
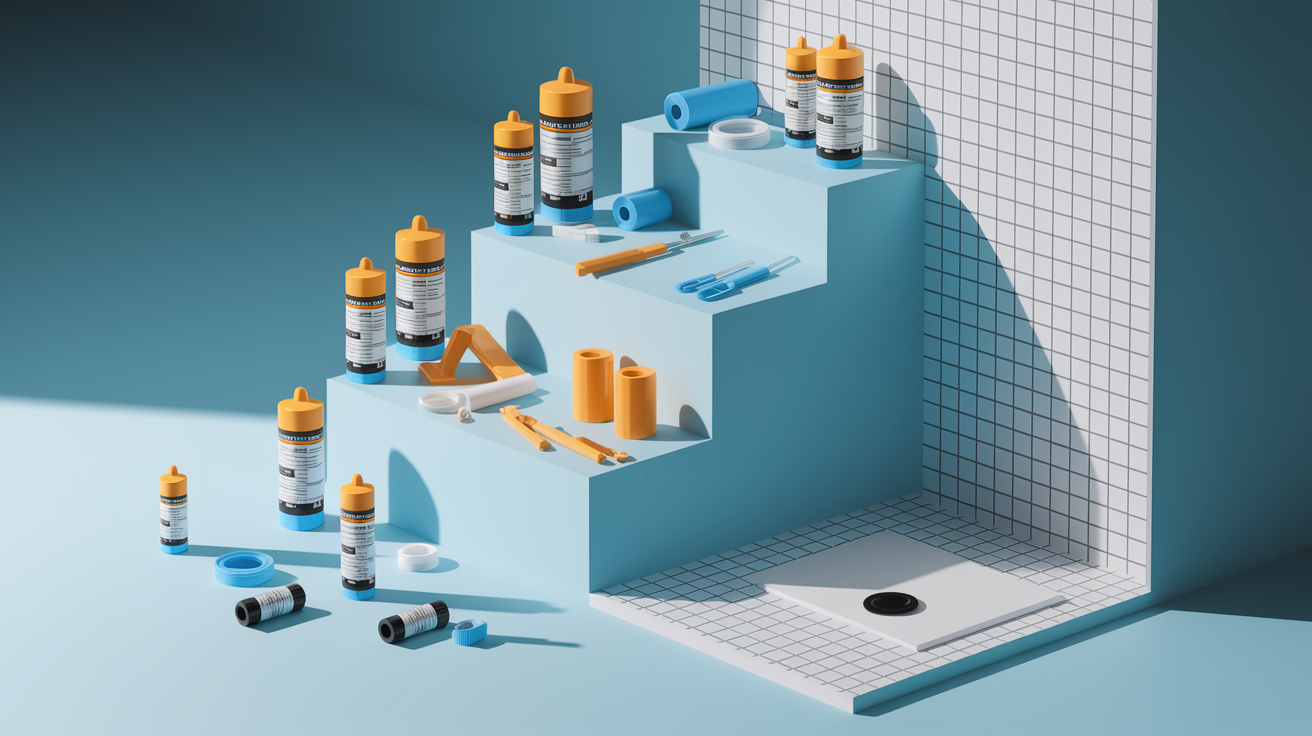
Essential Tools and Materials for Shower Pan Repair
Having the correct tools and materials ready before you start prevents project delays and ensures quality repairs. Nothing’s worse than tearing apart your shower on Saturday morning and realizing you need a specialty item that won’t arrive until Tuesday.
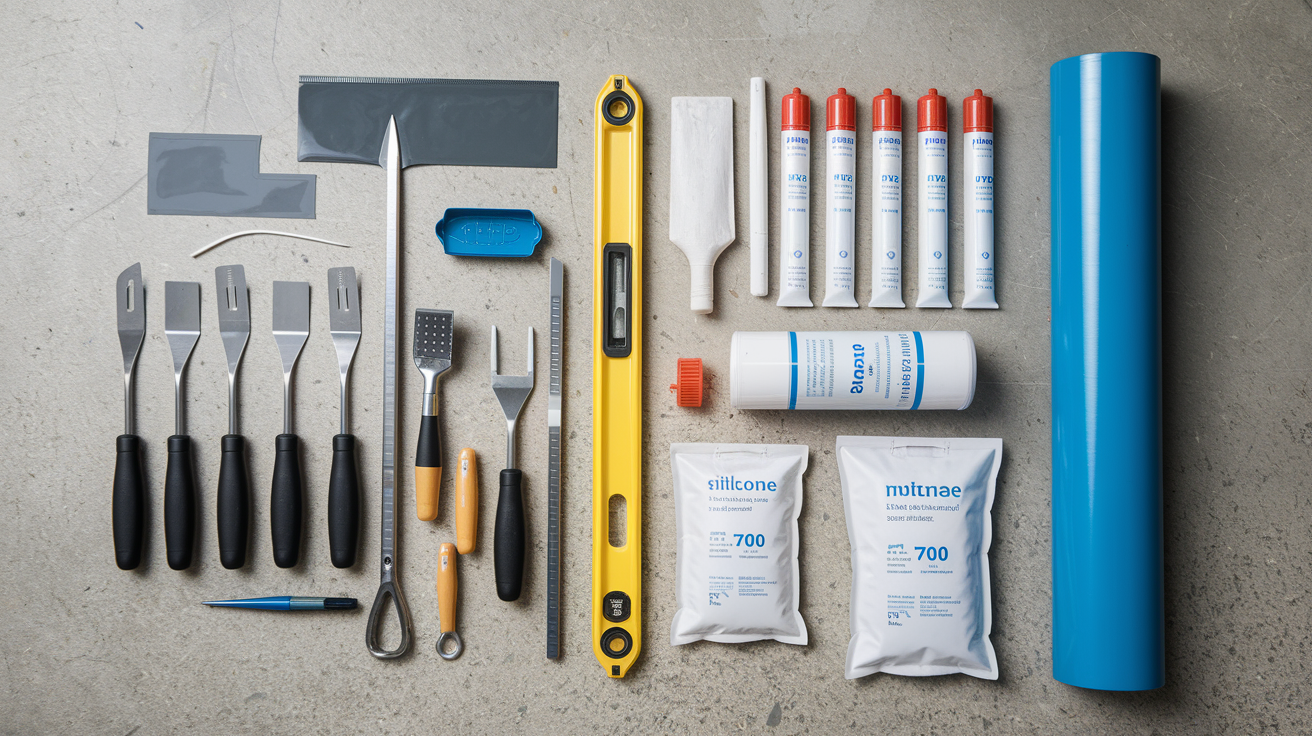
Basic tools you’ll need:
- Utility knife and pry bar for tile removal
- Hammer and chisel for demolition work
- Strap wrench for drain components
- Mixing paddle and drill for mortar
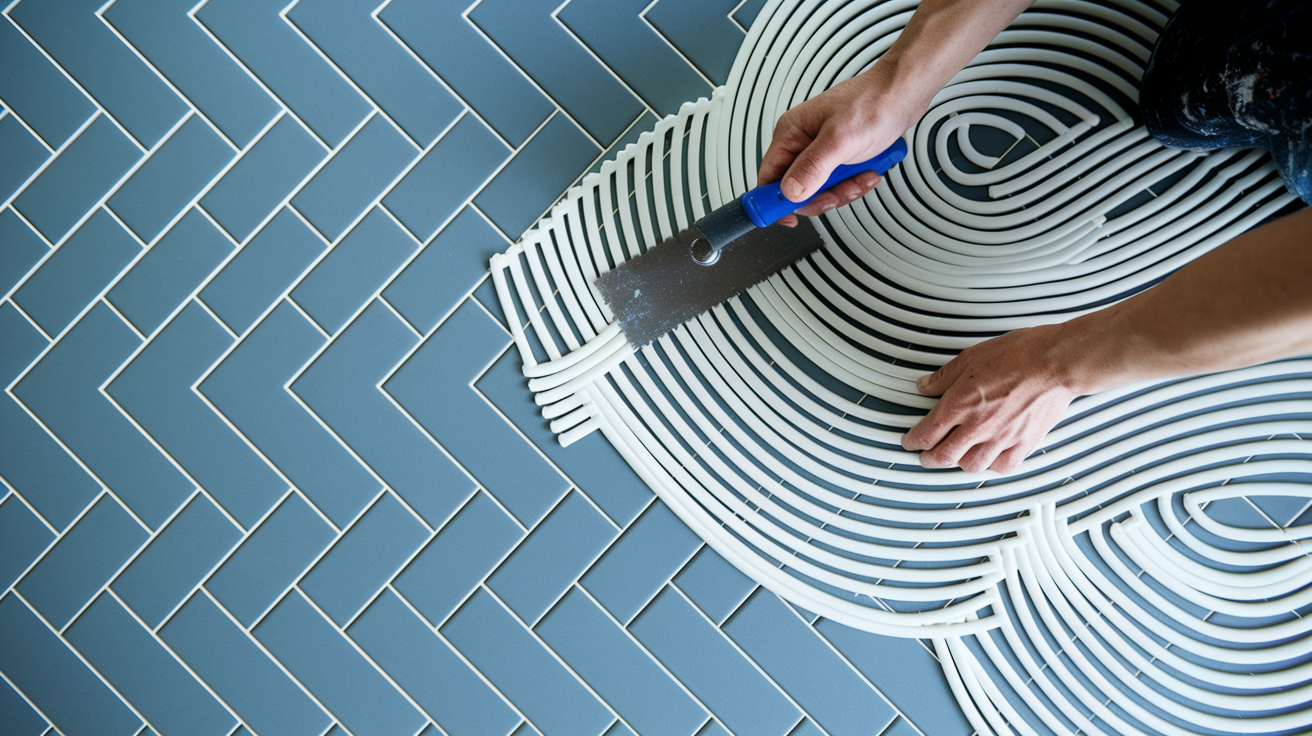
- Notched trowel for adhesive application
- Level for checking slope and alignment
- Flashlight and small mirror for inspection
- Bucket and rags for cleanup
Materials required for repairs:
- Waterproofing membrane or fabric (Kerdi, PVC liner, rubber membrane)
- Silicone sealant designed for wet areas
- Epoxy or masonry sealer for crack repair
- Mortar or concrete mix for base
- Thinset adhesive for tile
- Replacement grout
- Teflon tape and plumber’s putty
Complete Shower Pan Replacement: Professional Grade Installation
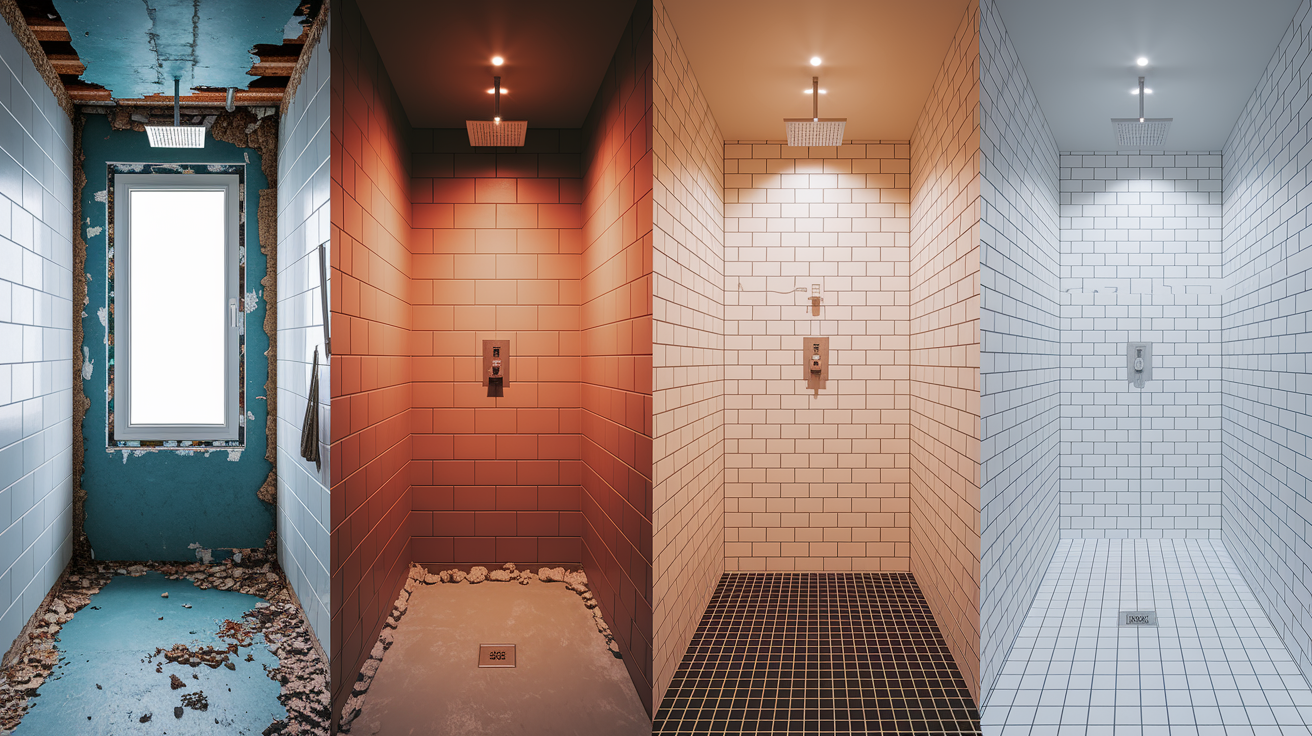
Complete liner replacement with proper waterproofing is what you need when the pan has widespread cracking, structural failure, or missing waterproofing underneath. This approach addresses the root cause and gives you a 20 plus year lifespan instead of repeated patch jobs. It’s a multi day project that requires proper subfloor inspection and drying time between steps.
You’re basically rebuilding the shower base the way it should have been done from the start. Each phase has to happen in order because you can’t install waterproofing over a damaged subfloor, and you can’t tile until the waterproofing and mortar have cured properly.
Demolition and Subfloor Preparation
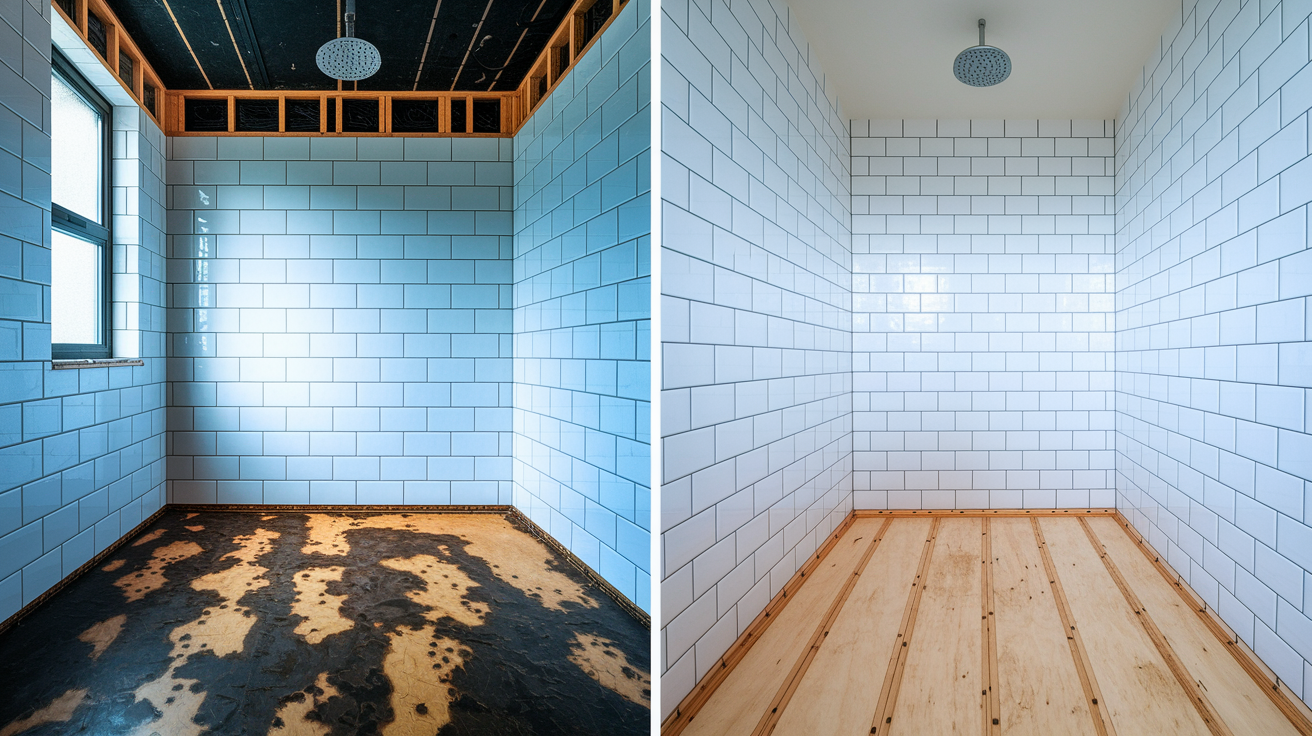
Start by removing floor tile, the curb, and the first two rows of wall tile going down to the plywood subfloor. Use a hammer and chisel, working carefully if you’re planning to save the upper wall tiles to reduce costs. Once you’re down to bare subfloor, inspect everything carefully.
Look for darkened plywood, soft spots, deterioration, mold growth, and compromised structural members. If you find water damage, cut out the bad plywood sections. Treat any mold. Install new plywood patches and make sure they’re supported properly. That means adding blocking between the floor joists using doubled 2x4s for code compliance. The subfloor has to be solid and completely dry before you move forward.
Installing the Drain Assembly and Pre Slope
If your existing drain pipe is 1 and a half inches, upgrade it to code compliant 2 inch pipe. That’s not optional. Undersized drains cause drainage problems that lead to standing water and pan deterioration.
Next comes the pre slope layer. This is a thin mortar layer that slopes toward the drain at a quarter inch per foot. It goes down before the waterproofing membrane. The reason for pre slope is that water needs to drain even underneath the waterproofing layer. If water somehow gets beneath the membrane through weep holes in the drain, the pre slope directs it to the drain instead of letting it pool under your shower.
Waterproofing Membrane Installation and Sealing
This is the critical step that actually stops water. Remember, tile and grout are decorative only. The membrane is what protects your home.
You’ve got options. Sheet membranes like PVC liner or rubber membrane, fabric membranes like Kerdi, or liquid applied membranes like RedGard or HydroBan. Whichever you choose, installation has to be continuous. The membrane covers the entire floor and goes up the walls a minimum of 6 inches. Every corner and seam gets sealed. The membrane connects properly to the drain flange, and weep holes in the drain assembly stay clear so water trapped beneath the tile can drain.
For triple protection, use a layered approach. Install Kerdi fabric for the floor and floor to wall joints. Apply KerdiFix sealant on all seams. Then add a RedGard layer on top. That gives you multiple barriers against moisture. The weep holes are important because they let any water that works its way under the tile escape to the drain instead of soaking your subfloor.
Make sure all materials are compatible. Don’t mix products that aren’t meant to work together. Follow manufacturer instructions for curing time.
Final Mortar Bed and Curb Reconstruction
Install the final sloped mortar bed over your waterproofing membrane. This layer also slopes toward the drain at a quarter inch per foot. It creates the surface that tile adheres to.
Rebuild the shower curb to the exact original height if you’re reusing your shower door or glass enclosure. You need precision here. Within a sixteenth of an inch tolerance. If the curb height is off, your glass won’t fit.
Once the mortar bed has cured, you can tile. Tile can be installed directly on concrete backerboard for the walls as long as your floor and curb have that continuous waterproofing barrier underneath. That’s the difference. Walls don’t pool water. The floor does. The floor needs the full waterproofing treatment.
Repairing Cracked Shower Pan Bases

Small hairline cracks in fiberglass or acrylic pans can sometimes be repaired if you catch them early. But if you’ve got widespread cracking, the pan has failed structurally and needs replacement. Any cracking in plastic pans signals complete failure. Cracks in porcelain pans indicate problems too.
Stop using the shower immediately if you see cracking or splintering. Continued use makes it worse fast. Water’s getting through those cracks and damaging your subfloor right now.
Crack repairs are temporary solutions only. Use them to buy time while you arrange for replacement, not as a permanent fix.
Five steps to repair surface cracks temporarily:
- Clean and dry the cracked area thoroughly, removing all soap residue and debris
- Sand the crack and surrounding area (2 inch radius) with fine grit sandpaper to create texture for adhesive bonding
- Apply fiberglass repair epoxy or specialized shower pan patch compound following manufacturer’s mixing and application instructions
- Smooth the patch material flush with surrounding surface using applicator tool
- Allow full curing time (typically 24 to 48 hours) before testing with water or resuming shower use
Addressing Shower Pan Drainage Problems
Standing water accelerates shower pan deterioration, creates slip hazards, and tells you something’s wrong with the slope or drainage. Water should flow to the drain and disappear. If it pools, you’ve got a problem that needs fixing.
Proper shower pan slope should be a quarter inch per foot toward the drain. That’s enough pitch to move water without feeling like you’re standing on a hill. Drains must be code compliant 2 inch pipe, not the undersized 1 and a half inch pipe that was common in older installations.
Weep holes in the drain assembly matter too. They’re small openings that let water trapped beneath the tile drain away instead of soaking into your subfloor. If those holes get sealed or clogged during installation or repairs, moisture builds up under your shower and you get rot.
Six common drainage problems to check for:
- Inadequate slope in mortar bed causing water pooling away from drain
- Clogged drain from accumulated hair and debris
- Undersized drain pipe (1 and a half inch instead of code required 2 inches)
- Blocked or sealed weep holes preventing subsurface drainage
- Improper drain flange installation or loose connection
- P trap issues causing slow drainage and water backup
Subfloor Inspection and Water Damage Assessment
Shower pan leaks often cause hidden damage beneath the pan that you have to address before installing new waterproofing or a new liner. Skip this step and your repair fails because the foundation underneath is compromised.
After you remove the tile and old pan, do a careful visual inspection of the plywood subfloor. Look for darkened areas, soft spots, deterioration, mold growth, and structural members that look damaged. Press on the plywood in different spots. Solid subfloor doesn’t give. If it feels spongy or you can push through it, that section needs replacing.
Remove damaged plywood sections completely. Don’t try to patch over rotted wood. Treat any mold you find. Install new plywood patches and make sure they’re supported properly by blocking between the floor joists. Code requires doubled 2x4s between joists for this kind of structural support.
If you see deflection, sagging, or unusual slopes in your shower floor, that indicates serious subfloor compromise. It’s not just wet plywood at that point. You might have damaged joists or other structural issues. That creates a safety hazard and requires immediate professional structural assessment. Don’t proceed with cosmetic repairs when the structure underneath is failing.
Retiling After Shower Pan Leak Repairs
Complete floor tile removal plus the first two rows of wall tile is typically necessary to access the pan and install proper waterproofing. The good news is you can often preserve the upper wall tiles, which reduces your retiling costs significantly.
If you’re reusing your shower door or frameless glass enclosure, the curb height has to be rebuilt precisely. Within a sixteenth of an inch of the original height. Glass is cut to exact specifications. If the curb is higher or lower, the glass won’t fit right and you’re buying new glass.
Six steps to retile your shower after pan repair:
- Remove old tile carefully using hammer and chisel, preserving upper wall tiles if possible to reduce costs
- Ensure substrate (mortar bed or backerboard over waterproofing) is level, clean, and properly cured before tiling
- Apply thinset adhesive using notched trowel sized appropriately for tile dimensions
- Install floor tiles working from drain outward, maintaining proper slope direction
- Rebuild curb to exact original specifications and tile to match surrounding areas
- Allow thinset to cure fully (typically 24 to 48 hours) before grouting and another 24 hours before water exposure
Shower Pan Leak Repair Costs and Budget Planning
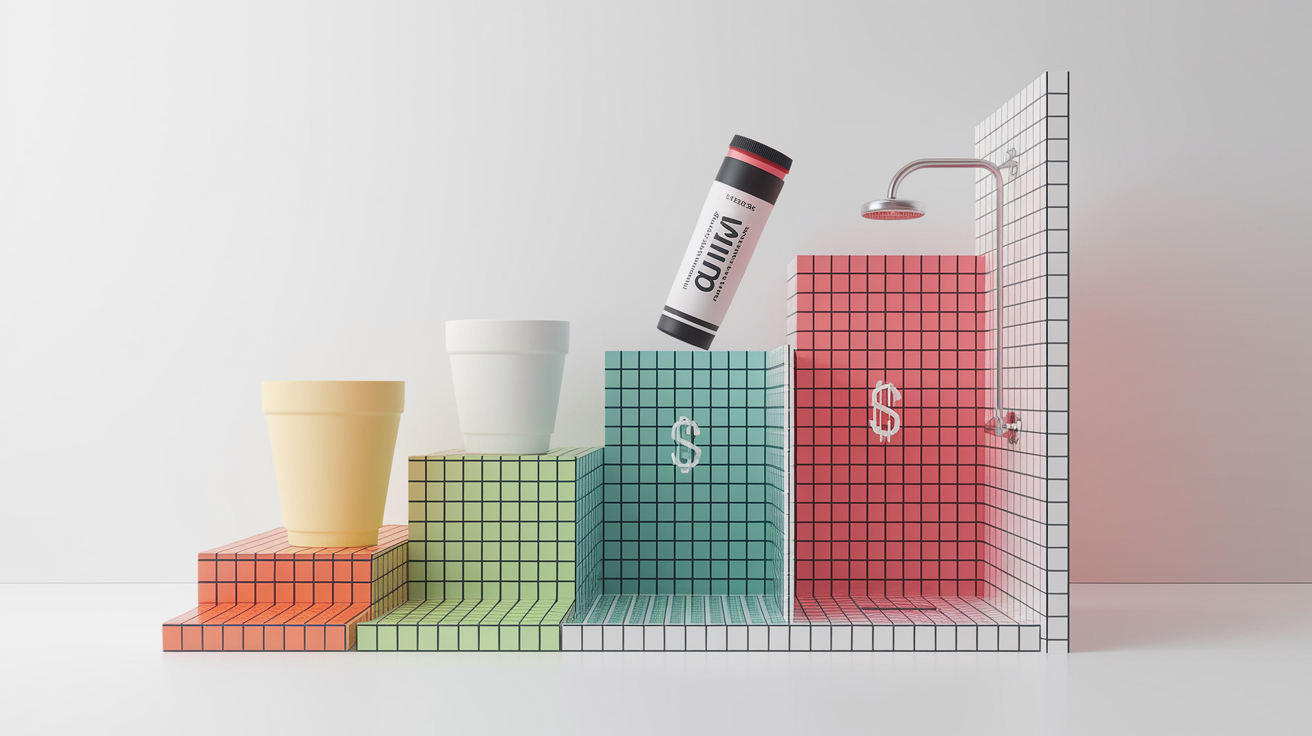
Repair costs vary dramatically based on how bad the leak is, how big your shower is, what materials you choose, and whether you’re doing the work yourself or hiring a pro. A tube of caulk and some grout costs $30. Full professional shower replacement can run over $4,000.
Addressing leaks promptly with the right repair approach prevents costs from escalating. A $500 repair today beats a $5,000 repair plus mold remediation and structural work next year. Water damage spreads. The longer you wait, the more expensive it gets.
Factors that affect your costs include pan material type. Fiberglass and acrylic pans cost less than custom tile. Accessibility matters. First floor showers are easier to work on than second floor units where you have to protect rooms below. Subfloor condition impacts costs significantly. If the subfloor is solid, you save on structural repairs. And whether you can reuse existing fixtures like frameless glass enclosures makes a difference. New frameless glass runs $1,500 to $2,000.
| Repair Type | Cost Range | Timeline | DIY Feasibility |
|---|---|---|---|
| Temporary fixes (caulk, grout, sealant) | $30 to $500 | 1 to 2 hours | High |
| Minor crack repair (epoxy patch) | $50 to $300 | 2 to 4 hours | Moderate |
| Partial pan repair (waterproofing only) | $800 to $2,000 | 2 to 4 days | Low |
| Complete pan replacement (DIY) | $500 to $1,500 | 4 to 7 days | Low to Moderate |
| Complete pan replacement (professional) | $900 to $4,600 | 3 to 5 days | N/A |
| Full shower rebuild with tile | $2,500 to $7,000 plus | 1 to 2 weeks | Very Low |
DIY Shower Pan Repair vs. Hiring Professionals
Simple temporary fixes and minor caulking or sealing work fine as DIY projects. But waterproofing installation and structural repairs require professional expertise. The techniques aren’t complicated, but the stakes are high. Get waterproofing wrong and you’re dealing with repeat failures and thousands in water damage.
Improper waterproofing leads to exactly the problem you’re trying to fix, except now you’ve spent money and time on a repair that failed. For permanent repairs involving membrane installation, mortar beds, or structural work, professional installation is worth the cost. They know the building codes, they’ve done hundreds of installations, and their work typically comes with warranties.
When you hire contractors, get quotes from at least three who are licensed, bonded, and insured. Compare their approaches, not just their prices. Ask about their experience with waterproofing specifically. Verify they pull permits when required.
When DIY makes sense:
- Minor grout or caulk deterioration with no structural damage
- Surface crack repairs as temporary measures
- Leak testing and basic diagnostics
- Preventative maintenance and inspection
- Temporary emergency sealing while scheduling professional repairs
When to call a professional:
- Complete liner replacement or waterproofing installation
- Subfloor damage, rotted joists, or structural issues
- Extensive mold growth requiring remediation
- Leaks originating within walls or under flooring
- Building code compliance and permit requirements
- Situations requiring warranty or insurance claims documentation
Preventing Future Shower Pan Leaks
Regular maintenance significantly extends shower pan lifespan. A properly waterproofed base lasts 20 plus years, but only if you take care of the surfaces and seals above it. Preventive tasks are simple. Most take minimal time and cost. But they provide substantial protection against expensive water damage.
The key is addressing small issues before they become big problems. A tube of caulk and ten minutes of work today prevents a $3,000 repair next year.
Nine preventive maintenance tasks that protect your shower pan:
- Inspect and reseal grout lines annually using waterproof grout sealer
- Recaulk all seams, joints, and horizontal surfaces every 1 to 2 years with quality silicone designed for wet areas
- Keep drain clear of hair and debris through regular cleaning
- Inspect and replace worn gaskets, seals, or O rings immediately when noticed
- Check for standing water after showers indicating slope problems requiring correction
- Squeegee shower walls and floor after use to reduce moisture exposure
- Ensure bathroom ventilation (fan or window) operates during and after showers
- Inspect visible pan areas monthly for early signs of cracks, discoloration, or movement
- Address any leaks, cracks, or deterioration immediately before they worsen
Building Codes and Safety Considerations for Shower Pan Repairs
Shower repairs involving plumbing, waterproofing, or structural changes typically require permits and must meet local building codes. This isn’t just bureaucracy. Codes exist because certain methods fail and certain shortcuts cause problems. Following code means your repair is done correctly and safely.
Specific code requirements include 2 inch minimum drain pipe diameter. Not 1 and a half inch. That undersized pipe was common in older homes but doesn’t meet current code and causes drainage problems. Proper slope is required at a quarter inch per foot toward the drain. Waterproofing standards specify membrane types, installation methods, and how far up the walls protection must extend.
Safety considerations include proper ventilation when you’re using epoxy or adhesive products. Work with windows open or exhaust fans running. Be careful around electrical outlets and switches when water’s involved. And structural load support for subfloor repairs means adding proper blocking between joists for code compliant support, not just screwing down plywood wherever it fits.
Professional contractors handle permitting and ensure code compliance as part of their service. If you’re DIYing complex projects, understand that work done without permits can cause issues when you sell your home. Inspectors look for this stuff. Failed inspections delay closings. Plus, if your repair doesn’t meet code and it fails, your homeowners insurance might deny claims related to the damage.
Troubleshooting Common Shower Pan Repair Challenges
Repair projects often encounter unexpected issues. Knowing how to troubleshoot common problems keeps your project moving forward instead of stalling out halfway through.
The biggest mistake people make is rushing. Adhesives and sealants need time to cure. Water exposure before they’re ready causes bond failure, and then you’re starting over.
Seven common challenges with solutions:
- Insufficient drying time: Allow minimum 24 to 48 hours for adhesives and sealants to cure before water exposure, rushing causes bond failure
- Improper slope after repair: Check with level during mortar bed installation, minimum quarter inch per foot toward drain required
- Membrane wrinkles or air pockets: Work methodically from center outward when installing sheet membranes, pressing out bubbles
- Mismatched tile after partial repair: Purchase extra tiles from original batch if available, or plan accent pattern to incorporate different tiles
- Dropped hardware during disassembly: Cover drain with rag before removing components to prevent lost screws and parts
- Premature leak test failure: Ensure all sealants have fully cured per manufacturer specifications before conducting water test
- Incomplete surface preparation: Thoroughly clean and dry all surfaces before applying adhesives, contaminants prevent proper bonding
Insurance and Warranty Coverage for Shower Pan Leaks
Homeowners insurance typically covers sudden or accidental water damage. That means burst pipes or a supply line that fails and floods your bathroom. But gradual deterioration from an aging shower pan usually doesn’t qualify. Insurance views that as a maintenance issue, not a covered event.
Home warranties generally don’t cover water damage itself, but they may cover related plumbing component failures that caused the leak. If your shower valve fails and that’s what created the leak, the warranty might pay for the valve repair. The water damage to your ceiling and walls is on you.
Document everything when you discover a leak. Take photos of the damaged areas, the leak source once you find it, and the extent of the damage. Get professional assessments in writing. This documentation supports potential insurance claims and helps you prove the damage was sudden rather than gradual if that’s legitimately the case. Before you hire a contractor, verify they’re licensed and insured. That protects you from liability if someone gets hurt working on your property.
Final Words
A shower pan leak doesn’t have to turn into a nightmare if you catch it early and fix it right.
Whether you’re handling simple caulk repairs or facing a full liner replacement, the key is understanding what caused the leak and stopping it at the source.
Temporary fixes buy you time, but proper waterproofing solves the problem for decades.
If you’re not sure how to fix a shower pan leak or the damage goes deeper than expected, bring in a pro. Your home’s worth protecting, and a solid repair now beats chasing water stains later.
FAQ
Can a leaking shower pan be fixed?
A leaking shower pan can be fixed depending on the severity and cause of the leak. Minor surface issues like deteriorated grout or small cracks can be addressed with temporary repairs such as epoxy patches or silicone caulking. However, structural failures, widespread cracking, or missing waterproofing membranes require complete liner replacement with proper waterproofing installation to provide a permanent solution that lasts 20+ years.
How much does it cost to fix a shower pan leak?
The cost to fix a shower pan leak ranges from $30 to $500 for temporary repairs like resealing and regrouting, while complete professional pan replacement typically costs $900 to $4,600 depending on shower size, material choice, and subfloor condition. DIY complete replacement can cost $500 to $1,500 in materials if you have moderate skills, though improper waterproofing installation often leads to repeat failures and higher long-term costs.
What is the life expectancy of a shower pan?
The life expectancy of a properly waterproofed shower pan is a couple decades minimum, typically 20+ years with regular maintenance. However, improperly installed pans missing waterproofing membranes can fail within a few years due to water damage to the subfloor and surrounding structures. Regular maintenance including annual grout resealing, keeping drains clear, and replacing caulking every 1-2 years significantly extends pan lifespan.
How do you seal a shower base leak?
To seal a shower base leak as a temporary fix, clean and dry the affected area thoroughly, then apply high-quality silicone caulk designed for wet areas to all seams, gaps, and horizontal surfaces. For small cracks, sand the area and apply fiberglass repair epoxy or specialized shower pan patch compound, allowing 24-48 hours curing time before water exposure. These are stopgap measures only and won’t prevent long-term damage from missing or compromised waterproofing membranes beneath the tile.
When should you call a professional for shower pan repair?
You should call a professional for shower pan repair when dealing with complete liner replacement, subfloor damage or rotted joists, extensive mold growth, leaks within walls or under flooring, or situations requiring building code compliance and permits. Professional expertise ensures proper waterproofing installation that prevents repeat failures, while DIY is suitable only for minor surface repairs like caulking and temporary sealing measures.
How do you test if your shower pan is leaking?
To test if your shower pan is leaking, seal the drain with a test plug, pour 2 inches of standing water into the pan, mark the water level with tape, and wait 8 hours without disturbance. Check for water level drops and inspect surrounding areas including baseboards, ceiling below, and bathroom floor for new moisture or stains that indicate water escaping through compromised waterproofing.
What are the warning signs of a failing shower pan?
Warning signs of a failing shower pan include movement or flexing when stepping on it, deflection or sagging indicating subfloor water damage, visible cracks in the pan surface, moisture in adjacent baseboards, musty odors in bathroom or nearby closets, water stains on ceiling below, and discoloration or soft spots on bathroom floor near shower. Any movement or deflection creates a major safety hazard requiring immediate professional inspection.
Can you repair a cracked fiberglass shower pan?
You can repair small hairline cracks in fiberglass pans temporarily by cleaning the area, sanding a 2-inch radius around the crack, applying fiberglass repair epoxy, and allowing 24-48 hours curing time before water exposure. However, widespread cracking indicates complete structural failure requiring pan replacement, and any cracking in plastic pans signals you should stop using the shower immediately and plan for professional replacement.
Why do shower pans fail even with tile and grout?
Shower pans fail because tile and grout are porous decorative surfaces, not waterproof barriers, and require a waterproofing membrane layer beneath to actually stop water penetration. Improper installation often uses concrete backerboard with mortar but zero waterproofing membrane, allowing water to reach the subfloor and cause rot, mold, and structural damage over time regardless of surface tile condition.
What waterproofing options are best for shower pan replacement?
The best waterproofing options for shower pan replacement include sheet membranes like PVC liner or rubber membrane, fabric membranes like Kerdi, or liquid-applied membranes like RedGard and HydroBan. Professional installations often layer multiple systems such as Kerdi fabric for floor and corners, KerdiFix sealant on seams, and RedGard coating on top for triple protection, ensuring continuous coverage from floor up walls with proper drain flange connection.
How long does shower pan repair take?
Shower pan repair takes 1-2 hours for temporary fixes like caulking and sealing, 2-4 hours for minor crack repairs, and 2-4 days for partial waterproofing repairs. Complete professional pan replacement typically requires 3-5 days to allow proper subfloor drying, waterproofing installation, mortar bed curing, and tile setting, while full shower rebuilds can take 1-2 weeks including finishing work.
Do you need a permit for shower pan replacement?
You need a permit for shower pan replacement in most jurisdictions when the work involves plumbing modifications, waterproofing installation, or structural changes to subfloor support. Professional contractors typically handle permitting and ensure repairs meet local building codes including 2-inch minimum drain pipe diameter, proper 1/4 inch per foot slope toward drain, and code-compliant subfloor blocking, while DIY repairs on complex projects risk failing inspection.
Will homeowners insurance cover shower pan leak damage?
Homeowners insurance typically covers sudden or accidental water damage from events like burst pipes but usually excludes gradual deterioration from lack of maintenance or aging shower pans. Document leak discovery, damage extent, and repair process with photos and professional assessments to support potential claims, and note that home warranties generally don’t cover water damage itself but may cover related plumbing component failures.