
You just found a dark patch spreading across your drywall, and now you’re racing the clock. The difference between a quick cleanup and thousands in repairs comes down to how fast you dry things out. But speed without safety creates bigger problems, from electrical hazards to mold taking hold in hidden spaces. This guide walks you through proven drying methods that work with what you have at home, shows you when to call pros, and explains exactly how to verify walls are actually dry instead of just looking okay on the surface.
Immediate Actions to Stop Water Damage and Begin Drying

What you do in the first hour after finding wet drywall basically determines how bad things get and how much you’ll spend fixing it. Fast action keeps moisture from going deeper, stops structural problems before they start, and prevents mold from getting established.
Here’s what to do, in order:
- Shut off the water at the supply valve or main shutoff if you can reach it
- Kill power to wet areas at the breaker panel before you step into heavily soaked spaces
- Get furniture, electronics, and other stuff away from wet walls
- Pull out standing water with towels, mops, or a wet/dry vac
- Aim household fans at wet walls and open interior doors for airflow
- Keep windows closed if it’s more than 60% humidity outside (opening them just brings in more moisture)
- Take photos and notes of everything for insurance
- Call your insurance company and Emergency Water Damage Services right away
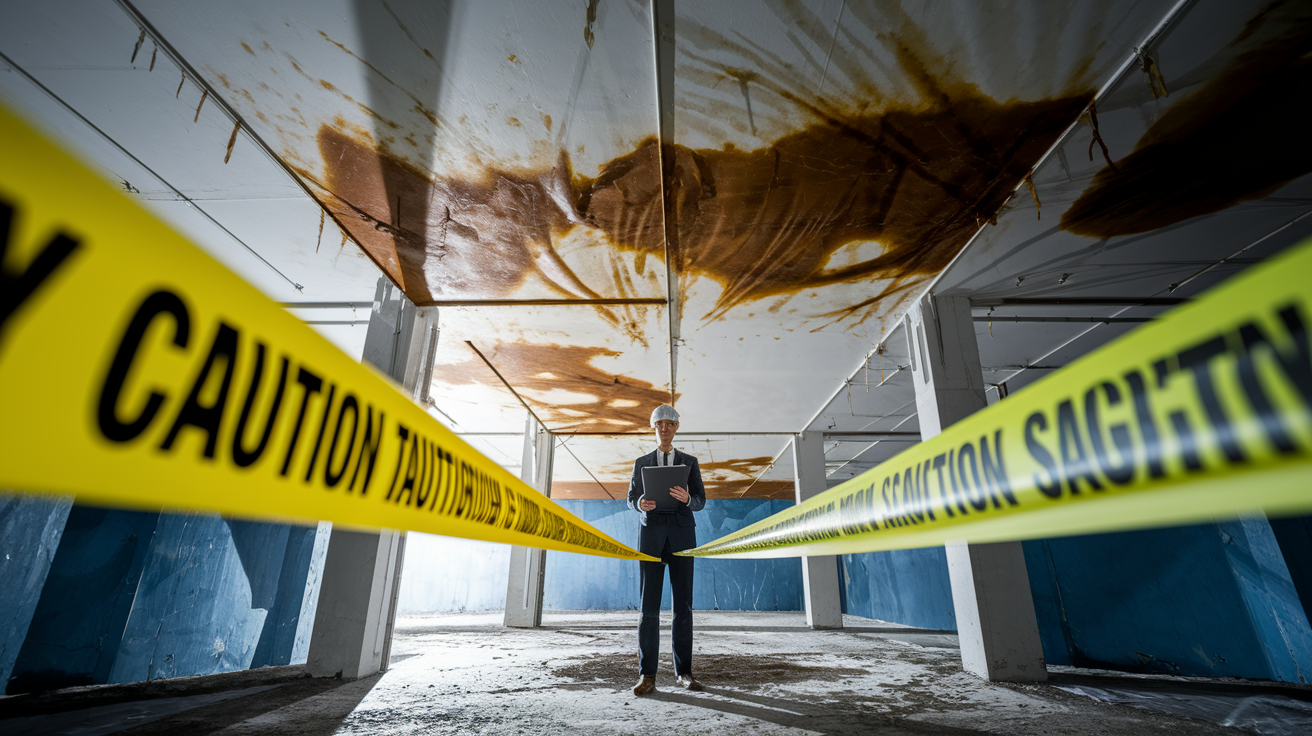
Don’t do anything that risks injury or makes damage worse. Never try removing sagging ceiling material yourself. Water soaked ceiling drywall can hold 50+ pounds per section and collapse without warning. Don’t touch outlets, switches, or appliances in wet areas even if the power looks off. Skip entering deeply flooded spaces without proper safety gear and confirmed electrical shutoff.
Step-by-Step Process for Drying Wet Drywall

Get all standing water out first. A wet/dry vacuum works fastest, starting from the deepest puddles and working outward. Then use towels and mops for what’s left on the surface. Squeegees help push water toward where you’re extracting it. The more water you pull out mechanically, the faster everything dries.
Position fans where they’ll actually move air across wet surfaces. Angle each fan toward the wall at about 45 degrees, 6 to 8 feet back from the wet drywall. Space multiple fans to cover different sections instead of bunching them up. High velocity box fans or pedestal fans work for DIY drying. Point airflow at the lower parts of walls where water usually concentrates.
Put your dehumidifier somewhere central with clearance on all sides for air intake. Keep it at least 12 inches from walls and furniture. If it has continuous drainage, hook up the hose to a floor drain or run it outside. Otherwise, you’ll empty the bucket every 8 to 12 hours to keep it running. Make sure air can circulate freely around the unit.
Check outdoor humidity before you decide about ventilation. Opening windows when outside humidity is below 50% actually helps. It pulls drier air through and pushes moisture laden indoor air out. When outdoor humidity’s above 60%, keep windows closed and rely totally on the dehumidifier. Open interior doors to create airflow between rooms and stop moisture from building up in closed spaces.
You’re looking at 24 to 72 hours of continuous operation with professional equipment for complete drying. DIY household fans and standard dehumidifiers stretch this to 3 to 7 days or longer. Small leaks you caught within hours affecting limited areas typically dry in 24 to 48 hours with proper setup. Moderate damage soaking wall bases usually takes 2 to 4 days of active drying. Major flooding or hidden long term leaks need 3 to 7 days minimum, often requiring professionals. Check progress daily by feeling walls for coolness and dampness. Adjust fan angles and dehumidifier settings based on which areas dry fastest.
Essential Drying Equipment: Capacities and Usage Guidelines
Equipment choice directly determines how fast things dry and whether you’ll actually succeed. Air circulation removes moisture from material surfaces. Dehumidification pulls that moisture from the air so it doesn’t just get reabsorbed into walls.
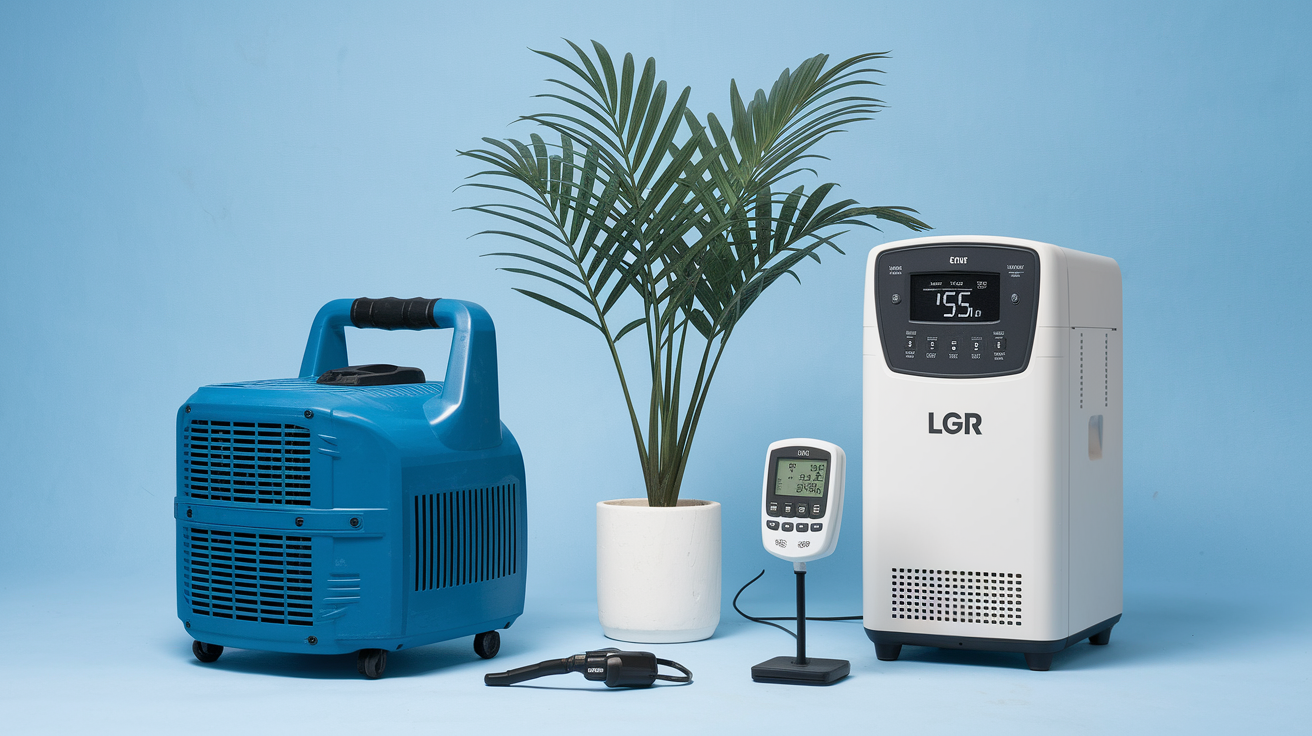
Residential drying equipment includes box fans putting out 1,000 to 2,000 CFM (cubic feet per minute), pedestal fans for targeted air movement, and standard household dehumidifiers removing 30 to 50 pints of moisture daily. You’ll also want a basic moisture meter to track progress. Pin type meters cost $30 to $60 and give accurate readings by penetrating the drywall surface. These residential tools work for minor water exposure caught early, but they stretch drying timelines considerably compared to professional gear.
Professional restoration equipment operates at way higher capacities. Commercial air movers produce 2,000 to 3,000 CFM with focused nozzles directing air exactly where it needs to go. LGR (Low Grain Refrigerant) dehumidifiers remove 100 to 140+ pints per day, roughly triple what residential units do. Professional moisture meters include both pin and pinless types for non-invasive scanning. Thermal imaging cameras detect hidden dampness behind paint, cabinets, and trim that looks completely dry. Wall cavity drying systems inject heated air directly into the spaces between studs, addressing moisture trapped behind intact drywall.
Your home’s HVAC system can’t substitute for dedicated drying equipment during water emergencies. AC was designed for comfort cooling and normal humidity control, not structural drying. AC systems remove only 5 to 10 pints of moisture daily under typical conditions. That’s inadequate for handling wet building materials. Running your AC continuously during drying wastes energy without meaningfully speeding things up. Use equipment specifically designed for moisture removal.
| Equipment Type | Residential Specs | Professional Specs | Drying Timeline Impact |
|---|---|---|---|
| Box fans / Air movers | 1,000–2,000 CFM, general airflow | 2,000–3,000 CFM, focused high velocity nozzles | Residential adds 2–4 days to timeline |
| Dehumidifiers | 30–50 pints/day removal capacity | 100–140+ pints/day LGR units | Professional cuts timeline by 50–70% |
| Moisture meters | Basic pin type, manual spot checks | Pin and pinless, moisture mapping, data logging | Professional ensures complete drying verification |
| Specialty tools | Visual inspection only | Thermal imaging, wall cavity injection systems | Professional detects hidden moisture missed by DIY |
| Complete system | 3–7+ days for moderate damage | 24–72 hours with 24/7 monitoring | Professional reduces total damage and costs |
Using Moisture Meters to Track Wet Drywall Drying Progress

Pin type moisture meters use two metal probes that penetrate the drywall surface, measuring electrical resistance between them to calculate moisture content. These give the most accurate readings for drywall and wood framing but leave small holes. Pinless meters use electromagnetic sensors to scan surfaces without penetration, ideal for finished walls where you don’t want damage. Use pin meters for precise readings at specific depths, and pinless meters for quickly scanning large areas to identify problem zones.
Target moisture content for dry conditions sits at 10 to 12% for wood framing and studs. Drywall moisture readings should match the levels in unaffected areas of your home, typically 5 to 8% depending on climate and season. Readings above these levels mean materials are still too wet and need continued drying. Anything over 15% creates favorable conditions for mold growth within 24 to 48 hours.
Establish baseline readings before starting active drying. Walk to a completely dry area of your home (an interior room far from the water damage) and take moisture readings from the walls and any exposed wood. Record these numbers as your target endpoints. During drying, your affected areas should eventually match these baseline readings, confirming complete moisture removal instead of just guessing based on how materials feel.
Check the same locations daily at consistent times. Mark your testing spots with painter’s tape so you measure identical points each day rather than random areas. Record each reading with date and time. Watch for steady downward trends. Moisture content should drop 1 to 3 percentage points daily with proper equipment operation. If readings plateau or increase, adjust fan positions, check dehumidifier settings, or add equipment capacity. Thermal imaging helps during these daily checks by revealing hidden dampness behind baseboards, inside wall cavities, or under cabinets where moisture meters can’t easily reach.
Mold Prevention and Safety Precautions During Drywall Drying
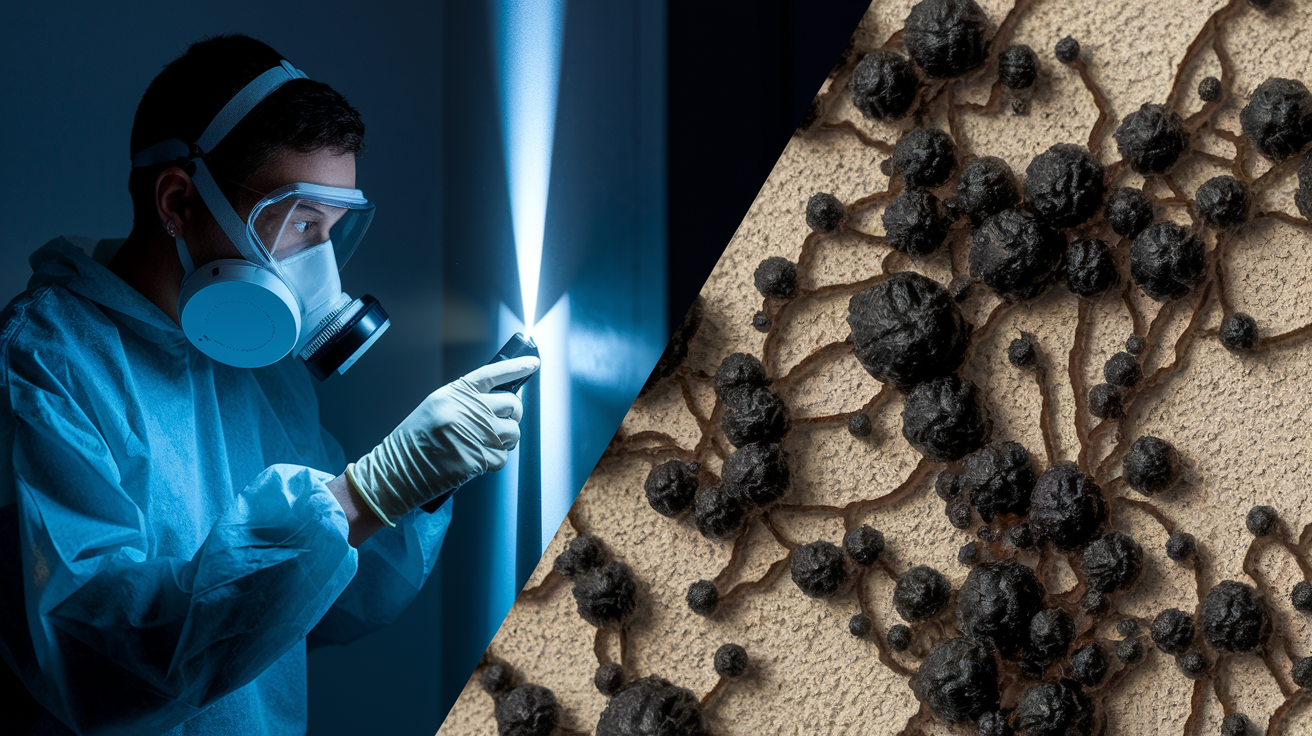
Mold begins forming within 24 to 48 hours on damp drywall in warm conditions. Spores exist everywhere in normal indoor air, but they only germinate and establish colonies when they land on materials with enough moisture and nutrients. Paper faced drywall provides ideal food sources once water saturation exceeds 20% moisture content. This tight timeline demands immediate action. Starting the drying process within hours of discovery keeps conditions unfavorable for mold establishment. Maintain continuous air circulation and keep indoor humidity below 60% throughout the drying period. The faster you remove moisture from materials, the less opportunity mold has to take hold.
Electrical hazards around wet drywall need careful attention before starting any work. Shut off power to affected circuits at your main breaker panel. If you can’t determine which circuits serve the wet areas, shut off power to that entire section of your home. Water conducts electricity and creates shock risks through outlets, switches, light fixtures, and any wiring behind soaked walls. Don’t restore power until an electrician inspects the affected circuits and confirms safety. Never touch outlets, switches, or electrical devices while standing on wet surfaces or wearing damp clothing.
Essential safety measures for working around water damage:
- Wear waterproof gloves to protect hands from contaminated water and cleaning chemicals
- Use N95 respirators when working in areas with musty odors or visible mold growth
- Protect eyes with safety glasses during water extraction, equipment setup, and drywall removal
- Wear rubber boots in areas with standing water or saturated flooring
- Ventilate work areas with fans positioned to push airborne particles outside
- Apply antimicrobial treatments if contaminated water contacted surfaces
Recognize mold growth signs even after surfaces appear dry. Visible spots ranging from black and green to white and orange indicate established colonies requiring professional remediation. A persistent musty odor after surface drying indicates hidden moisture remains trapped in wall cavities or insulation. Surface appearances don’t tell the complete story. Discoloration patterns spreading beyond the original water stain suggest mold growth rather than simple water marking. Take these signs seriously. Mold remediation requires specialized equipment and containment procedures beyond standard drying techniques.
Assessing Water Damage Severity and Determining Drying Approach

Drywall consists of a gypsum plaster core sandwiched between two layers of heavy paper facing. Both materials absorb water readily. Gypsum is naturally porous with microscopic air pockets throughout its structure, while paper facing acts like a sponge. This layered construction means water penetrates quickly and spreads through the entire panel thickness.
Capillary action and wicking cause water to spread upward through porous gypsum several feet above the visible damage line. Think of how a paper towel draws liquid upward when you dip one edge in water. Drywall behaves similarly. Moisture travels through the connected network of tiny pores in the gypsum core, defying gravity to rise 2 to 4 feet above where you see wetness. The paper facing contributes to this upward spread by channeling water along its fibers. The affected area always extends far beyond what’s visible on the surface. A water stain 12 inches high often indicates saturation reaching 3 feet or more up the wall.
Identify surface versus deep saturation through physical inspection and careful observation. Press firmly on the drywall with your palm. Dry material feels rigid and solid, while saturated sections feel soft and may dimple under pressure. Check multiple points from floor level upward until you find where firmness returns. Look for sagging areas where water weight causes the drywall to bow outward from the studs. Observe discoloration patterns (dark staining, yellowing, or brownish marks indicate water presence). Feel for coolness to the touch. Evaporating moisture creates a temperature difference you can detect by comparing wet zones to dry surrounding areas.
Saturation depth depends on several variables. Duration of water exposure matters most. A pipe dripping for days penetrates deeper than a brief overflow. Water volume affects how quickly materials reach full saturation. Wall construction type influences spread patterns. Exterior walls with insulation behave differently than hollow interior walls.
Severity indicators and red flags requiring professional assessment include crumbling texture where the paper facing separates from the gypsum core or the gypsum itself breaks down into powder. Structural sagging signals severe water weight loading (walls bow outward, corners separate, or entire sections droop). Extensive staining spreading upward multiple feet from the source indicates prolonged wicking and deep penetration. Persistent dampness after 48 hours of active drying with fans and dehumidifiers suggests water trapped in wall cavities or insulation that surface equipment can’t reach. These conditions typically exceed DIY drying capacity and benefit from professional moisture detection tools and targeted interventions.
Understanding Water Categories and Contamination Impact

Water damage severity depends not just on saturation amount but contamination level, which dictates different handling protocols and salvage possibilities. Clean water from a fresh supply line allows more aggressive drying efforts and higher salvage rates. Contaminated water introduces bacteria, pathogens, and chemical hazards that make materials unsafe to keep even after drying.
Category 1: Clean Water Sources
Category 1 water originates from sanitary sources: supply line leaks inside walls, clean water pipe bursts, water heater leaks from the tank or connections, and roof leaks allowing rainwater entry. This water contains no substantial contamination at the point of origin. Drywall exposed to Category 1 water offers the best prognosis for drying in place success. Act within 24 to 48 hours for highest salvage rates. The contamination level starts increasing once water sits. Bacteria from building materials and dust begins multiplying, potentially downgrading clean water to Category 2 if drying efforts don’t start promptly.
Category 2: Grey Water Contamination
Category 2 water contains biological or chemical contamination sufficient to cause discomfort or illness if contacted. Sources include dishwasher discharge, washing machine overflow, sump pump failures, and aquarium spills. This water carries bacteria, detergents, food particles, or other contaminants. Grey water allows a shorter drying window due to bacterial presence and material degradation. The critical threshold sits at 24 to 48 hours. Beyond this timeframe, drywall usually requires removal and replacement rather than drying attempts. Paper facing begins breaking down, gypsum loses structural integrity, and bacterial growth accelerates. Living areas with grey water exposure need conservative treatment approaches prioritizing health safety.
Category 3: Black Water Hazards
Category 3 water is grossly contaminated and contains pathogenic organisms, toxins, or hazardous chemicals. Sewage backups, toilet overflows containing waste, external flooding from rivers or storm surge, and rising groundwater all produce Category 3 conditions. This water harbors serious health risks including bacteria like E. coli, viruses, parasites, and chemical contaminants. Drywall contacted by Category 3 water always requires complete removal and replacement. No salvage attempts. The contamination penetrates too deeply for surface cleaning to address, and porous materials retain pathogens even after drying. Wall framing exposed to black water needs antimicrobial treatment before new drywall installation.
When Category 2 water exposure exceeds 24 to 48 hours or any Category 3 exposure occurs, professional remediation services are necessary for proper sanitation protocols and safe material handling. Personal protective equipment, containment procedures, and disposal methods go beyond standard drying techniques. Safety takes priority over salvage attempts with contaminated water scenarios.
Environmental Factors Affecting Wet Drywall Drying Time

High humidity air can’t absorb moisture effectively from wet materials, which stalls the drying process. Air holds water vapor up to its saturation point (the percentage of moisture it contains relative to maximum capacity at a given temperature). When indoor humidity climbs above 60%, the air approaches saturation and can’t accept much additional moisture from drying drywall. Evaporation slows dramatically as the humidity gradient between wet material and surrounding air decreases. Think of it like trying to dry a towel in a steamy bathroom versus outside on a dry day. The humid bathroom air is already holding so much moisture that the towel stays damp.
Raising indoor humidity from 50% to 90% at a constant 55°F temperature increases drying time by up to 4 times compared to low humidity conditions. A wall section that would dry in 24 hours at 50% humidity might require 4 full days at 90% humidity with identical airflow and temperature. Austin’s spring and summer climate complicates natural drying when outdoor humidity exceeds 60 to 70% for extended periods. These humid conditions during warm months create resistance to moisture evaporation. The outdoor air can’t accept much water vapor because it’s already carrying heavy moisture loads.
Temperature plays a critical role in evaporation rates and air’s moisture holding capacity. Warmer air holds exponentially more water vapor than cooler air, roughly double the capacity with every 20°F increase. Evaporation accelerates in warm environments as molecular activity increases, allowing water molecules to escape from material surfaces more readily. Optimal drying occurs between 70 and 80°F where air circulation efficiency balances with evaporation rates. Temperatures above 85°F can accelerate drying but may promote bacterial growth in contaminated scenarios. Below 60°F, evaporation slows considerably and requires longer equipment run times.
Check outdoor conditions carefully before making ventilation decisions. Opening windows when outdoor humidity sits at 40 to 50% helps tremendously. It creates cross ventilation pulling drier air through your home and pushing moisture laden indoor air outside. Your dehumidifier works less and drying accelerates. But opening windows during high outdoor humidity periods above 60% introduces more moisture than it removes. You’re essentially pumping humid air into your home, fighting against your dehumidifier and extending the drying timeline. Monitor local humidity levels through weather apps or a simple hygrometer before cracking windows. When outdoor air is drier than indoor conditions, ventilate freely. Otherwise, seal the space and rely entirely on mechanical dehumidification.
When to Cut Out and Replace Saturated Drywall Sections
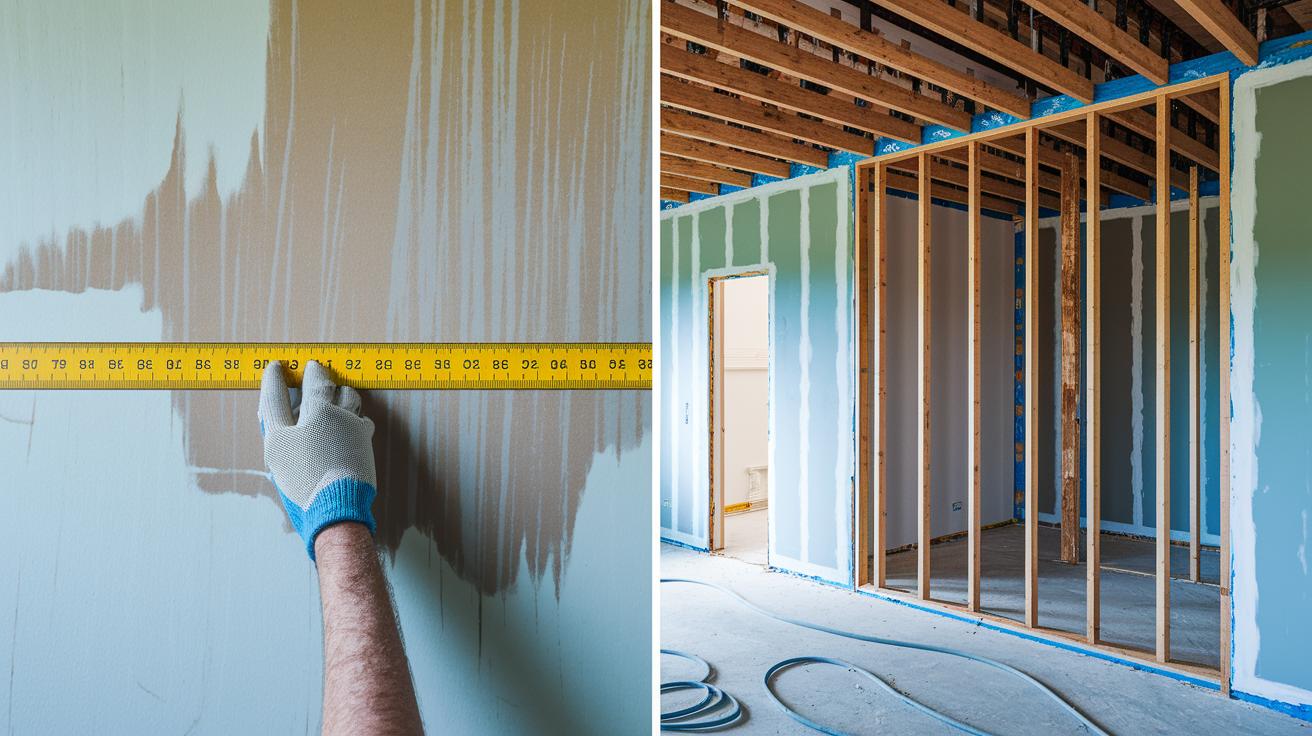
Flood cuts involve removing drywall horizontally 24 inches above the highest visible moisture line to expose wall cavities for proper air circulation and drying. This conservative approach accounts for capillary wicking that pulls moisture several feet above where you see dampness. Cut the entire lower section in one clean horizontal line rather than patching around visible stains. Water spreads behind the surface where you can’t see it. Removing the lower 24 to 36 inches exposes the stud cavities, allows air movement behind the wall plane, and provides access for treating the framing. It prevents trapped moisture from causing hidden mold growth that surface drying can’t address. Flood cuts create clean repair lines that installers can finish more easily than irregular patches following stain patterns.
Weep holes offer an alternative for minor saturation in non-insulated interior walls where full removal seems excessive. Drill 1 inch diameter holes near the floor level (typically 6 inches above the baseboard) spaced every 16 inches along the affected wall. These holes allow moisture venting from the wall cavity without removing large drywall sections. Position fans to blow air across the weep holes, creating pressure differentials that pull moisture out. This technique works for limited clean water exposure caught early, particularly on interior partition walls without insulation. Weep holes don’t work for insulated walls or significant water exposure where cavity contents need removal.
Specific scenarios requiring replacement instead of drying attempts:
- Category 2 grey water or Category 3 black water contact (contamination penetrates too deeply for salvage)
- Visible mold growth established on surfaces or detected through musty odors (indicates colony formation)
- Structural compromise including sagging, crumbling, or loss of rigidity (material integrity is gone)
- Insulation saturation in exterior walls (wet insulation can’t be salvaged and prevents cavity drying)
- Persistent musty odor after attempted drying (signals hidden moisture and early mold in inaccessible areas)
- Water exposure exceeding 72 hours before drying began (materials have degraded beyond reliable salvage)
- Saturation affecting more than 50% of wall height (extensive replacement is more cost effective than partial drying attempts)
Exposing wall studs and cavities requires removing damaged drywall completely in the affected section, then inspecting the framing carefully. Remove any wet insulation. Fiberglass and cellulose insulation act like sponges and release moisture slowly for weeks even after wall surfaces dry. Treat wood framing with antimicrobial products if contaminated water exposure occurred, following manufacturer instructions for application and drying time. Verify the cavity dries completely with moisture meter readings on the studs reaching 10 to 12% before installing new drywall. Rushing reinstallation over damp framing traps moisture and creates hidden mold growth.
Special Drywall Drying Challenges: Ceilings and Insulated Walls
Certain structural locations present special drying challenges requiring modified techniques and often professional intervention due to safety concerns and access difficulties. Ceilings and insulated exterior walls behave differently than standard interior partition walls.
Ceiling Water Damage Risks
Gravity works against ceiling drywall by pulling water downward into the material and concentrating weight at the attachment points. Ceiling drywall begins sagging within hours of significant water exposure as moisture accumulates. Water saturated ceiling drywall can hold 50+ pounds per 4×8 panel. That’s 50 pounds suspended overhead by screws or nails designed for the panel’s normal 50 pound dry weight. This loading creates immediate collapse danger. Visible warning signs include sagging where the panel bows downward between joists, drooping at seams and corners, cracking along fastener lines, and brown or yellow discoloration spreading from the water source. Ceilings require faster intervention compared to walls. The 24 hour window is critical before structural failure risk becomes significant. Never attempt to remove sagging ceiling materials yourself. The water weight overhead creates sudden collapse potential that can cause serious injury. Professional assessment determines whether emergency support systems are needed before attempting drying or removal. Restoration specialists install support bracing, drain pooled water through controlled release points, and monitor structural stability throughout the drying process.
Insulated Exterior Wall Complications
Fiberglass and cellulose insulation absorb water like sponges, holding moisture and releasing it slowly over weeks even after drywall surface appears dry to the touch. Wet insulation fills the wall cavity and prevents the air circulation needed for effective drying. Moisture remains trapped against the back side of drywall and the exterior sheathing, creating ideal conditions for hidden mold growth you won’t detect until odors emerge or you cut the wall open. Insulated walls require flood cut removal of both drywall and wet insulation. Drying in place is not viable. Plan for minimum 2 foot flood cuts on exterior walls to provide adequate access to the cavity. Reach into the cavity and pull out all wet insulation material. It typically falls apart easily once saturated. Wet insulation loses R value completely and can’t be salvaged after saturation. The materials break down, compress into clumps, and retain moisture indefinitely. Replacement is necessary after complete cavity drying. New insulation should only be installed after moisture meter readings on the studs and exterior sheathing confirm dryness at 10 to 12% moisture content.
These special cases mandate professional intervention for safety when sagging ceilings exist or when insulated walls require cavity access. Professionals have support equipment for ceiling stabilization, cavity drying systems that inject heated air directly into wall spaces, and experience recognizing structural risks that aren’t obvious to homeowners.
Insurance Coverage and Documentation for Water Damage Claims
Most homeowner insurance covers sudden accidental water damage from burst pipes, appliance supply line failures, water heater ruptures, and storm related roof damage allowing rain entry. Policies typically pay for both the emergency water extraction and structural drying, plus repairs to damaged materials. Coverage applies when the water event is sudden and unexpected. A washing machine hose bursting while you’re away qualifies. What homeowner insurance excludes matters just as much: gradual leaks from poor maintenance like a slow dripping faucet that goes unaddressed for months, seepage through foundation cracks, and backup through sewer lines unless you purchased specific additional coverage. Insurance companies view maintenance issues as homeowner responsibility rather than covered perils.
Flood insurance exists as a completely separate policy requirement for external flooding events. Rising water from rivers, streams, or storm surge, overflowing bodies of water, and surface water accumulation from heavy rain aren’t covered under standard homeowner policies. The National Flood Insurance Program (NFIP) or private flood insurers provide this coverage. Even homes outside designated flood zones can purchase flood insurance and should consider it in areas with poor drainage or near water bodies. Standard homeowner policies explicitly exclude flood damage, often causing confusion when basements fill during storms. Know which policy covers what before filing claims.
Critical documentation steps to strengthen claims:
- Take time stamped photos and video immediately after discovering damage before moving anything or starting cleanup
- Record moisture meter readings from affected areas and note the readings from dry reference areas for comparison
- Write detailed damage notes including measurements of affected areas, water source identification, and timeline of events
- Obtain professional inspection reports from restoration companies with technical measurements and industry standard assessments
- Keep receipts for all equipment rentals, materials purchased, and services hired during mitigation and repair
Professional restoration documentation strengthens claims significantly through detailed moisture mapping, photographic evidence showing equipment placement and progress, and scope reports using terminology insurance adjusters recognize. Adjusters understand industry standard drying metrics and equipment specifications. A professional report stating “LGR dehumidification achieved target moisture content of 11% in wall studs after 72 hours” carries more weight than a homeowner’s description. This technical documentation often increases claim approval rates and payout amounts by demonstrating appropriate mitigation steps and actual drying verification rather than assumed results. The cost of professional services is typically recoverable through insurance when covered perils cause the damage, making it a worthwhile investment for both proper restoration and claim documentation.
Preventing Future Drywall Water Damage in Your Home
Establish regular inspection routines for vulnerable areas throughout your home. Check under kitchen and bathroom sinks monthly for dampness, corrosion on pipes, or loose connections that signal slow leaks. Inspect around toilet bases every few months for water rings or soft flooring indicating seal failures. Walk around your water heater quarterly looking for rust stains, dampness, or corrosion on the tank and connections. Water heaters typically last 8 to 12 years before failure risks increase. Examine ceilings below bathrooms for staining, particularly around light fixtures and along walls where pipes run. Check basement walls after heavy rains for seepage, new cracks, or efflorescence (white mineral deposits left by evaporating water). Inspect window frames and sills after storms for water intrusion, especially on walls facing prevailing weather. Catching these early warning signs prevents minor issues from becoming major water events requiring emergency drying.
Plumbing maintenance and early leak detection prevent supply line failures and fixture leaks. Inspect visible supply lines under sinks, behind toilets, and to your water heater every few months for bulging, cracking, or corrosion. Replace braided stainless steel appliance hoses every 5 years regardless of appearance. Internal rubber deteriorates before exterior damage shows. Schedule water heater inspections annually, including anode rod checks that prevent tank corrosion from the inside. Test shut off valves quarterly by turning them off and back on to prevent them from seizing. A stuck valve is useless during emergencies. Know the location of your main water shut off valve and ensure all household members can operate it. Mark it clearly and keep the area accessible. For Preventative Plumbing Maintenance on supply systems and fixtures, schedule professional inspections every 2 to 3 years to catch issues before failures occur.
Control humidity and moisture through environmental management in vulnerable areas. Run bathroom exhaust fans during showers and for 20 minutes after to remove moisture before it condenses on walls. Place dehumidifiers in basements during humid months to maintain humidity below 50%, preventing condensation on cool foundation walls and pipes. Ensure attic ventilation meets building code requirements. Proper airflow prevents moisture accumulation and ice dams in winter that cause roof leaks. Address condensation sources by insulating cold water pipes that sweat during humid weather, repairing weatherstripping around windows and doors, and fixing HVAC systems that create indoor humidity issues through poor sizing or maintenance.
| Home Area | Prevention Measure | Inspection Frequency |
|---|---|---|
| Kitchen | Check under sink plumbing, dishwasher connections, refrigerator water lines for leaks or corrosion | Monthly visual inspection |
| Bathrooms | Inspect toilet base seals, shower/tub caulking, sink connections, check for ceiling stains from above | Monthly checks, re-caulk every 2–3 years |
| Water heater area | Look for tank corrosion, connection leaks, pressure relief valve discharge, test TPR valve operation | Quarterly inspection, annual professional service |
| Basement | Monitor for wall seepage, check sump pump operation, maintain dehumidifier, inspect floor drains | After heavy rains, monthly during humid season |
| Roof/gutters | Clean gutters and downspouts, extend downspouts 6+ feet from foundation, inspect roof after storms | Clean gutters twice yearly (spring and fall) |
| Plumbing lines | Replace appliance hoses, test shut off valves, check for pipe corrosion, insulate pipes in unheated areas | Hose replacement every 5 years, valve testing quarterly |
| HVAC system | Change filters monthly, clear condensate drain lines, check drip pans, maintain proper drainage | Monthly filter changes, seasonal professional service |
Final Words
Water damage doesn’t stop on its own. Once you shut off the source and get the drying equipment running, the next 24 to 72 hours make all the difference.
If you’re dealing with more than a small leak, contaminated water, or you’re just not sure the damage is fully contained, that’s when to call us. We’ll handle the moisture mapping, cavity drying, and verification so you know it’s actually fixed.
Learning how to dry out wet drywall the right way protects your home from mold, rot, and a much bigger repair bill down the road. You’ve got the steps. Now you can make the call that keeps your walls solid and your air safe.
FAQ
How long does it take to dry out wet drywall?
Drying out wet drywall typically takes 24 to 72 hours with professional dehumidifiers and air movers, while DIY household fans require 3 to 7 days or longer depending on saturation depth and equipment quality.
Can you dry out drywall that got wet?
You can dry out drywall that got wet if you start within 24 to 48 hours, the water is clean (Category 1), and the material shows no sagging, crumbling, or mold growth requiring replacement instead.
Will mold always grow on wet drywall?
Mold will not always grow on wet drywall if you begin aggressive drying within 24 to 48 hours, maintain air circulation, and reduce humidity below 60 percent to prevent spore germination and colonization.
How long does it take for black mold to grow on wet drywall?
Black mold begins growing on wet drywall within 24 to 48 hours when dampness persists in warm conditions, making immediate drying action critical to prevent mold establishment and health risks.
What equipment works best for drying wet drywall quickly?
Professional LGR dehumidifiers removing 100 to 140 pints daily combined with commercial air movers producing 2000 CFM airflow dry wet drywall fastest, completing the process in 24 to 72 hours.
How do you know when wet drywall is completely dry?
You know wet drywall is completely dry when moisture meter readings match unaffected areas at 10 to 12 percent moisture content, the surface feels room temperature, and no musty odor remains.
Should you remove wet insulation from walls?
You should remove wet insulation from walls because fiberglass and cellulose act like sponges, holding moisture for weeks, preventing cavity drying, losing R-value, and promoting hidden mold growth behind drywall.
What water damage requires drywall replacement instead of drying?
Water damage requires drywall replacement instead of drying when material shows sagging or crumbling, visible mold growth, contaminated water contact, persistent odor after drying attempts, or saturation in insulated walls.
Does homeowner insurance cover wet drywall repairs?
Homeowner insurance covers wet drywall repairs from sudden accidental events like burst pipes and appliance failures but excludes gradual leaks, poor maintenance, and external flooding requiring separate flood insurance.
How far does water wick up drywall above the visible line?
Water wicks up drywall several feet above the visible wetness line through capillary action in porous gypsum and paper layers, making affected areas much larger than what you see on the surface.