
Your well pump kicks on constantly even when nobody’s using water. That’s not just annoying, that’s the sound of your pressure tank losing air and your electric bill climbing. Most homeowners never check tank pressure until symptoms force the issue, but catching low pressure early prevents expensive pump damage from short cycling. Here’s how to test your tank pressure in under 20 minutes using a simple tire gauge, interpret what the reading means, and know whether you need a quick air recharge or a tank replacement.
Using a Pressure Gauge on Your Tank’s Air Valve

The whole process takes about 15 to 20 minutes from start to finish. You need accurate readings, which means following safety steps in order and making sure the tank’s completely drained before you measure.
-
Turn off well pump power at the circuit breaker or disconnect switch near the tank. Don’t ever attempt pressure testing while the pump has power.
-
Close the main water shutoff valve to isolate your well system and keep your entire plumbing system from draining during testing.
-
Attach a garden hose to the boiler drain on the tank manifold, usually at the bottom of the tank connection assembly.
-
Secure the hose end to a floor drain with something heavy like a brick or sandbag so the hose doesn’t jump around when water pressure releases.
-
Open the drain valve and let the tank empty completely. This usually takes 5 to 10 minutes depending on tank size.
-
Verify complete drainage by checking three things: the pressure gauge on your system reads zero, no water flows from the drain hose, and the tank sounds hollow when you tap it with your knuckles.
-
Locate the Schrader valve at the top of metal tanks or at the base of composite fiberglass tanks. It looks just like a car tire valve.
-
Remove the air valve cap and check the valve opening for any water before testing.
-
Press a tire pressure gauge firmly against the Schrader valve until the hissing stops and the gauge needle settles on a reading.
-
Read the PSI measurement on the gauge and write down the number so you can compare it to your target pressure.
-
Check for water leaking from the valve during testing. Water means bladder failure.
-
Replace the valve cap securely after you’re done reading to prevent slow air leaks over time.
Water appearing at the valve or leaking during the test means bladder failure and you’ll need tank replacement. The reading’s only accurate when the tank’s completely empty of water. That hollow sound test when tapping the tank confirms proper drainage. Normal readings should match your pressure switch cut in setting minus 2 PSI.
Essential Tools and Equipment for Pressure Testing

Proper tools make sure you get accurate readings and test safely without risking damage to your system or injury. Most tools needed for pressure testing are available at hardware stores or might already be in your garage.
- Tire style pressure gauge (analog dial gauges or digital models both work, with ranges up to 60 PSI)
- Garden hose with secure fittings (standard 5/8 inch diameter, at least 10 feet long)
- Electric air compressor (portable models with adjustable PSI settings and tire chuck attachment)
- Adjustable wrench (for loosening hose connections and removing pressure switch covers)
- Bucket or floor drain access (to safely handle drainage water)
- Flashlight (for visibility when inspecting valve stems and tank connections)
Tire gauges designed for automotive use work perfectly for pressure tank testing since both use Schrader valves and similar pressure ranges. Optional items like work gloves provide safety when handling metal components and hose connections.
Understanding Normal Water Tank Pressure Ranges
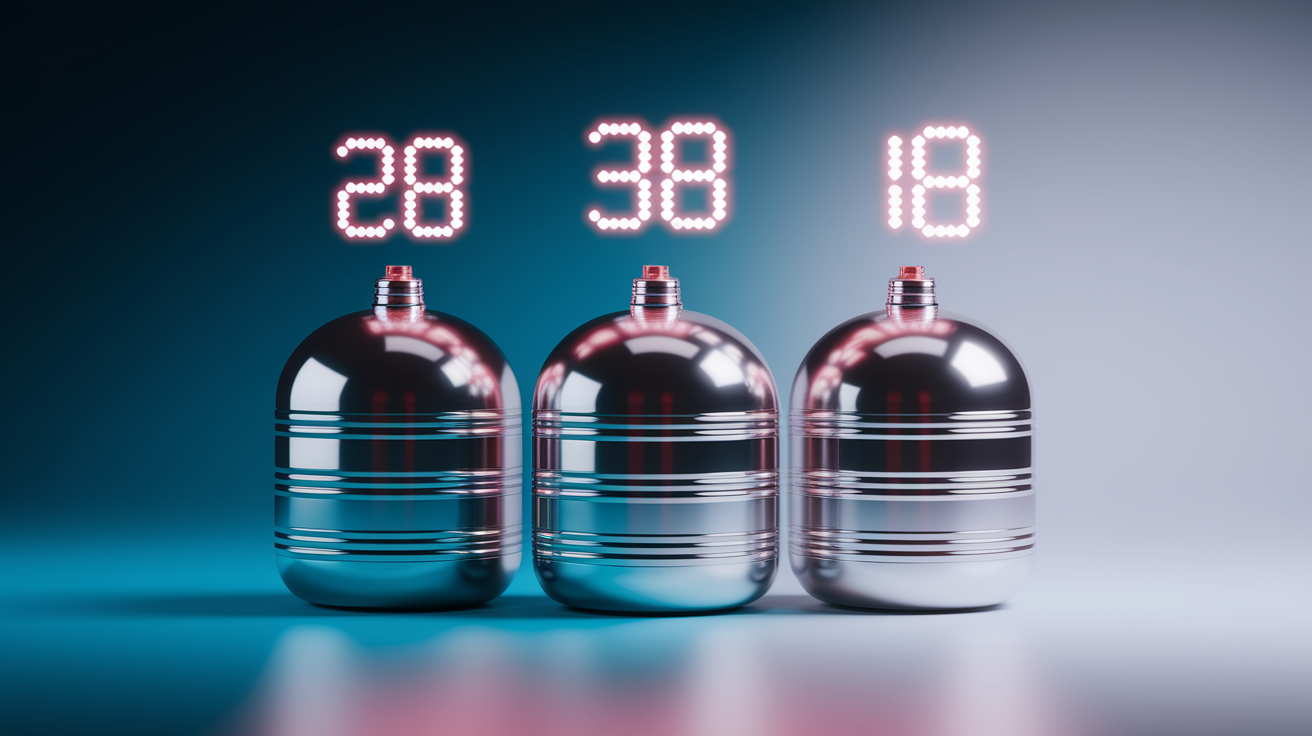
Well pressure tanks should be set at 2 PSI below the pressure switch cut in point. This means a system with a 30/50 pressure switch setting needs 28 PSI tank pressure, while a 40/60 switch setting needs 38 PSI tank pressure. Most residential well tanks come factory set at 30/50 pressure switch settings, which is standard for typical household water demand.
Cut in pressure is when your pump starts running. Cut out pressure is when the pump stops after refilling the system. You’ve got to maintain a 20 PSI separation between cut in and cut out pressure on all pressure switches to prevent pump short cycling. For example, a 30/50 setting means the pump starts at 30 PSI and stops at 50 PSI, creating the required 20 PSI differential that protects your pump from excessive wear.
Factory default settings cover most residential needs, but your tank pressure has to match your specific switch configuration. The 2 PSI rule applies no matter which pressure range your system uses. Some older or specialized systems may use different settings like 20/40 for low demand applications or where elevation affects pressure requirements.
| Pressure Switch Setting | Cut-In Pressure | Cut-Out Pressure | Correct Tank Pressure |
|---|---|---|---|
| 30/50 | 30 PSI | 50 PSI | 28 PSI |
| 40/60 | 40 PSI | 60 PSI | 38 PSI |
| 20/40 | 20 PSI | 40 PSI | 18 PSI |
Locating Your Pressure Switch Settings
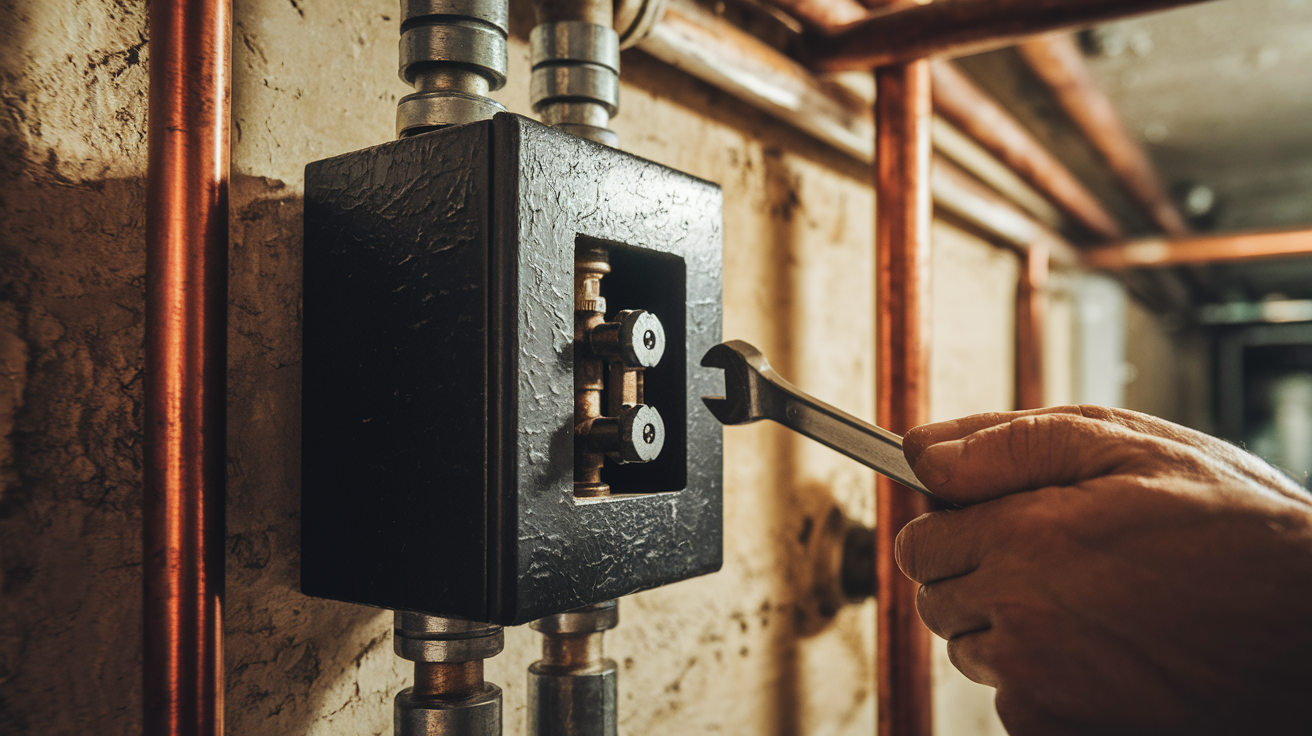
You need to know your switch settings before testing because your target tank pressure depends entirely on this number. The pressure switch is usually a rectangular black box attached to the tank manifold near the round pressure gauge.
-
Locate the rectangular black switch box mounted near your pressure tank, usually within a few feet of the tank itself.
-
Remove the cover by loosening the retaining nut with an adjustable wrench to check for a label or internal diagram showing settings.
-
Observe your system pressure gauge mounted on the same manifold to see current line pressure.
-
Perform a faucet test by running water and watching when the pump activates, then closing the faucet to see when it stops.
The faucet test gives you accurate settings when labels are missing or faded. If the pump kicks on at 30 PSI and shuts off at 50 PSI, you’ve got a 30/50 switch. If it activates at 40 PSI and stops at 60 PSI, you’ve got a 40/60 switch. Many switches include internal diagrams showing standard settings like 30/50, 40/60, or 20/40 molded into the plastic housing. Watching actual pump activation gives you definitive settings when documentation isn’t available.
Identifying Signs of Pressure Loss in Your System

Pressure loss shows up through noticeable changes in daily water use that gradually get worse over time. Pressure problems develop progressively as bladders weaken and air leaks slowly reduce tank efficiency before complete failure occurs.
- Pump cycling every few minutes even when water isn’t running
- Weak water flow at fixtures throughout the house
- Pressure fluctuations during showers or when multiple fixtures run
- Pump running longer than normal to build pressure
- Clicking or rapid on off sounds from the pressure switch
- Waterlogged tank that feels heavy and doesn’t sound hollow when tapped
- Water spurting or stuttering from faucets when first opened
- Increased electricity bills showing excessive pump operation
These symptoms connect directly to underlying tank issues that affect system performance. Early detection prevents pump damage because submersible well pumps are water cooled but generate excessive heat from electrical current during frequent cycling. Without a properly functioning pressure tank, the pump cycles every time water is demanded, causing rapid motor failure. Addressing symptoms quickly protects both the tank and the expensive pump that depends on proper tank function.
Diagnosing Tank Condition From Pressure Readings

Pressure readings reveal specific tank conditions that tell you whether your system’s healthy or needs attention. The difference between normal and problematic results guides your next steps toward proper system maintenance.
Normal Pressure Reading: Readings within 2 PSI of your target pressure mean a healthy system operating as designed. A 30/50 system showing 26 to 30 PSI falls within acceptable range, as does a 40/60 system reading 36 to 40 PSI. Minor variations are normal and these tanks need no immediate service beyond continued monitoring.
Low Pressure Reading (5+ PSI below target): Readings significantly below target but still showing air pressure respond well to simple recharge with an air compressor. A 30/50 system reading 20 PSI or a 40/60 system showing 30 PSI needs air added to restore proper function. This is common maintenance over time, not a system failure. Air slowly escapes through valve seals and small imperfections in bladder materials.
Zero Pressure Reading: Zero PSI means different things depending on tank type. Air over water tanks normally read zero pressure when drained because the air and water share the same chamber without separation. Bladder tanks should maintain air pressure even when drained since the bladder separates air from water. Zero PSI in a bladder tank signals bladder rupture requiring professional service and likely replacement. You can identify bladder tanks by the visible bladder system at the tank opening or manufacturer labels showing “bladder” or “diaphragm” construction.
Water at the Valve: Water appearing at the Schrader valve means bladder rupture and the tank can’t function properly. The bladder has failed from repeated expansion and contraction stress, starting with pinhole leaks that progress to complete rupture. This creates a direct path for water to enter the air chamber. Failed bladders can’t be repaired and the tank must be replaced. Signs accompanying water at the valve include rapid pump cycling, increasingly short drawdown cycles where the pump runs sooner after each use, inability to hold added air pressure, and early leak detection showing water covering the inlet connection inside the tank.
Readings tell you whether you need simple recharge or complete replacement. Waterlogged tanks from bladder failure feel heavy when you try to move them and lack the hollow sound of properly functioning tanks. Early detection through pressure monitoring prevents sudden system failures that leave you without water.
Adjusting and Recharging Your Pressure Tank

Recharging is needed when readings show low but not zero pressure, which means the bladder’s intact but needs more air. A careful, gradual approach prevents overshooting the target and damaging the bladder.
-
Connect the air compressor chuck to the Schrader valve, making sure you get a tight seal before starting the compressor.
-
Add air in short 5 second bursts rather than continuous filling to keep control over the pressure increase.
-
Check pressure after each addition by disconnecting the compressor and testing with your pressure gauge.
-
Stop adding air 1 to 2 PSI before target pressure because the reading will rise slightly as air settles.
-
Allow pressure to stabilize for 30 seconds without the gauge attached, then reconnect for a final reading.
-
Take a final reading to confirm you’ve reached the target pressure without exceeding it.
-
Replace the valve cap securely to prevent slow air leaks that will reduce pressure over time.
Overpressurization creates serious problems including reduced water storage capacity, bladder damage from excessive stretching, and pump cycling issues when the tank empties without triggering the pressure switch. An overpressurized tank holds less water because the overinflated bladder takes up space needed for water storage. The tank may empty completely without dropping pressure enough to start the pump, leaving you without water. Check pressure frequently during inflation and add air slowly to prevent overshooting your target. The tight valve cap after adjustment prevents the gradual pressure loss that makes recharging necessary in the first place.
Restarting Your Well Pump System After Testing

Proper restart sequence prevents water hammer and system damage that can happen when pressure surges through empty lines. The purging process takes 5 to 10 minutes but protects your plumbing from shock and clears sediment disturbed during tank drainage.
-
Verify all drain valves are closed on the tank manifold and any other points where you opened drainage.
-
Restore power to the pump at the breaker or disconnect switch while keeping the main shutoff valve closed.
-
Listen for the pump to start and fill the tank, which usually takes 2 to 3 minutes.
-
Wait for the pump to shut off automatically when the tank reaches cut out pressure.
-
Slowly open the main shutoff valve over 10 to 15 seconds to let pressure gradually enter your plumbing.
-
Run cold water at faucets without aerators starting with the fixture closest to your tank.
-
Continue running water until it flows clear and air stops sputtering from the faucet, then repeat at other fixtures throughout your home.
Dirty water and air sputtering from faucets are normal after tank service because sediment settles in tanks and lines during drainage. Check your work area for leaks 15 to 20 minutes after completing the restart sequence, giving enough time for connections to show problems if seals weren’t properly secured. Restart water treatment equipment like softeners or filters only after water runs clear at all fixtures.
Maintenance Schedule for Water Tank Pressure Checks

Routine checking extends tank and pump lifespan by catching problems before they cause expensive damage or system failure. Preventive maintenance costs way less than emergency repairs or pump replacement, which can run several thousand dollars including labor for pulling and reinstalling submersible pumps.
- Check pressure annually at minimum, ideally in spring before heavy summer water use
- Inspect for visible corrosion on tank surfaces and connections every 6 months
- Listen for abnormal cycling patterns monthly during regular water use
- Test pressure immediately after power outages or any service work on your well system
- Schedule professional inspection every 3 to 5 years for systems over 7 years old
Systems over 7 years old, tanks with a history of pressure issues, or homes with heavy water use benefit from more frequent checks every 6 months rather than annually. Keep a simple log noting pressure readings and dates in a notebook or on your phone, creating a record that shows gradual pressure loss trends before they become emergencies. Consistent monitoring shows whether your tank loses 2 PSI over a year, which is normal, or 10 PSI indicating accelerated bladder wear or valve leaks requiring attention.
When Professional Service Is Required

Testing pressure yourself is straightforward and DIY friendly, but some findings need professional help that exceeds homeowner capability. Early professional consultation when you spot warning signs prevents extensive damage that costs more to repair than addressing problems promptly.
- Zero pressure reading with water appearing at the valve means bladder replacement needed
- Tank unable to hold pressure after multiple recharge attempts suggests bladder failure or air valve damage
- Visible tank corrosion or rust through on the tank body means replacement before catastrophic failure
- Pump cycling every 30 seconds despite correct pressure settings indicates electrical or mechanical pump problems
- Electrical issues with pump or pressure switch connections require licensed electrician
- Sulfur smell or unusual water odors may indicate well pump malfunction or water quality problems
- Pressure switch adjustment when you’re uncomfortable working with electrical components
- Tank sizing problems where drawdown capacity doesn’t match pump output or household demand
- Complete loss of water pressure suggesting pump failure or major line breaks
Tank replacement and pump work require specialized tools, knowledge of well systems, and often heavy equipment to lift waterlogged tanks that can weigh over 500 pounds. Attempting complex electrical repairs can void warranties on pumps and pressure switches that typically include 5 year manufacturer coverage. Professional service provides expert diagnosis and reliable repairs for situations beyond DIY capability, keeping your well system operating safely and efficiently for years.
Final Words
Learning how to check water tank pressure protects your well system from expensive damage and keeps water flowing smoothly. The process is straightforward once you understand the steps and safety precautions.
If your readings show anything other than normal pressure, you’ve caught the problem early. That’s the whole point.
Low pressure? Add air. Zero pressure with water at the valve? Time for professional help. Either way, you’re no longer guessing.
Check your tank once a year. Keep it simple. Your pump will last longer, and you’ll avoid the stress of sudden water issues down the road.
FAQ
What PSI should your water tank be at?
Your water tank should be at 2 PSI below your pressure switch’s cut-in setting. For a standard 30/50 switch, set the tank at 28 PSI. For a 40/60 switch, the correct pressure is 38 PSI. This 2 PSI rule ensures optimal performance and prevents pump short-cycling.
How do I tell if my water pressure tank is bad?
A bad water pressure tank shows several clear signs: the pump cycles every few minutes, water pressure fluctuates during use, the tank feels heavy instead of hollow when tapped, or water comes from the air valve when checking pressure. Zero pressure in a bladder tank or rapid pump cycling indicates bladder failure requiring replacement.
What happens if bladder tank pressure is too low?
If bladder tank pressure is too low, your pump cycles more frequently, water pressure becomes inconsistent at fixtures, and the pump works harder than necessary. Low pressure reduces the tank’s water storage capacity, forcing the pump to activate for smaller water demands. This excessive cycling shortens pump lifespan and increases electricity costs.
How do you repressurize a water tank?
To repressurize a water tank, turn off the pump power, drain the tank completely until the gauge reads zero, then connect an air compressor to the Schrader valve. Add air in short bursts, checking frequently with a tire gauge until reaching your target pressure. Replace the valve cap securely and restart the system.