
You probably think water pressure is fine because your shower works and your toilet fills. But weak flow from upstairs faucets, appliances that take forever to run, or showers that barely rinse shampoo all point to pressure problems you’re living with every day. The good news is you don’t need a gauge to figure out what’s happening. A bucket, a timer, and a few simple tests show you exactly where your pressure stands and whether you need to do something about it.
Practical DIY Methods to Measure Water Flow
These testing methods work by measuring flow rate. That’s how much water moves through your pipes in a set amount of time. Flow rate serves as a reliable pressure indicator because higher pressure pushes more water through your plumbing faster, while lower pressure reduces the volume that flows in the same timeframe.
Calculation-Based Testing Methods:
-
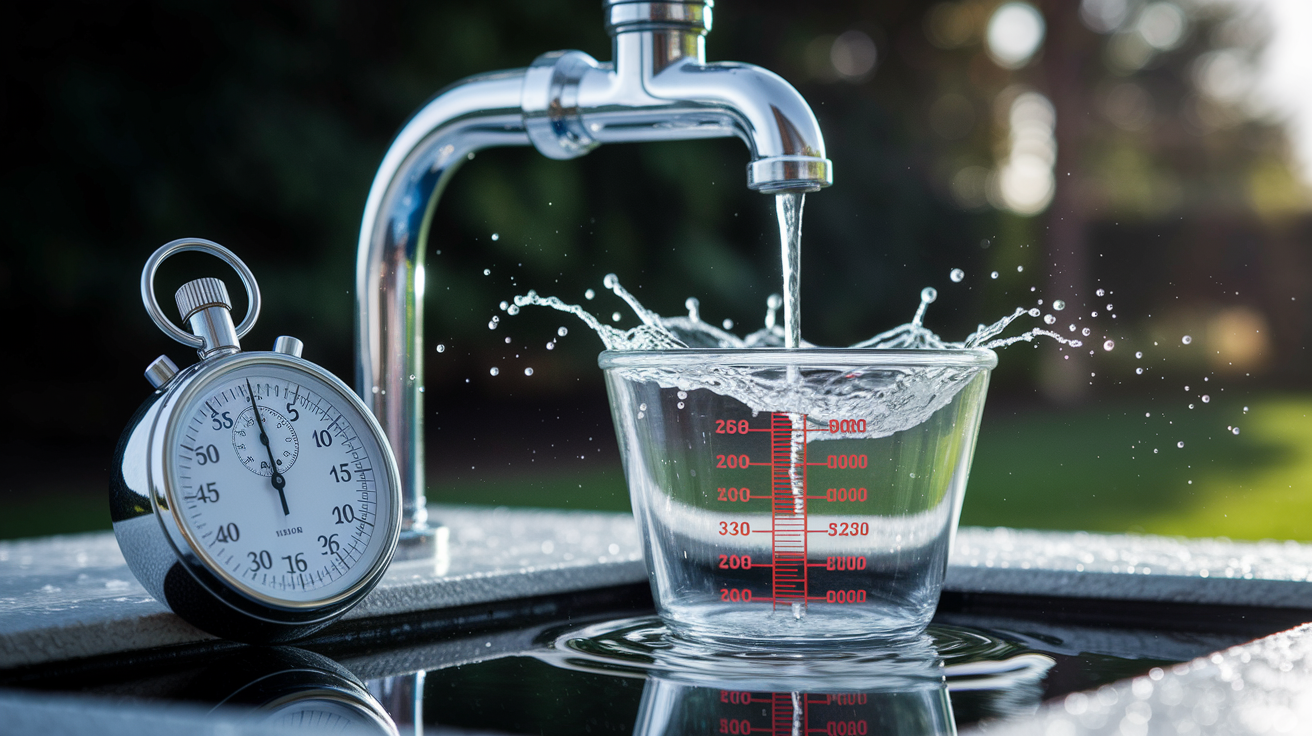
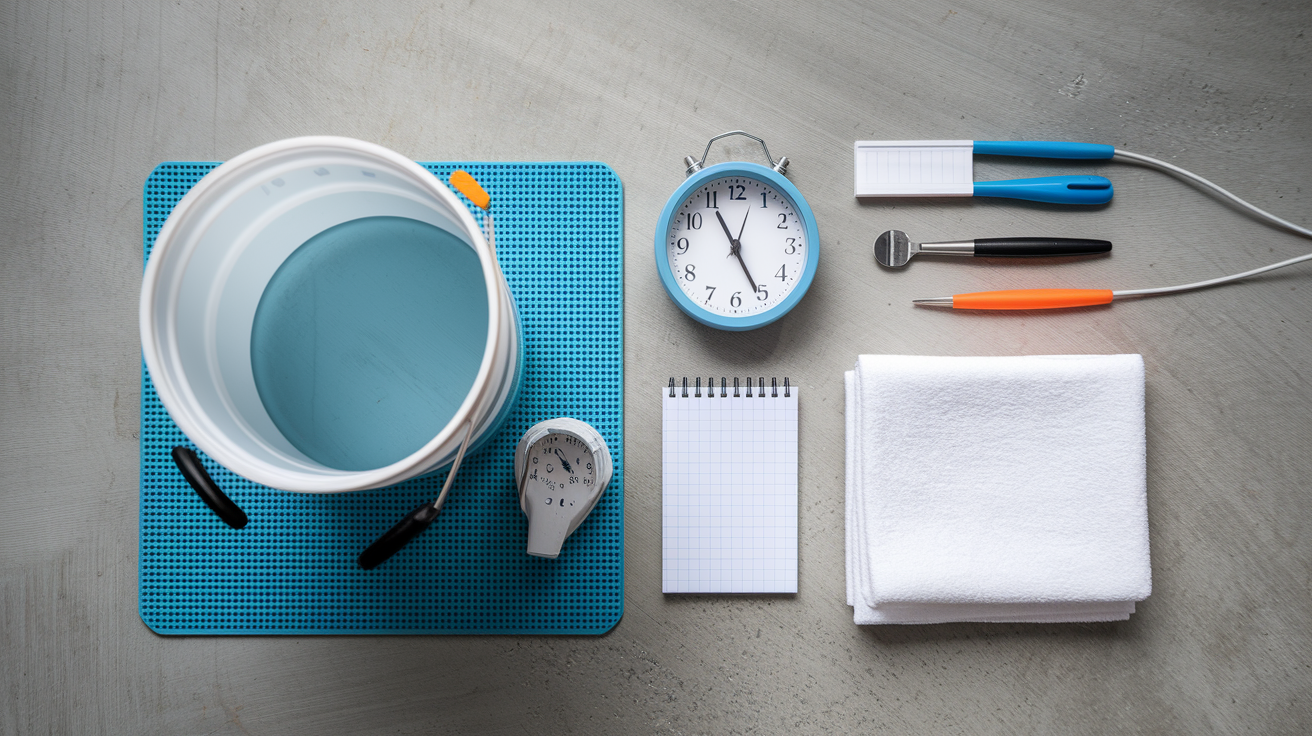
One-Gallon Bucket Test – Place a standard one-gallon bucket under the outdoor spigot closest to your water main. Make sure all other water sources in your home are turned off. Open the faucet completely and start your timer the moment water hits the bucket. Stop timing when the bucket reaches exactly one gallon. Divide 60 by the number of seconds it took to fill. The result is your flow rate in gallons per minute (GPM). If your bucket filled in 12 seconds, that’s 60 ÷ 12 = 5 GPM.
-
Four-Quart Cup Method – Use a four-quart measuring container at the faucet closest to your water source. Turn off all other taps and appliances. Run the water at full blast for exactly 10 seconds. Multiply the volume you collected by 10 to calculate your flow rate in GPM.
-
One-Quart Measuring Jug Test – Fill a one-quart measuring jug at a fully opened faucet while timing. If the jug fills completely in 10 seconds, your flow rate is approximately 1.6 GPM. Adjust proportionally for different fill times. If it takes 5 seconds, you’re looking at roughly 3.2 GPM.
-
Six-Second Measuring Jug Method – Use a 1-2 liter measuring jug and set a timer for 6 seconds. Run the water at maximum flow from the tap nearest your main line with all other fixtures off. Multiply the liters you collected by 10 to get your flow rate in liters per minute.
-
Garden Hose Height Method – Attach a garden hose to an outdoor tap and open the faucet fully. Lift the hose vertically, keeping it straight, until water stops flowing from the open end. Measure the height in feet from the faucet to where the water stopped. Divide this number by 2.31 to estimate pressure in PSI. This method requires ladders, possibly roof access, and significant physical effort. It’s more time-consuming than the other options and often less practical than just buying an inexpensive gauge.
Accuracy depends entirely on eliminating other water use during testing. Every running toilet, active dishwasher, or dripping faucet pulls water from your system and reduces the flow reaching your test location. This makes your readings artificially low and misleading. Testing at the outdoor hose bib or the fixture closest to where your main water line enters the house gives you baseline readings that show what your system delivers before water travels through interior plumbing, encounters pipe bends, or splits off to multiple fixtures.
Observation-Based Supplementary Checks:
- Toilet Fill Time – A standard toilet cistern holding 7.5 liters should refill completely within 1 minute 40 seconds after flushing. Longer fill times signal low pressure.
- Bathtub Fill Duration – An 80-liter standard bathtub should fill in approximately 5 minutes with the tap fully open. Significantly longer fill times indicate pressure issues.
- Shower Container Test – Hold a known container (one-gallon jug or two-liter bottle) under your showerhead at full spray and time how long it takes to fill, then calculate flow rate using the same formulas above.
The calculation methods give you numbers you can compare against standards and track over time. Bucket tests and timed jug measurements are what you need here. Observation methods like watching your toilet refill or timing your bathtub tell you something’s off, but they don’t give you the specific flow rate data you need to determine whether you’re dealing with minor inconvenience or a problem that needs fixing.
Understanding Your Water Pressure Test Results

Flow rate and actual water pressure connect directly but aren’t identical measurements. When you calculate gallons per minute or liters per minute, you’re seeing the result of your water pressure pushing through your specific plumbing setup. Pressure is the force (measured in PSI), while flow rate is the volume that force delivers.
DIY methods don’t give you exact PSI numbers the way a gauge would, but they reveal whether your pressure falls in acceptable ranges for normal household use. These estimates work because residential plumbing follows predictable patterns. Certain flow rates consistently correspond to certain pressure ranges in typical home systems.
| Flow Rate Result | Pressure Indication | What It Means |
|---|---|---|
| Below 5 GPM / 10 liters per minute | Low pressure (likely under 40 PSI) | Appliances may struggle, showers feel weak, fixtures take longer to fill |
| 5-6 GPM / 10-15 liters per minute | Acceptable (approximately 40-60 PSI) | Adequate for basic household needs, though performance could improve |
| Above 6 GPM / 15+ liters per minute | Good to high (likely 60-80+ PSI) | Strong fixture performance, appliances operate efficiently |
| Significantly above 6 GPM | Potentially excessive (may exceed 80 PSI) | Risk of fixture leaks, pipe stress, premature appliance wear |
These ranges serve as guides, not absolutes. Your specific plumbing configuration affects how pressure translates into flow. A house with wide modern pipes delivers different flow than one with narrow galvanized pipes, even at identical pressure levels. The type of fixture matters too. Low-flow faucets and showerheads intentionally restrict volume regardless of pressure.
Factors Affecting Reading Accuracy:
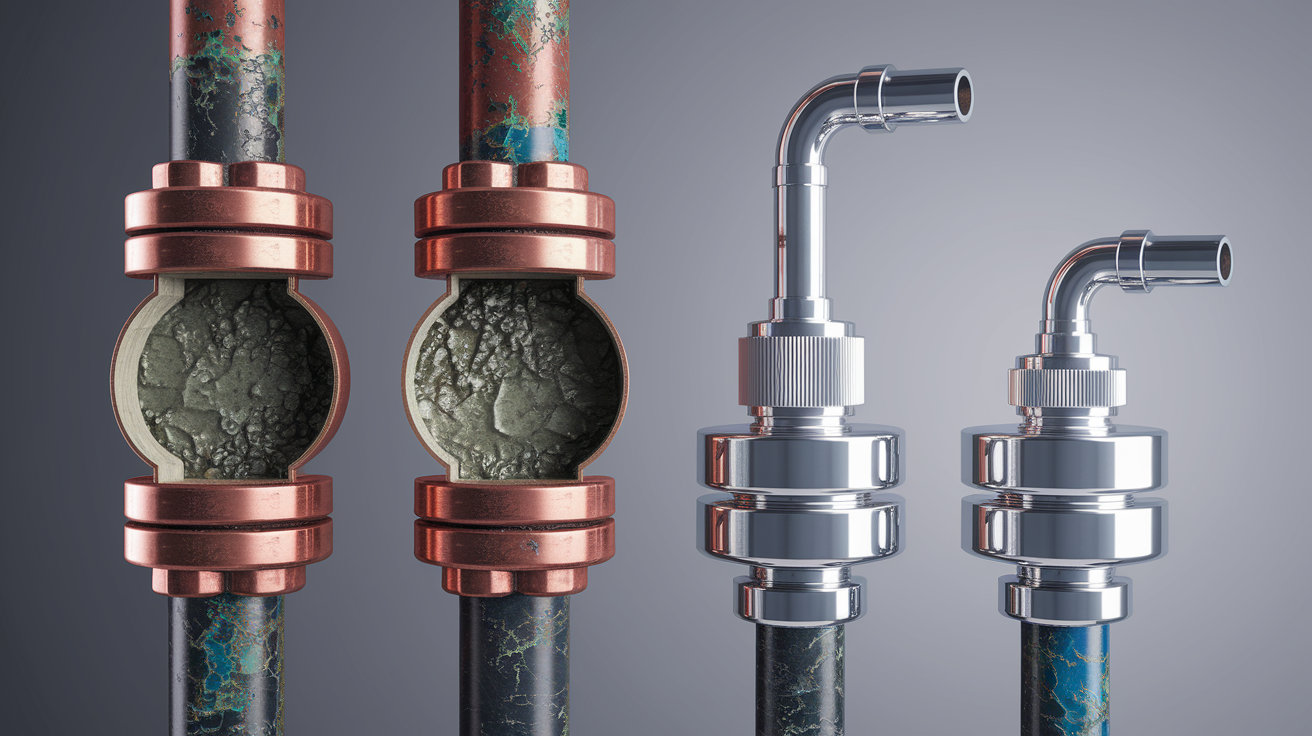
- Pipe diameter and material – Narrower pipes or those with corrosion and mineral buildup restrict water flow, reducing volume even when pressure is adequate
- Elevation and floor level – Upper stories experience approximately 0.43 PSI loss for every foot of height above the water source
- Distance from water main – Longer pipe runs from your meter or well to the test fixture result in pressure loss through friction
- Municipal supply fluctuations – City water systems adjust pressure based on overall demand and infrastructure capacity
- Time of day – Peak usage during morning and evening hours when neighbors are showering and running appliances reduces available pressure
- Seasonal demand – Summer typically brings the lowest pressure as lawn irrigation and increased household use strain municipal systems
- Neighborhood usage patterns – Pressure drops when multiple nearby homes draw water simultaneously from shared supply lines
Testing gives you estimates rather than laboratory precision. A professional gauge provides exact PSI down to tenths of a pound. Your bucket and timer give you a practical answer: enough, not enough, or too much.
Testing multiple times creates a more complete picture of what your system actually delivers under various conditions. Morning readings when you’re the only one awake show your system’s best performance. Evening tests during dinner prep while neighbors are home reveal your worst-case scenario. Seasonal testing captures how your pressure changes when everyone’s watering gardens or when winter reduces outdoor demand.
Consistent technique matters more than perfect precision. Use the same bucket, same faucet, same fill level every time, and you’ll spot trends and changes reliably even if the absolute numbers aren’t gauge perfect.
Testing Water Pressure Across Multiple Fixtures

The outdoor hose bib nearest your water meter or the point where your main line enters your house shows what pressure you’re receiving before your plumbing system affects it. This baseline reading tells you whether low performance stems from your municipal supply or well system versus problems within your home’s pipes. Interior fixtures reveal what happens after water travels through your plumbing. Navigating pipe bends, passing through older sections, splitting off to serve multiple rooms, and fighting gravity to reach upper floors.
Systematic Testing Procedure:
-
Test outdoor spigot first – This establishes your baseline. If flow is weak here, the problem originates before your house plumbing.
-
Move to kitchen sink – Typically the shortest pipe run from the main line in most homes, showing pressure with minimal system resistance.
-
Test bathroom farthest from water entry – The longest pipe run reveals pressure loss through distance and multiple connections.
-
Check upstairs fixtures if applicable – Each foot of elevation costs approximately 0.43 PSI, so upper floors always show lower pressure than ground level from the same supply.
-
Test during simultaneous fixture use – Run two or three faucets at once to see how your system handles multiple demands. Pressure drop here is normal but excessive reduction indicates undersized pipes or supply issues.
Testing at different times reveals patterns beyond your plumbing’s physical characteristics. Morning pressure when you’re the first person awake in your neighborhood often reads higher than evening measurements when everyone’s home cooking dinner and running showers. Weekday readings may differ from weekends when household routines change. Municipal water systems adjust pressure based on overall demand, and your home sits within a larger network of users all pulling from shared infrastructure.
Document each test with the date, time, location, and measured flow rate. Over months, this record shows whether pressure is stable, gradually declining, or fluctuating unpredictably. Gradual decline might indicate pipe corrosion or sediment buildup. Sudden drops point to new leaks or changes in municipal supply. Consistent low readings at distant fixtures but good pressure near the main suggest your interior plumbing needs attention.
Identifying Low and High Pressure Warning Signs
Everyday household behaviors signal pressure problems before you conduct any formal testing. Recognizing these patterns tells you whether testing is necessary and helps you describe issues clearly if you need to call a plumber.
Low Pressure Warning Signs:
- Weak stream from multiple faucets when opened fully. One fixture suggests a local clog, but several indicate system-wide low pressure.
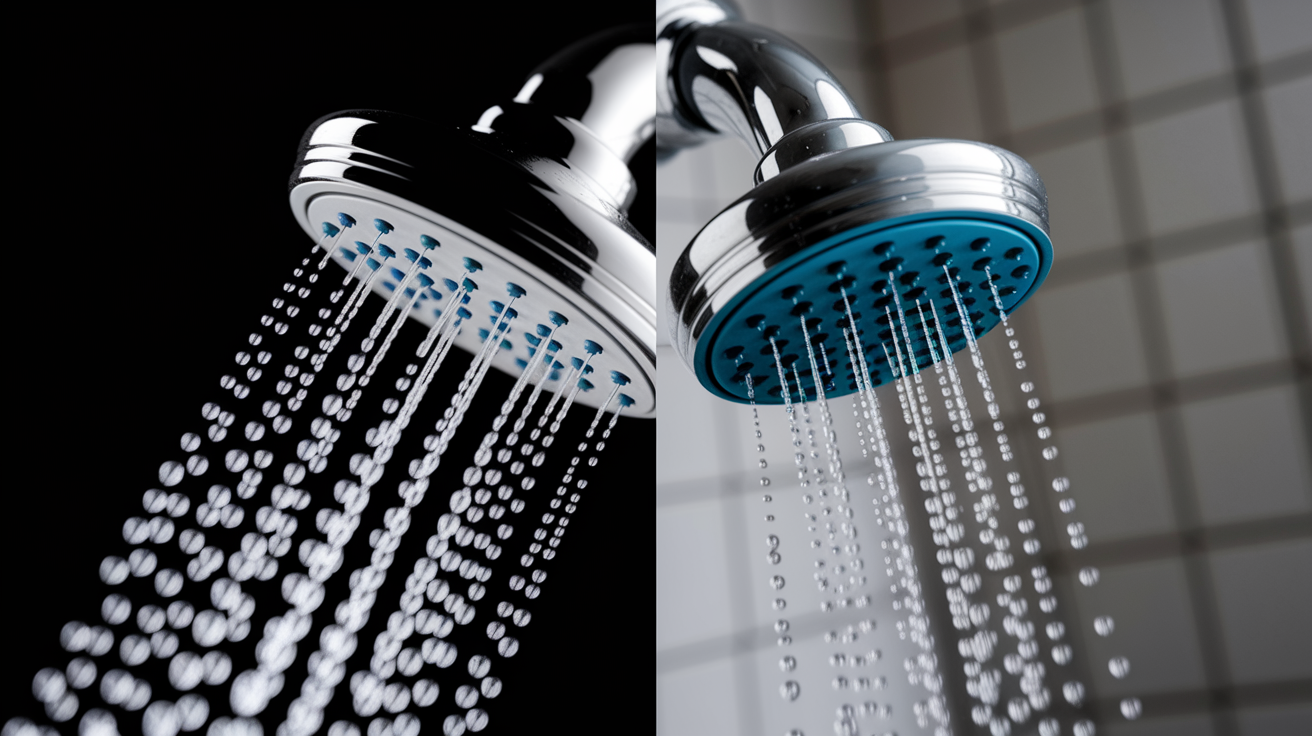
- Shower spray that lacks force and feels like standing under a drizzle rather than a proper shower
- Washing machine taking significantly longer than normal to fill for each cycle
- Dishwasher running extended cycles because water enters too slowly
- Toilet tanks refilling sluggishly after flushing. Filling should complete within 1 minute 40 seconds at normal pressure.
- Electric showers shutting off unexpectedly because their safety mechanisms detect pressure dropping below minimum operating requirements
- Water trickling rather than flowing from outdoor spigots when you connect a hose
- Appliances making strained or unusual sounds during water intake because they’re working harder to pull adequate volume
High Pressure Warning Signs:
- Fixtures leaking at connection points where washers and seals can’t withstand excessive force
- Banging pipes (water hammer) when you shut off faucets quickly. High pressure creates shockwaves through the system.
- Hissing sounds at faucets even when partially closed
- Water spraying forcefully when taps are barely cracked open. Normal pressure allows gradual flow control.
These observations don’t give you numbers, but they tell you whether your system is operating in its normal range. If you’re noticing several low-pressure signs simultaneously, formal testing will quantify the problem and help determine whether the cause is your municipal supply, your home’s plumbing, or something in between. High-pressure signs mean testing is critical because sustained excessive pressure damages pipes, shortens appliance lifespan, and eventually causes leaks that turn into larger water damage issues.
Diagnosing and Fixing Common Pressure Problems
Water pressure issues develop from various causes ranging from simple fixture clogs to whole-system problems requiring professional intervention. Understanding common culprits helps you work through solutions systematically, starting with the quickest fixes.
Multiple factors combine to create the pressure you experience at any given fixture. Some you can control and fix yourself. Others require professional assessment or are simply characteristics of your home’s location and plumbing design.
| Pressure Issue | Common Cause | DIY Solution |
|---|---|---|
| Sudden pressure drop | Leaking pipes drawing water before it reaches fixtures | Inspect visible connections, check for damp spots, address any leaks found |
| Gradual pressure decline | Mineral buildup and sediment accumulating in pipes and water heater | Clean fixture aerators, flush water heater annually to remove sediment |
| Inconsistent pressure | Faulty pressure regulator failing to maintain steady output | Check regulator adjustment screw, consider replacement if unit is old |
| Low pressure at single fixture | Clogged aerator restricting flow at that specific location | Remove aerator, soak in vinegar to dissolve mineral deposits, reinstall |
| Pressure loss upstairs only | Elevation reducing pressure through gravity, compounded by partially closed valves | Verify all upper-floor shut-off valves are fully open |
| Fluctuating pressure | Main shut-off valve not fully open, restricting flow inconsistently | Locate main valve near meter or entry point, ensure it’s turned completely open |
| Seasonal variations | Neighborhood demand changing with weather and irrigation needs | Test at off-peak hours to establish baseline, adjust usage patterns if needed |
Systematic Troubleshooting Steps:
-
Check main shut-off valve is fully open – This valve controls all water entering your home and sits near your water meter or where the main line enters. Even partially closed, it restricts flow to every fixture. Turn it counterclockwise until it stops. If it moves at all, it wasn’t fully open.
-
Remove and clean faucet aerators – These small mesh screens screw onto the end of faucet spouts and trap mineral deposits over time. Unscrew counterclockwise (you may need pliers with tape to protect the finish), soak in white vinegar for several hours to dissolve buildup, rinse thoroughly, and reinstall.
-
Inspect for visible leaks – Walk through your home checking under sinks, around toilets, near the water heater, and in the basement or crawl space. Even small leaks divert water before it reaches your fixtures. For guidance on finding hidden leaks, see our guide on leak detection and repair.
-
Flush water heater to remove sediment buildup – Sediment settling in the tank reduces capacity and restricts flow. Attach a hose to the drain valve at the tank’s base, run it to a floor drain or outdoors, turn off the water supply to the heater, and drain several gallons until the water runs clear. Do this annually.
-
Check individual fixture shut-off valves – Under every sink and behind every toilet, small valves control water to that specific fixture. Make sure these are turned fully counterclockwise. Partially closed valves are easy to overlook but severely restrict flow.
-
Test pressure at outdoor spigot – If outdoor pressure is strong but interior fixtures are weak, the problem lives in your home’s plumbing. If outdoor pressure is also low, the issue is your supply line or municipal system.
-
Clean showerheads – Remove the showerhead, soak it in a vinegar solution overnight to dissolve mineral deposits in the small spray holes, scrub with an old toothbrush, and reinstall.
If your home has a pressure regulator (usually a bell-shaped device near where your main water line enters), inspect it carefully. These regulators contain an adjustment screw that can shift over time or be accidentally bumped. Some older units simply wear out and fail to maintain consistent pressure. The regulator’s job is protecting your plumbing from excessive municipal pressure, but a malfunctioning unit can reduce pressure below usable levels.
When DIY efforts don’t improve your situation, professional assessment becomes necessary. Persistent low pressure affecting all fixtures after you’ve cleaned aerators, verified valves, and checked for visible leaks suggests problems inside walls, underground supply line issues, or municipal delivery below acceptable standards. Suspected leaks you can’t locate by visual inspection require detection equipment professionals use to find hidden moisture. If your testing consistently shows readings that translate to below 40 PSI or above 80 PSI across multiple fixtures and times, that’s outside the safe operating range for residential plumbing and needs expert diagnosis.
Water Pressure Requirements for Home Appliances
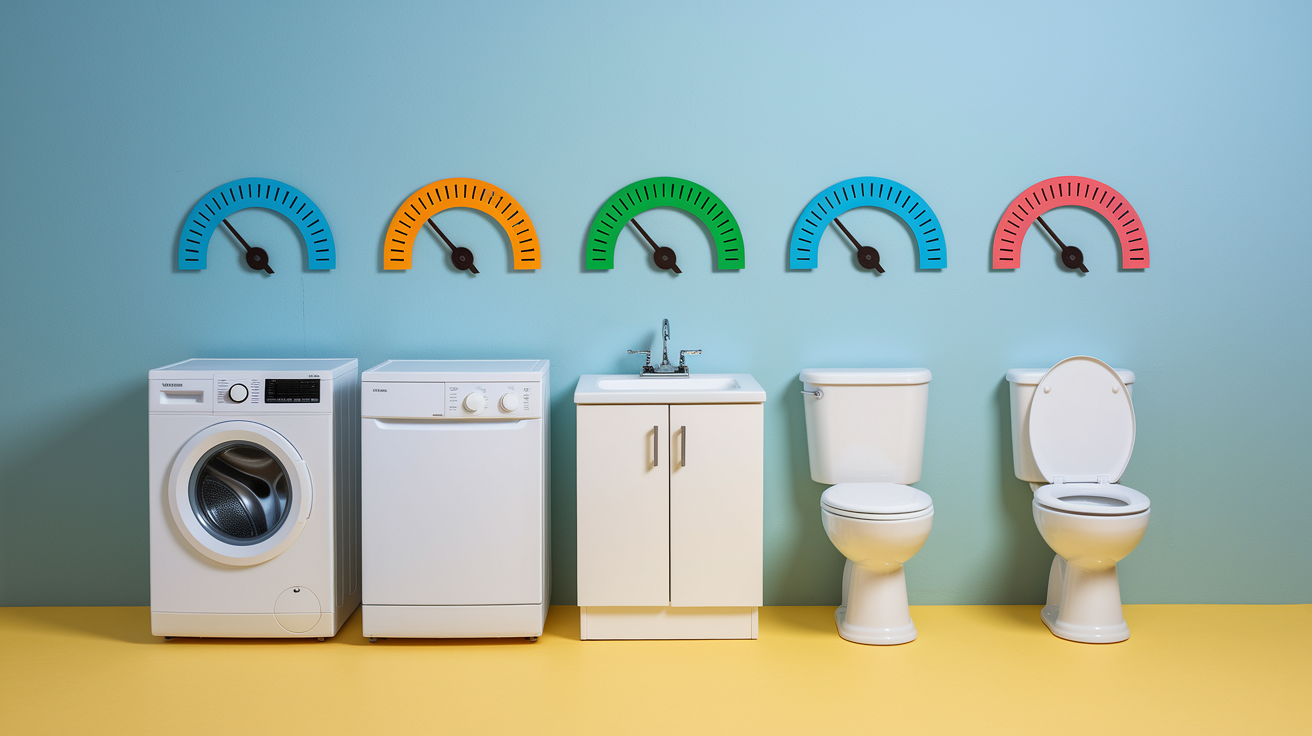
Different appliances and fixtures require minimum pressure levels to operate correctly. Understanding these requirements helps you interpret whether your test results indicate a problem that needs addressing or marginal performance you can live with.
| Appliance/Fixture | Minimum Pressure Needed | Optimal Performance Range |
|---|---|---|
| Washing machine | 20-30 PSI | 40-60 PSI |
| Dishwasher | 20 PSI | 40-60 PSI |
| Toilet | 15-20 PSI | 40-60 PSI |
| Shower | 30 PSI | 45-60 PSI |
| Standard faucets | 20 PSI | 40-60 PSI |
| Water heater | Varies by type | 40-60 PSI |
| Irrigation systems | Varies | 30-50 PSI |
Pressure below 40 PSI causes appliances to underperform in noticeable ways. Washing machines and dishwashers take longer to fill, extending cycle times significantly. The spray action in dishwashers weakens, reducing cleaning effectiveness. Showers feel unsatisfying. Toilets refill slowly after flushing. Faucets deliver weak streams that make rinsing dishes or filling pots frustratingly slow. These aren’t just minor inconveniences. Appliances designed to operate within specific pressure ranges work harder and wear faster when pressure is inadequate.
Excessive pressure above 80 PSI creates different problems that are less immediately obvious but more damaging long term. Higher force stresses every connection in your plumbing system. Washers and seals that would last years at normal pressure fail prematurely. Appliance valves and internal components wear faster. For specific water heater pressure concerns and troubleshooting, see our water heater troubleshooting guide. Fixtures develop leaks at connection points. The constant stress on pipes can lead to pinhole leaks in older copper plumbing or joint failures in any system. Water hammer (that banging sound when you shut off faucets quickly) gets worse at high pressure and can eventually damage pipes and connections.
When to Call a Professional for Water Pressure Assessment
DIY testing methods give you practical answers about whether your water pressure falls in acceptable ranges, but certain situations require the precision and diagnostic capability only professionals provide.
Your bucket tests, timed measurements, and observation of fixture performance work well for general assessment and monitoring changes over time. These methods cost nothing beyond a few minutes and items you already own. They tell you enough to decide whether your system is operating normally or needs attention.
Situations Requiring a Plumber:
- Persistent low pressure across multiple fixtures even after cleaning aerators, checking valves, and addressing visible issues
- Pressure drops affecting your whole house simultaneously with no obvious explanation
- Suspected leaks inside walls, under slabs, or in underground supply lines that you can’t locate visually
- Test results consistently indicating pressure below 40 PSI or above 80 PSI at multiple locations
- Malfunctioning pressure regulator or complete absence of one when municipal pressure is high
- Corroded pipes or visible deterioration of plumbing components discovered during testing
- Water pressure that fluctuates dramatically throughout the day without corresponding changes in your household usage
- Questions about whether your system meets local building codes or needs upgrades for renovations
Professionals bring tools and expertise DIY methods can’t match. Digital pressure gauges measure exact PSI at any test point, removing the estimation involved in flow-rate calculations. They can install or replace pressure regulators properly, ensuring correct settings for your specific system. Leak detection equipment locates hidden moisture inside walls, underground, or under concrete slabs. They assess whether your pipe diameter and material are adequate for your home’s size and water demands.
The cost of professional pressure testing and diagnosis typically runs far less than repairing water damage from unaddressed pressure problems. A plumber can also verify whether your DIY test estimates align with actual measured PSI, giving you confidence in your monitoring approach. If your bucket test suggests borderline pressure around 40 PSI equivalent, a professional measurement determines whether you’re at 38 PSI (needs fixing) or 43 PSI (monitor but acceptable).
Safety Considerations When Testing Water Pressure
Testing water pressure involves working with your household plumbing system and requires basic precautions to avoid creating problems while diagnosing existing ones.
Water testing is generally low risk compared to other home maintenance tasks, but carelessness can waste significant water, create slipping hazards, or damage fixtures. Following simple safety practices keeps the process straightforward and prevents turning a diagnostic check into a repair project.
Safe Testing Practices:
- Turn off all water-using appliances and fixtures before testing to prevent inaccurate readings, avoid wasting water while measuring, and ensure no one unknowingly uses water during your timed test
- Ensure outdoor testing areas have proper drainage so you’re not standing in pooled water while working with faucets and hoses
- Don’t overtighten connections when attaching hoses or testing equipment. Excessive force can crack fixture threads or damage washers.
- Avoid testing outdoor spigots during freezing weather unless they’re freeze-proof models designed for winter use
- Keep testing areas clear of electrical outlets, extension cords, and devices to prevent any possibility of water and electricity mixing
- Never ignore signs of excessive pressure such as extremely rapid bucket filling or water spraying forcefully when faucets barely open. These indicate risk of pipe damage that needs immediate attention.
If any fixture shows signs of damage during your testing (cracks in the faucet body, significant leaks at connections, loose components that won’t tighten properly), stop testing that fixture immediately. The pressure test isn’t causing the damage, but it’s revealing a weakness that could fail completely under continued stress. Address the fixture problem before resuming pressure assessment.
The bucket and cup timing methods are low risk approaches ideal for beginners. You’re simply collecting water in a container and measuring time. There’s nothing to break and minimal opportunity for error beyond spilling some water. The garden hose height method introduces unnecessary complications and safety concerns. Climbing ladders while manipulating a water-filled hose creates fall hazards. Accessing roofs or elevated areas for a rough pressure estimate doesn’t make practical sense when the same information comes from safer ground-level methods or a simple inexpensive gauge from any hardware store.
Final Words
You now know how to check water pressure without a gauge using simple household items and timing methods.
The bucket test, measuring jug approach, and fixture observation techniques give you reliable estimates of your home’s water flow. These practical methods help you spot pressure problems early and decide whether DIY fixes or professional help make sense.
Test at different times and locations for the most accurate picture. Clean those aerators, check your valves, and keep an eye on how your fixtures perform.
Most pressure issues have straightforward solutions once you understand what you’re dealing with.
FAQ
How do I check my water pressure PSI without a gauge?
You can check your water pressure PSI without a gauge by using the garden hose height method—attach a hose to an outdoor tap, lift it vertically until water stops flowing, measure the height in feet, and divide by 2.31 to estimate PSI.
What’s the easiest way to test the water pressure in your house?
The easiest way to test water pressure in your house is the one-gallon bucket method at your outdoor spigot—turn off all other water sources, time how long it takes to fill the bucket, then divide 60 by the seconds to calculate gallons per minute.
How to manually measure water pressure?
You can manually measure water pressure using the four-quart cup method—fill the cup for exactly 10 seconds at the faucet closest to your water source with all other water turned off, then multiply the collected amount by 10 to get gallons per minute.
How to calculate water pressure from a tap?
You calculate water pressure from a tap by timing how long it takes to fill a known container, then converting that to flow rate—if a one-quart jug fills in 10 seconds, your flow rate is approximately 1.6 gallons per minute, indicating acceptable pressure.
What flow rate indicates normal water pressure?
A flow rate of 5 to 6 gallons per minute indicates normal water pressure for most households—below 5 GPM suggests low pressure that affects appliance function, while above 6 GPM indicates higher pressure that may exceed recommended levels.
Why should I turn off all water sources before testing pressure?
You should turn off all water sources before testing pressure because running fixtures and appliances reduce flow to your test location, giving inaccurate readings that don’t reflect your actual baseline water pressure from the main supply line.
Where should I test water pressure for the most accurate reading?
You should test water pressure at the outdoor hose bib closest to your water meter or where the main line enters your home because this location provides baseline pressure before water travels through your plumbing system and loses pressure.
How accurate are DIY water pressure testing methods?
DIY water pressure testing methods provide rough estimates rather than exact PSI measurements—they reliably indicate whether pressure falls within acceptable ranges and allow you to track changes over time when using consistent testing techniques.
What does it mean if my toilet takes longer than normal to fill?
If your toilet takes longer than 1 minute 40 seconds to fill its standard 7.5-liter cistern, it indicates low water pressure affecting fixture performance—this is a practical observation method that doesn’t require any special tools or calculations.
How does elevation affect water pressure test results?
Elevation affects water pressure by reducing it approximately 0.43 PSI per foot of height—upper floor fixtures naturally show lower pressure than ground-level taps, which is why testing at multiple locations creates a complete pressure picture.
When should I call a professional instead of testing pressure myself?
You should call a professional when you have persistent low pressure after DIY fixes, pressure drops affecting multiple fixtures simultaneously, suspected leaks inside walls, or readings consistently indicating below 40 PSI or above 80 PSI requiring precise measurement.
What causes water pressure to fluctuate throughout the day?
Water pressure fluctuates throughout the day due to neighborhood demand patterns—morning and evening peak usage times reduce pressure as many homes draw water simultaneously, while overnight and midday hours typically show higher baseline pressure.
How often should I test my home’s water pressure?
You should test your home’s water pressure at different times and on different days to understand typical patterns, then document results monthly to track gradual changes—consistent testing technique over months reveals developing problems before they cause damage.