
You might think a little dampness won’t hurt anything, but painting over wet drywall guarantees paint failure and sets you up for mold growth. The surface has to be completely dry before primer or paint touches it. No exceptions. If the compound feels cool or damp when you press your finger against it, you’re not ready. We see homeowners rush this step all the time, and it always costs more to fix later than it would have to just wait another day and do it right the first time.
The Direct Answer: Moisture Testing and Readiness
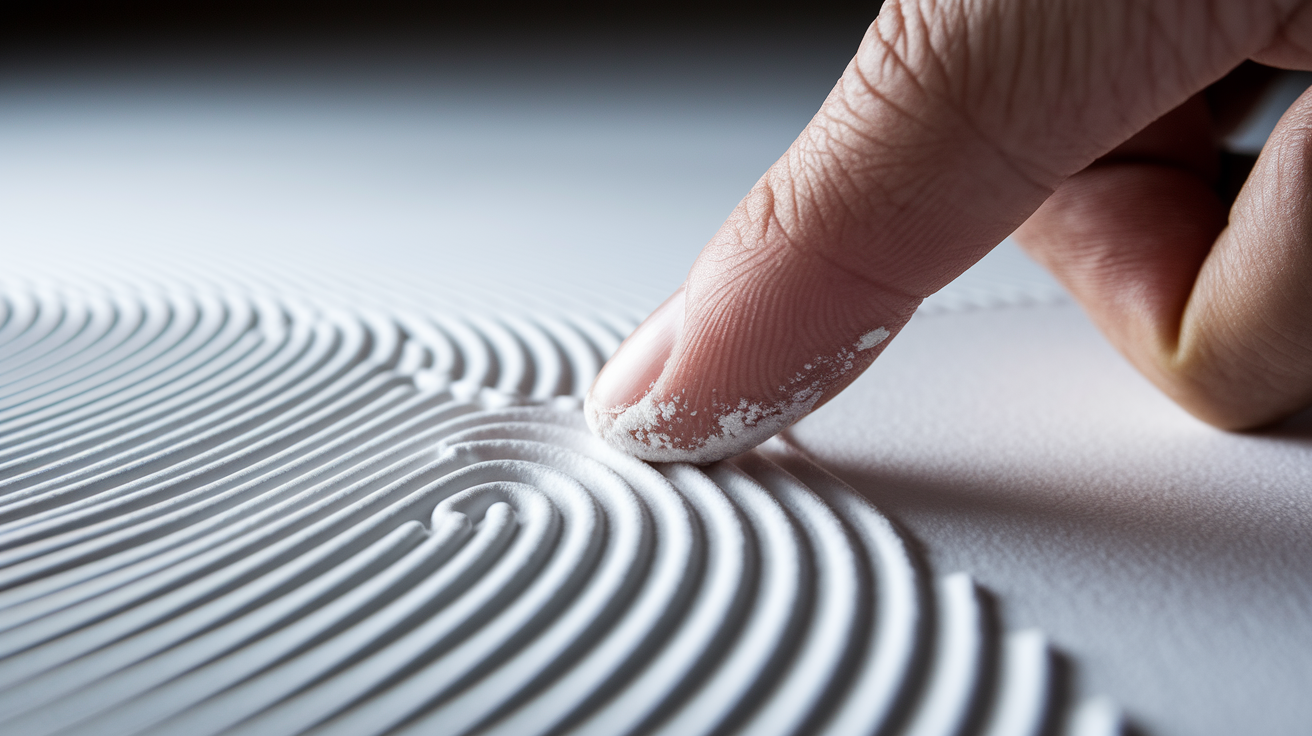
Don’t paint over wet drywall. You need to wait at least 24 hours after applying joint compound or after any moisture exposure before you touch it with primer or paint. If you try painting wet drywall, you’re guaranteeing paint failure and setting up perfect conditions for mold. The surface has to be completely dry to the touch. No cool or damp feeling. The compound should feel smooth and powdery when you rub your finger across it.
| Testing Method | What to Look For | Ready to Paint? |
|---|---|---|
| Moisture Meter Reading | Reading below 12% moisture content | Yes, safe to proceed |
| Touch Test | Surface feels smooth and powdery, not damp or cool to fingertips | Yes, likely ready |
| Visual Inspection | Compound appears light-colored with no dark wet spots or sheen | Yes if uniform color |
| Tap Test | Tapping the surface produces no bending or flexing | Yes, compound has set |
Drying time depends heavily on temperature, humidity, and how much air’s moving through your space. In a well ventilated room at normal temperature (somewhere between 65 and 75°F) with moderate humidity, standard joint compound typically dries in 24 hours. High humidity slows everything down. Sometimes you’re looking at 48 hours or more. Interior corners, thick applications, and spots with poor air circulation take longest to dry and need special attention before you move forward. Run your hand along inside corners and feel for any cool dampness that tells you the compound hasn’t fully cured. When conditions aren’t ideal, add extra drying time instead of rushing it.
The Critical Risks: Why Wet Drywall Ruins Paint Jobs
Painting over wet drywall creates three distinct problems: immediate paint adhesion failures, structural damage to the wall surface, and health hazards from trapped moisture. Each one costs you time and money to fix. None of them can be corrected by just adding more paint coats.
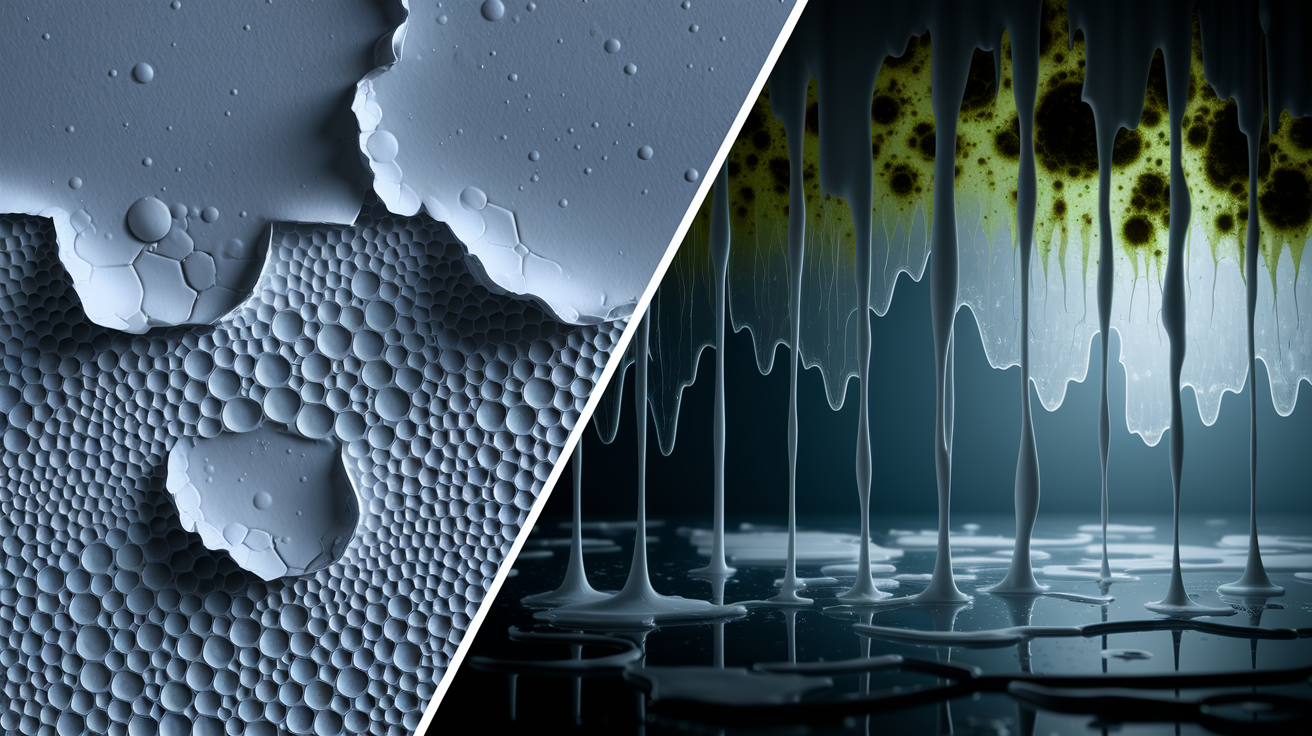
When you apply paint to wet drywall compound, the moisture stops proper bonding between the paint and the surface. The wet compound absorbs moisture from the paint itself, creating a barrier that prevents the paint from adhering correctly. You get bubbling where the paint lifts away as moisture tries to escape. Blistering shows up as small raised areas filled with water or air. Peeling happens when entire sections of paint lose grip and separate from the wall, often taking dried compound with it. The finish looks dull because the wet surface can’t accept the paint properly. You end up with uneven absorption that creates blotchy, darker sections where paint soaked in too deeply.
Common paint failures from wet drywall:
Bubbling and blistering as trapped moisture pushes paint away from the surface. Peeling in sheets or strips where adhesion completely fails. Cracking as paint film dries at different rates over wet spots. Discoloration with darker patches where moisture concentrated. Uneven texture from paint pooling or being absorbed irregularly. Complete adhesion failure requiring full removal and reapplication.
The structural problems go beyond just the paint surface. Wet compound loses its strength and can dislodge from the drywall backing. The mud and paint layers separate together. Wall sagging occurs between joists or studs when the weight of wet compound and wet paint combines before either has properly set. This creates a pillowing effect where sections bow outward. The compound may crack as it finally dries under the paint layer, since paint traps moisture and prevents even curing. These structural failures often mean scraping down to bare drywall and starting the entire finishing process over.
The health risks center on mold and mildew growth. When you seal moisture into the wall with paint, you’re creating perfect conditions for mold. Darkness, moisture, and organic material (the paper backing on drywall) for mold to feed on. Mold can begin growing within 24 to 48 hours in these conditions. Once it’s established behind paint, mold spreads invisibly until it breaks through as black or green spots or creates a musty smell. Exposure to mold causes respiratory problems, allergic reactions, and aggravates asthma. The structural damage to the drywall itself as mold breaks down the gypsum and paper eventually requires complete drywall replacement. If you’re dealing with wet drywall from water damage rather than fresh compound, fixing the water source is critical before any painting happens. Leak detection and repair has to come first, or the problem will return no matter how well you paint.
Understanding Moisture Content in Drywall

Drywall consists of a gypsum core sandwiched between two layers of paper. Gypsum is naturally porous and absorbent. It’s excellent for controlling humidity in normal conditions, but it also acts like a sponge when exposed to water. The paper facing adds structural integrity but absorbs moisture readily. When joint compound is applied, it contains significant water content that must evaporate before the surface is ready for paint.
High moisture content affects drywall in several ways. The material becomes softer and loses structural rigidity. The paper facing can separate from the gypsum core. Saturation changes the surface characteristics, making it too unstable for paint to form a proper bond. Even after the surface appears dry, moisture can remain deeper in the material. This happens especially in thick applications or in corners where air circulation is limited. This internal moisture will eventually migrate to the surface, causing paint failures weeks or months after application.
Fresh joint compound behaves like a sponge when wet. It absorbs paint instead of accepting it as a coating. Without primer, unprimed walls show darker or more saturated sections where paint absorbed unevenly, particularly along seams and joints. This uneven absorption makes it impossible to achieve uniform color or finish quality. Moisture problems compound painting failures because the wet substrate can’t provide the stable surface that paint needs to cure properly.
Drying Time Requirements for Different Drywall Conditions
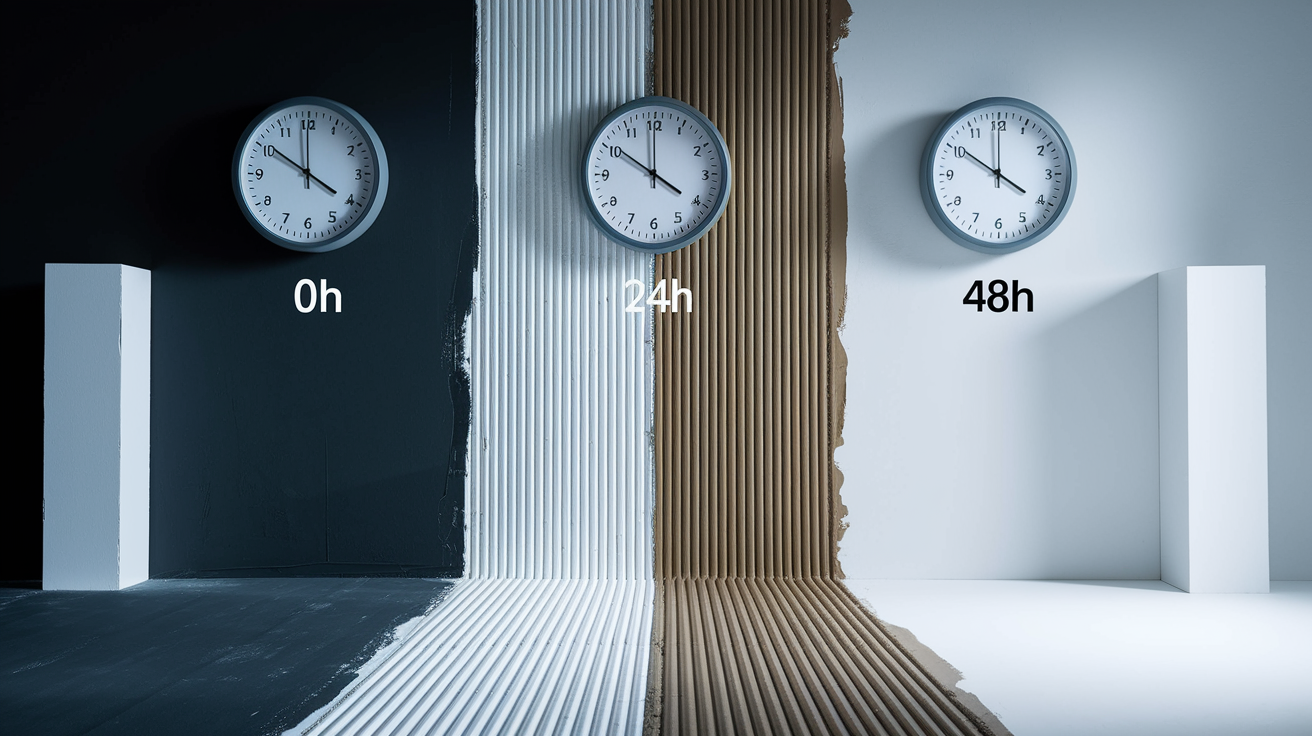
The baseline rule requires at least 24 hours of drying time under normal conditions before painting. This applies to standard weight joint compound in a room with moderate temperature and humidity and decent air circulation.
Traditional all purpose joint compound typically needs 24 hours for thin coats and up to 48 hours for thicker applications or in less than ideal conditions. The compound changes color as it dries, starting darker when wet and lightening to white or off white when fully cured. Multiple coats require complete drying between applications, so a three coat finishing process can take three to four days total. High humidity extends these timeframes significantly because the moisture has nowhere to evaporate. Cold temperatures below 55°F also slow drying considerably, sometimes doubling the required time.
Fast setting compounds like DURABOND offer dramatically shorter drying times. They take approximately one hour to set and form a hard, granular surface when dried. These products chemically set rather than simply drying through evaporation, which makes them much faster but also more challenging for beginners. Once mixed, you have a limited working time before the compound becomes too stiff to apply or smooth. Fast setting mud works well for urgent repairs or when you need to apply multiple coats in a single day, but the quick set time means you can’t go back to fix mistakes. The trade off is speed versus forgiveness in application.
Temperature, humidity, and ventilation form the three key environmental factors affecting drying time. Warm air (70 to 80°F) speeds evaporation and reduces drying time. Low humidity allows moisture to leave the surface faster because the air can hold more water vapor. Good ventilation moves moisture laden air away from the drying surface and brings in drier air to continue the evaporation process. In a cold, humid room with no air movement, drying time can extend to 72 hours or more. In a warm, dry, well ventilated space, you might achieve complete drying in 18 hours.
Accelerating Drywall Drying Without Compromising Quality
You can safely speed drywall drying by controlling environmental conditions, but forcing the process too aggressively causes cracking and other quality problems. Focus on methods that support natural evaporation rather than extreme measures that stress the material.
Effective techniques for accelerating drying:
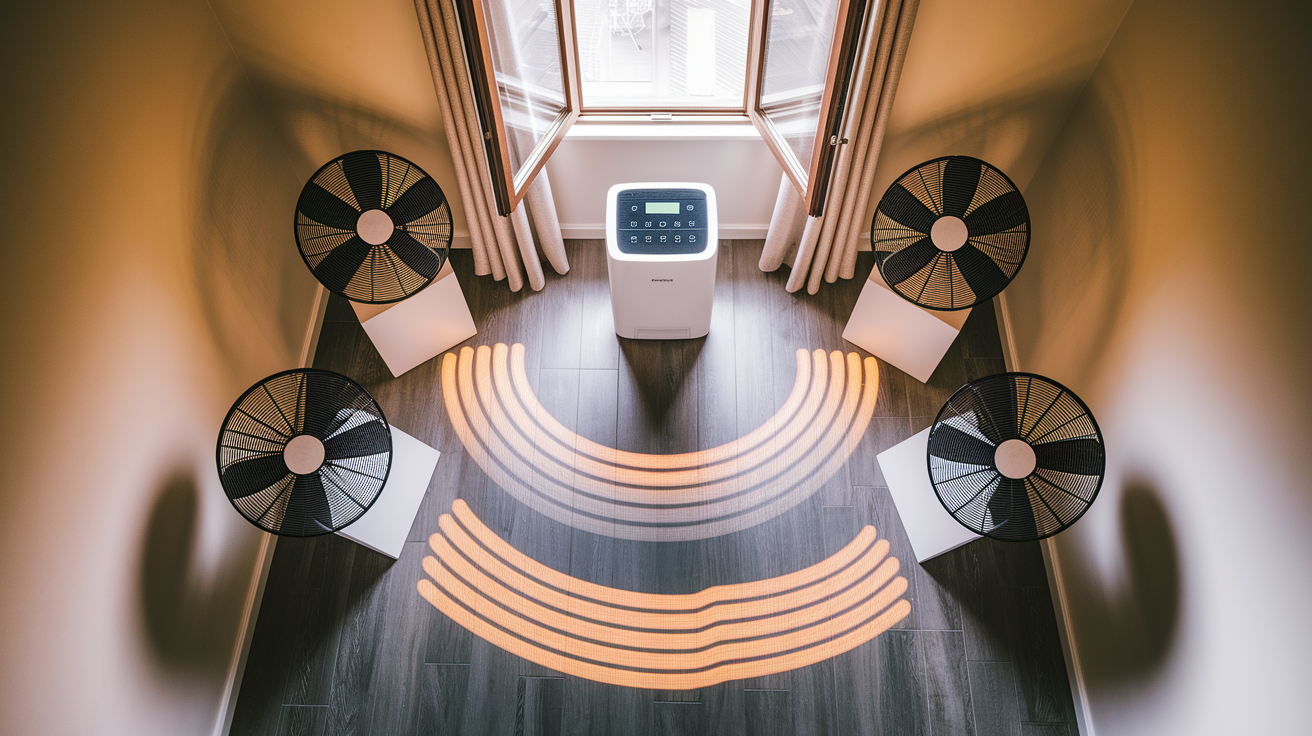
Open windows to create cross ventilation and remove moisture laden air. Position box fans to blow across the drywall surface, not directly at it at close range. Run a dehumidifier to lower ambient humidity and increase evaporation rate. Increase room temperature to 70 to 75°F using central heating, not space heaters aimed at walls. Ensure return air vents remain unblocked to maintain whole room air circulation.
Dehumidifiers counteract high humidity, which is a major contributor to prolonged drying times. In humid climates or during wet seasons, a dehumidifier can cut drying time by 30 to 40% by pulling moisture from the air and allowing the drywall to release its moisture more quickly. Run the unit continuously rather than in cycles for best results. Position it centrally in the room rather than directly against walls. Empty the collection bucket regularly or connect a drain hose so the unit doesn’t shut off when full. Proper ventilation with fans or open windows significantly enhances drying rates by maintaining air movement. The moving air carries moisture away from the surface and replaces it with drier air that can accept more moisture. Place fans strategically to create steady airflow without creating wind tunnels that dry surfaces unevenly.
Never use high heat from space heaters, heat guns, or hair dryers aimed directly at drying compound. These create uneven drying where the surface hardens while interior moisture remains trapped. That leads to cracking and separation. Avoid excessive heat above 90°F, which can cause the compound to cure too quickly and develop stress cracks. Don’t close up the room completely with heaters running. This creates a moisture saturated environment where evaporation stops despite the heat. Skip chemical accelerators or additives unless you’re experienced with professional grade products. Natural drying produces the most reliable results for homeowners. Patience beats speed when quality matters. If conditions aren’t ideal, add an extra day of drying rather than risk paint failure.
Preparing Dried Drywall Surface for Painting Success

Surface preparation determines whether your paint job looks professional or amateur. Once the compound has completely dried, you can’t skip the preparation steps and expect good results.
Sanding smooths the dried joint compound and feathers the edges to blend with the surrounding drywall surface. Use 120 grit sandpaper for the main passes and 150 grit for final smoothing. Sand in circular motions with light to medium pressure, checking frequently with your hand to feel for ridges or rough spots. The goal is a surface that feels uniform when you run your palm across it, with no detectable transitions between compound and drywall. Wear a dust mask during sanding because the fine particles irritate lungs and sinuses.
Dust removal must be thorough before primer application. A vacuum cleaner with a brush attachment is better than a duster for comprehensive dust removal after sanding. Vacuum the walls, floor, and any surfaces where dust settled. Follow with a slightly damp (not wet) cloth wiped across the drywall to pick up fine dust the vacuum missed. Let the surface dry completely from the damp wipe before priming. Typically takes 15 to 30 minutes.
Priming is necessary to ensure joint compound blends with drywall for a uniform surface. This isn’t optional. Without primer, fresh drywall absorbs paint like a sponge. You get uneven absorption along seams where compound was applied. The compound and the paper faced drywall have different absorption rates, so paint soaks in at different depths. This creates darker or more saturated sections where paint absorbed unevenly, making seams and repairs visible through the topcoat no matter how many paint coats you apply. The blotchy appearance ruins the finished look and wastes paint because the porous surfaces keep absorbing coat after coat.
Quality primers like Zinsser Primecoat2 create a uniform surface that improves paint adherence and ensures even coverage. The primer seals both the drywall paper and the joint compound, giving your topcoat paint a consistent surface to bond to. This means better adhesion, more even color, and fewer coats needed for solid coverage. Primer creates a slight texture that helps paint grip rather than slide. For situations involving water stains or previous moisture damage, use stain blocking primers that prevent discoloration from bleeding through. Moisture blocking primers add an extra layer of protection in bathrooms, kitchens, or areas prone to humidity. Apply primer in even coats using a roller for main surfaces and a brush for corners and edges, following the manufacturer’s coverage guidelines.
Before applying topcoat paint, inspect the primed surface in good lighting. Look for missed spots, uneven primer coverage, or any remaining imperfections that will show through paint. Feel the surface with your hand to confirm uniform texture. Check corners and edges where primer tends to be applied too thin. Touch up any areas that need additional primer and let them dry completely. This final inspection catches problems while they’re still easy to fix, before you’ve invested in topcoat application.
Dealing with Water Damaged Drywall Before Painting

Water damaged drywall presents unique challenges because the damage goes beyond surface moisture. Before any painting happens, you must identify and fix the source of water intrusion. Root causes like leaking pipes, radiator leaks, or rising damp must be fixed before painting, or stains will reappear no matter how well you prepare the surface. Water will continue damaging the drywall and creating conditions for mold growth. No amount of paint or primer stops an active leak. For comprehensive help identifying and stopping water sources, water damage triage and prevention repairs should be your first step.
Common water damage sources requiring repair before painting:
Plumbing leaks from supply lines, drain pipes, or fixture connections. Roof leaks allowing rainwater to enter walls and ceilings. Condensation issues from poor ventilation or insulation problems. Flood damage from natural events, appliance failures, or sewer backups.
Water based emulsion paint will not hide water stains no matter how many coats are applied. The stain blends with the new paint and bleeds through. Regular paint is too porous to block the tannins, minerals, and other compounds that create visible staining. Walls and ceilings must be completely dry before painting begins to avoid damaging existing paintwork around the repair area. Use fans and dehumidifiers to accelerate drying after the water source is fixed. Check moisture levels with a meter to confirm readings below 12% before proceeding.
Specialist stain blocker products like Zinsser Cover Stain or oil based paints create a waterproof barrier that prevents stains from bleeding through your topcoat. These products are specifically formulated to seal stains and block moisture from migrating to the surface. Apply stain blocking primer directly over the dried, water damaged area, extending slightly beyond the visible stain. One coat is typically sufficient, though severe staining may require a second coat. Zinsser Cover Stain dries in 30 minutes and is recoatable in two hours, making it practical for same day project completion. Feather the edges when applying stain blocker to blend with surrounding areas. Let the stain blocker fully cure before applying your finish paint.
Severely water damaged drywall may require replacement rather than repair. If the drywall feels soft or spongy when pressed, has crumbled or separated from the studs, shows visible mold growth beyond surface staining, or has swollen so the surface is no longer flat, replacement is the only reliable solution. Small areas can sometimes be cut out and patched, but extensive damage affecting large sections makes full sheet replacement more practical and cost effective than trying to repair compromised material.
Common Painting Mistakes That Trap Moisture in Drywall

Well intentioned DIY painters often make mistakes that create or worsen moisture problems without realizing it. These errors turn straightforward paint jobs into problem projects requiring extensive rework.
| Common Mistake | Why It’s Problematic | Correct Approach |
|---|---|---|
| Painting before full drying | Traps moisture under paint layer causing bubbling and mold | Verify dryness with touch test and moisture meter before painting |
| Poor ventilation during application | Prevents moisture from escaping, extends drying time dramatically | Open windows, run fans, maintain air circulation throughout process |
| Applying multiple quick coats | Each layer traps moisture from previous coat, preventing proper curing | Follow recoat times on paint can, typically 2 to 4 hours between coats |
| Ignoring high humidity conditions | Paint can’t dry properly in moisture saturated air | Check weather forecast, run dehumidifier, choose low humidity days |
| Skipping or inadequate primer | Leaves porous surfaces that absorb moisture and paint unevenly | Apply full primer coat to all new drywall and compound before painting |
Recoat timing errors happen when painters assume that if paint looks dry on the surface, it’s ready for another coat. Paint dries from the outside in, so surface dryness doesn’t indicate the full layer has cured. Applying the second coat too soon traps solvents and moisture from the first coat, preventing it from properly hardening. This creates a soft paint film prone to damage and reduces adhesion of subsequent layers. The layers can separate or develop a tacky feel that never fully resolves. Multiple coats applied too quickly can trap moisture between layers, essentially laminating wet paint that has nowhere to dry. Follow the manufacturer’s recoat time guidelines printed on the paint can. These times account for the specific formulation’s drying characteristics. In humid conditions, add extra time beyond the minimum.
Environmental control during painting is just as important as during drying. High humidity affects paint application and curing, not just compound drying. Paint applied in humidity above 85% may never cure properly, remaining soft or developing surface problems. Temperature extremes create similar problems. Cold temperatures below 50°F prevent paint from flowing smoothly and slow curing dramatically. Paint applied in cold conditions may look acceptable initially but fail within weeks. Check conditions before starting and maintain proper temperature and humidity throughout the entire process. Use a simple indoor thermometer/hygrometer to monitor conditions in real time. If conditions aren’t suitable, wait for a better day rather than pushing forward with the project.
Professional Help Versus DIY Drywall Painting Decisions

Several factors determine whether drywall painting is a suitable DIY project or requires professional help. The scope of work, your skill level, the condition of the substrate, and the presence of complicating factors all influence this decision.
Suitable DIY scenarios include small repairs of a few square feet or less, painting over properly dried and prepared new drywall in good condition, touching up or repainting rooms without underlying moisture problems, and working with standard joint compound in areas with normal humidity. Homeowners with basic tool skills and patience for proper preparation can handle these situations successfully. The key is having enough time to allow for proper drying, being willing to follow preparation steps carefully, and having realistic expectations about finish quality compared to professional work.
Complex situations requiring professional expertise include extensive water damage affecting large wall sections or multiple rooms, visible mold growth that has penetrated into or behind the drywall, structural issues like sagging, bowing, or separation from framing, recurring moisture problems from unidentified sources, and ceiling work above 10 feet or on difficult angles. Fast setting mud chemically sets and dries faster than traditional mud but is more challenging for beginners due to the quick working time and less forgiving application. Any cracks or flaking plaster must be repaired before painting to ensure proper adhesion and finish quality, and these repairs often require professional assessment to address underlying structural movement. Professionals have the experience to identify hidden problems, the equipment to address them efficiently, and the skill to achieve quality finishes the first time.
Cost benefit considerations and warranty implications matter when choosing between DIY and professional work. Professional work costs more upfront but includes warranty coverage if problems develop. Most professional painters warranty their work for one to two years, covering paint failure, adhesion problems, or visible defects that result from improper application. DIY work costs less in labor but puts all risk on you if problems occur. If you’re planning to sell the home soon, professional documentation of proper repairs and painting can be valuable during home inspections. Insurance claims for water damage often require professional restoration and documentation to ensure coverage. Attempting DIY repairs on water damaged drywall before insurance inspection can void claims or reduce payouts. In these situations, professional help isn’t optional.
Troubleshooting Paint Problems on Drywall

Even with careful preparation, paint problems sometimes develop. Recognizing the issues early and understanding the causes helps you address them before they worsen.
Common problems with solutions:
Bubbling paint. Caused by painting over damp surfaces or in high humidity. Fix by scraping away loose paint, letting surface dry completely, priming bare spots, and repainting in better conditions.
Peeling paint. Results from poor adhesion due to inadequate surface prep, missing primer, or moisture. Fix by removing all loose paint, sanding to feather edges, cleaning thoroughly, applying primer, and repainting.
Cracking paint. Happens when paint is applied too thick, over flexible surfaces, or during temperature extremes. Fix by scraping cracked areas, sanding smooth, priming if bare drywall shows, and applying thinner paint coats.
Uneven texture. Caused by inconsistent application, wrong roller nap, or varying absorption rates. Fix by sanding high spots, applying primer to create uniform surface, and using consistent technique with appropriate tools.
Discoloration and staining. Results from water stains, tannin bleed through, or unprimed patches. Fix by identifying if moisture is active, applying stain blocking primer over affected areas, and repainting.
Mildew growth. Develops in damp conditions with poor ventilation, indicates ongoing moisture problem. Fix by addressing moisture source, cleaning with mildew killing solution, ensuring complete drying, priming with mildew resistant primer, and painting with mildew resistant paint.
Prevention strategies focus on proper preparation and patience. Allow full drying time even when it feels inconvenient. Use appropriate primers for the specific situation rather than assuming all primers are equivalent. Apply paint in thin, even coats rather than trying to achieve coverage in one heavy application. Maintain proper environmental conditions during application and drying. Painting wet mud causes dislodging of mud and paint, wall sagging or pillowing between joists, and dull lackluster appearance that no amount of additional coats can fix. Address problems at the source rather than trying to cover them with paint.
Warning signs that moisture problems persist include paint that feels tacky or soft weeks after application, recurring stains that appear in the same location, musty odors that develop after painting, or mildew that returns within weeks of cleaning. These symptoms indicate moisture is still present in the wall system. Stop adding paint coats and investigate the moisture source. Use a moisture meter to check readings at different depths and locations. Look for active leaks, condensation sources, or vapor transmission from exterior moisture. Problems that persist despite proper surface preparation suggest issues behind the drywall that paint can’t resolve. In these cases, removing sections of drywall to inspect the wall cavity may be necessary to identify hidden moisture sources, insulation problems, or structural issues allowing water intrusion.
Final Words
You can’t paint over wet drywall without creating serious problems. The minimum 24-hour drying rule isn’t a suggestion.
Moisture content determines everything. Test with a moisture meter, check by touch, and inspect visually before opening any paint can.
When you rush the process, you’re setting yourself up for bubbling, peeling, mold growth, and potentially expensive repairs down the road.
Fix any water sources first. Let the drywall dry completely. Prime properly. Then paint with confidence knowing the finish will actually last.
FAQ
Can you use Kilz on torn drywall?
You can use Kilz primer on torn drywall only after properly repairing the damaged areas with joint compound and allowing it to dry completely. The torn sections must be patched, smoothed, and fully cured before applying any primer or paint for proper adhesion and appearance.
What happens if you paint before drywall mud is dry?
Painting before drywall mud is dry causes the paint to bubble, peel, and fail to adhere properly. The wet compound absorbs moisture from the paint, creating a dull finish, possible wall sagging between joists, and eventual dislodging of both the mud and paint layers.
How do you paint a water-damaged wall?
Painting a water-damaged wall requires first fixing the water source, allowing the wall to dry completely, and applying a stain-blocking primer before topcoat. Regular paint won’t hide water stains because the stain blends with new paint, requiring specialty products like Zinsser Cover Stain instead.
Can you paint over a water leak in a ceiling?
You cannot paint over a water leak in a ceiling without first stopping the leak and letting the area dry completely. Painting over active moisture traps water inside, causes paint failure, and creates conditions for mold growth while the underlying problem continues damaging your home.
How long should drywall mud dry before painting?
Drywall mud should dry for a minimum of 24 hours before painting under standard conditions. Fast-setting compounds like DURABOND dry in approximately 1 hour, but traditional joint compound requires longer drying time, especially in interior corners where moisture takes longest to escape.
How do you know if drywall is dry enough to paint?
Drywall is dry enough to paint when it feels smooth and powdery to touch rather than damp or cool, doesn’t bend when tapped, and shows no visual darkening or moisture. A moisture meter reading below 12 percent confirms readiness, with special attention to interior corners.
Why won’t paint cover water stains on drywall?
Paint won’t cover water stains on drywall because water-based paint blends with the stain instead of sealing it. The tannins and minerals in water stains bleed through regular paint no matter how many coats you apply, requiring oil-based or specialty stain-blocking primers to create a waterproof barrier.
What primer is best for water-stained drywall?
The best primer for water-stained drywall is a stain-blocking product like Zinsser Cover Stain or similar oil-based primer that creates a waterproof barrier. These specialty primers prevent stains from bleeding through topcoats, unlike regular primers that allow stains to reappear through the finish paint.
Can you speed up drywall mud drying time?
You can speed up drywall mud drying time safely by using dehumidifiers, improving air circulation with fans, increasing ventilation through open windows, and maintaining moderate temperatures. Avoid excessive heat or forced drying methods that cause cracking, shrinking, or compromised compound integrity.
When should you replace water-damaged drywall instead of painting?
You should replace water-damaged drywall instead of painting when the material shows significant sagging, crumbling, extensive mold growth, or structural weakness. Severely saturated drywall that’s been wet for extended periods loses integrity and cannot be adequately repaired with paint or patches alone.