
Most homeowners try to dry wet drywall from the outside surface only. That won’t work. Water soaks deep into the gypsum core and hides inside sealed wall cavities where fans and dehumidifiers can’t reach it. Surface drying leaves hidden dampness that turns into mold within 48 hours. Complete drying requires access points, aggressive airflow, commercial grade equipment, and constant monitoring with a moisture meter. This guide walks you through the actual steps that work when flood water hits your walls.
Immediate Assessment and Action Plan for Flooded Drywall
Mold starts forming within 24 to 48 hours on wet drywall in warm conditions. Every hour counts after flood damage occurs. This narrow window determines whether your walls can be dried and salvaged or if they need complete replacement. The moment you discover wet walls, your priority shifts to rapid assessment and immediate action before biological growth takes hold and turns a manageable water damage situation into a full-scale remediation project.
Electrical safety comes first, before touching any wet surfaces or moving equipment. Turn off power to heavily soaked areas if the breaker panel is accessible and you can reach it without walking through standing water. Never touch electrical outlets, switches, or appliances while standing in water or touching wet walls. If water has reached outlet level or you see any sparking, flickering lights, or burning smells, shut off the main breaker from a dry location or evacuate and call an electrician immediately. Water and electricity create lethal conditions that require absolute caution.
Structural safety assessment happens next, focusing on ceiling integrity and wall stability. Look up first and check for sagging, bulging, or discolored ceiling areas that indicate water pooling above the drywall’s paper facing. Sagging ceilings pose immediate collapse risk due to trapped water weight, and you should evacuate any space directly below compromised ceiling sections without attempting to touch or drain them. Bulging walls, soft or spongy drywall texture, and visible bowing all signal structural compromise. Once you’ve identified hazardous areas and kept people away from them, locate and stop the water source by shutting the supply valve for the affected fixture or the main water shut-off if the source isn’t immediately clear.
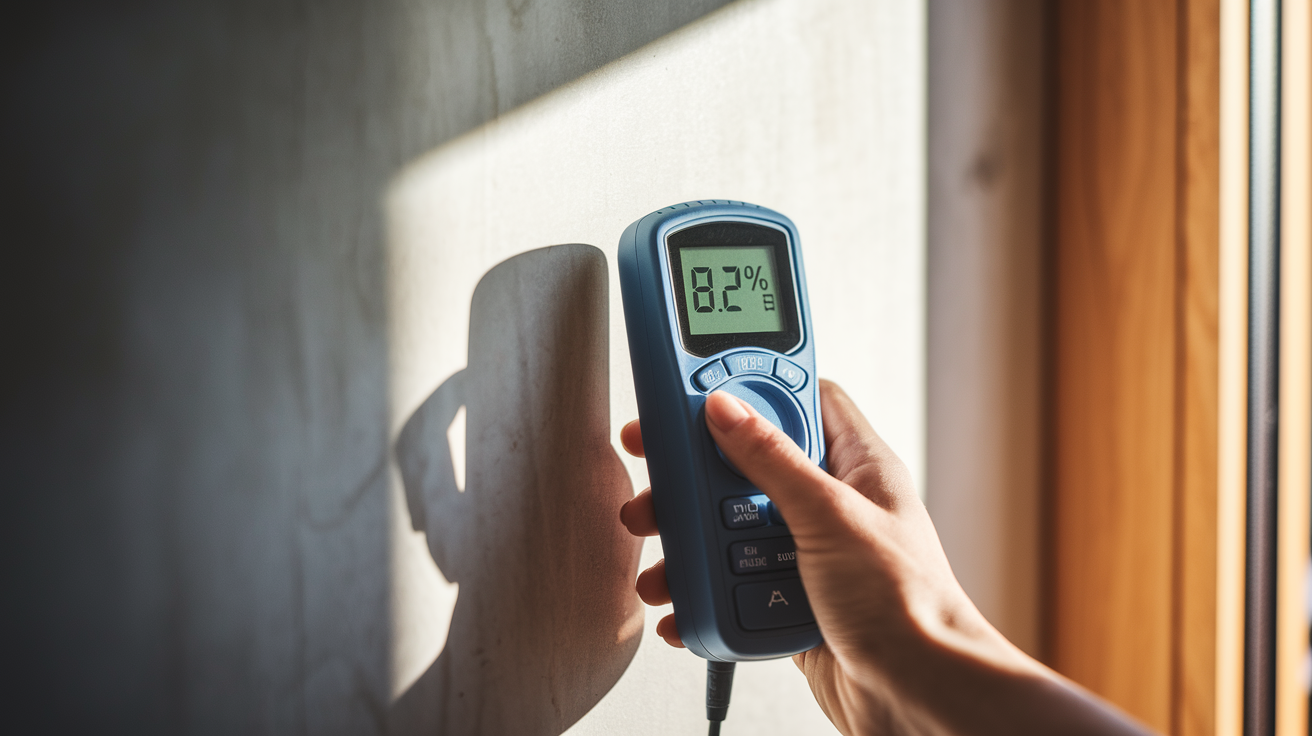
Moisture assessment begins with a moisture meter if you have access to one. Readings over 12% indicate wet drywall requiring immediate drying efforts. Without a meter, use visual and tactile assessment to gauge saturation levels. Wet areas feel noticeably cooler than surrounding dry walls when you place your palm flat against the surface. Look for obvious discoloration, darker patches spreading from the water entry point, and soft or spongy texture when you press gently with your fingertips. Water source classification matters critically at this stage. Category 1 clean water from supply lines or air conditioning condensate can often be dried if you act within hours. Category 2 grey water from dishwashers, washing machines, or toilet overflow with urine may require partial wall removal. Category 3 black water from sewage backup, river flooding, or stormwater always requires complete drywall replacement regardless of how quickly you respond.
Protect your belongings and create a safe work zone as your final immediate action. Move furniture, electronics, and other items away from wet walls to prevent additional water absorption and create access for drying equipment. Remove area rugs and lift any items stored on the floor in affected rooms. Clear a path for equipment and foot traffic, knowing you’ll need repeated access to the damaged area over the next several days.
First hour action steps in priority order:
- Assess electrical hazards and turn off power to wet areas from a safe, dry position
- Check ceilings and walls for sagging, bulging, or collapse risk and evacuate compromised zones
- Stop the water source by shutting supply valves or the main water line
- Evaluate moisture levels using a meter or visual/tactile assessment and classify water type
- Move belongings away from wet areas and clear space for drying equipment access
Understanding Water Categories and Your Drywall’s Salvageability
Water source determines whether your drywall can be saved or must be discarded, regardless of how effectively you dry it. Health risks from contaminated water remain in the porous gypsum core and paper facing even after complete moisture removal. Certain water types make salvage physically impossible no matter how fast you respond or how much equipment you deploy.
Category 3 water always means replacement, full stop. No amount of drying eliminates the bacteria, viruses, chemicals, and pathogens that contaminated water deposits deep into porous building materials. Attempting to save drywall exposed to sewage, river flooding, or stormwater wastes time and money while creating ongoing health hazards for everyone in the building.
| Water Category | Source Examples | Can Drywall Be Saved? |
|---|---|---|
| Category 1 (Clean Water) | Supply line bursts, refrigerator lines, AC condensate drains, water heater leaks | Yes, if dried within 24–48 hours with proper equipment and techniques |
| Category 2 (Grey Water) | Dishwasher overflows, washing machine discharges, toilet overflow with urine only, sump pump backups | Maybe, only if dried within 24 hours and contamination is minimal; often requires partial removal |
| Category 3 (Black Water) | Sewage backups, river or creek flooding, toilet overflow with feces, standing water over 48 hours | No, always requires complete removal and replacement regardless of drying efforts |
Essential Equipment for the Drying Process

A moisture meter functions as your diagnostic foundation throughout the entire drying process, not just during initial assessment. Pin type meters insert metal probes into the material to measure internal moisture content, while pinless models use electromagnetic sensors that scan beneath the surface without creating holes. Both types display readings as percentages, with anything over 12% indicating wet drywall that requires active drying. Hardware stores sell basic moisture meters for about $40, and this single tool eliminates guesswork that leads to premature restoration and hidden mold growth. You’ll use it during initial evaluation, throughout the drying period to track progress, and during final verification before any repairs begin.
Home dehumidifiers rated at 30 to 50 pints per day work for small, isolated dampness in a single room where saturation is minimal and response time was immediate. Commercial LGR (Low Grain Refrigerant) dehumidifiers remove 140 or more pints daily, creating the aggressive moisture extraction needed for moderate to severe flooding. The performance gap between these units is substantial. A home dehumidifier might take a week to remove moisture that a commercial unit pulls in 48 hours, and that extra time allows mold to establish deep in wall cavities. For anything beyond a minor leak affecting one wall section, rent commercial grade dehumidifiers from equipment rental centers or restoration supply companies. Size the unit to the room volume and saturation level, knowing that undersized equipment extends timelines and increases mold risk.
Air movers create the high velocity airflow that actually evaporates moisture from wet surfaces and pushes humid air toward the dehumidifier for extraction. Commercial air movers deliver 1,000 CFM (cubic feet per minute) or more, while household box fans typically move 1,000 to 2,000 CFM with much less focused velocity and directional control. The difference matters because drying requires concentrated airflow directed across wet drywall surfaces, into opened wall cavities, and along floors where moisture accumulates. Position air movers at angles to create air circulation patterns that sweep across entire wall sections, not just blow air generally around the room. Thermal imaging infrared cameras reveal hidden dampness behind cabinets, inside closed wall cavities, and beneath finished surfaces that appear completely dry to the eye. These cameras cost thousands to purchase but can be rented if you’re managing significant water intrusion where moisture migration paths aren’t obvious.
Complete DIY drying equipment list:
- Moisture meter (pin or pinless type, about $40 purchase)
- Commercial dehumidifier (140+ pints/day capacity, about $60–$80 per day rental)
- Air movers, 2–4 units depending on affected area (about $25–$40 per day rental each)
- Heavy duty extension cords rated for continuous high amperage draw
- Plastic sheeting (6 mil thickness) for sealing windows and doorways
- Basic cutting tools for access point creation if needed
- Personal protective equipment (respirator, gloves, eye protection)
Wall Preparation: Creating Airflow Access Points

Drywall’s gypsum core absorbs water like a sponge, while the paper facing on both sides wicks moisture through capillary action that can spread water several feet beyond the initial wet area. Sealed wall cavities trap this moisture between the drywall and studs, creating hidden damp zones that never receive direct airflow from fans or dehumidifiers. Surface drying alone leaves the gypsum core and wall cavity damp. You must create access points that allow air circulation to reach these hidden moisture sources.
The 24 inch flood cut removes a horizontal strip of drywall starting at floor level and extending 24 inches above the highest visible moisture line detected by your moisture meter. This technique is required for insulated exterior walls where wet fiberglass or cellulose insulation acts like a saturated sponge that can’t dry effectively through intact drywall. Flood cuts also apply to extensive saturation where water has wicked high up the wall or where moisture readings indicate deep penetration through the entire drywall thickness. Cut carefully with a utility knife, making the top edge straight and level so that patch installation is simpler during restoration.
Weep holes serve as a less invasive alternative for non-insulated interior walls with minimal water intrusion caught within hours. Drill 1 inch diameter holes near floor level, spaced every 16 inches along the affected wall section, positioned between studs. These holes allow air movers to push drying air directly into the wall cavity without removing large drywall sections. Weep holes work when saturation is shallow, water exposure was brief, and moisture hasn’t spread extensively behind the wall surface.
Baseboards, trim, and flooring materials create moisture traps where water collects and wicks into wall bases. Remove baseboards along all affected walls to expose the bottom edge of the drywall and the wall to floor junction. Pull up any wet carpet, pad, or vinyl flooring that extends under the wall base. Leave hardwood flooring in place unless moisture readings show saturation requiring removal. Wet trim and baseboards should be discarded if made from wood or MDF, since these materials swell and distort permanently when saturated.
Wall preparation approaches by construction type:
- Insulated exterior walls: 24 inch flood cut mandatory, removing both drywall and wet insulation for cavity access and direct airflow
- Non-insulated interior walls with limited water: Weep holes every 16 inches near floor level, baseboard removal, targeted drying through access points
- Ceiling areas: Small inspection holes to verify moisture presence above paper facing; if wet, larger access cuts for cavity drainage and airflow
- Walls behind cabinets or fixtures: Remove toe kicks, create access holes through cabinet backs, or remove entire cabinet units if saturation is extensive
Step by Step Drying Procedures and Room Setup
Seal the affected room using 6 mil plastic sheeting over windows and doorways, creating an enclosed environment where humidity can be controlled and extracted efficiently. Opening windows during high outdoor humidity introduces additional moisture that slows evaporation and can actually worsen conditions rather than help. Your goal is to create a closed system where the dehumidifier progressively lowers relative humidity while air movers accelerate evaporation from wet surfaces. The only exception to sealing the room occurs when outdoor humidity is significantly lower than indoor levels, which is rare immediately after flooding events.
Air mover positioning determines drying effectiveness more than any other equipment variable. Place the first air mover aimed directly across the largest wet wall section at a 45 degree angle, with the airstream hitting the wall about two feet above floor level. Position a second air mover facing the opposite direction to create circular airflow patterns that sweep the entire room. Direct additional air movers into opened wall cavities through flood cuts or weep holes, positioning them to push air through the cavity space rather than just blowing across the opening. Place one air mover aimed downward at any wet flooring or carpet to accelerate floor drying. Keep all air mover power cords routed safely away from standing water or damp areas, using heavy duty extension cords rated for continuous operation.
Set up your dehumidifier in a central location with adequate clearance around air intake and exhaust vents, typically requiring 12 to 18 inches of space on all sides for proper airflow. Choose a spot where you can access the water collection reservoir easily for regular emptying, or connect a drain hose if your unit has that capability and you have a floor drain available. Commercial dehumidifiers are sized by the moisture load and room volume they can handle. A single 140 pint unit works for rooms up to 500 square feet with moderate water damage. Larger affected areas or severe saturation requires multiple units or larger capacity equipment. Run all equipment 24 hours a day without interruption. Turning equipment off overnight or during absences extends the drying timeline significantly and allows moisture levels to re-stabilize in materials you’re trying to dry.
Daily monitoring and adjustment routine:
- Check and empty dehumidifier reservoir every 8–12 hours or confirm drain hose is flowing freely
- Take moisture meter readings at the same wall locations you tested initially to track drying progress
- Reposition air movers every 12–24 hours to target areas showing slower drying or direct fresh airflow patterns
- Inspect ceiling and wall surfaces for new moisture signs, bulging, or deterioration indicating replacement needs
- Record daily readings in a simple log showing date, location, and moisture percentage for documentation
- Adjust dehumidifier settings if humidity levels aren’t dropping, increasing extraction rate or adding a second unit if available
Drying Timeline Expectations and Variables

Professional restoration equipment dries most wet drywall in 24 to 72 hours, while DIY household fans and small dehumidifiers require 3 to 7 days or longer for the same results. This gap exists because commercial air movers and LGR dehumidifiers extract moisture at rates that basic home equipment simply can’t match.
Saturation depth and affected area size directly control how long drying takes. Surface dampness caught within an hour or two might dry completely in 24 to 48 hours even with moderate equipment, especially if ambient humidity is low and air circulation is strong. Small clean water leaks detected immediately and affecting a single wall section represent the fastest drying scenario. Moderate leaks that have spread to multiple walls or soaked through the full drywall thickness require 2 to 4 days of continuous active drying with properly sized commercial equipment. Each additional wall section adds time, and water that has migrated into insulated cavities or behind finished surfaces extends timelines further.
Major flooding involving multiple rooms or floor to ceiling saturation requires 3 to 7 or more days, and often results in mandatory replacement rather than salvageable drying.
Exposure duration determines how deeply water has penetrated and whether gypsum core degradation has begun. Water sitting against drywall for hours wicks deeper into the material than water wiped away within minutes. Long term exposure lasting days or weeks before discovery creates saturation so complete that drying timelines become impractical and structural integrity is compromised. The difference between a two hour response and a two day response can mean the difference between 48 hour drying and complete replacement.
Humidity levels create the largest variable impact on drying speed, with the potential to extend timelines by up to four times when conditions shift from 50% relative humidity to 90%. Opening windows during high outdoor humidity (commonly 60 to 70% after storms) introduces additional moisture into the room that your dehumidifier must process before it can extract moisture from the walls. This actually slows evaporation from wet drywall since there’s minimal humidity gradient to drive moisture from the material into the air. Think of it like trying to dry a towel in a steamy bathroom versus a dry room. The steamy environment actively prevents drying. Instead, seal the space and let your dehumidifier progressively lower indoor humidity to 30 to 40%, creating the dry air that pulls moisture out of wet materials. Temperature affects drying speed as well, with warm air holding more moisture and accelerating evaporation compared to cold conditions. However, warm weather also accelerates mold growth, which is why the 24 to 48 hour window remains critical regardless of how temperature might help drying. Air circulation quality matters beyond just having fans running. Stagnant air pockets behind furniture, in corners, or along floor areas mean moisture isn’t being carried away from surfaces to the dehumidifier. Your residential AC system is designed for comfort cooling and basic humidity control, not emergency moisture removal. It can’t extract water fast enough to prevent mold growth after severe water damage, which is why dedicated dehumidification equipment is necessary.
Preventing Mold Growth During and After Drying

Drying wet drywall doesn’t kill mold spores if growth has already begun. Prevention must start within the first 24 to 48 hours before biological activity takes hold. Once visible mold appears on paper facing or moisture readings confirm drywall has been wet beyond this critical window, antimicrobial treatment becomes necessary. Apply EPA registered antimicrobial solutions to surfaces showing early mold signs, following product instructions for dilution rates and contact time. These treatments won’t reverse structural damage or eliminate the need for replacement in contaminated water scenarios, but they can prevent mold expansion during the drying process when clean water damage is caught quickly.
Hidden moisture behind walls creates invisible mold sources that persist even after surface areas appear completely dry. Wall cavities trap humid air, especially in insulated spaces where ventilation is minimal. This is why flood cuts and weep holes matter beyond just speeding drying time. They allow direct airflow and antimicrobial application into cavity spaces where mold grows unseen. Warm temperatures accelerate biological growth dramatically, which compounds the urgency in summer months or heated indoor spaces. A wall that might stay biologically stable for 72 hours in cool conditions can begin growing mold in 24 hours when temperatures rise above 80°F and humidity stays elevated.
Post-drying mold indicators tell you whether hidden moisture or incomplete drying has created problems despite your efforts. A persistent musty smell after equipment removal and moisture meter verification strongly suggests mold growth in inaccessible cavities or materials you didn’t test thoroughly. Visible mold appearing days or weeks after you thought drying was complete means either residual moisture remained or a continuing water source exists that you haven’t identified. Recurring moisture signs like cool spots, discoloration, or elevated moisture readings after you’ve restored surfaces indicate incomplete drying or new water intrusion requiring immediate re-assessment.
Mold prevention best practices during drying:
- Begin drying within 24 hours of water intrusion to prevent spore germination
- Maintain indoor relative humidity below 50% using dehumidifiers throughout the drying period
- Create direct airflow into wall cavities through flood cuts or weep holes, not just across surface areas
- Apply EPA registered antimicrobial solutions to surfaces if moisture has been present 24+ hours or early growth appears
- Monitor daily for musty odors, visible growth, or new moisture signs indicating drying isn’t progressing adequately
Verification: Confirming Complete Dryness
Moisture meter target readings provide the only reliable verification that drying is complete. Wood framing should measure 10 to 12% moisture content, which matches the normal equilibrium level for lumber in climate controlled indoor environments. Drywall readings must match unaffected areas of your home, typically ranging from 5 to 8% depending on seasonal humidity and your specific climate. Test the same wall locations you’ve been monitoring throughout the drying process, plus additional spots around the perimeter of affected areas to confirm moisture hasn’t spread beyond your initial assessment.
Visual and tactile verification methods offer supporting evidence but can’t replace moisture meter testing. Dry drywall feels the same temperature as surrounding walls when you place your palm flat against the surface, while damp areas feel noticeably cooler due to ongoing evaporation. Color should be uniform across the entire wall section without darker patches, water lines, or discoloration. Gently press the drywall surface with your fingertips. Dry material feels firm and solid. Damp gypsum core gives slightly under pressure or feels soft and spongy. These observations help you target moisture meter testing to questionable areas, but they miss hidden moisture in the gypsum core or wall cavity that hasn’t reached the surface yet. Trusting surface appearance alone leads to premature restoration that traps residual moisture and guarantees future mold growth and paint failure.
Test comprehensively across all potentially affected areas before removing equipment or beginning repairs. Take multiple readings on each wet wall section, spacing measurements 12 to 18 inches apart vertically and horizontally to create a grid pattern. Test adjacent walls that appeared dry initially to verify moisture hasn’t wicked into these areas during drying. Check flooring materials along the base of affected walls. Use your moisture meter through flood cuts and weep holes to measure wall cavity conditions directly, confirming that hidden spaces behind the drywall have dried completely.
Final verification process before equipment removal:
- Take moisture readings at six or more points across each affected wall section, creating a grid pattern from floor to ceiling height
- Test wall cavities directly through access points you created, confirming readings match target levels for both framing and cavity air
- Check adjacent areas including walls that initially appeared dry, floor materials, and ceiling sections if water originated above
- Compare readings to unaffected areas of your home to establish baseline dry readings for your specific materials and environment
Special Drying Challenges: Ceilings and Insulated Walls

Certain areas present unique challenges requiring modified techniques or professional intervention beyond standard wall drying procedures. These spaces trap moisture differently, limit equipment access, or pose structural risks that make DIY approaches difficult or dangerous.
Wet Ceiling Drywall
Water pools above the ceiling’s paper facing due to gravity, creating concentrated weight that causes sagging and bulging long before floor level walls show similar problems. Ceilings also hide plumbing lines, electrical wiring, and HVAC ducts that complicate moisture detection and access. The collapse risk from saturated ceiling drywall is immediate and severe. A 4 foot by 8 foot ceiling section can hold dozens of gallons of water, weighing several hundred pounds when fully saturated. This weight pulls away from fasteners, creating the bulging and separation you see before complete failure. Never attempt to drain bulging ceiling sections yourself by poking holes or cutting access points while standing beneath the area. The sudden release of trapped water can cause immediate collapse. Evacuate spaces below compromised ceilings and call professionals for assessment and safe water removal. Even minor ceiling dampness requires faster intervention than wall damage because the limited drying access and gravity working against you mean mold establishes more quickly. If moisture meter readings confirm dampness without structural compromise, position air movers to direct airflow upward across the ceiling surface while dehumidifiers work to lower ambient humidity.
Insulated Exterior Walls
Fiberglass batts and blown cellulose insulation absorb and hold water like sponges, often retaining saturation long after the drywall face appears dry from surface testing. You can’t effectively dry wet insulation through intact drywall. The material must be exposed to direct airflow, which requires flood cuts removing both the drywall and the saturated insulation behind it. Exterior walls also typically involve vapor barriers and potential air sealing materials that trap moisture and prevent cavity ventilation. Identify exterior walls by checking for insulation through electrical outlet openings (turn off power first), looking at your home’s floor plan, or simply noting which walls face outside. Any exterior wall showing moisture above superficial surface dampness requires a minimum 2 foot flood cut from floor level upward. Remove wet insulation completely, dispose of it, and allow direct airflow into the exposed cavity until framing members test dry at 10 to 12% moisture content. You’ll need to install fresh insulation during restoration after confirming complete dryness.
Limited Access Areas
Walls behind kitchen or bathroom cabinets, tile surrounds in showers and tub areas, and built-in fixtures create physical barriers that prevent air circulation and equipment positioning. These spaces also hide moisture from visual inspection and tactile assessment, letting water sit undetected while more accessible areas receive all your attention. HVAC closets and utility rooms compound access problems with tight spaces, minimal ventilation, sealed doors, and multiple wet materials simultaneously, including water heater insulation, ductwork, and stored items. Address limited access areas by creating ventilation paths rather than accepting slow drying. Remove cabinet toe kicks to expose the space beneath base cabinets. Drill access holes through the backs of vanities or kitchen cabinets that sit against wet walls, allowing air mover placement that pushes airflow through the hidden cavity behind the fixture. For extensive saturation or confirmed mold growth behind cabinets, removal of the entire cabinet unit becomes necessary to access, dry, and restore the wall properly. Tile surrounds require grout line inspection with your moisture meter. If readings show saturation, the tile and cement board backing usually require complete removal since these materials don’t dry effectively and trap moisture against the wall framing.
When Wet Drywall Must Be Replaced Instead of Dried
Some damage extends beyond what drying can fix, and attempting to salvage compromised drywall leads to recurring problems, hidden mold, structural failure, and wasted money on restoration that won’t last. Replacement isn’t a failure. It’s recognizing that certain conditions have degraded the material beyond safe or effective repair.
Structural integrity indicators show you when drywall has absorbed water so thoroughly that the gypsum core has begun breaking down. Press gently against questionable sections. If the surface feels soft, spongy, or crumbly rather than firm and solid, the gypsum has begun deteriorating and won’t regain structural strength even after drying. Warping, buckling, and sagging indicate that water weight and prolonged moisture have deformed the material beyond what fasteners can hold or what drying can reverse. Paper facing that has separated or delaminated from the gypsum core won’t reattach through drying and creates loose layers that will continue failing.
Mandatory replacement scenarios:
- Category 3 black water contact from sewage, river flooding, or stormwater, regardless of response speed or drying efforts, due to permanent pathogen contamination in porous materials
- Category 2 grey water saturation beyond 24 hours where bacterial contamination has penetrated the gypsum core and paper facing too deeply for safe salvage
- Visible mold growth on paper facing or discovered behind wall surfaces during inspection, indicating biological contamination requiring removal not just treatment
- Structurally compromised drywall that feels soft, crumbles under light pressure, sags away from fasteners, or shows buckling and warping that won’t flatten after drying
- Ceiling sections showing imminent collapse risk including bulging, heavy sagging, water staining across large areas, or separation at seams and fastener locations
- Exterior insulated walls requiring flood cuts because attempting to dry insulation through intact drywall is ineffective and all cut sections need new material during restoration anyway
- Long term or hidden leaks lasting weeks to months where repeated wet dry cycles have created deep biological growth and structural deterioration throughout wall cavities
- Persistent problems after drying attempts including ongoing musty odors, recurring moisture readings, bubbling or peeling paint, or visible staining that returns despite appearing dry initially
DIY Drying vs. Professional Restoration Services
DIY drying makes sense for clean Category 1 water damage affecting limited wall sections where you can respond within hours, the affected area is accessible without ceiling involvement, and you have time to monitor equipment continuously for 3 to 5 days. Think burst refrigerator supply lines, small water heater leaks caught immediately, or washing machine overflows that you stopped and wiped up within an hour. These scenarios involve minimal water volume, clean source water, and damage you can see and access completely. Renting commercial equipment still costs money, but the $300 to $500 for dehumidifier and air mover rentals over five days stays well below professional restoration fees for straightforward cases.
Professional help becomes mandatory rather than optional when water contamination, structural concerns, extensive damage, or insurance claims enter the picture. Category 2 grey water and all Category 3 black water require professional handling due to health hazards from bacteria, viruses, and pathogens in contaminated water. Professionals have the training, protective equipment, antimicrobial treatments, and disposal protocols that DIY approaches can’t safely replicate. Ceiling water damage poses structural collapse risk that requires professional assessment before any work begins. You can’t judge ceiling integrity accurately from below, and attempting access from above without understanding load capacity and collapse indicators creates serious injury risk. Extensive flooding affecting multiple rooms, soaking into wall cavities, or involving saturated insulation demands professional equipment quantity and expertise. One homeowner can’t effectively monitor and manage six air movers and three dehumidifiers running across different zones while adjusting based on moisture readings. Insurance claims almost always require professional documentation including photos, detailed moisture readings, equipment logs, and scope of work reports that support coverage decisions and claim amounts.
Compare costs realistically before committing to DIY approaches. Equipment rental runs $400 to $600 for five days of commercial dehumidifier and air mover use. Professional service for the same limited damage typically costs $1,000 to $2,000 depending on area and severity, which includes equipment, expertise, monitoring, and documentation. That gap narrows when you factor in your time investment monitoring equipment for nearly a week, taking days off work if needed, and potential for mistakes that extend timelines or require professional correction. On the other hand, drywall replacement from delayed action or failed drying attempts costs $500 to $750 for a moderate area, often more once you include mold remediation, insulation replacement, and multiple contractor visits. Acting fast with appropriate methods, whether DIY or professional, almost always costs less than delayed response leading to major restoration.
Insurance documentation matters significantly if you’re filing a claim. Most homeowner policies cover sudden and accidental water damage including burst pipes, appliance malfunctions, and some storm damage, but flooding requires separate flood insurance through the National Flood Insurance Program. Professional restoration companies document everything specifically for insurance purposes including initial moisture readings, daily progress photos, equipment placement and runtime logs, and final verification testing. This documentation supports your claim and establishes the scope and cost of proper restoration. DIY approaches require you to create this documentation yourself if you want insurance reimbursement, meaning detailed photos, written logs, equipment rental receipts, and moisture readings throughout the process.
Common Mistakes That Compromise Drying Success
Premature restoration based on surface dryness causes more long term problems than any other single mistake. Drywall surfaces dry first because they’re exposed to airflow, while the gypsum core and wall cavity behind remain damp for days longer. Running your hand across the wall and finding it feels dry doesn’t confirm the internal structure has released its moisture. Relying on appearance and touch instead of moisture meter verification leads to patching, priming, and painting over walls that are still wet inside. Paint bubbles and peels within weeks as trapped moisture works its way outward. Hidden mold grows behind the restored surface where it produces spores and musty odors without being visible for inspection. Framing members remain damp enough to support wood decay fungi and structural degradation. Wait for verified dryness at 10 to 12% moisture content in framing and matching readings to unaffected home areas in drywall before any restoration work begins.
Opening windows during humid weather actively introduces moisture rather than helping removal. Many homeowners assume fresh air will speed drying and open windows immediately after discovering water damage. If outdoor relative humidity is high (60 to 70% or above during spring and summer months, especially after storms), opening windows brings humid exterior air into your drying space. Your dehumidifier now has to remove this additional atmospheric moisture before it can continue extracting water from your walls, dramatically slowing progress. The same mistake happens with inadequate air circulation from poor equipment positioning. Placing all your air movers in one corner or aiming them randomly around the room instead of directing concentrated airflow across wet surfaces and into cavity openings means much of your wall area isn’t receiving the evaporation assistance it needs. Air movers work through direct, high velocity airstream contact with wet materials, not just general room air movement.
Preparation shortcuts guarantee incomplete drying even when equipment is adequate. Leaving baseboards in place traps moisture along the entire bottom edge where water accumulates most heavily and wicks up into the wall base. You can’t get effective airflow to this critical zone with trim in place, and wet baseboards themselves hold moisture that continues feeding the wall. Skipping access holes or flood cuts in favor of surface only drying means gypsum core and wall cavity moisture stays trapped with no ventilation path to remove it. Moisture barriers like vinyl wallpaper, multiple layers of paint (especially high gloss enamel), or wallboard facing create vapor impermeable surfaces that prevent moisture from evaporating outward through the wall face. These materials must be removed or breached to allow drying, yet homeowners often leave them hoping to avoid repair work.
Specific mistakes to avoid:
- Trusting surface dryness without moisture meter confirmation in the gypsum core and wall cavity, leading to premature restoration over still wet materials
- Opening windows during high humidity (60%+ relative humidity outdoors) which introduces moisture instead of helping evaporation
- Running equipment intermittently by turning it off overnight or during absences, allowing humidity to re-stabilize in materials and extending timelines significantly
- Positioning air movers poorly by aiming them randomly rather than directing concentrated airflow across wet surfaces and into access openings
- Skipping baseboard removal which traps moisture along wall bases and prevents airflow to the heaviest saturation zone
- Avoiding flood cuts or weep holes in insulated walls or deep saturation scenarios, leaving cavity moisture with no drying access
- Leaving moisture barriers intact including vinyl wallpaper, high gloss paint, or tile surrounds that prevent vapor transmission and slow drying to impractical timelines
Post Drying Restoration and Finishing Steps
Document the final state before beginning restoration work. Take photos showing moisture meter readings at multiple wall locations, opened access points with visible cavity conditions, removed materials like baseboards and wet insulation, and equipment positioning during the final drying stage. These photos protect you if moisture problems resurface later by proving you followed proper drying protocols. Write down final moisture readings with dates and locations. If you filed an insurance claim, this documentation supports your completed work and shows the scope of restoration needed. Keep copies separate from the work area in case additional water events occur during restoration.
Patch and repair techniques must seal exposed materials properly while maintaining vapor transmission capabilities that prevent future moisture traps. Cut edges along flood cuts and access holes need smooth, clean perimeters for good joint compound adhesion. Apply paper or fiberglass mesh tape to all seams where new drywall meets existing material. Use setting type joint compound for the first coat over taped seams since it’s less affected by any minor residual moisture than standard ready mix compounds. Build up joint compound in three thin coats with sanding between each layer until the patch sits flush with surrounding surfaces. Match existing wall texture using spray texture, knock down technique, or hand applied patterns depending on your wall finish.
Finish with moisture resistant primers and appropriate paint types. Oil based or shellac based primers seal restored areas and prevent any residual staining from bleeding through fresh paint. These
Final Words
Drying wet drywall after flood damage comes down to speed, the right equipment, and thorough verification.
Catch clean water within the first 24 hours, use commercial-grade dehumidifiers and air movers, and test moisture levels in wall cavities before you close anything up.
Skip those steps and you’re setting up for hidden mold, soft framing, and repairs that don’t last.
If you’re dealing with contaminated water, sagging ceilings, or widespread saturation, call in professionals who can document the work and get it done safely.
Your home’s worth protecting correctly the first time.
FAQ
How do you dry out drywall after a flood?
To dry out drywall after a flood, you shut off power to wet areas, remove standing water, set up commercial dehumidifiers and air movers within 24 hours, cut access points into wall cavities if needed, and run equipment continuously for 3-5 days while monitoring moisture levels with a meter until readings match unaffected areas.
How long does it take for drywall to dry after water damage?
Drywall takes 3-5 days to dry after water damage with professional-grade dehumidifiers and air movers running continuously. DIY household fans and home dehumidifiers typically require 3-7 days or longer depending on saturation level, humidity conditions, and affected square footage.
Will mold always grow on wet drywall?
Mold will not always grow on wet drywall if you start aggressive drying within 24-48 hours and achieve complete dryness before the mold window closes. However, warm conditions accelerate mold formation, and any drywall staying damp beyond 48 hours will likely develop mold growth requiring replacement.
Can wet drywall be salvaged if dried properly?
Wet drywall can be salvaged if dried properly when exposed to Category 1 clean water, dried within 24-48 hours, shows no structural softness or warping, and moisture meter readings return to normal levels. Category 3 contaminated water, visible mold, sagging ceilings, or prolonged saturation always require replacement.
What moisture meter reading indicates wet drywall?
A moisture meter reading above 12% indicates wet drywall requiring active drying. Completely dry drywall should match the moisture content of unaffected areas in your home, typically 10-12% for wood framing and similar baseline readings for gypsum panels.
Why can’t you just open windows to dry wet drywall after flooding?
You cannot just open windows to dry wet drywall after flooding because outdoor humidity levels often reach 60-70% during storm conditions, which introduces moisture instead of removing it. Sealed rooms with dehumidifiers create controlled low-humidity environments that actually pull moisture from materials.
What’s the difference between flood cuts and weep holes for drying walls?
Flood cuts remove drywall 24 inches above the highest moisture line to expose insulated wall cavities for direct airflow and insulation removal. Weep holes are small openings drilled near floors in non-insulated walls to allow air circulation without complete drywall removal.
Do you have to remove baseboards to dry wet drywall?
You have to remove baseboards to dry wet drywall because they trap moisture against the wall’s bottom edge and prevent airflow into the critical floor-level area where water accumulates. Leaving baseboards attached creates hidden damp zones that develop mold.
What water category requires automatic drywall replacement?
Category 3 water requires automatic drywall replacement regardless of drying efforts. This includes sewage backups, river flooding, stormwater intrusion, and any contaminated water containing harmful bacteria or toxins that make salvaging materials unsafe.
Why does ceiling drywall dry differently than wall drywall?
Ceiling drywall dries differently than wall drywall because gravity causes water to pool above the paper facing, creating heavier saturation and sagging that poses collapse risk. Ceilings require faster intervention and more frequently need partial removal rather than in-place drying.
How do you know if drywall is completely dry inside?
You know drywall is completely dry inside when moisture meter readings at multiple test points match unaffected areas, the surface temperature feels identical to surrounding dry walls, color appears uniform without dark spots, and no musty odor remains after equipment removal.
Can you dry drywall without removing insulation behind it?
You cannot effectively dry drywall without removing wet insulation behind it because fiberglass and cellulose insulation absorb water like sponges and hold moisture against the drywall’s back surface. Insulated exterior walls require flood cuts removing both materials simultaneously.
What makes professional drying equipment better than household fans?
Professional drying equipment performs better than household fans because commercial air movers deliver high CFM airflow at strategic angles, and LGR dehumidifiers remove 140+ pints daily versus 30-50 pints for home units, reducing drying time from 7+ days to 3-5 days.
Should you use antimicrobial treatment when drying wet drywall?
You should use antimicrobial treatment when drying wet drywall exposed to Category 2 grey water, when drying takes longer than 48 hours in warm conditions, or when any visible mold appears during the process, but treatment doesn’t replace proper drying or eliminate replacement needs.
When is DIY drywall drying safe versus needing professionals?
DIY drywall drying is safe for limited areas affected by Category 1 clean water from sources like supply line leaks when caught within hours and involving accessible walls without ceiling damage. Professionals are necessary for contaminated water, structural concerns, extensive flooding, or insurance documentation requirements.