
You probably don’t think about the pipes behind your walls until something goes wrong. By then, water may have been soaking into drywall, insulation, and framing for weeks. The trick is catching it early, before a small leak turns into rotted studs, black mold, and a five figure repair bill. Most hidden leaks leave clues if you know what to look for. This guide walks you through the warning signs, the tools that actually work, and when it’s time to call someone who can find the source without tearing your house apart.
Warning Signs of Water Leaks Behind Walls

Catching a leak early can save you from major structural repairs, mold outbreaks, and a repair bill that keeps climbing. Hidden leaks don’t announce themselves right away. By the time you see a stain, water may have been pooling behind your walls for days or even weeks.
Water doesn’t always show up where it starts. It travels downward through wall cavities, follows along framing members, and can appear on a completely different wall or even a floor below the actual source. That brown streak near the baseboard might come from a leaking pipe three feet higher. The damp patch on your ceiling could trace back to a bathroom fixture on the floor above. Understanding how water moves through your home helps you look in the right places.
Here’s what to watch for:
Yellow or brown streaks running down walls or spreading across ceilings. Warped, bulging, or soft spots in drywall that give slightly when you press them. Paint or wallpaper that’s peeling, bubbling, or cracking without explanation. Dark spots or visible mold patches, especially in corners or near fixtures. Wet patches that appear and disappear or never quite dry out.
Dripping, trickling, soft hissing, or whooshing sounds when you turn off all water sources and listen carefully. Musty or earthy smell that won’t go away, even after cleaning. Often the first sign of hidden mold from excess moisture. Water stains on floors near walls, especially along baseboards. Ceiling drips or water pooling that seem to come from nowhere.
Unexplained spike in your water bill without any change in household water use.
That last one matters more than most people think. A small, steady leak might not flood your bathroom, but it’ll quietly run up your water bill month after month while rotting out the framing behind your walls.
Moisture Meters for Pinpointing Leak Locations
Moisture meters take the guesswork out of finding hidden moisture. You can pick one up at most home improvement stores or rent one for a day. They’re not expensive, and they’re one of the simplest ways to confirm what you’re dealing with before you start cutting into walls.
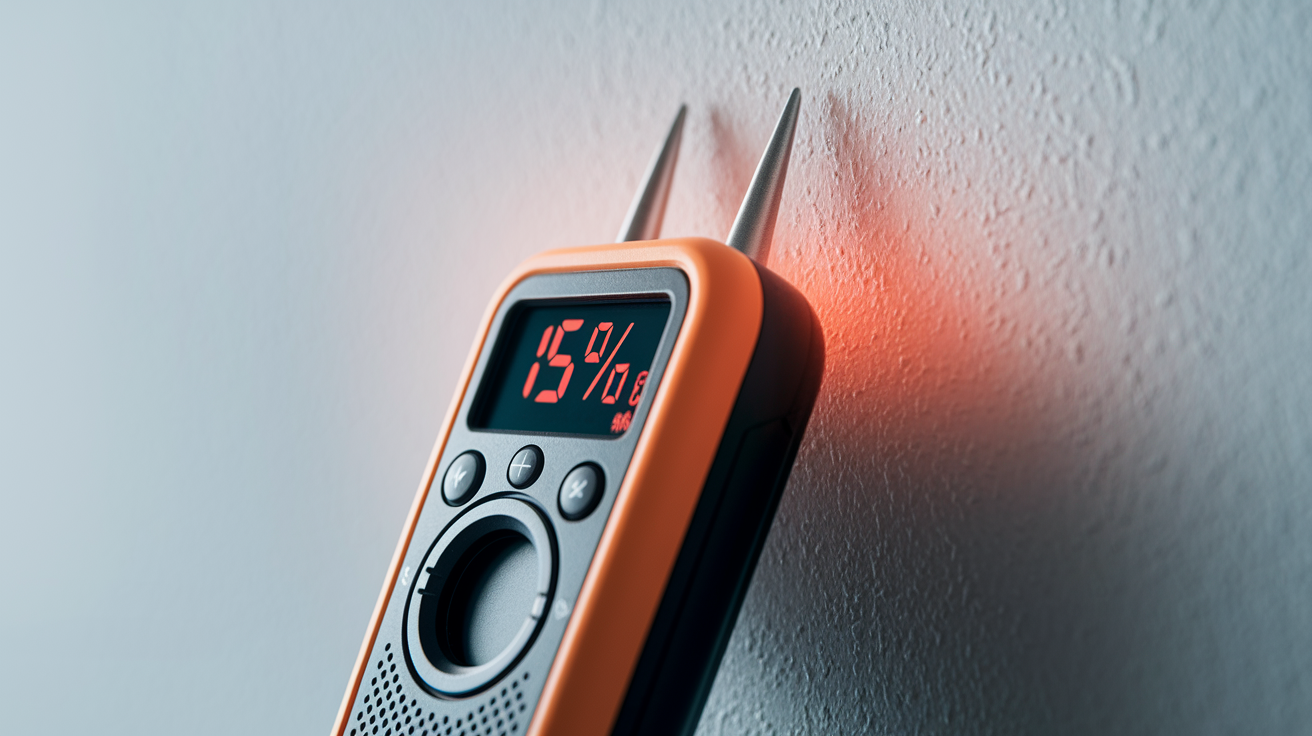
There are two main types. Pin type meters use two small metal probes that you push into the material. Drywall, wood, whatever you’re testing. The meter measures electrical resistance between the pins to calculate moisture content. Pinless meters scan the surface without penetration, using electromagnetic signals to detect moisture up to an inch or so deep. Pin type meters give you precise readings in small areas, especially when you want to know the exact moisture level at a specific depth. Pinless meters let you cover more ground fast, scanning larger sections of wall to find general problem zones.
Here’s how to use one effectively. Start by testing a wall you know is dry. One that’s not near plumbing, hasn’t shown any damage, and feels completely normal. Record that reading. That’s your baseline. Now move to the suspicious area and take multiple readings in a grid pattern, spacing them six to twelve inches apart. Compare every reading to your baseline. Anything significantly higher tells you there’s moisture where it shouldn’t be. Work your way across the wall, checking above and below the visible damage if there is any. The highest readings usually cluster near the leak source, though remember that water travels, so the wettest spot might still be a little ways from the actual problem.
| Meter Type | Best For | How It Works | Pros | Cons |
|---|---|---|---|---|
| Pin-Type | Small, precise spots; determining exact depth of moisture | Two metal pins inserted into material measure electrical resistance | Highly accurate; pinpoints specific moisture depth; affordable | Leaves tiny holes; slower for scanning large areas |
| Pinless | Scanning large wall sections quickly | Electromagnetic sensor reads moisture without surface penetration | No surface damage; fast coverage; good for initial surveys | Less precise; can’t determine moisture depth; more expensive |
Normal readings for drywall, concrete, and masonry are less than one percent moisture content. Once you start seeing readings of five, ten, or fifteen percent, you’ve found your problem area. The beauty of a moisture meter is that it narrows the search zone down to a few square feet instead of an entire wall. You know exactly where to focus your attention, whether that means calling a plumber or planning where to cut an inspection hole.
Reading and Interpreting Moisture Levels
Numbers without context don’t help much. Less than one percent is the target for drywall, concrete, and masonry. Basically dry. Most meters will show that as a green light or a low numerical reading. Anything above that baseline starts to raise concern. Two to four percent might indicate elevated humidity or a very slow moisture issue. Above five percent, you’re looking at active moisture intrusion that needs attention. Readings above ten percent usually mean there’s water actively present or materials are thoroughly saturated.
Always establish your baseline first by testing a known dry section of the same material type. Different materials hold moisture differently, and what’s normal for one isn’t normal for another. Once you have that reference point, any reading that’s significantly above it, even by a few percentage points, tells you something’s off. Mark the highest reading spots with painter’s tape so you can track them, then retest a day or two later to see if the moisture is spreading or drying out.
Thermal Imaging Camera Detection Methods

Thermal imaging cameras don’t actually see water. They see temperature differences, and moisture changes the way heat moves through materials. When part of a wall is damp, it usually shows up cooler than the surrounding dry areas because water absorbs and redistributes heat differently than dry drywall or insulation. The camera displays these temperature variations as different colors. Blue and purple typically indicate the coldest zones. Often the wettest spots. Warmer colors like red, orange, and yellow mark drier, warmer areas.
This technology works best when there’s a temperature difference between the wet material and the surrounding air. Early morning or late evening can be ideal times to scan because the wall has had time to equalize with room temperature while moisture pockets stay cooler. You’re looking for unusual cold spots that don’t make sense. Patches that aren’t near exterior walls, windows, or air vents where you’d expect temperature variation. Those out of place cold zones are often where water has collected.
Thermal cameras come in professional grade models that cost thousands and consumer versions you can rent or even attachments for smartphones that run a few hundred dollars. Rental options make this accessible for a single use situation. The professional versions pick up smaller temperature differences and give you clearer images, but even basic models can reveal significant moisture problems. When you scan, work in a systematic pattern, moving slowly across the wall from top to bottom. Document what you see with photos, noting the temperature readings if your camera displays them.
One important catch. Thermal imaging can also pick up air leaks around outlets, gaps in insulation, or drafts from exterior walls. Not every cold spot is water. That’s why you never rely on thermal imaging alone. Once you’ve identified a suspicious area with the camera, confirm it with a moisture meter. The combination of the two gives you reliable information. The thermal camera shows you where to look, and the moisture meter proves there’s actually water present.
Acoustic Leak Detection for Active Plumbing Leaks

Sometimes the simplest method is just listening. Turn off every water source in your house. Faucets, appliances, ice makers, toilets, everything. Wait a few minutes for water flow to completely stop, then stand quietly near the wall where you suspect a leak. Listen for dripping, trickling, soft hissing, or a faint whooshing sound of water moving through pipes under pressure. It takes a quiet environment and a little patience, but active leaks often make noise, especially if they’re in supply lines carrying pressurized water.
Professional acoustic equipment amplifies those sounds dramatically. Plumbers use electronic listening devices that pick up pipe vibrations and the high frequency noise of water escaping through even small openings. These tools can isolate the sound source to within inches, which makes a huge difference when you’re trying to avoid unnecessary demolition. The equipment essentially works like a medical stethoscope but designed for pipes. Sensors placed against the wall or floor amplify leak sounds and filter out background noise so the technician can trace the sound to its origin.
Acoustic detection works best on pressurized supply lines. The pipes that bring fresh water to your fixtures. Drain leaks are harder to catch this way because they only carry water when you’re actively using a fixture, and that water isn’t under pressure. If you hear a constant sound even when no water is running, that’s a supply line issue. If you only hear something when a toilet flushes or someone uses the shower, you might be dealing with a drain or waste line problem, which calls for a different approach. Modern, well insulated walls can also make it tougher to hear smaller leaks, so acoustic methods work better in older homes or when the leak is significant enough to produce noticeable sound.
Visual Inspection Through Strategic Access Points
When non invasive methods have narrowed down the leak location to a small section of wall, sometimes you just need to look inside. That doesn’t mean ripping out half a wall. A small, carefully placed inspection hole can show you exactly what’s happening without creating a huge repair job afterward.
Plan the hole location carefully. Look for spots that will be easy to patch and easy to hide. Behind a toilet, under a sink, near floor trim, or close to a ceiling line are all good choices. Areas where furniture sits against the wall also work. Before you cut anything, use a stud finder to locate framing and mark it. Check for electrical wiring and plumbing pipes along that section. You’re not looking for a random spot. You’re looking for the safest spot close to where your moisture meter or thermal camera showed the highest readings.
Here’s how to choose a safe location. Pick spots that will be hidden by fixtures, furniture, or trim once repaired. Stay at least a few inches away from electrical outlets and switches to avoid wiring. Avoid areas directly above or below known plumbing to reduce the chance of hitting pipes. Target spaces between studs for easier cutting and cleaner patching. Choose locations where you can reach in and angle a light or camera up, down, and sideways. Consider cutting near the floor or ceiling where repair work blends into trim work.
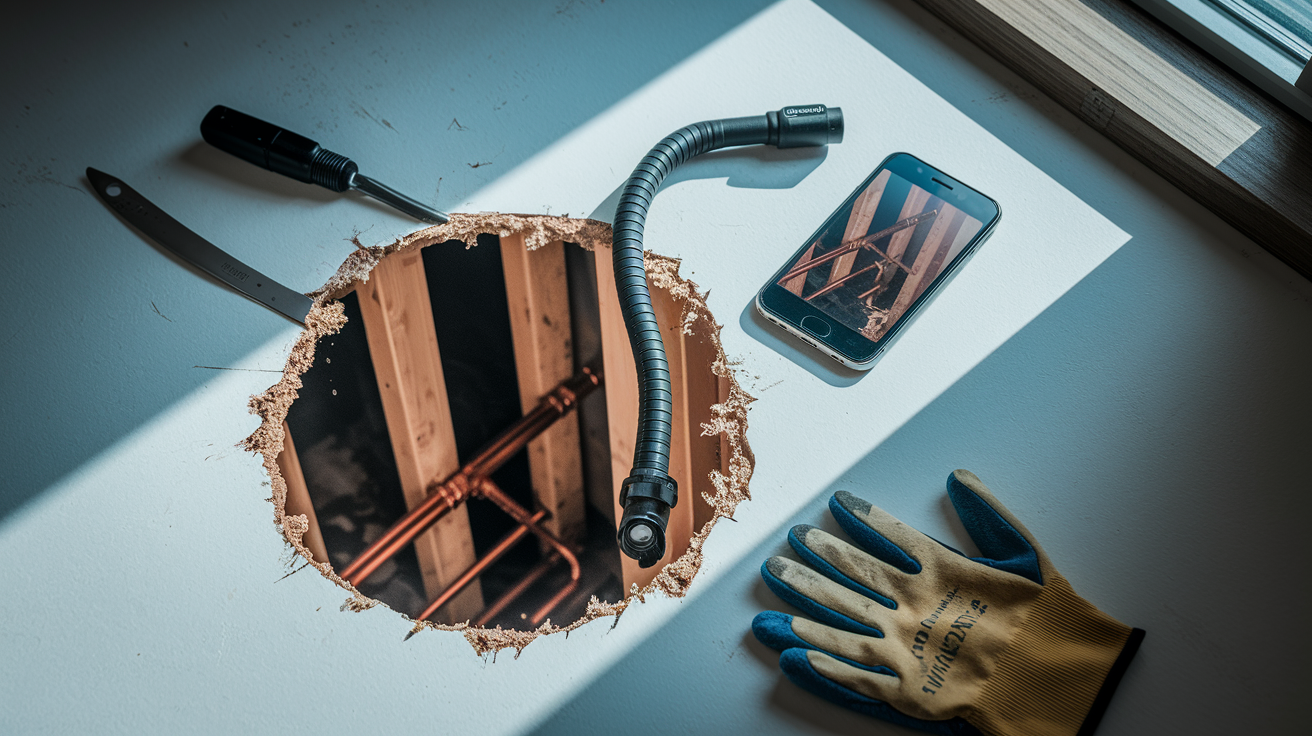
Start small. A hole about two inches across is usually enough to fit a flashlight and get a good look with a small mirror or your smartphone camera. Hold the light at an angle and move it around to illuminate different sections inside the wall cavity. Look for dripping water, damp insulation, discolored framing, or the actual pipe with visible moisture. You can find inexpensive borescope or endoscope cameras online that plug into your phone and have their own light source. These flexible camera cables let you snake around corners and get a clear view of what’s inside without cutting multiple holes.
Remember, visible damage on the drywall might be several feet away from the actual leak since water travels along framing members and down through the wall cavity. If your initial inspection hole doesn’t show the source, you might need to cut a second one higher up or farther along the path the water likely traveled. The goal is to visually confirm the leak location before doing any major repair work, not to tear apart the entire wall hoping to stumble across the problem.
Water Meter Testing for Leak Confirmation
The water meter test is a straightforward way to confirm a leak exists somewhere in your home’s plumbing. It won’t tell you exactly where the leak is, but it will tell you for certain that you’ve got one, which can be enough to justify calling a plumber or continuing with more detailed detection methods.
Here’s the test process, step by step. It only takes a few hours, and you don’t need any special tools. Just access to your water meter.
Turn off every single water using device in your home. Faucets, showers, washing machine, dishwasher, ice maker, toilets. Don’t flush. Walk through the house and double check. Even a toilet tank refilling will throw off your results.
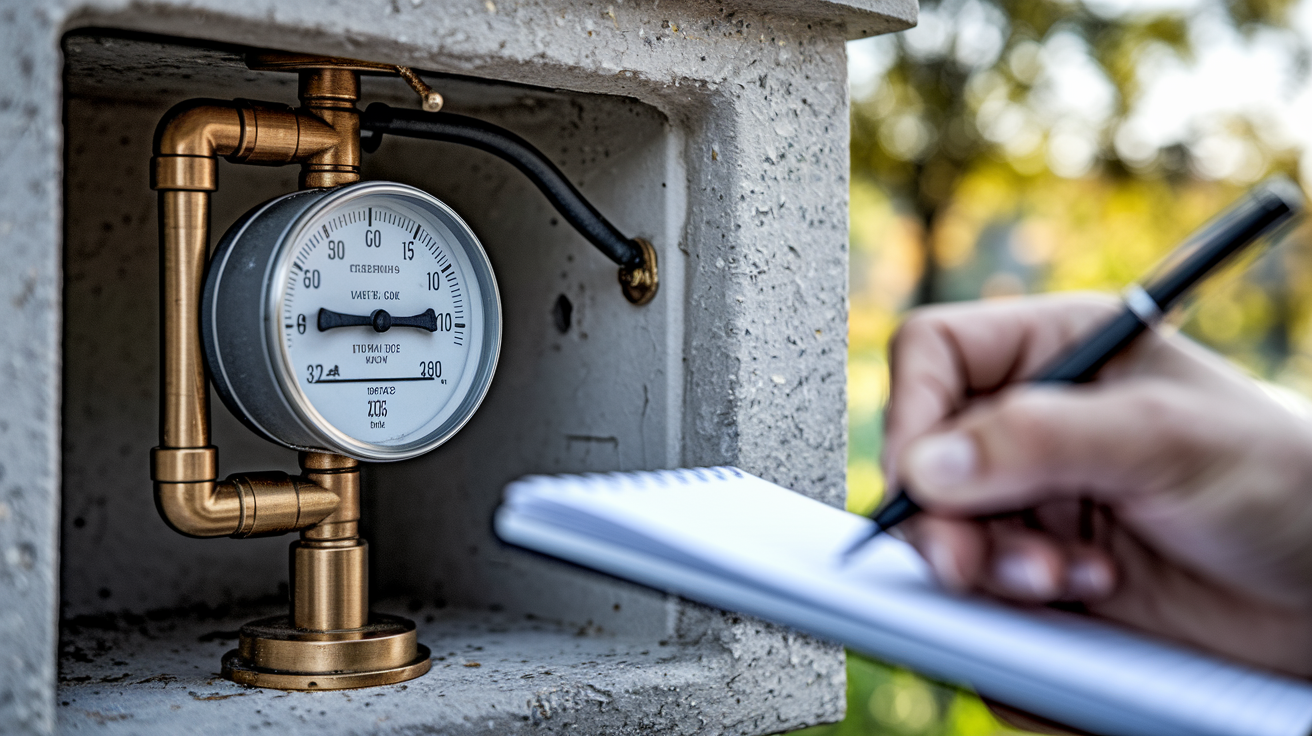
Locate your water meter. It’s usually in the basement, crawl space, or outside near the street in a small concrete box. Write down the exact reading in gallons or cubic feet, depending on what your meter displays. Take a photo of it if that’s easier.
Leave everything off for at least two to three hours. Longer is better. Overnight works great if you can manage it. The key is giving enough time for any hidden leak to register measurable water flow through the meter.
Check the meter again without using any water first. Write down the new reading.
Compare the two readings. If the numbers changed at all, you’ve got a leak somewhere in the system. Even a small increase means water is moving through your pipes when it shouldn’t be.
If the meter test confirms a leak, you can narrow down which part of your plumbing system is responsible by isolating sections. Most homes have individual shut off valves for different plumbing branches. One for the kitchen, one for a bathroom, one for an outdoor hose, and so on. Turn off one branch at a time and repeat the meter test with that section isolated. When you shut off the branch that contains the leak, the meter will stop moving. That narrows your search area significantly, especially in a larger home with multiple bathrooms and fixtures spread across different walls and floors.
This test is a confirmation tool, not a location tool. It’s most useful when you’re not sure if that damp spot is actually from a leak or just humidity, or when you want to verify that the leak you repaired was actually the only leak before you seal everything back up.
Professional Leak Detection Services and Equipment

Some leak situations call for professional help right from the start. If you’ve tried DIY detection methods and still can’t pinpoint the problem, if the visible damage is extensive, or if you simply don’t have time or access to the right tools, bringing in a professional service is the smart move. We don’t expect every homeowner to own a thermal camera or acoustic leak detector, and we definitely don’t expect you to feel confident cutting into walls if you’re not sure what you’ll find.
Professional leak detection companies and plumbers carry commercial grade equipment that goes beyond what you can rent or buy at a hardware store. Their thermal cameras pick up finer temperature gradients. Their acoustic devices isolate leak sounds more precisely. Most pros carry both pin type and pinless moisture meters so they can scan large sections of wall quickly, then zero in on the exact depth and location of the moisture once they’ve found the problem zone. They also bring pressure testing equipment that can isolate sections of your plumbing system, increase internal pressure, and measure exactly where that pressure drops. A clear indicator of where water is escaping.
The typical professional process starts with an in depth assessment. They’ll ask about what you’ve noticed, when it started, and whether the problem seems to be getting worse. Then they’ll visually inspect the area, looking at walls, ceilings, floors, and any nearby fixtures. After that, they’ll use moisture meters and thermal cameras to map out where moisture is concentrated. If they need more information, they’ll bring in acoustic devices to listen for active leaks or pressure test your plumbing lines. Once they’ve located the source, they’ll shut off the water supply to stop additional damage, document the findings, and give you a clear explanation of what’s causing the leak and what it will take to fix it.
Cost for professional leak detection typically ranges from $150 to $400 for a standard service call, though that can go higher if the situation is complex or requires multiple visits. Some plumbers include detection in their overall service fee if they’re also doing the repair. The price depends on your location, the size of the home, and how difficult the leak is to access. That upfront detection cost can save you thousands by preventing unnecessary demolition and targeting the repair exactly where it needs to happen.
One thing to keep in mind. Plumbers and leak detection specialists handle the plumbing side of the problem. Once they’ve fixed the leak, you’ll likely need separate contractors to handle mold remediation if there’s significant growth, cleaning and sanitizing the affected area, replacing damaged drywall, and repainting. Some restoration companies offer full service packages, but most plumbing companies focus on the leak itself and leave the finish work to others. If you’re dealing with extensive water damage, consider contacting a water damage restoration service that can coordinate the entire process from leak repair through final restoration. That way you’re not juggling multiple contractors and trying to manage the timeline yourself.
Pressure and Dye Testing for Leak Verification
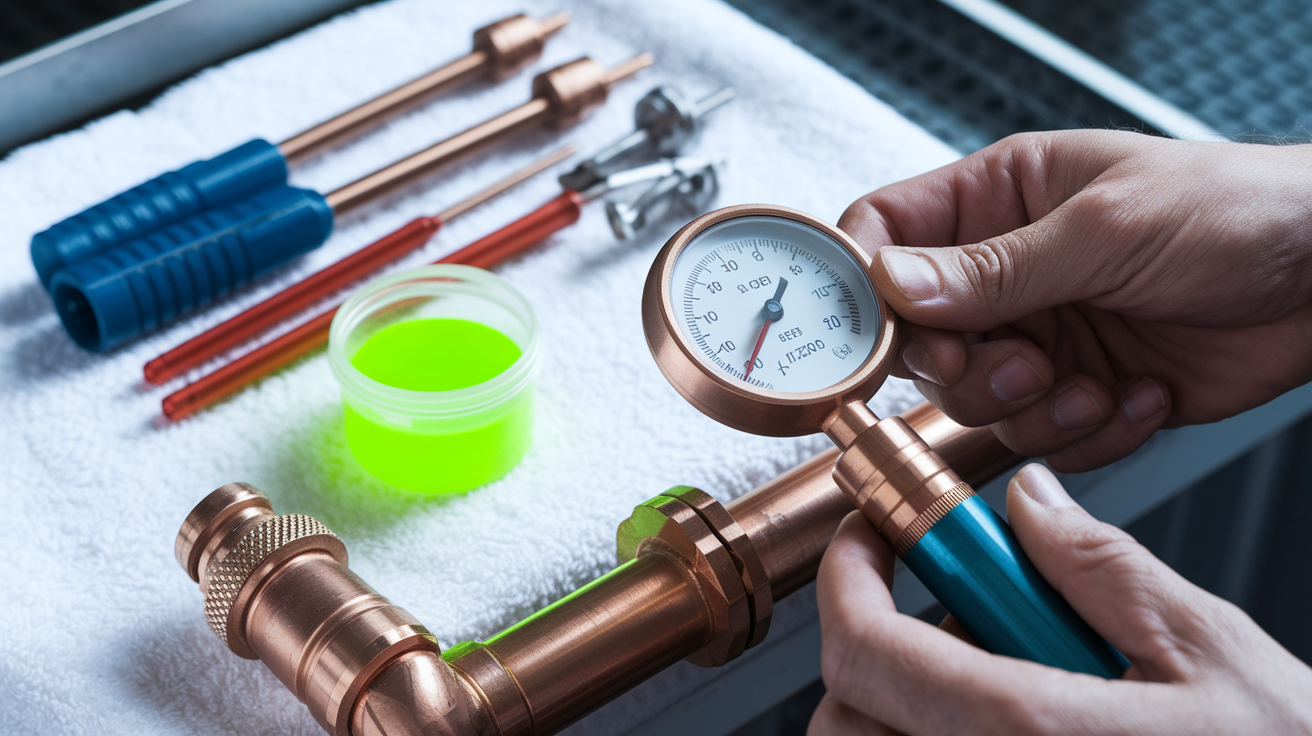
Pressure testing is a method plumbers use to verify that a repair actually worked and to locate leaks in specific sections of pipe without tearing into walls prematurely. They isolate a section of the plumbing system. Sometimes just one branch, sometimes the entire supply line. And increase the pressure inside those pipes above normal operating levels. Then they monitor that pressure over time, usually at least several minutes. If the pressure holds steady, the pipes are sound. If it drops, there’s a leak somewhere in that isolated section, and the rate of pressure drop can even give clues about the size of the leak.
Dye testing works differently and is used mainly for drain and waste lines, where pressure testing isn’t effective since those pipes don’t normally hold water under pressure. A plumber will introduce colored dye into the drain system. Sometimes fluorescent dye that shows up under UV light. And then watch where it appears. If dye seeps out through a crack in a drainpipe or shows up in a wall cavity where it shouldn’t be, that pinpoints the problem. It’s especially useful for shower pan leaks, bathtub drain issues, or any situation where wastewater might be escaping a drain line and soaking into the surrounding structure.
After a repair is completed, pressure testing the repaired section is standard procedure. The plumber will pressurize the new pipe connection or patched area and leave it under pressure for at least a few minutes. Sometimes longer depending on the situation. To make sure the fix holds. Only after that verification do they restore water service to the rest of the house. Then they’ll check the water meter again to confirm the leak has actually stopped. That final meter check is important because occasionally there’s more than one leak, and fixing the obvious one might still leave a smaller problem active. We’d rather catch that during the verification step than have you call us back a week later because the damp spot returned.
Repair Process and Damage Mitigation Steps
Once you’ve found the leak, stopping it is priority one. The longer water flows, the more damage piles up and the higher your water bill climbs. Here’s the complete sequence from discovery through final restoration.
Shut off the water supply immediately. Use the fixture shutoff valve if the leak is at a specific sink, toilet, or appliance. If you can’t isolate it, shut off the main water supply to the house. Stop the water flow before you do anything else.
Document everything for potential insurance claims. Take photos from multiple angles showing the visible damage, the location of the leak relative to studs, floor, ceiling, and nearby fixtures. Sketch a simple layout of the wall showing where the leak is and what’s around it. Measure distances from corners or fixed reference points. Insurance adjusters appreciate thorough documentation.
Assess the damage and determine the repair method. Small pinhole leaks or minor joint seepage can sometimes be fixed with a pipe patch or sealant. Larger leaks, corroded sections, or cracks that compromise the pipe’s integrity require cutting away the damaged section and replacing it with new pipe. Your plumber will decide which approach is appropriate based on what they find.
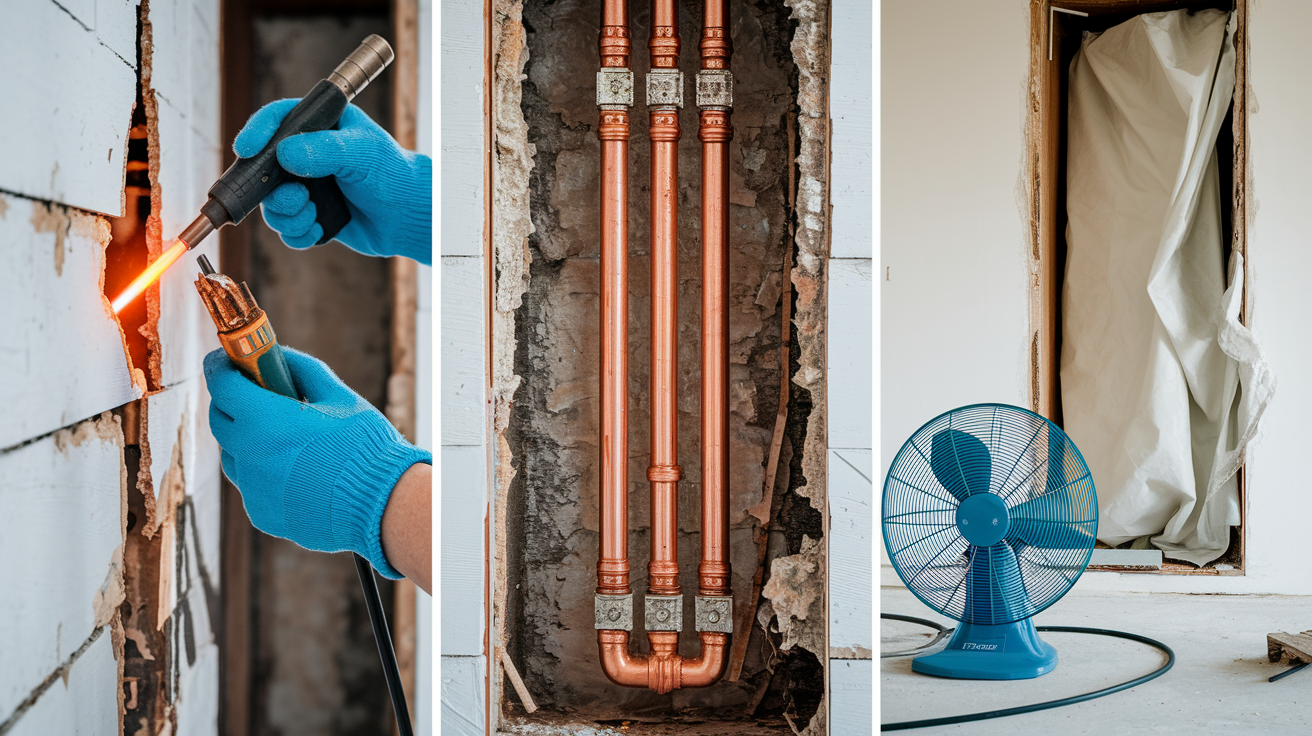
Remove the damaged pipe section if replacement is needed. This usually means cutting into the wall to access the pipe, cutting out the bad section, and cleaning the pipe ends for new fittings.
Install the new pipe or repair components. Solder, clamp, or connect the new section, making sure all joints are secure and properly sealed.
Pressure test the repair. Turn the water back on to that section and monitor the repaired area for at least a few minutes under full pressure to confirm there’s no leakage at the new connections.
Allow the wall cavity to dry completely before sealing. This is critical. Trapped moisture will lead to mold growth and rot even though the leak is fixed. Use fans, dehumidifiers, or give it time depending on how wet things got. A moisture meter can confirm when the cavity is dry enough to close up.
If you’ve discovered an active leak, especially one that’s flooding or causing immediate damage, check out our guide on emergency water leak situations for specific steps to take right now while you’re waiting for help to arrive.
The cost of waiting is real. A slow leak behind a wall might only drip a gallon or two per day, but that’s 60 gallons a month soaking into your framing and drywall. Your water bill creeps up, the damage spreads, and by the time you finally address it, you’re paying for structural repairs and mold treatment on top of the plumbing fix. Catching it early means a simpler repair, less mess, and a much smaller bill.
Causes and Prevention of Concealed Wall Leaks
Understanding what causes leaks in the first place helps you prevent the next one. Most hidden wall leaks trace back to a handful of common issues, and regular maintenance catches a lot of them before they become serious problems.
Interior Plumbing Failures
The pipes inside your walls don’t last forever. Copper pipes can develop pinhole leaks from corrosion, especially if your water chemistry is aggressive or if the pipes are over 40 years old. Galvanized steel pipes corrode from the inside out, building up rust and restricting flow until they eventually start leaking. Homes built before the 1960s often still have galvanized supply lines that are well past their useful life. PEX piping is more modern and generally reliable, but even PEX can fail if fittings weren’t installed correctly or if the pipe freezes and bursts.
Joints and connections are common weak points. As pipes expand and contract with temperature changes, or as your home settles over time, joints can loosen and start seeping. High water pressure puts constant stress on every connection, and over years that pressure takes a toll. Frozen pipes are another major cause. When water freezes inside a pipe, it expands and can crack the pipe wall or blow out a joint. By the time the ice thaws, you’ve got water spraying into the wall cavity.
Supply lines to fixtures also fail. The flexible hoses that connect faucets, toilets, and appliances like washing machines and dishwashers have a limited lifespan, usually around ten years. After that, the rubber or braided material starts to degrade, and a sudden rupture can dump gallons of water behind a vanity or inside a wall before you even notice.
Bathroom and Fixture-Related Leaks
Bathrooms are leak prone because they concentrate so much plumbing in one area. Shower pans crack or develop gaps in the waterproof membrane, letting water seep through the floor and into the wall cavity or ceiling below. Toilet wax rings deteriorate over time, especially if the toilet rocks slightly, and water from every flush starts leaking at the base and soaking into the subfloor and wall behind the toilet. Bathtub overflows, cracked tile grout, and failed caulking around tubs and showers all allow water to migrate behind finished walls where it sits and does damage unseen.
Even something as simple as a loose faucet connection can drip steadily inside a vanity cabinet, and if that cabinet backs up to a wall, the moisture eventually soaks through the back panel and into the drywall. These fixture leaks tend to be small and slow, which is exactly why they go unnoticed until the damage is obvious.
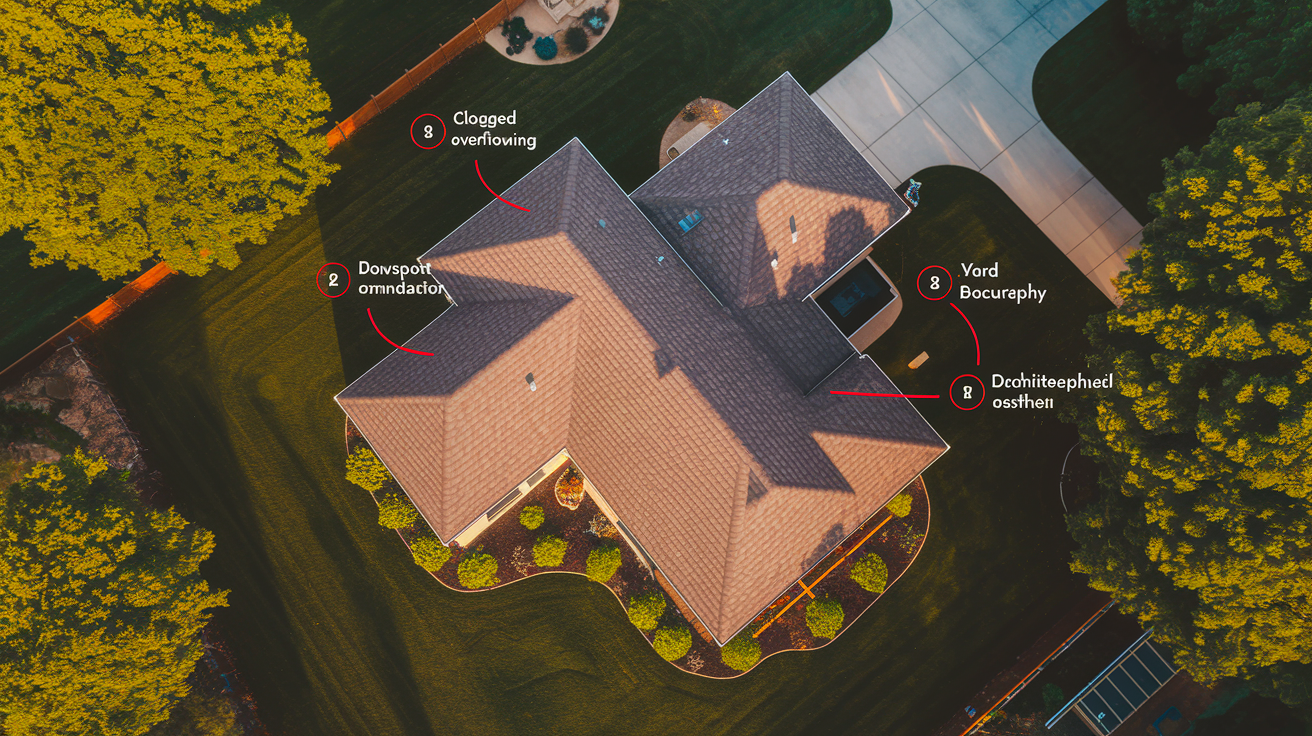
Exterior Water Intrusion
Not all wall leaks come from plumbing. Water can enter from outside and work its way into your wall cavities. Clogged gutters overflow during rain and pour water down the side of your house, soaking into siding and eventually finding its way through gaps into the wall framing. Downspouts that dump water right at the foundation let it pool against basement walls and seep through cracks or porous concrete. Deteriorating caulk around windows, worn out flashing above doors, and damaged siding all create paths for water to get behind your exterior walls.
Below grade issues are particularly troublesome. If your yard slopes toward the house instead of away from it, every rainstorm drives water toward your foundation. Damaged sprinkler pipes buried near the house can leak for months without anyone noticing, slowly saturating the soil and pushing moisture through foundation walls into basements and crawl spaces. French drains that are clogged or improperly installed stop doing their job, and water that should be directed away from your foundation instead sits against it and finds a way in.
Preventing concealed leaks takes regular attention, but it’s straightforward work. Have a plumber inspect your plumbing every few years, especially if your home is over 30 years old or still has original pipes. Check water pressure and install a pressure regulator if it’s consistently above 80 psi. High pressure wears out pipes and fixtures faster. Replace appliance hoses and fixture supply lines every ten years even if they look fine. Know where your pipes run before you hang heavy shelves or drill into walls. Insulate pipes in unheated areas to prevent freeze damage.
On the exterior side, keep up with the basics. Clean gutters and downspouts twice a year, more if you have trees overhead. Check that downspouts drain at least five feet away from the foundation. Inspect caulking around windows and doors annually, recaulk any gaps or cracks. Look for damaged or missing flashing above doors, windows, and where walls meet the roof. Test your grading. Water should slope away from the house, not toward it.
Walk your property after heavy rain and watch where water pools or runs toward the foundation. Service your sprinkler system and check for leaks near the house. Make sure basement window wells drain properly and aren’t holding standing water. Test sump pumps before rainy season to confirm they’re working.
Most of this doesn’t require a professional. A Saturday afternoon twice a year checking gutters, caulk, and drainage can prevent thousands of dollars in hidden water damage. Pay extra attention to areas where you’ve had problems before. Leaks often happen in the same general area if the underlying cause wasn’t fully addressed.
Health and Safety Concerns with Hidden Wall Moisture
Moisture trapped inside walls doesn’t just damage your house. It creates conditions for mold growth, and mold affects your health. You’ll notice it first as a musty smell, but by the time the smell is strong, spores are already airborne. Frequent sneezing, runny nose, itchy eyes, or a persistent cough that seems worse at home can all trace back to mold from a hidden leak. People with asthma or weakened immune systems are especially vulnerable, and long term exposure increases respiratory issues even in otherwise healthy individuals.
Mold can spread fast once it starts. A damp wall cavity provides everything mold needs. Moisture, darkness, and organic material like paper faced drywall and wood framing. Within 48 hours of water intrusion, mold colonies can begin to establish.
Beyond health issues, structural damage escalates the longer moisture sits inside your walls. Wood framing rots and loses strength. Drywall crumbles. Insulation becomes waterlogged and useless. If the leak is on an upper floor, the water travels down through wall cavities and eventually affects the framing below, spreading the damage vertically through multiple levels of your home. Foundation walls that stay damp develop cracks and allow even more water intrusion, creating a cycle that gets worse over time.
There’s also the electrical risk. Water and electricity are a dangerous combination. If a leak reaches electrical wiring inside a wall, it can cause shorts, damage outlets and switches, or in the worst case, create a fire hazard. Any time you discover water damage near outlets, light switches, or electrical panels, shut off power to that circuit immediately and call both a plumber and an electrician.
Ignoring a hidden leak doesn’t just mean a higher repair bill later. It means health risks, structural compromise, and reduced property value. Homes with a history of water damage or mold problems are harder to sell and often require disclosure, which can scare off buyers or lower offers. Insurance companies don’t like seeing repeated water damage claims, and coverage can become more expensive or harder to get. The cost of addressing the problem now is always less than the cost of letting it continue.
Cost Factors and Budget Planning for Detection and Repair
Leak detection and repair costs vary depending on the tools you use, the severity of the leak, and how much of the surrounding structure is damaged. Planning for realistic expenses helps you make informed decisions about when to handle something yourself and when to bring in a pro.
DIY tools are the most affordable starting point. A basic pin type moisture meter costs between $30 and $100. Pinless models run a bit higher, usually $80 to $200. Rental options at home improvement stores might charge $20 to $40 per day for a moisture meter or $50 to $75 per day for a thermal imaging camera. If you already suspect the general area and just need to confirm moisture before cutting into the wall, renting a tool for a day or two makes sense. For acoustic detection, you can try the free method of just listening carefully, or rent specialized equipment if a plumber offers that option separately.
Professional leak detection services typically charge $150 to $400 for a service call that includes assessment, equipment use, and pinpointing the leak location. That fee is sometimes rolled into the overall repair cost if you hire the same company to fix the problem. Complex situations, multiple potential leak sources, hard to access areas, or large properties, can push detection costs higher, occasionally reaching $500 to $800 for extensive diagnostic work. But paying for accurate detection usually saves money in the long run by avoiding unnecessary demolition and targeting repairs precisely.
Repair costs depend on what’s broken and where it’s located. A small pipe patch or sealant application might only cost $150 to $300 if a plumber can access it easily. Replacing a section of pipe inside a wall typically runs $400 to $1,000, including labor, materials, and the cost of cutting into and repairing drywall. If the pipe is in a difficult location, inside a ceiling, behind tile, or running through multiple wall cavities, that cost can climb to $1,500 or more. Major failures like a burst pipe that requires rerouting plumbing or replacing long sections can easily reach several thousand dollars, especially if multiple tradespeople are involved.
Restoration and remediation expenses come after the plumbing is fixed. Drywall repair and repainting might add $200 to $600 depending on the size of the area. If mold treatment is needed, professional remediation services typically charge $500 to $3,000 or more, depending on the extent of contamination and the square footage involved. Replacing damaged insulation, fixing flooring, or repairing structural framing all add to the total. A leak that went unnoticed for months can easily result in total repair and restoration costs exceeding $5,000 to $10,000 once you factor in all the trades and materials involved.
| Service Type | Typical Cost Range | Notes |
|---|---|---|
| DIY Moisture Meter Purchase | $30–$200 | Pin-type models are less expensive; pinless models cost more but scan faster |
| Equipment Rental (per day) | $20–$75 | Moisture meters on the lower end; thermal cameras higher |
| Professional Leak Detection | $150–$800 | Standard service calls $150–$400; complex or large properties cost more |
| Minor Plumbing Repair | $150–$300 | Pipe patches, sealant application, easily accessible small leaks |
| Major Pipe Replacement | $400–$2,500+ | Depends on pipe location, length, and access difficulty |
| Drywall Repair & Painting | $200–$600 | Small to moderate patches; larger areas or multiple rooms cost more |
| Mold Remediation | $500–$3,000+ | Depends on contamination extent, square footage, and containment needs |
| Total Typical Project | $1,000–$10,000+ | Includes detection, repair, drying, restoration; severe cases exceed this range |
Insurance can help offset some of these costs, but coverage depends on your policy and the cause of the leak. Sudden, accidental failures like a burst pipe are usually covered. Gradual leaks from deferred maintenance or old pipes often aren’t. Always document the damage thoroughly with photos and notes, and file a claim as soon as you discover the problem. Your insurer will send an adjuster to assess the damage and determine what’s covered. Be prepared for a deductible, and understand that filing multiple water damage claims can affect your rates or future coverage.
The financial argument for early detection is simple. A small leak caught early might cost $500 to fix. That same leak ignored for six months can result in $5,000 or more in combined plumbing, mold, and structural repairs, plus months of inflated water bills from the constant drip. The longer water flows, the more it spreads, and the more trades you’ll need to bring in to set things right. Detection and repair costs feel like a lot when you’re writing the check, but they’re a fraction of what you’ll pay if you wait.
Final Words
Water leak detection behind walls starts with recognizing warning signs, then moves through detection tools like moisture meters and thermal cameras, followed by careful visual confirmation and professional equipment when needed.
The key is acting fast. Small drips turn into soft drywall, mold, and repair bills that climb fast.
Whether you use a simple moisture meter or call in a pro with acoustic gear, finding the source stops the damage. Get the wall cavity dry, verify the fix, and you’re protecting your home for the long run.
FAQ
How do plumbers detect leaks behind walls?
Plumbers detect leaks behind walls using moisture meters to measure dampness levels in drywall, thermal imaging cameras to spot temperature differences where water alters heat flow, and acoustic listening devices that amplify sounds of water escaping pressurized pipes.
Is there a way to detect moisture behind a wall?
Moisture behind a wall can be detected using pin-type or pinless moisture meters that measure water content in materials without cutting the wall. Professional-grade thermal imaging cameras also reveal hidden moisture by showing cooler spots where dampness affects surface temperature.
How much does it cost to fix a leak behind a wall?
The cost to fix a leak behind a wall typically ranges from a few hundred dollars for simple pipe patches to several thousand for major pipe replacement, drywall restoration, and mold remediation requiring separate contractors if extensive damage occurred.
How do I find a water leak that is not visible?
A water leak that is not visible can be found by conducting a water meter test with all fixtures turned off for three hours, using moisture meters to scan walls in grid patterns, listening for dripping or hissing sounds, and watching for musty odors or unexplained water bill increases.
What are the most common warning signs of hidden wall leaks?
The most common warning signs of hidden wall leaks include yellow or brown water stains on walls or ceilings, peeling or bubbling paint, soft spots in drywall, musty odors indicating mold growth, sounds of running water when fixtures are off, and unexplained increases in monthly water bills.
Can I use a moisture meter myself or do I need a professional?
You can use a moisture meter yourself as both pin-type and pinless models are available at home improvement stores for purchase or rental. Take multiple readings in grid patterns and compare suspicious areas to known-dry spots to establish a baseline for accurate results.
When should I call a professional for leak detection instead of doing it myself?
You should call a professional for leak detection when DIY methods fail to pinpoint the leak location, extensive visible damage suggests major plumbing failure, you lack access to specialized equipment like thermal cameras, or the repair requires cutting into walls near electrical wiring or structural elements.
How long does it take for hidden wall moisture to cause mold growth?
Hidden wall moisture can cause mold growth within 24 to 48 hours in ideal conditions. The musty smell indicating mold often appears before visible black spots, making early detection critical to prevent respiratory problems like frequent sneezing and serious structural damage.
What’s the difference between supply line leaks and drain leaks behind walls?
Supply line leaks behind walls occur in pressurized pipes carrying fresh water and often make hissing or whooshing sounds, while drain leaks happen in unpressurized waste pipes and typically appear as gradual dampness without audible sounds requiring different detection and repair approaches.
Do I need to dry the wall cavity before repairing the drywall?
You absolutely need to dry the wall cavity completely before repairing drywall to prevent trapped moisture from causing mold growth or additional structural damage. The drying period varies based on dampness extent but rushing this step creates serious long-term problems.
Will my homeowner’s insurance cover leak detection and repair costs?
Homeowner’s insurance typically covers sudden and accidental pipe failures but may not cover gradual leaks from poor maintenance or wear. Review your policy specifics and document all damage with photographs, measurements, and wall layout sketches to support your insurance claim.
What prevents water leaks from developing behind walls in the first place?
Water leaks behind walls are prevented through annual plumbing inspections focusing on pipe age assessment, regular gutter and downspout cleaning, proper grading that slopes away from the foundation, maintaining appropriate water pressure, and checking fixture connections and appliance hoses for wear or corrosion.