
Ever turn on your shower and wonder why it feels more like a gentle mist than actual water pressure? You’re not imagining it. Low water pressure frustrates millions of homeowners, and the causes range from a two-minute aerator cleaning to a hidden leak stealing hundreds of gallons behind your walls. Before you assume the worst or call a plumber, you should know that most sudden pressure drops trace back to just two simple fixes you can handle yourself right now. This guide walks you through the most common culprits, starting with the fastest solutions first.
Common Causes Behind Reduced Water Pressure in Your Home
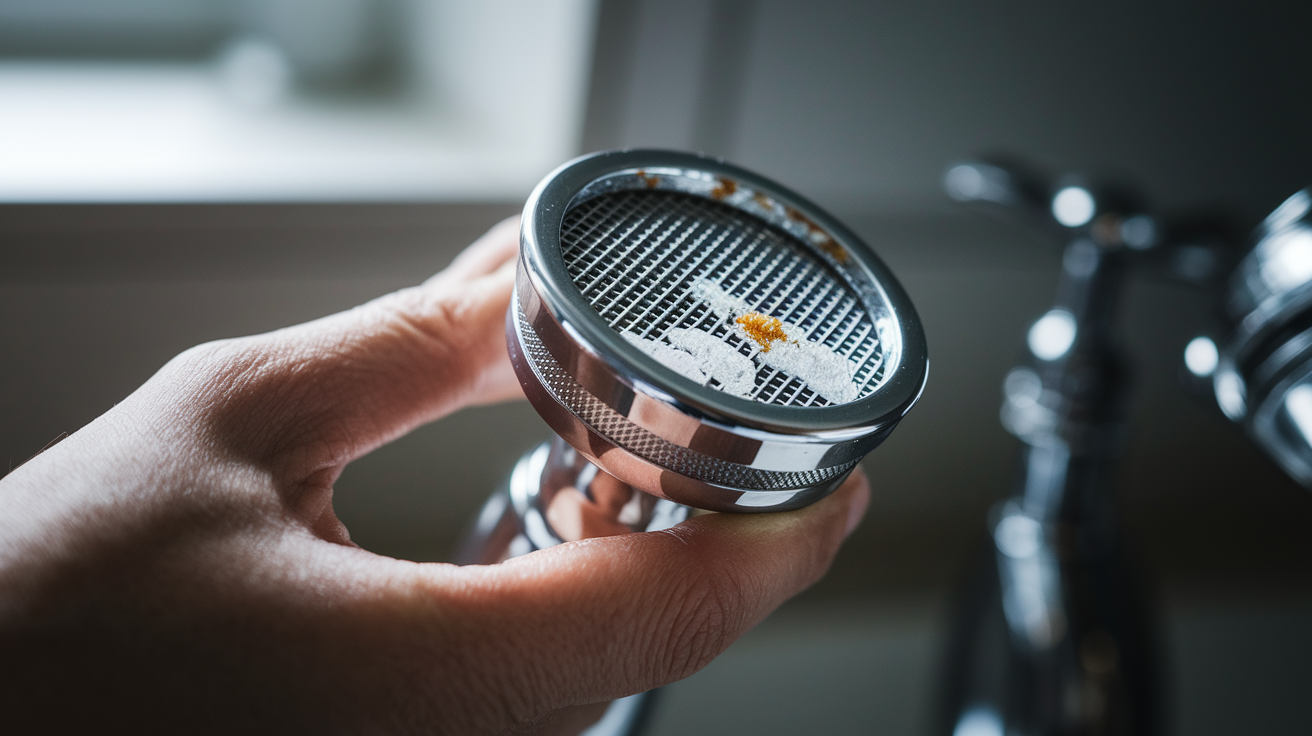
If you’ve noticed weak flow at your sink or a disappointing shower, start with the two fastest fixes that solve most sudden pressure problems. First, check your main shut-off valve near the water meter. It should be turned fully counterclockwise. Someone may have partially closed it during a repair and forgotten to open it completely. Second, unscrew the tip of your faucet or showerhead and look inside the aerator screen. You’ll often find trapped debris, rust particles, or white mineral buildup blocking the tiny openings. Rinse it clean under running water or soak it in white vinegar for 20 minutes. These two checks take less than ten minutes and fix the majority of pressure complaints we hear about.
Beyond those quick wins, several other issues can cause low water pressure throughout your home:
Mineral deposits and sediment inside pipes restrict flow over time, especially in areas with hard water where calcium and lime gradually coat pipe interiors.
Leaking pipes divert water before it reaches your fixtures, whether the leak is visible under a sink or hidden behind walls or underground.
Corroded or deteriorated pipes in aging plumbing systems narrow from decades of rust accumulation and mineral scale buildup.
Municipal supply issues and peak usage times cause temporary pressure drops when your neighborhood’s demand exceeds the distribution system’s capacity.
Faulty pressure regulators that control your household pressure settings can malfunction or be adjusted too low.
Water heater specific problems affect only hot water pressure while cold water flows normally.
Figuring out whether the problem hits a single fixture or your whole house narrows down the cause considerably. Low pressure at just one faucet usually means a clogged aerator or a partially closed fixture valve under that sink. When every fixture in the home runs weak, you’re dealing with something affecting your main plumbing system. A supply line issue, pressure regulator problem, or pipes narrowed by buildup. Before you start diagnosing your own plumbing, check with a neighbor or two. If they’re experiencing the same weak flow at the same time, it’s a city water supply problem rather than something isolated to your home. Normal water pressure falls between 40 and 80 PSI, and anything consistently below that range needs attention.
Troubleshooting and DIY Fixes to Restore Water Pressure

The smart approach is working through simple fixes first, then moving to more involved diagnostics only if needed. This saves time and prevents unnecessary worry about complex repairs when the solution might be right in front of you.
Follow these steps in order to identify and fix the most common pressure problems:
-
Ask neighbors if they’re affected. If multiple homes have low pressure simultaneously, it’s a municipal supply issue and you’ll need to contact your water utility to report it and get an estimated fix time.
-
Locate your main water shut-off valve near the water meter (usually in the basement, crawl space, or outside near the property line) and turn it fully counterclockwise until it stops. This valve is often left partially closed after maintenance work or inspections.
-
Check individual fixture shut-off valves under every sink and behind each toilet, making sure they’re turned completely counterclockwise. These small valves can get bumped or left partially closed during cleaning.
-
Remove faucet aerators by unscrewing the tip of each affected faucet. Wrap it with a cloth and use pliers if it’s stuck tight. Rinse out any visible debris, soak the screen in white vinegar for 20 minutes to dissolve mineral deposits, scrub with an old toothbrush, and screw it back on or replace it if the screen is damaged beyond cleaning.
-
Unscrew showerheads using an adjustable wrench (protect the finish with a cloth), soak them in a bowl of white vinegar for 30 minutes to break down lime and calcium buildup, use a toothbrush to scrub the spray holes clean, rinse thoroughly, and reattach with plumber’s tape on the threads.
-
Test pressure at multiple fixtures throughout the house. Turn on bathroom and kitchen faucets, flush toilets, run the shower to determine if it’s whole-house or limited to certain fixtures or just hot water versus cold.
-
Use a pressure gauge (available at any hardware store for under $15) by screwing it onto an outdoor spigot, turning the water on fully, and reading the dial. Normal range is 40 to 80 PSI, and readings below 40 indicate a real problem that needs further investigation.
-
Perform a leak test by making sure all faucets, toilets, appliances, and irrigation systems are completely off for two full hours, then checking your water meter before and after. If the reading increases even slightly during that period, you have a hidden leak stealing pressure somewhere in your plumbing system.
-
Adjust your pressure regulator if you can access it (usually located near the main valve) by making small clockwise quarter turns of the adjustment screw on top, then testing water flow after each tiny adjustment and stopping when pressure feels normal again.
These combined steps address most single fixture and whole house pressure issues you’ll run into. If you’ve worked through this list without improvement, the cause involves something you can’t see or easily reach. Hidden leaks, deteriorated pipes inside walls, or malfunctioning equipment that requires professional diagnosis with specialized tools.
Valve and Pressure Regulator Issues Affecting Water Pressure

Your pressure regulator is a bell-shaped valve installed on your main water line near the shut-off valve. It does one essential job: it reduces the high pressure coming from the municipal supply line (which can exceed 150 PSI) down to a safe level for your household plumbing, typically between 50 and 60 PSI. The regulator uses an adjustable screw on top that you can turn to raise or lower the pressure setting. This device protects your pipes, fixtures, and appliances from damage caused by excessive pressure. When it’s working correctly, you don’t think about it.
A failing pressure regulator causes problems in two ways. The internal mechanism (springs, diaphragm, and pressure sensing components) can wear out over time and stop maintaining consistent pressure. When this happens, you’ll notice pressure that fluctuates unpredictably or drops well below the 40 PSI minimum you need for normal household use. The other issue is simpler: someone adjusted the screw too far counterclockwise, lowering the pressure setting below what your showers and appliances need to function properly. You’ll notice weak flow everywhere in the house, not just at one or two fixtures.
Partially closed valves create similar whole house pressure problems. The main shut-off valve near your water meter should always stay fully open unless you’re doing repairs. If it’s turned even a quarter turn toward the closed position, it restricts flow to your entire plumbing system. The same applies to the fixture shut-off valves under sinks and behind toilets. They should be turned all the way counterclockwise. These valves get bumped, or someone closes them partway during a repair and forgets to reopen them completely.
You can try small pressure regulator adjustments yourself. Clockwise quarter turns of the adjustment screw, testing flow after each adjustment. But if the regulator itself has failed, you’ll need a professional plumber to replace it. A new regulator costs between $150 and $350 installed, and proper installation matters for maintaining consistent safe pressure throughout your home.
Leaking Pipes and Hidden Water Pressure Loss

Any leak in your plumbing system steals water volume before it reaches your fixtures. Even a small leak behind a wall, under a concrete slab, or in an underground supply line diverts hundreds of gallons per day. That lost water means less pressure available at every faucet and showerhead in your home. A pinhole leak in a supply line might seem minor (just a slow drip behind drywall) but it’s enough to drop your pressure by 10 or 15 PSI across the whole system. The bigger the leak, the more dramatic the pressure loss.
The two hour meter test catches leaks you can’t see. Shut off everything that uses water: faucets, toilets, ice makers, washing machine, dishwasher, irrigation system. Check your water meter reading and write down the numbers. Wait two hours without using any water. Check the meter again. Any increase in the reading, even a small one, means water is flowing somewhere in your plumbing system when it shouldn’t be. That’s a leak. This test works whether the leak is inside your home or in the underground supply line between the meter and your house.
Watch for visible signs that point to hidden leaks. Brown or yellow stains spreading across ceilings or walls. Damp spots on floors or carpets that never quite dry out. The sound of running water when every fixture is off. A musty smell in cabinets under sinks. Unexplained puddles in the basement or crawl space. A section of yard that stays green and soft while the rest is dry. These signs mean water is escaping somewhere it shouldn’t.
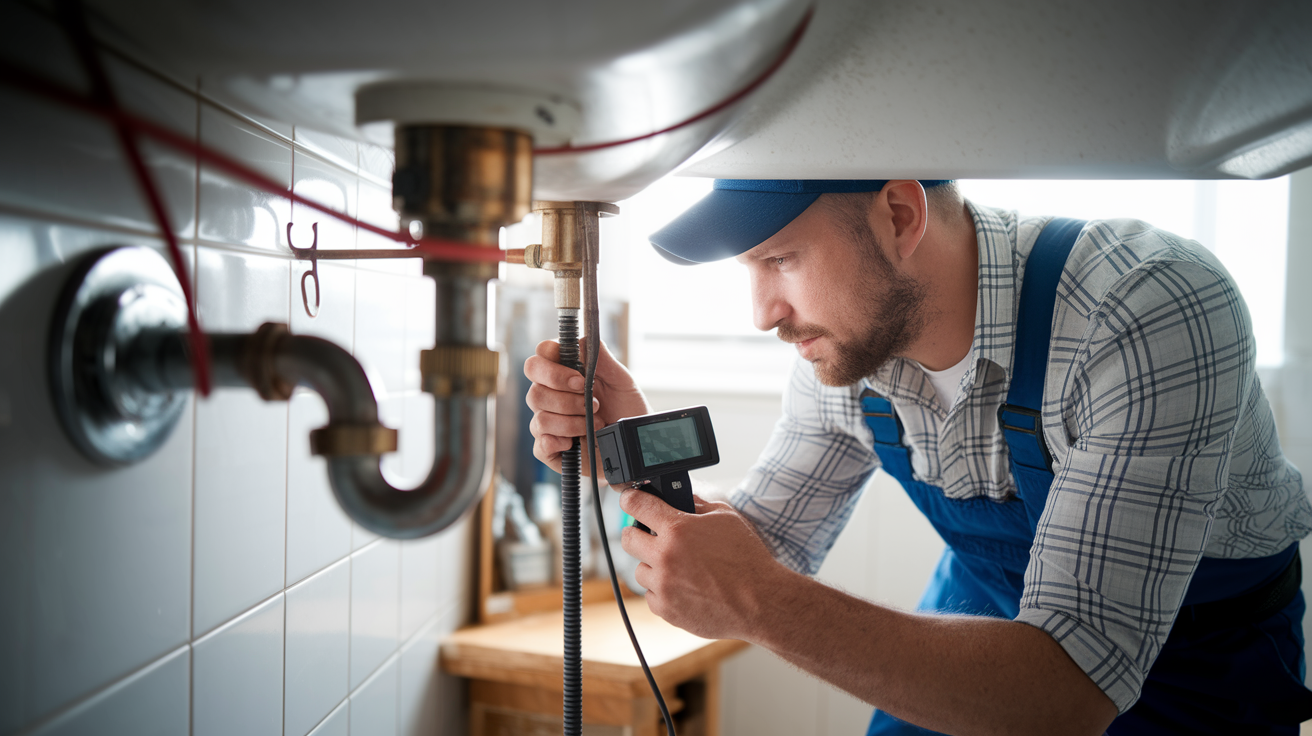
You can spot some leaks yourself. Dripping faucets, toilet flappers that don’t seal, visible moisture under sinks. But leaks hidden in walls, under floors, or underground require professional leak detection and repair services. Plumbers use acoustic listening devices that hear water escaping through pipe walls, thermal imaging cameras that show temperature differences caused by moisture, and pressure testing equipment that isolates leak locations in your supply lines. Finding the exact spot before cutting into walls or digging up yards saves time, cost, and unnecessary damage.
Water Heater Problems and Mineral Buildup Reducing Pressure

When only your hot water runs weak while cold water flows normally, the problem is isolated to your water heater or its connected pipes rather than your whole plumbing system. That’s actually good news because it narrows down where to look.
Several water heater issues cause hot water pressure loss. Sediment accumulates at the bottom of tank style water heaters over months and years. Minerals from hard water settle and harden into a thick layer that reduces tank capacity and blocks the outlet connection. The shut-off valve on the heater’s cold water inlet or hot water outlet might be partially closed, restricting flow in or out. The temperature pressure relief valve can malfunction and fail to maintain proper pressure inside the tank. In older units, the dip tube that directs incoming cold water to the tank bottom can crack and break, causing cold water to mix with hot water at the top and creating weak, lukewarm flow at fixtures.
Tankless water heater systems have their own pressure challenges. Mineral scale builds up inside the heat exchanger coils, narrowing the pathways and restricting flow. This happens faster in areas with hard water. Insufficient gas supply or electrical power prevents the unit from heating water fast enough, which feels like pressure loss even though it’s actually a heating capacity issue. Flow rate limitations kick in when you’re running multiple hot water fixtures simultaneously. The unit can only heat so many gallons per minute, and exceeding that capacity reduces pressure at all hot water taps.
Mineral deposits from hard water don’t just affect water heaters. Those same calcium and magnesium minerals gradually coat the interior surfaces of every pipe in your home. Over years and decades, the buildup layer grows thicker, narrowing the pipe diameter and choking flow. This happens so slowly you don’t notice it day to day, but five or ten years later your pressure has dropped noticeably. The problem affects your whole house eventually, not just individual fixtures. You might first notice it in the shower or at the kitchen sink where you use water most often.
Pipe corrosion works hand in hand with mineral accumulation, especially in older homes. Galvanized steel pipes, common in houses built before 1960, start corroding after 20 years of service. Rust forms on the interior walls, and minerals in the water stick to the rough rust surface, accelerating the narrowing process. Brass pipes last longer (40 to 70 years before significant deterioration) but they still accumulate mineral scale. Copper pipes begin showing corrosion after 50 years, usually starting with pinhole leaks before internal diameter reduction becomes severe. In water heaters, this sediment process is accelerated by heat, which causes minerals to separate from the water faster and settle at the tank bottom where they reduce both capacity and heating efficiency.
Flushing your water heater annually prevents sediment from hardening into a thick layer. It’s a maintenance task that takes 30 minutes and protects your hot water pressure. While you can clean aerators yourself at each fixture, pipes throughout your home that have been narrowing for decades from mineral buildup need professional inspection. In many cases, restoring proper pressure and flow rate requires replacing sections of pipe or sometimes entire supply lines, not just cleaning.
Municipal Supply and Peak Usage Water Pressure Drops

Your municipal water supply system delivers water from treatment plants through a network of mains and distribution lines to your neighborhood. When many households draw water simultaneously, the system experiences demand spikes that temporarily lower pressure for everyone connected to that zone. This happens predictably during morning rush hours when people shower and make coffee before work, and again in the evening when families do laundry, run dishwashers, and water lawns. You might notice your shower pressure drops between 6 and 8 a.m., then returns to normal by mid-morning. That’s peak usage affecting your neighborhood supply line.
Summer months intensify the problem. Hot, dry weather means everyone’s running sprinklers and filling pools. More frequent showers and extra laundry loads from sweaty clothes add to demand. Outdoor faucets run for hours watering gardens and lawns. Neighborhoods that normally share available pressure without issue suddenly max out the distribution system’s capacity during evening watering hours. If you’re trying to shower while your neighbors run their irrigation systems, you’ll feel the impact.
Scheduled municipal maintenance, emergency repairs, and infrastructure upgrades can reduce pressure across entire zones or multiple neighborhoods. Water main breaks require shutting down sections of the distribution system while crews make repairs. The water department upgrades aging pipes and valves, work that often requires reducing pressure to nearby homes for hours or days. These situations are temporary but can affect pressure significantly while the work is underway.
Checking with neighbors tells you immediately if it’s a city supply problem or something isolated to your home. If three houses on your street have weak flow at the same time, it’s not your plumbing. Contact your local water utility to report the issue. They can tell you if there’s maintenance in progress, if they’re aware of a problem in your area, and when they expect pressure to return to normal. Temporary peak hour drops are just part of living on a shared municipal system. Persistent supply issues lasting days, though, need utility investigation and repair.
Well Pump and Private Water System Pressure Issues

Homes with private well systems rely on completely different equipment than city water connections. Your submersible or jet pump pulls water from underground and pushes it into a pressure tank. That tank maintains consistent pressure at your fixtures between pump cycles. When pressure problems hit a well system, you’re troubleshooting pump performance, tank function, and pressure switch settings rather than municipal supply lines.
Common well pump issues include normal wear that reduces pumping efficiency after 10 to 15 years of operation. The pump still runs but can’t generate the pressure it used to. Incorrect pressure switch settings cause the pump to shut off too early, before pressure reaches the normal range. The switch might be set to cut in at 30 PSI and cut out at 50 PSI when it should be running from 40 to 60 PSI. During drought conditions, well water levels drop below the pump intake, and the pump struggles to draw sufficient water volume to maintain pressure. You’ll notice pressure that starts strong but fades quickly as the pump runs.
The pressure tank deserves special attention because it controls pressure consistency between pump cycles. Inside the tank is an air bladder or air cushion separated from the water. When the bladder fails or the air pressure inside is set incorrectly, the tank can’t maintain steady pressure. It should typically be set 2 PSI below the pump cut in pressure, so if your pump starts at 40 PSI, the tank air pressure should read 38 PSI. A waterlogged tank with a failed bladder causes rapid pressure drops and forces the pump to cycle on and off constantly, sometimes every few minutes. You’ll hear the pump running frequently even when you’re using just a small amount of water.
Check the pressure gauge mounted on your tank. It shows real time pressure in your system. If readings stay consistently below 40 PSI even when the pump runs, something’s wrong with the pump performance, the pressure switch settings, the tank bladder, or possibly your well’s recovery rate. These well system issues require professional well pump service to diagnose accurately. The problem could be electrical, mechanical, or related to the well itself. All situations where specialized knowledge and tools are necessary for proper diagnosis and safe repair.
When Professional Plumber Services Are Necessary for Water Pressure
Some pressure problems exceed what homeowners can diagnose or fix safely with basic tools. If you’ve tried the DIY troubleshooting steps without improvement, the cause involves equipment or hidden issues that need professional expertise. Call a licensed plumber when pressure stays low after checking valves and cleaning aerators. When the problem affects your whole house with no obvious cause you can identify. When your meter test shows a hidden leak but you can’t locate where water is escaping. When your pressure regulator appears to be malfunctioning, either not maintaining consistent pressure or needing replacement. When you have corroded pipes that need to be replaced rather than just cleaned. When water heater pressure problems go beyond simple valve adjustments and sediment flushing.
Professional diagnosis involves precision tools and systematic testing you can’t replicate at home. Plumbers use calibrated pressure gauges at multiple points throughout your plumbing system to measure exact PSI and identify where pressure drops occur. Specialized leak detection equipment (acoustic sensors that listen for water escaping through pipe walls, thermal imaging cameras that show temperature differences caused by hidden moisture) pinpoints leak locations without guessing or unnecessary demolition. Video camera inspection threads a small waterproof camera through pipes to see their interior condition, revealing corrosion, blockages, and deterioration that explain pressure loss.
Common professional repairs include replacing malfunctioning pressure regulators (typically $150 to $350 installed). Repairing or replacing damaged sections of supply line between the meter and your home. Replacing corroded galvanized or failing copper pipe sections inside walls or under floors. Sealing leak locations after detection confirms the exact spot. Servicing well pumps, replacing pressure tanks, or adjusting pressure switch settings on private well systems.
Cost and timeframe depend on the specific problem. Simple repairs like valve replacement typically take one to two hours of plumber time. Pipe replacement projects vary based on accessibility and the length of pipe involved. A small section under a sink is quick work, while replacing galvanized supply lines throughout a basement might take a full day. Catching issues early through professional inspection prevents situations from escalating into emergency repairs and water damage triage and prevention repairs. A $200 pressure regulator replacement now prevents a $5,000 flood repair later when excessive pressure finally bursts a weakened pipe.
Preventive Maintenance to Avoid Future Water Pressure Problems

Regular maintenance protects the pressure you have now and prevents the gradual deterioration that leads to expensive repairs down the road. Your plumbing system benefits from consistent attention even when everything seems to be working fine.
Flush your water heater annually to remove sediment before it hardens into a thick layer that restricts flow and reduces heating efficiency. Drain several gallons through the drain valve at the tank bottom until the water runs clear.
Clean faucet aerators and showerheads every 3 to 4 months if you live in a hard water area, removing trapped minerals before they completely block the tiny openings.
Install a water softener if your home has hard water with high mineral content. Softened water prevents scale accumulation in pipes, water heaters, and fixtures.
Replace water filter cartridges on schedule. Whole house filtration systems need regular filter changes (every 3 to 6 months depending on usage and water quality) because clogged filters create pressure drop throughout your plumbing system.
Schedule professional plumbing inspections every 2 to 3 years to catch early signs of pipe corrosion, deteriorating connections, and pressure regulator wear before they cause noticeable flow problems.
Monitor pressure gauge readings periodically by checking PSI at an outdoor spigot several times a year to establish a baseline and catch gradual pressure loss trends before they become severe.
Homes with older plumbing systems need preventive maintenance even more. Galvanized steel pipes over 20 years old are actively corroding inside, narrowing from rust and mineral accumulation. Copper pipes over 40 years old show the early signs of deterioration that eventually lead to leaks and pressure loss. Catching small issues during routine maintenance (a pressure regulator that’s starting to drift out of adjustment, a supply line with minor corrosion that hasn’t failed yet) prevents emergency situations. It also protects your home from water damage risks that come with failing pipes and hidden leaks that go undetected until they cause visible destruction.
Final Words
Low water pressure doesn’t have to stay a mystery.
Start with the easiest checks: open that main shut-off valve all the way, clean out clogged aerators, and test a few fixtures to narrow down the problem.
If those quick fixes don’t bring back normal flow, you’re likely dealing with hidden leaks, aging pipes, or equipment that needs professional attention.
Catching pressure issues early protects your home and saves you from bigger repairs down the road. And when you need help figuring out why your water pressure is low, we’re here to diagnose it right and fix it for good.
FAQ
How do I fix low water pressure in my house?
To fix low water pressure in your house, start by fully opening the main shut-off valve near your water meter and checking that individual fixture valves under sinks are completely open. Next, unscrew and clean faucet aerators and showerheads to remove trapped debris and mineral deposits, which resolves most sudden pressure drops.
How do I get my water pressure back up?
You can get your water pressure back up by checking that all plumbing valves are fully open, cleaning clogged aerators on faucets and showerheads, and testing pressure at multiple fixtures to determine if it’s whole-house or isolated. If these steps don’t work, use a pressure gauge to measure PSI and consider whether a faulty pressure regulator or hidden leak needs professional attention.
Why is my hot water pressure low but my cold is fine?
Hot water pressure is low but cold is fine because the problem is isolated to your water heater or its connections rather than your whole plumbing system. Common causes include sediment buildup in the tank bottom, a partially closed shutoff valve on the heater’s inlet or outlet, or mineral scale accumulation in tankless systems.
Why is my sink water pressure low but the shower is fine?
Sink water pressure is low but the shower is fine because the problem affects only that specific fixture, usually from a clogged faucet aerator trapping debris and mineral deposits. Unscrew the faucet tip, clean out trapped buildup with white vinegar, rinse thoroughly, and reinstall or replace if damaged to restore normal flow.
What is normal water pressure for a house?
Normal water pressure for a house ranges between 40 and 80 PSI, which provides adequate flow for showers, appliances, and multiple fixtures running simultaneously. You can measure your home’s pressure using a gauge attached to an outdoor spigot to determine if readings fall within this safe and functional range.
Can a hidden leak cause low water pressure?
Yes, a hidden leak can cause low water pressure because any leak in the plumbing system diverts water before it reaches fixtures, reducing available pressure throughout the home. Even small leaks behind walls, under floors, or in underground supply lines significantly impact pressure and require professional leak detection equipment to locate.
How do I know if my pressure regulator is bad?
You know your pressure regulator is bad if you measure consistently low PSI readings below 40 throughout the house, experience sudden pressure fluctuations, or notice the adjustment screw no longer changes pressure levels. A malfunctioning regulator typically requires professional plumber replacement to ensure proper installation and safe pressure settings.
Does mineral buildup affect water pressure?
Yes, mineral buildup affects water pressure by gradually accumulating on pipe interiors and narrowing the diameter, which restricts water flow throughout the plumbing system. This process happens slowly over years in homes with hard water, eventually reducing pressure at all fixtures and inside water heaters where sediment settles.
When should I call a plumber for low water pressure?
You should call a plumber for low water pressure when DIY fixes like opening valves and cleaning aerators don’t restore flow, pressure affects the whole house with no obvious cause, or meter testing indicates a hidden leak. Professional diagnosis uses specialized equipment to locate problems like corroded pipes, faulty regulators, and sealed leaks requiring expert repair.
How often should I flush my water heater to prevent pressure loss?
You should flush your water heater annually to prevent sediment accumulation at the tank bottom that restricts flow and reduces hot water pressure. Regular flushing removes mineral deposits before they build up significantly, protecting heating efficiency and maintaining consistent pressure at fixtures throughout the home.