
Most homeowners don’t realize their shower pan is leaking until they see water damage on the ceiling below or smell that musty odor that won’t quit. By then, what started as a slow drip has already soaked into framing, drywall, and subfloor. The good news? You can catch pan leaks early with simple tests you can do yourself. We’ll walk you through flood testing, visual inspections, and alternative detection methods so you know exactly what’s happening under that tile before the damage gets expensive.
Warning Signs Your Shower Pan Is Leaking
Catching a shower pan leak early keeps a small problem from turning into a financial disaster. The sooner you spot it, the less you’ll spend fixing it and the better chance you have of avoiding mold, rot, or damaged framing.
Here’s what to watch for:
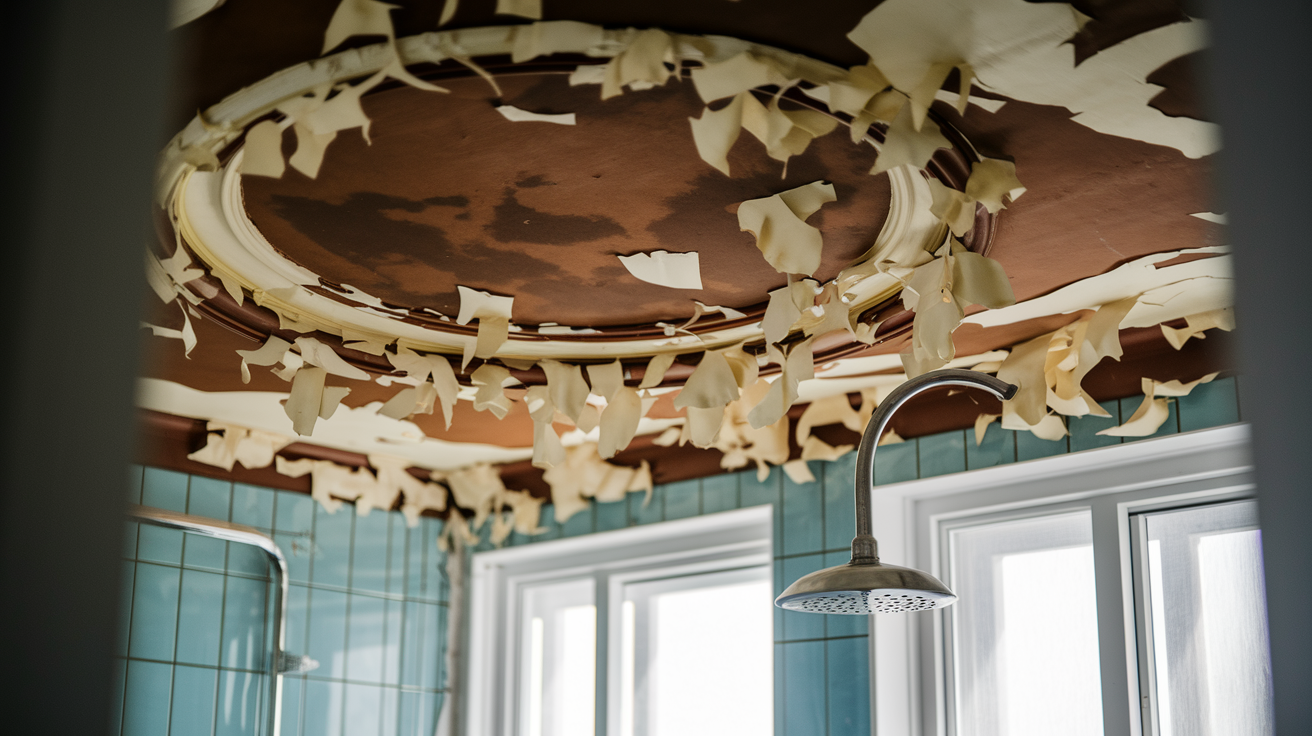
- Water stains on the ceiling right below the shower (brown, yellow, or rust colored rings)
- That musty smell that won’t go away (even after you’ve scrubbed everything)
- Mold or mildew around the shower base that keeps coming back (black, green, or gray patches)
- Paint peeling or bubbling on walls near the shower (it lifts away in sheets or forms blisters)
- Loose or discolored tiles next to the shower (they rock when you step on them or look darker than they should)
- Soft spots on the bathroom floor (areas that feel spongy under your weight)
- Baseboards that look off (darker wood, swelling, or pulling away from the wall)
- Dripping sounds when nobody’s using the shower (water moving behind walls after everything’s turned off)
Don’t assume damp spots show up directly under the leak. Water doesn’t work that way. It follows joists, pipes, electrical lines, whatever’s easiest. That ceiling stain three feet from the shower? Could still be your shower pan.
Drywall starts growing mold within 24 hours of getting wet. If you’re seeing or smelling moisture, don’t wait. The damage is already happening.
Comprehensive Flood Test Procedure for Shower Pan Leaks

Flood testing gives you the most reliable answer about whether your shower pan’s actually leaking. You plug the drain, fill the pan with water, and watch what happens to the water level over time.
Before you start, you’ll need some equipment.
| Tool/Material | Purpose | Notes |
|---|---|---|
| Drain test plug (inflatable or wingnut style) | Seals drain opening to hold water | Inflatable plugs seal more reliably than wingnut types |
| 60+ gallons of water | Fills shower pan to proper test level | Amount varies by shower size; upstairs showers typically need 60 gallons |
| Pencil or marker | Marks starting water level | Use waterproof marker on tile or grout line |
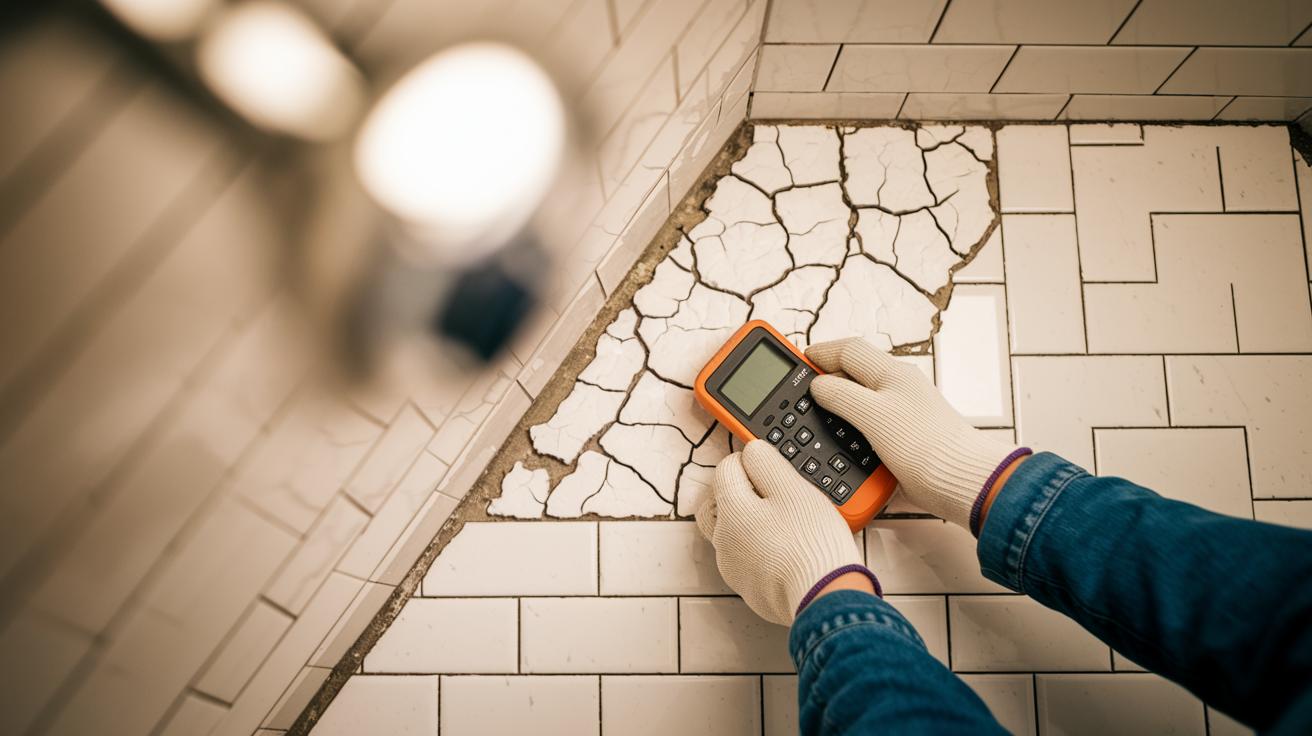
| Moisture meter | Detects moisture in surrounding surfaces post-test | Helps pinpoint leak location if test fails |
| Non-staining dye or food coloring | Makes water level easier to see and track | Optional but helpful for monitoring |
| Temporary dam materials (foam/sealant) | Creates barrier for curbless showers | Spray foam or foam board sealed with waterproof caulk |
| Measuring tape or ruler | Records exact water level measurements | Measure from consistent reference point |
Most tile shower drains use a 2 inch drain size. Inflatable test plugs work better than wingnut style plugs, which are tricky to tighten evenly and often leak during the test.
For curbless showers, you’ll need to build a temporary dam at the entrance. Use spray foam (the expanding kind) or cut foam board to fit, then seal all edges with waterproof silicone. Let the sealant cure for however long the tube says before you fill the pan.
Here’s how to run the test:
- Make sure the shower’s completely dry (wait 24 to 48 hours after the last shower if you need to)
- Get that drain plug in there and make it tight (follow the instructions for whatever plug you bought)
- Start filling the pan (hose or buckets, doesn’t matter)
- Fill to just below the top of the curb (this tests the whole pan surface)
- Mark the water level clearly (pencil line on tile or curb)
- Write down the exact time and date (or take a photo)
- Wait at least 24 hours (48 to 72 is even better)
- Check the level every 6 to 12 hours (just a quick look)
- Set up an evaporation control (put a bucket of water nearby and mark that level too)
- Document any changes (measure from your mark to the water surface)
Now, what do your results mean? If the water level drops completely and the pan’s bone dry after 24 hours, your drain plug probably failed. That’s actually common with wingnut plugs that weren’t tightened right.
Partial drops mean you’ve got a real leak. Could be where the drain connects to the drainpipe, where the membrane meets the drain, at membrane seams or corners, or straight up holes in the membrane. How much it drops tells you how bad it is. A quarter inch over 48 hours is slow. Two inches overnight is serious.
After you’re done and you pull the plug, watch the weep holes while the water drains. Weep holes are those small openings in standard 3 piece clamping drains that let trapped water escape. All of them should drain, not just a couple. If only one or two are flowing, you’ve got slope problems or blocked weep holes.
Evaporation rarely causes measurable drops, especially over a day or two. But that’s why you’ve got the bucket sitting there. If both the shower and bucket drop the same amount, that’s evaporation. If only the shower drops, you’re leaking.
Keep in mind this test only checks the pan itself. Curbs, shower benches, half walls? Water’s not reaching those during a flood test. If you think those areas are leaking, you’ll need different testing.
Take photos at the start showing your water level mark, and again at the end. Use a moisture meter on walls, floors, and ceilings after draining to figure out exactly where moisture got through. This narrows down the leak location before you start tearing into anything.
Understanding Shower Pan Construction and Common Leak Sources

A shower pan isn’t just one layer. It’s a waterproofing system with multiple parts that all have to work together. Understanding this helps you figure out where things went wrong.
The bottom layer is the pre-slope. It angles toward the drain so water can’t sit there. The pre-slope goes directly on the subfloor and has to be sloped correctly before the waterproof membrane goes down. Installing a liner on a flat subfloor is just wrong and guarantees problems.
The waterproof membrane sits on top of the pre-slope. This is your actual water barrier. It keeps shower water from reaching the wood below. It wraps up the walls several inches to create a watertight basin.
Weep holes show up in standard 3 piece clamping drains and cast iron drains. You won’t find them in bonding flange drains (like Kerdi systems or most linear drains). Weep holes let water that gets under the tile drain out instead of sitting on top of the membrane.
Most common leak sources:
- The drain connection (the weakest point in the whole system)
- Failed seams or corners (where membrane pieces meet or bend)
- Cracks or holes in the pan material (from impact, flexing, or just getting old)
- Worn out gaskets in the drain assembly (rubber parts dry out and shrink)
- Wrong slope causing standing water (water that won’t drain puts constant pressure on everything)
- Damaged weep holes (blocked or sealed weep holes trap water under tile)
If your flood test shows standing water or birdbaths (low spots where water pools), that’s a slope problem. The pan should drain completely within minutes of pulling the plug. Standing water needs to be fixed because it increases leak risk and grows mold.
Bad installation during original construction causes a lot of shower pan failures. Corners that weren’t folded right, membranes that weren’t secured at the drain, pre-slopes that were skipped entirely. These shortcuts sometimes don’t show up as leaks for years, but they always fail eventually.
Pre-Test Visual Inspection for Shower Pan Issues
Before you commit to a full flood test, do a systematic visual check. You might find something simple that doesn’t involve the pan at all.
Here’s what to look for:
- Check all caulk lines for cracks or separation (especially where the pan meets the walls)
- Look at grout between tiles for gaps or deterioration (missing chunks, dark staining, crumbly texture)
- Tap tiles gently to check for loose or hollow spots (use your knuckle and listen for a different sound)
- See if water stands around after showering (it should clear within a few minutes)
- Test shower door seals with a spray bottle (spray corners and edges while the door’s closed, then check for water getting through)
- Look for discoloration or white mineral deposits on tiles (efflorescence looks like powder or crystals)
- Listen for dripping when the shower’s off (a leaking faucet or showerhead is easy to fix)
Test one area at a time while everything’s dry. Spray just the door seals. Dry it. Then spray just one wall section. This tells you whether water’s getting through grout, past door seals, or somewhere else.
These simple checks might reveal easy fixes before you assume pan failure. A bad door seal or missing grout can cause the same symptoms as a pan leak (water damage below, musty smells, ceiling stains), but the fix is completely different and way less expensive.
Alternative Detection Methods Using Dye and Moisture Meters
Sometimes flood testing isn’t practical right away. Maybe you can’t access the drain, or you’re trying to narrow things down first.
Dye Testing for Visible Leak Paths
Add food coloring to shower water during normal use. Blue or green works well. Use the shower like usual, letting colored water flow across the pan and down the drain. Then check below the shower (basement ceiling, crawl space, room below) for colored water showing up.
This works best for active leaks that happen during regular use. If colored water appears somewhere specific, you found your leak path. You do need visual access to the area below the shower though.
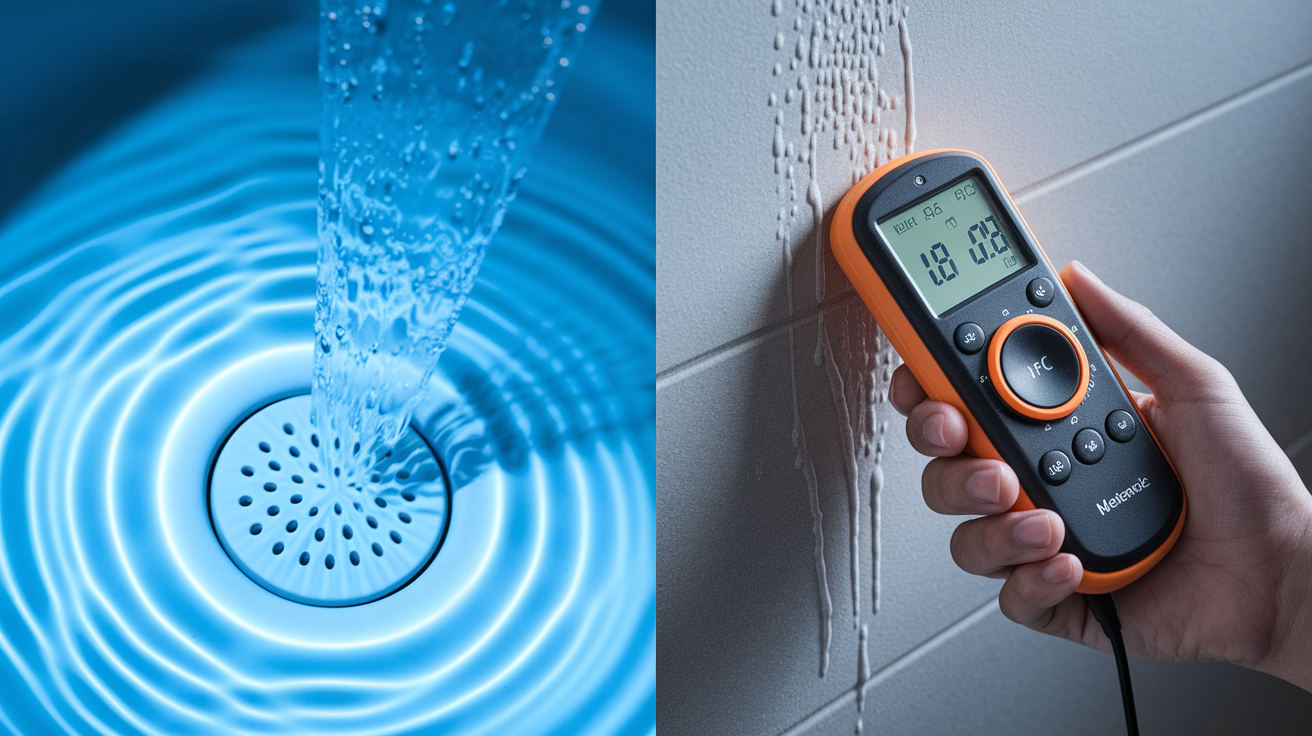
Moisture Meter Detection
Moisture meters measure moisture in walls, floors, and ceilings without making holes. You hold it against the surface and it gives you a reading. High readings mean moisture got through and help you identify problem areas for focused investigation.
These tools won’t tell you exactly where water’s entering the pan, but they’ll show you where it’s ending up. That helps you work backward to find the source.
Infrared Thermal Imaging
Thermal cameras visualize temperature differences caused by moisture. Wet areas show up cooler on the thermal image because water conducts heat differently than dry material. This lets you detect moisture behind walls or tile without cutting into anything.
Professional leak detection services use thermal imaging as part of their diagnostic process. Some tool rental places now have consumer grade thermal cameras that attach to smartphones.
These methods complement flood testing but won’t give you definitive confirmation like a proper flood test does. They’re helpful for narrowing down where to look, but if you need absolute certainty about the pan itself, the flood test is still your best option.
Recognizing Shower Pan Structural Damage and Water Intrusion Severity
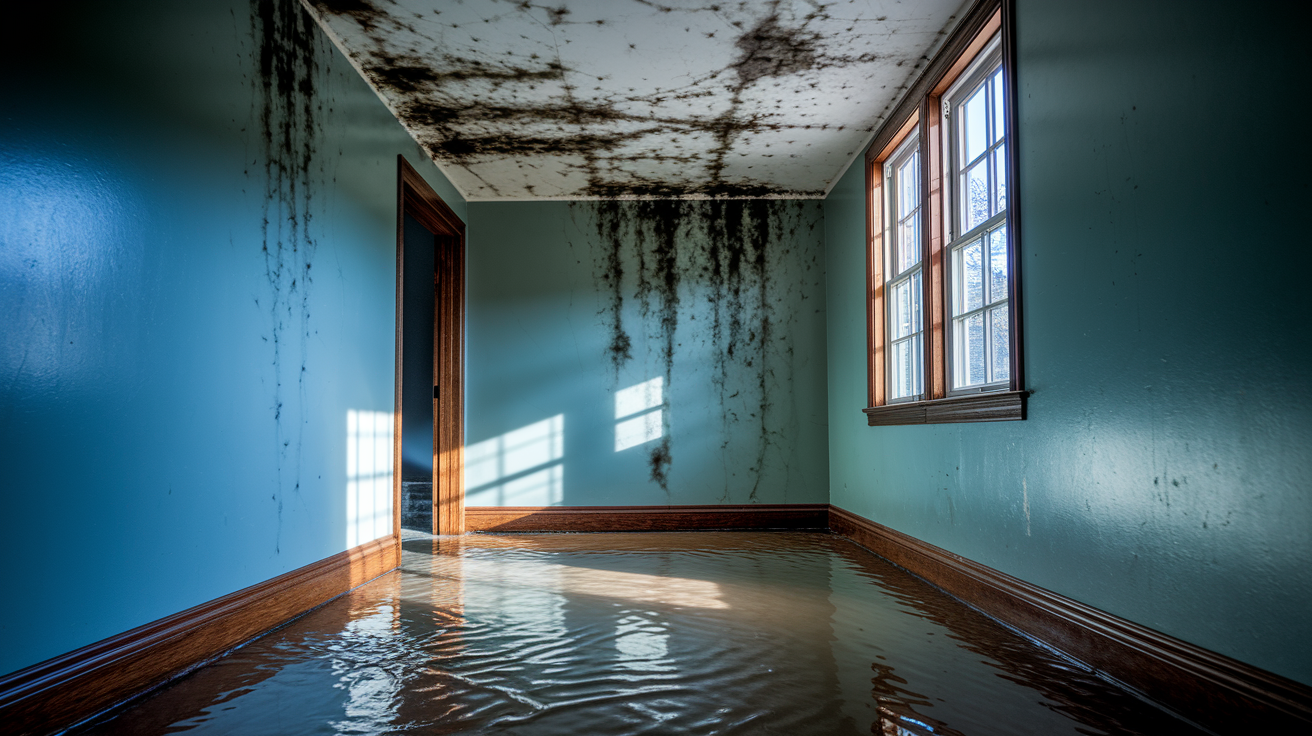
How long the leak’s been active and how much water escaped determines what kind of damage you’re dealing with. This matters because it affects what needs repair and how urgent things are.
Progressive damage indicators, roughly from minor to severe:
- Minor water stains on the ceiling below (light discoloration, texture’s still normal)
- Peeling paint or wallpaper (surface finishes separating)
- Soft or spongy bathroom floor (subfloor starting to degrade)
- Warped or discolored baseboards (wood swelling from moisture)
- Visible mold growth (active colonies you can see and smell)
- Sagging floor (structural members losing integrity)
- Musty odor (hidden mold in walls or insulation you can’t see yet)
Water follows the path of least resistance. It runs along joists, pipes, electrical wiring. It travels down inside walls and pools in low spots. Visible damage might not show you where the leak actually is. That ceiling stain could be six feet from where water’s getting in.
Mold affected drywall has to be removed and replaced. You can’t just paint over mold or clean it with bleach. Once drywall’s been wet long enough, it becomes food for mold. Cut it out, treat the studs with fungicide, install new drywall.
Structural wood rot compromises your home’s integrity and attracts pests. Termites love wet, rotting wood. Water damage creates warm, moist environments where all kinds of pests show up. This makes fast repair critical beyond just looks. You’re protecting the structure itself.
When to Call a Professional Plumber for Shower Pan Diagnosis

There’s a point where you should stop diagnosing and call someone who does this for a living. Recognizing that limit saves time and keeps you from making things worse.
Situations that need professional help:
- Flood test confirmed a leak but you can’t find where (you know water’s escaping but not from where)
- Structural damage is visible or suspected (soft floors, sagging ceilings, widespread mold)
- The leak involves plumbing connections needing pipe repair (problems beyond just the pan)
- Tile or pan removal is necessary for access (invasive work that affects waterproofing integrity)
- Moisture readings show extensive hidden damage (high readings in multiple areas or behind walls)
- Mold growth is widespread (more than a few square feet or appearing in multiple spots)
Professionals use tools like thermal imaging and specialized moisture detection equipment that most homeowners don’t own. These tools locate problems without unnecessary demolition. They can pinpoint a leak through 6 inches of concrete or behind tiled walls without removing anything.
Copper pipe repairs need cutting and welding. PVC connection failures need proper fitting replacement. Both are best handled by licensed plumbers. Sure, there are pipe repair patches and tape at hardware stores, but those are temporary. They buy you time until proper repair happens.
Professional epoxy injection can seal leaks beneath the surface without removing tile. This involves injecting epoxy resin directly into the leak source where it hardens to create a permanent waterproof barrier. Post repair verification uses moisture meters and thermal imaging to make sure the seal’s complete and the leak’s actually fixed, not just slowed down.
Shower Pan Leak Prevention and Maintenance Best Practices
Proactive maintenance costs way less than repair. A few simple tasks done regularly extend your shower pan’s life and prevent leaks before they start.
Maintenance schedule with recommended frequencies:
- Check caulk and grout quarterly (quick visual check during regular cleaning)
- Reseal all caulk lines annually (remove old caulk completely first)
- Reseal grout annually or when it absorbs water (if grout darkens when wet, it needs sealing)
- Clear the drain regularly (remove hair and debris at least monthly)
- Squeegee walls and floor after each use (takes 30 seconds and extends material life significantly)
- Check for standing water (after each shower, see if water clears within a few minutes)
- Fix soft tiles or loose areas immediately (loose tiles let water underneath)
- Run an annual flood test if accessible during remodel (if you’re doing other bathroom work, test the pan while you have access)
Caulk and grout break down over time from cleaning chemicals, temperature changes, and normal wear. That’s just how these materials work. Silicone based sealants last longer than acrylic versions, but even quality silicone needs replacement every year or two in a regularly used shower. Annual resealing is critical preventive maintenance.
Regular cleaning prevents soap scum buildup that traps water against surfaces. Soap scum is slightly acidic and holds moisture against grout and caulk, speeding up deterioration. A quick squeegee after each shower removes most water before it can cause problems.
Standing water means slope problems that need correction, not just repeated clearing. If you’re constantly dealing with puddles in the same spot, the pan wasn’t sloped right during installation. That needs fixing, because standing water puts constant pressure on waterproofing materials and creates perfect conditions for mold.
Comparing Shower Pan Materials and Leak Vulnerability
The pan material and how it was built significantly impact leak risk and what your repair options are. Different systems have different weak points.
| Pan Type | Material | Leak Vulnerability | Typical Lifespan |
|---|---|---|---|
| Traditional mud pan with membrane liner | Mortar bed over PVC/CPE liner | High at seams, corners, and drain connection | 20-30 years if properly installed |
| Fiberglass one-piece pan | Molded fiberglass | Medium; vulnerable to cracking from impact or flexing | 10-15 years |
| Acrylic pre-formed base | Molded acrylic | Low to medium; more flexible than fiberglass but still can crack | 15-20 years |
| Modern bonding flange systems | Waterproof membrane (Kerdi, RedGard, etc.) | Low if properly installed; bonds directly to substrate | 25+ years |
| Custom tile pan with PVC/CPE liner | Flexible waterproof sheet membrane | Medium to high at seams and drain connection | 20-30 years |
Traditional mud pan systems need proper pre-slope installation underneath the membrane. The pre-slope directs water that gets through the tile and mortar toward the drain, where weep holes let it escape. These systems are vulnerable at seams (where membrane pieces meet) and at the drain connection (where membrane attaches to the drain assembly). Corners are especially tricky because the membrane has to be folded just right.
One piece fiberglass and acrylic pans eliminate seam leaks entirely because there aren’t any seams. But they can crack from impact (dropping something heavy) or from flexing (if the subfloor wasn’t properly supported during installation). Once they crack, repair’s difficult. You’re usually looking at replacement.
Modern bonding flange systems like Kerdi don’t use traditional weep holes. The waterproof membrane bonds directly to the substrate (cement board or mortar) and to the drain flange. Water never gets behind the membrane in the first place. These systems have fewer vulnerable points, but they require precise installation. If the membrane isn’t bonded correctly, you’ve got problems.
Shower age matters regardless of pan type. Materials deteriorate over time. Plastics get brittle. Adhesives lose strength. Gaskets dry out and shrink. A 15 to 20 year old shower of any type has increased failure risk just from age. At that point, preventive replacement during a bathroom remodel often makes more sense than waiting for a leak to force the issue.
DIY Repair Options Versus Complete Shower Pan Replacement
There’s a difference between surface repairs that seal small gaps and structural fixes that address the actual waterproof barrier. Understanding this helps you make informed decisions about repair scope.
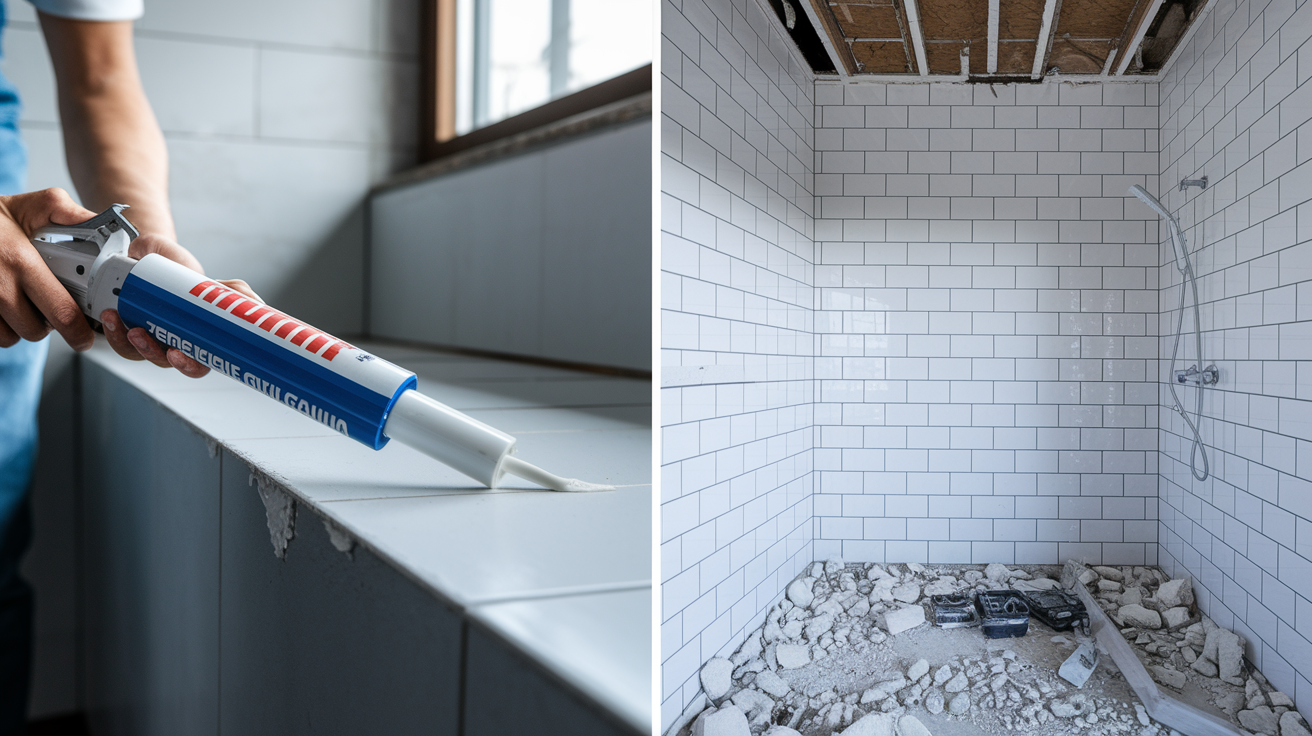
DIY surface repairs work for minor issues like deteriorated caulk or small grout gaps. Here’s the process: clean the area thoroughly with a degreasing cleaner and let it dry completely (24 to 48 hours). Apply silicone based sealant to visible cracks or gaps, smoothing with a wet finger or caulk tool. Install fresh caulk at all pan to wall junctions, removing old caulk completely first. After everything cures for the time specified on the product label, run a 24 hour flood test by blocking the drain and filling the shower pan with water above the repaired area.
These repairs only work for minor surface issues. If your flood test showed water escaping from the pan itself, surface caulking won’t fix it. That’s a failed waterproof membrane, and caulk doesn’t reach it.
Pipe patches and tape are temporary measures, not substitutes for proper repair. Use them when you need to stop an active leak right now and can’t get a plumber until tomorrow. But don’t treat them as permanent. They’re buying you time.
Complete replacement becomes necessary when:
- Failed flood test after attempted surface repair (the leak’s coming from beneath the surface)
- Widespread structural damage to subfloor (wood rot, mold, or compromised joists)
- Multiple leak sources identified (fixing one won’t solve the problem)
- Pan age exceeding 20 years (materials are at end of designed lifespan)
- Renovation opportunity for upgrades (if you’re already remodeling, replace it now)
Partial replacement is an option for localized damage. If the leak’s isolated to one corner or one section, you can sometimes remove and replace only that affected area. This preserves the rest of the structure and costs less than full replacement. But it requires careful work to integrate the new section with existing waterproofing.
Installing a new liner above the existing damaged liner is a less invasive professional solution that works in certain situations. The new liner creates a new waterproof barrier on top of the old failed one. This avoids full demolition down to the subfloor. It’s not appropriate for every situation (if there’s structural damage, you need to access and repair that), but it can work when the leak’s limited to membrane failure without underlying wood damage.
Any replacement has to meet current building codes. Codes change over time, and what was acceptable 20 years ago might not meet today’s standards. Proper waterproofing system installation includes correct membrane application, proper drain assembly, adequate slope, and verification testing (usually a flood test) before tile installation. Don’t skip the verification. That’s your proof the work was done correctly.
Final Words
A proper flood test is your best tool for confirming a shower pan leak. Mark the water level, wait 24 to 72 hours, and let the results tell you what’s happening.
If the test shows a drop, you’ve got clarity. That’s when targeted repair makes sense.
Catch it early, fix it right, and you’ll protect your home from the kind of damage that spreads quietly behind walls and floors.
We’re here when you need us.
FAQ
How do you check if your shower pan is leaking?
You can check if your shower pan is leaking by performing a flood test. Plug the drain with a test plug, fill the pan with water to just below the curb, mark the water level, and wait 24 to 72 hours. A partial drop in water level (not complete loss) confirms a shower pan leak at the membrane, drain connection, or seams.
What is the life expectancy of a shower pan?
The life expectancy of a shower pan typically ranges from 15 to 20 years, depending on the material, installation quality, and maintenance. Traditional mud pans with membrane liners, fiberglass, and acrylic bases all show increased failure risk after this timeframe, making proactive inspections important as your shower ages.
Does insurance cover a leaking shower pan?
Insurance coverage for a leaking shower pan depends on your policy and the cause of the leak. Most homeowner policies cover sudden, accidental damage but exclude gradual deterioration or maintenance-related failures. Review your policy carefully and document all damage with photos before filing a claim for the best chance of coverage.
How do plumbers detect hidden leaks?
Plumbers detect hidden leaks using moisture meters that measure water levels in walls and floors, thermal imaging cameras that visualize temperature differences from wet areas, and dye testing to trace leak paths. These non-invasive methods identify problem locations without creating holes or damage, allowing focused repair planning before any demolition begins.
Can you repair a shower pan leak without replacing it?
You can repair minor shower pan leaks without replacement by cleaning the area thoroughly, applying silicone-based sealant to cracks or gaps, and installing fresh caulk at pan-to-wall junctions. These surface repairs work only for minor issues and serve as temporary fixes. Failed flood tests after repair or widespread damage require complete replacement.
What causes shower pan leaks?
Shower pan leaks are caused by compromised membranes at drain connections, failed seams or corners in the waterproof membrane, cracks or holes in the pan material, deteriorated gaskets in the drain assembly, and improper slope causing standing water. Improper installation during construction accounts for many failures, especially when liners are installed on flat subfloors instead of pre-sloped surfaces.
How long should you wait during a shower pan flood test?
You should wait a minimum of 24 hours during a shower pan flood test, though 48 to 72 hours is preferred for more reliable results. Mark the water level clearly with a pencil and check it at regular intervals. Partial water level drops during this time confirm leaks, while complete water loss typically indicates plug seal failure rather than pan damage.
What are weep holes in a shower drain?
Weep holes in a shower drain are small openings that allow water trapped between the shower pan and the tile to drain properly. They’re found in standard 3-piece clamping drains and cast iron drains but not in bonding flange drains. All weep holes should drain water during drain-down after a flood test, not just some.
When should you call a professional for a shower pan leak?
You should call a professional for a shower pan leak when a flood test confirms leakage but you can’t identify the source, structural damage is visible or suspected, moisture readings indicate extensive hidden water damage, or mold growth is widespread. Professionals use thermal imaging and specialized moisture detection equipment unavailable to most homeowners.
How often should you reseal shower grout and caulk?
You should reseal shower grout and caulk annually to prevent shower pan leaks, as these materials degrade over time from cleaning chemicals, temperature changes, and normal wear. Use quality silicone sealant for caulk lines and reseal grout when water absorption is noticed. This preventive maintenance is far less expensive than repairing leak damage.