
You might assume low water pressure is just a minor annoyance until you realize it signals problems hiding in your walls, under your foundation, or right at your main water line. Weak flow from your shower or faucets means water is being restricted, diverted, or lost somewhere between the city main and your fixtures. The good news is that most causes follow a clear pattern. Once you know whether the problem affects your whole house or just one spot, you can narrow down the source fast and fix it correctly.
Common Causes and Quick Diagnostic Framework for Low Water Pressure
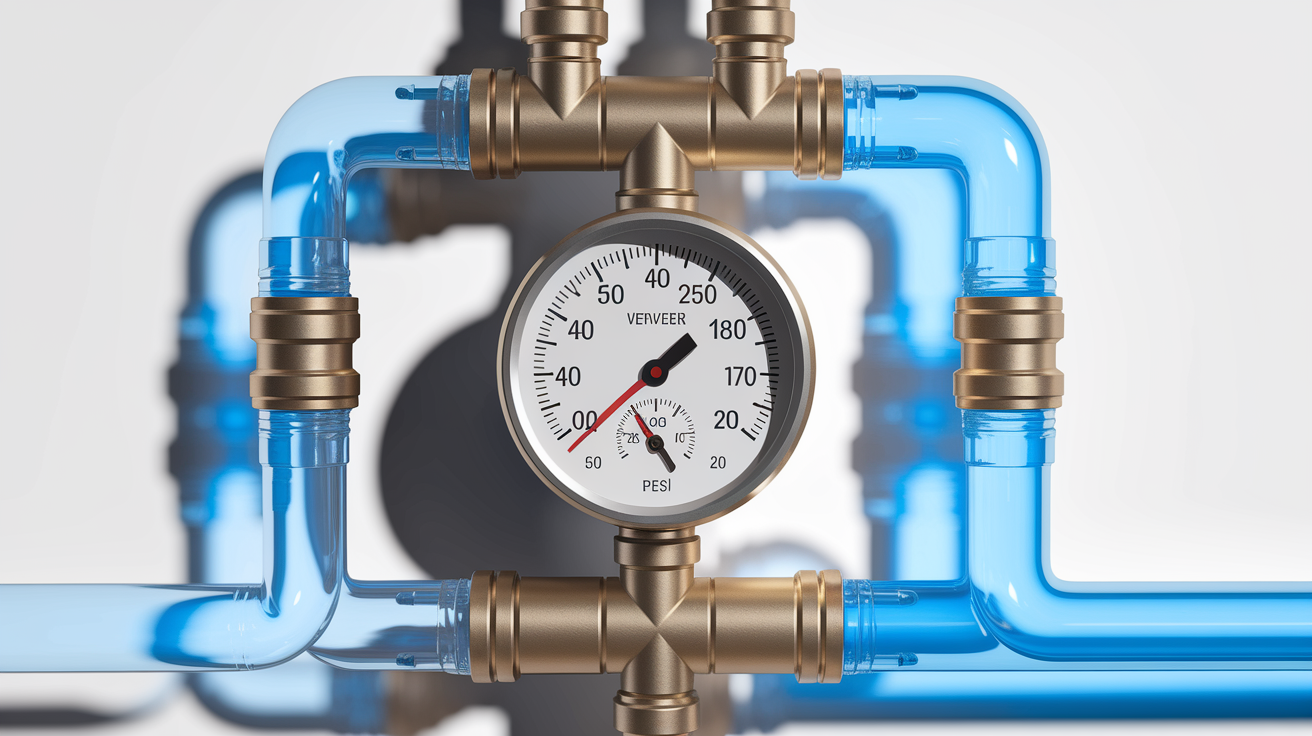
Normal residential water pressure should fall between 40 and 70 PSI after it enters your home. If your shower feels weak or your faucets run slow, the critical first step is figuring out whether the problem hits the whole house or just one fixture.
| Test Method | What It Reveals |
|---|---|
| Check multiple faucets throughout home | Whole house vs. isolated problem |
| Test both hot and cold water | Water heater issue vs. supply problem |
| Attach pressure gauge to outdoor spigot | Actual PSI reading (normal: 40-70) |
| Note if pressure drops during peak hours | Municipal/shared line capacity issue |
Here’s what typically causes low water pressure:
Partially closed shut-off valves limit the water supply reaching your fixtures. This happens a lot after plumbing work or repairs when valves get closed but aren’t fully reopened.
Pressure regulator malfunctions reduce pressure throughout your entire plumbing system. These devices normally step down incoming municipal pressure from 100+ PSI to safe household levels, but they can fail or get stuck in the wrong position.
Leaking pipes divert water away from your faucets before it gets there. Multiple small leaks create especially weak pressure, even if you don’t see obvious puddles.
Corroded or scaled pipes restrict water flow as rust and mineral deposits narrow the pipe diameter from the inside. Galvanized steel pipes corrode faster than other types.
Water heater problems affect only hot water pressure. Sediment settles at the tank bottom, clogging outlets and reducing capacity.
Municipal supply issues include water main breaks, treatment plant problems, or maintenance work that temporarily reduces pressure across entire neighborhoods.
Main water line problems occur in the service line connecting your home to the city main. Tree roots, corrosion, or crushing from soil settlement restrict flow before water even enters your house.
Mineral deposits and sediment buildup accumulate inside pipes over time. Hard water leaves calcium, magnesium, and lime that gradually narrow pipe diameter, while rust particles and debris from municipal systems collect at bends and joints.
Clogged aerators and fixture screens trap mineral deposits in the small mesh screens at faucet spouts and showerheads. This is the most common cause when just one fixture has weak flow.
Outdated galvanized steel pipes in homes built before 1970 deteriorate from decades of use, requiring full replacement rather than repair.
Shared water line congestion during peak usage creates temporary pressure drops when neighbors use water simultaneously in the morning and evening.
Frozen pipes in cold climates block water flow partially or completely until they thaw, and can burst if ice expansion cracks the pipe wall.
Whole house symptoms point to different problems than single fixture issues. If all your faucets run weak and a pressure gauge shows readings below 40 PSI, look at your supply system, pressure regulator, or main water line. If only one sink or shower has low pressure while others work fine, you’re dealing with a clogged aerator or a valve problem at that specific fixture.
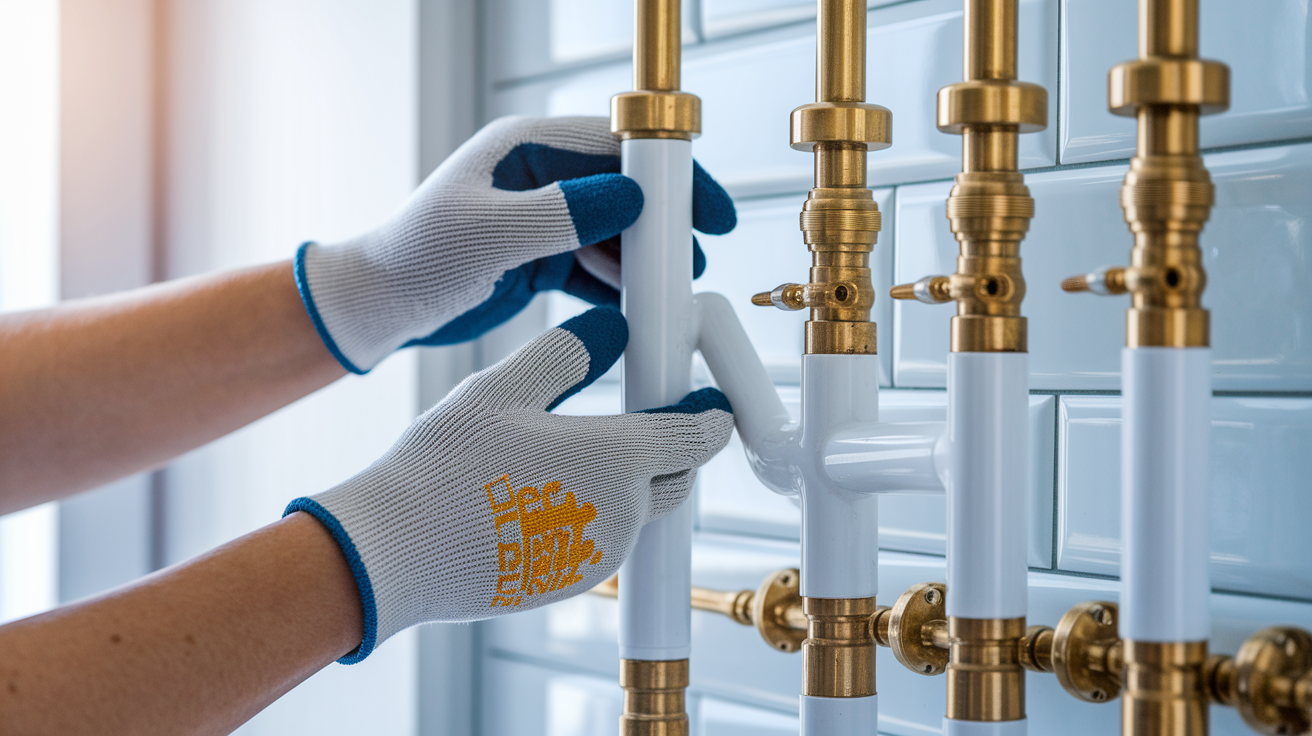
How Closed or Faulty Valves Create Water Pressure Problems
The main shut-off valve near your water meter controls all water entering your home. If it’s only halfway open, every fixture gets reduced pressure. This valve sits in different spots depending on your home. Sometimes in the basement near where the main line enters, sometimes in a crawl space, or in warmer climates often in a meter box outside near the street.
Individual fixture shut-off valves live under sinks, behind toilets, and at other connection points. These smaller valves let you stop water to one fixture without shutting down the whole house, but they also create pressure problems when they’re not fully open or when they get corroded and sticky.
Check these valves in this order:
- Main house valve at the water meter
- Pressure reducing valve (PRV) if your home has one
- Individual fixture shutoff valves under sinks and behind toilets
- Water heater inlet valve
- Outdoor spigot valves
To fully open each valve, turn the handle counterclockwise until it stops. Don’t force it. For ball valves, the handle should point in the same direction as the pipe when open. Gate valves need several full turns to open completely.
Valves can get stuck partially closed, especially if they haven’t been operated in years. The internal parts corrode, making them difficult to turn. Sometimes you can work them loose by turning back and forth gently while applying penetrating oil to the stem. But if a valve won’t open fully or if water leaks from the handle when you turn it, replacement is the safer choice than trying to repair a corroded valve that might fail completely.
Pressure Regulator Failures and Adjustment Issues
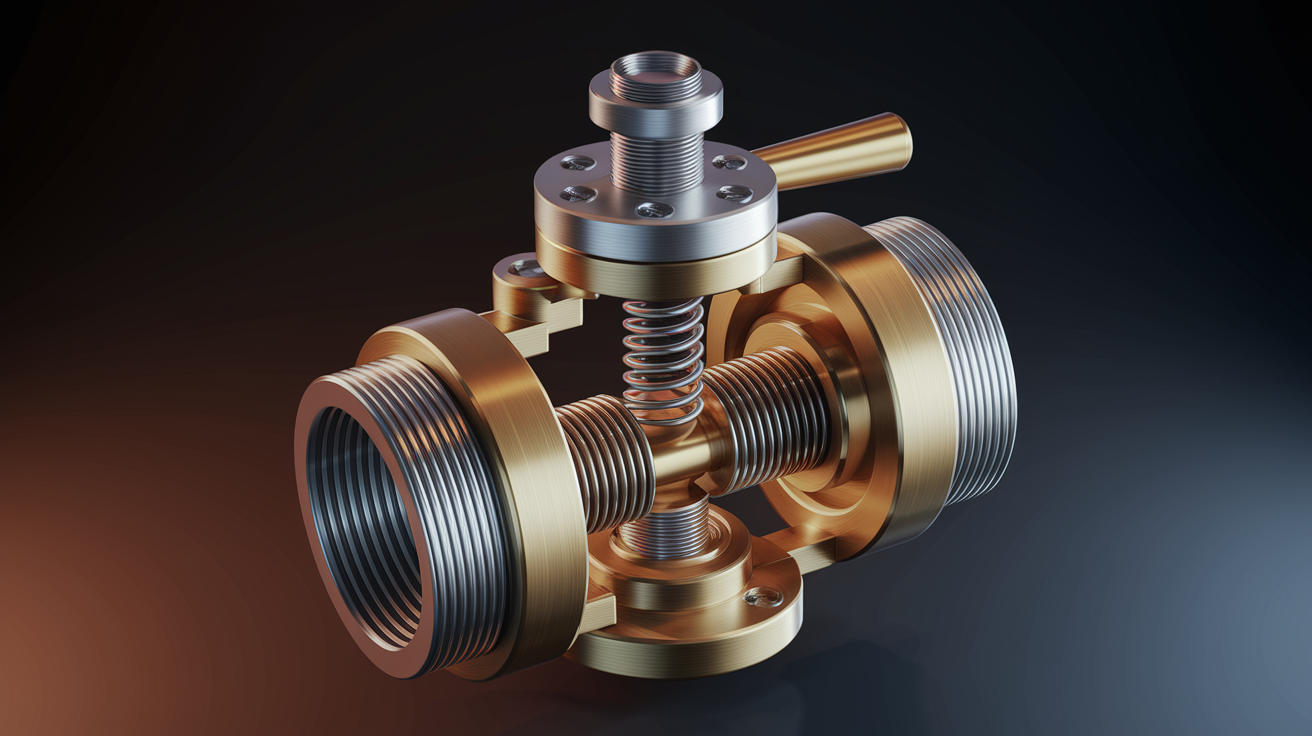
A pressure regulator (also called a pressure reducing valve or PRV) sits on your main water line, usually near the main shut-off valve. Municipal water systems deliver pressure around 100 to 150 PSI to push water through distribution lines across long distances. That’s too much for home plumbing. Your fixtures and appliances are designed for 40 to 60 PSI.
The regulator steps down that incoming pressure to safe household levels. When it fails, you might see sudden pressure drops throughout the house, readings below 40 PSI, or pressure that swings up and down for no clear reason.
Testing is straightforward. Attach a pressure gauge to an outdoor hose bib (the threaded spigot where you connect a garden hose). Make sure no water is running inside the house, then open the spigot and read the gauge. Normal pressure should fall between 40 and 70 PSI. Readings below 40 PSI indicate the regulator might be set too low or failing.
Some regulators have an adjustment screw on top. Turning this screw clockwise increases pressure. Make small adjustments, maybe a quarter turn at a time, then test again with your gauge. You’re aiming for 50 to 60 PSI, which works well for most homes. Avoid cranking the pressure too high, as readings above 80 PSI can damage fixtures, appliances, and pipes over time.
Pressure regulators typically last 10 to 15 years before they wear out. Once they fail, they need replacement rather than repair. Professional installation usually runs $200 to $400, including parts and labor. The job requires shutting off the main water supply, cutting the pipe, and soldering or threading the new regulator in place. Most plumbers complete this work in one to two hours.
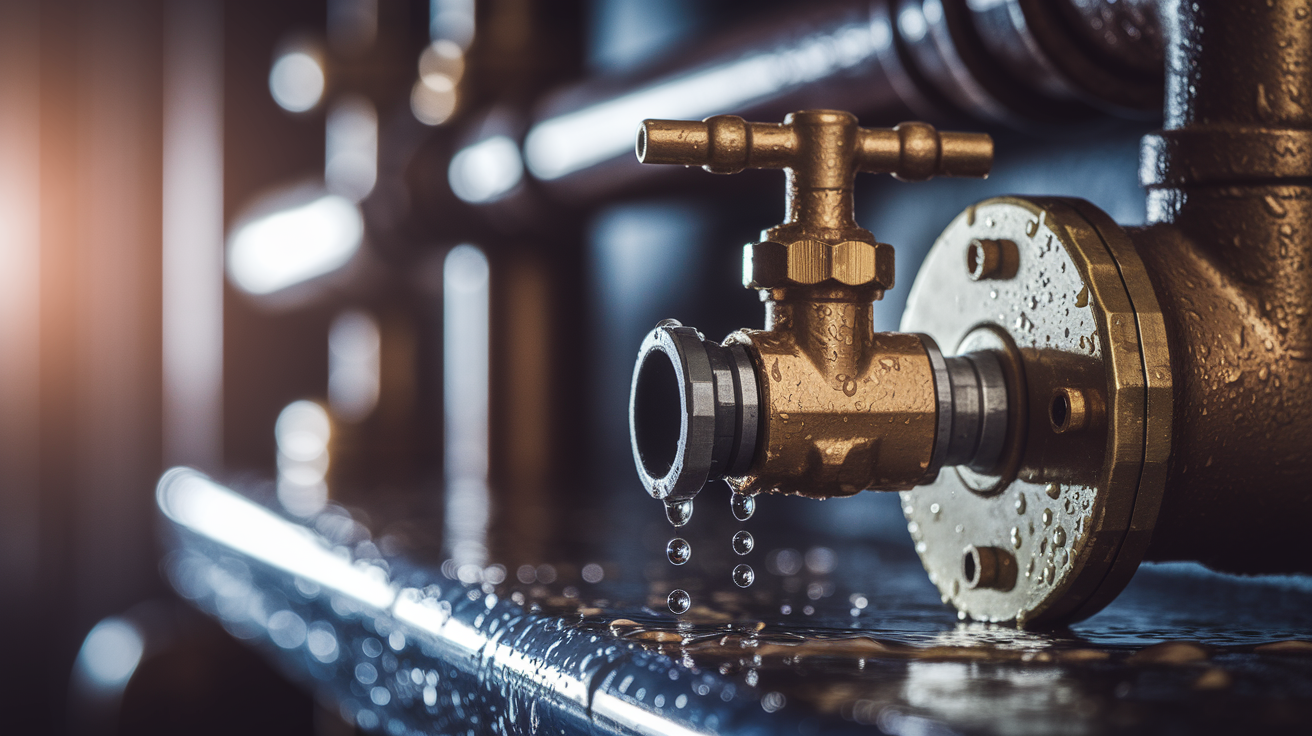
Pipe Leaks That Reduce Water Pressure Throughout Your Plumbing

Water leaking from pipes diverts flow away from your faucets and showerheads. Even small leaks reduce available pressure, and multiple leak points create especially weak flow. Some leaks are obvious. Others stay hidden for months.
Visible leaks show up as puddles under sinks, water stains on ceilings and walls, damp drywall that feels soft when you press it, brown rings on ceilings below bathrooms, and moisture around the foundation. Check these spots when you notice pressure dropping without other clear causes.
Hidden leaks are trickier. Run this water meter test. Shut off all fixtures, appliances, and outdoor spigots. Check your water meter and note the reading. Wait one hour without using any water, then check the meter again. If it moved, water is leaking somewhere even though you can’t see it. Listen for hissing sounds or running water noises in walls when everything should be quiet. Review your water bills for unexplained increases over the past few months.
Small pipe leaks might not leave obvious puddles, but they still steal pressure over time. A pinhole leak in a pipe can spray a fine mist that gets absorbed by surrounding drywall before it drips enough to stain the surface. These hidden problems often develop in pipes running through walls, under concrete slabs, or buried in the ground between your home and the city main.
Professional leak detection and repair services use specialized equipment when standard inspection doesn’t locate the source. Acoustic sensors pick up the sound of water escaping under pressure. Thermal imaging cameras show temperature differences where water soaks into building materials. Pressure testing isolates sections of plumbing to pinpoint where the leak occurs behind walls or under slabs. These detection methods prevent unnecessary demolition and speed up repairs.
Pipe Deterioration: Corrosion, Mineral Buildup, and Sediment
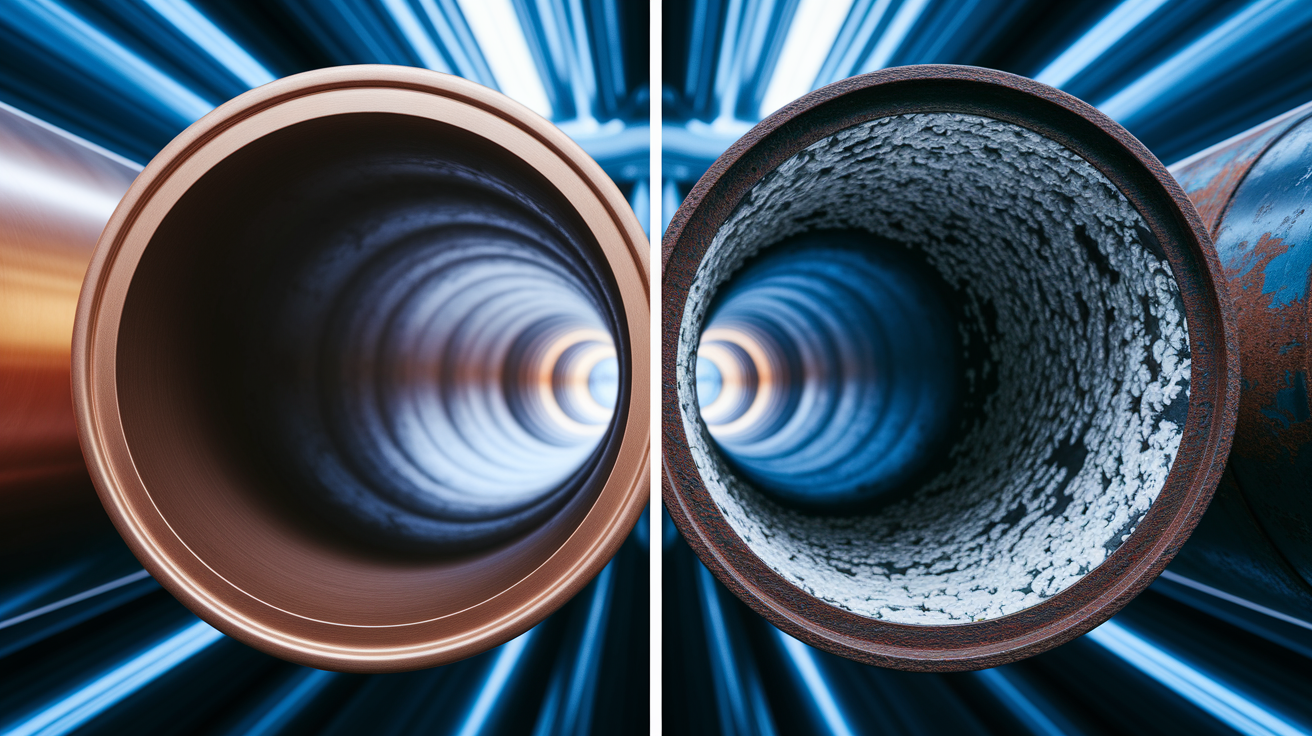
Pipes deteriorate through two related processes that often happen at the same time, especially in older plumbing systems. Internal corrosion eats away at pipe walls from the inside, particularly in galvanized steel pipes installed in homes built before 1970. These pipes rust over decades, with flaking rust and corrosion narrowing the interior diameter. At the same time, mineral and sediment buildup creates deposits that clog pipes from a different angle. Hard water carries dissolved calcium, magnesium, and lime that precipitate out and coat pipe interiors, gradually narrowing the flow path year after year.
Signs your pipes are deteriorating include:
- Gradual pressure decline over months or years rather than sudden drops
- Brown or rusty water when you first turn on faucets in the morning
- Worse pressure on hot water (minerals precipitate faster when water heats up)
- Visible rust or white and green deposits on exposed pipes or aerators you remove from faucets
- Your home’s pipes were installed 40 or more years ago
- You live in an area with hard water
- Pressure drops noticeably after water passes through the water heater
| Pipe Material | Typical Lifespan & Corrosion Pattern |
|---|---|
| Galvanized steel | 40-50 years, corrodes and scales rapidly |
| Copper | 50+ years, resistant but can corrode in aggressive water |
| PEX | 50+ years expected, highly corrosion-resistant |
| Brass | 40-70 years, moderate corrosion resistance |
| Cast iron (drains) | 75-100 years, rust buildup common |
Preventive solutions help slow deterioration before it becomes severe. Flush your supply lines annually by opening bathtub spigots and other high flow fixtures for 30 to 60 minutes. This clears loose sediment before it settles permanently. In hard water areas, installing a whole house water softener prevents future mineral deposits while protecting appliances and fixtures. For moderate accumulation that’s already built up, descaling solutions can dissolve some deposits, though you’ll need to flush lines thoroughly with clean water afterward.
Schedule professional pipe inspection for homes with original galvanized pipes approaching 40 to 50 years of age. Camera inspection shows interior pipe condition without tearing into walls.
Severely corroded or scaled pipes can’t be effectively cleaned and need replacement. Partial repiping replaces affected sections while leaving sound pipes in place, typically running $500 to $2,000 per section depending on accessibility and length. Whole house repiping addresses widespread deterioration throughout the system, with costs ranging from $4,000 to $15,000 based on home size, pipe material chosen, and how many fixtures need reconnection. Homes with galvanized steel pipes should plan for eventual replacement before emergency failures cause water damage.
Water Heater Issues Affecting Hot Water Pressure

If only your hot water has low pressure while cold water runs normally, the problem sits in your water heater or the hot water lines running from it. This isolated symptom points away from main supply issues and toward the tank itself or its connections.
Sediment accumulates at the bottom of water heater tanks over time. Minerals in the water supply settle out when water sits still and heats up. This sediment layer grows thicker year by year, reducing the tank’s effective capacity and clogging the outlet where hot water exits. The buildup acts like a partial blockage, restricting flow to all your hot water fixtures. The water heater inlet valve or outlet valve might also be partially closed or corroded, creating the same chokepoint effect.
Here are the main water heater causes of low hot water pressure:
- Sediment buildup covering the tank bottom and clogging the outlet
- Partially closed inlet valve (where cold water enters) or outlet valve (where hot water exits)
- Corroded dip tube that directs incoming cold water to the tank bottom. When this plastic tube breaks, cold and hot water mix improperly, reducing both temperature and pressure
- Clogged temperature and pressure relief valve that vents excess pressure but can get blocked by mineral deposits
- Mineral deposits in the heat exchanger on tankless models, restricting flow through the narrow passages
- Undersized water heater for your household’s demand, unable to keep up during high use periods
Solutions start with annual flushing. Attach a garden hose to the drain valve at the tank bottom. Open the valve and let water run into a bucket or outdoors until it flows clear instead of cloudy or brown. This removes loose sediment before it hardens into a thick layer. Check that inlet and outlet valves are fully open. If the dip tube broke, you’ll need to replace it, which requires draining the tank and removing the cold water inlet connection at the top.
For households that consistently run out of hot water or notice weak pressure during showers when other hot water runs at the same time, consider upgrading to a larger capacity tank or switching to a tankless water heater that provides unlimited hot water on demand. Tankless models need annual descaling in hard water areas but don’t accumulate the same sediment problems as tank style heaters.
Municipal Supply and Main Line Problems Beyond Your Home

Sometimes low pressure starts outside your property line, in the municipal water system or the main service line connecting your home to the city’s distribution network. These external causes sit beyond your direct control but still affect every fixture in your house.
Municipal issues include water main breaks that interrupt supply or reduce pressure across entire neighborhoods. Treatment plant problems, equipment failures, or maintenance shutdowns temporarily lower system pressure. Fire departments drawing large volumes of water from hydrants during emergencies reduce available pressure nearby. Older neighborhoods might have undersized distribution lines that were adequate decades ago but can’t handle current demand from more homes and higher water usage per household.
Service line issues affect just your home. The main line running from the street to your house can develop leaks, especially at the connection points where it joins the city main and where it enters your foundation. Corrosion eats through metal pipes over decades. Tree roots grow into small cracks, expanding them into larger breaks. Soil settlement can crush or kink pipes. Some older service lines were installed with diameters too small for modern household demand, creating a bottleneck even when everything else works correctly.
Peak usage patterns reveal capacity problems in shared lines. Pressure drops during morning hours (7 to 9am) when neighbors shower and run coffee makers before work, then drops again in the evening (6 to 8pm) during dinner prep and evening showers. If your pressure returns to normal during midday and late night when fewer people use water, that indicates the pipeline serving your street can’t handle simultaneous demand from multiple homes rather than a problem with your individual plumbing.
Contact your water utility company when you suspect external causes. Report the low pressure and ask if they’re aware of issues in your area. Many utilities track and respond to pressure complaints. Request a pressure test at your meter to determine whether pressure is adequate at that point. If the utility measures good pressure at the meter but you’re getting weak pressure inside your home, the problem sits downstream on your property (your responsibility). If pressure is already low at the meter, the issue is upstream in their distribution system (their responsibility).
DIY Fixes You Can Try Before Calling a Professional

Some water pressure problems are simple enough to fix yourself without specialized tools or plumbing knowledge. Others require professional diagnosis and repair. DIY friendly fixes include cleaning aerators, checking valves, and flushing sediment. Problems requiring professional help include pipe replacement, pressure regulator installation, and leak detection behind walls.
If only one faucet or showerhead has low pressure while others work fine, start with aerator cleaning. The aerator is the small mesh screen screwed onto the end of your faucet spout. Minerals in your water clog these screens over time. Unscrew the aerator by hand or use channel lock pliers wrapped in a cloth to protect the finish. Most turn counterclockwise. Take it apart carefully, noting the order of the parts so you can reassemble correctly. Soak all pieces in white vinegar for 30 to 60 minutes to dissolve mineral deposits. Scrub stubborn buildup with an old toothbrush. Rinse everything thoroughly under running water and reassemble. For fixed showerheads that don’t unscrew easily, fill a plastic bag with vinegar, secure it over the showerhead with a rubber band, and let it soak for 30 to 60 minutes before removing and running water to flush.
Additional DIY fixes you can try:
- Check that all shut-off valves are fully open. Walk around your home and check the main house valve at the meter, individual fixture shutoff valves under sinks and behind toilets, and the water heater inlet valve
- Adjust the pressure regulator if your home has one and it has an accessible adjustment screw. Turn clockwise in small quarter turn increments to increase pressure, testing after each adjustment
- Flush your water heater tank by attaching a hose to the drain valve and running water until it flows clear instead of brown or cloudy
- Flush main supply lines by running your bathtub spigot at full flow for 30 to 60 minutes to clear loose sediment
- Disconnect and flush individual fixture supply lines. Turn off the shutoff valve, disconnect the supply line at both ends, and flush water through it into a bucket
- Lubricate sticky valve stems with plumber’s grease if valves are difficult to turn
- Replace old low flow fixtures from the 1980s and 1990s with modern WaterSense certified models that provide better pressure while still conserving water
Tools you’ll need for these fixes include an adjustable wrench, channel lock pliers, a pressure gauge (available at hardware stores for $10 to $20), a screwdriver, a bucket, white vinegar, cloth for gripping fixtures without scratching, and an old toothbrush for scrubbing.
These DIY approaches resolve aerator clogs, valve positioning issues, and loose sediment problems. They won’t fix corroded pipes that need replacement, broken pressure regulators that need professional installation, or major leaks hidden behind walls. Those situations require diagnosis and repair from someone with specialized equipment and expertise.
When to Contact a Professional Plumber for Low Pressure

Some pressure problems need professional attention because they involve specialized equipment, hidden leaks, pipe replacement, or work that requires permits. Recognizing when to call for help prevents wasted time on DIY attempts that can’t solve the underlying issue.
Contact a professional leak detection and repair service for these situations: pressure below 40 PSI after you’ve checked all valves and cleaned aerators, suspected hidden leaks when your water meter moves with all fixtures off but you don’t see water anywhere, whole house pressure loss with no obvious cause like a closed valve, pressure regulator that needs replacement, corroded pipes identified during inspection, main water line issues between the street and your house, recurring pressure problems that return after DIY fixes, and pressure problems combined with discolored water or strange noises in pipes.
Professional plumbers offer capabilities beyond DIY methods. They use specialized leak detection equipment including acoustic listening devices that pick up the sound of water escaping under pressure, thermal imaging cameras that show temperature differences where moisture hides, and pressure decay testing that isolates which section of plumbing contains a leak. Camera inspection feeds a small waterproof camera through pipes to show interior conditions without demolition. Professionals install and calibrate pressure regulators to precise specifications. They handle pipe replacement and whole house repiping projects. Main service line repair and replacement requires excavation equipment and knowledge of local codes. Permits for major plumbing work get processed correctly.
Cost expectations help you plan and budget. Diagnostic service calls typically run $100 to $200, which includes the plumber coming out, testing your system, and identifying the problem. Simple fixes like adjusting valves or replacing aerators during that service call add $150 to $300. Pressure regulator replacement runs $300 to $600 including parts and labor. Professional leak detection costs $200 to $500 depending on how difficult the leak is to locate. Replacing a section of pipe ranges from $500 to $2,000 per section based on length, location, and accessibility. Whole house repiping for severely corroded systems runs $4,000 to $15,000.
Most repairs finish same day or within one to two days except major repiping projects, which typically take three to seven days depending on home size and how many fixtures need reconnection.
Preventing Future Low Pressure Through Regular Maintenance
Preventive maintenance costs less than emergency repairs and extends the lifespan of your entire plumbing system. Catching problems early, before they become severe, keeps water pressure steady and avoids expensive replacements.
Schedule these maintenance tasks at regular intervals:
- Flush your water heater tank annually to remove accumulated sediment before it hardens into a thick layer that restricts flow
- Clean faucet aerators and showerheads every three to six months, more often if you live in a hard water area where minerals clog screens faster
- Check and fully open all valves annually, including the main shutoff, pressure regulator, fixture shutoffs, and water heater valves
- Test water pressure with a gauge once a year to catch gradual decline before it becomes severe enough to notice during daily use
- Inspect visible pipes for corrosion and leaks twice yearly, looking for rust spots, green deposits, moisture, or dripping connections
- Flush main supply lines annually by running high flow fixtures like bathtub spigots to clear loose sediment
- Schedule professional plumbing inspection every two to three years for newer homes, annually for homes more than 40 years old
- Consider installing a water softener in hard water areas to prevent mineral deposits throughout your plumbing system and protect appliances
Watch for early warning signs that pressure is declining gradually. You might notice increasing time for fixtures to reach full flow when you first turn them on. Aerators clog more frequently, needing cleaning every few weeks instead of every few months. Discolored water when you first use a faucet indicates pipe corrosion releasing rust particles into the flow.
Homes with galvanized steel pipes installed in pre-1970 construction need special attention. These pipes have a practical lifespan of 40 to 50 years. Schedule professional evaluation of pipe condition by the time they reach 40 years of age. Planning for eventual repiping before emergency failures occur prevents water damage and gives you time to budget for the replacement cost. Whole house water filtration and softening systems protect your entire plumbing system from mineral damage while improving fixture performance and making everything last longer.
Final Words
Low water pressure happens for a lot of reasons. Partially closed valves, worn-out pressure regulators, pipe leaks, and mineral buildup are the most common culprits.
Start by checking what causes low water pressure in house for your specific situation. Test multiple fixtures, confirm your valves are fully open, and clean your aerators.
If DIY fixes don’t restore normal flow, we’ll track down hidden leaks, test your pressure regulator, or identify corroded pipes that need replacement. Regular maintenance prevents most pressure problems before they start.
FAQ
How do you fix low water pressure in your house?
To fix low water pressure in your house, start by checking if all shut-off valves are fully open, cleaning faucet aerators and showerheads, and testing your water pressure with a gauge. If pressure remains below 40 PSI after these steps, you likely need professional help to address pipe leaks, corroded lines, or a faulty pressure regulator.
What is the most common cause of low water pressure?
The most common cause of low water pressure is clogged aerators on faucets and showerheads from mineral deposit buildup, followed closely by partially closed shut-off valves that weren’t fully reopened after maintenance work. Both issues are easy to check and fix yourself before investigating deeper plumbing system problems.
How do you regain water pressure in your house?
You regain water pressure in your house by identifying whether the problem affects all fixtures or just one, then addressing the specific cause. For whole-house issues, check your main shut-off valve and pressure regulator. For single fixtures, clean aerators and ensure fixture valves are fully open.
Can a neighbor cause your low water pressure?
A neighbor can cause your low water pressure if you share a water line and they’re using high volumes simultaneously, especially during peak morning and evening hours. Pressure that drops at specific times but returns to normal during off-hours indicates shared pipeline congestion rather than a problem with your individual plumbing system.
How do you know if low pressure is a whole-house or single-fixture problem?
You know if low pressure is a whole-house or single-fixture problem by testing multiple faucets throughout your home and checking both hot and cold water. If all fixtures show weak flow, it’s a system-wide issue. If only one faucet or showerhead is affected, the problem is localized to that fixture.
What PSI reading indicates you have low water pressure?
A PSI reading below 40 on a pressure gauge attached to an outdoor spigot indicates you have low water pressure, while normal residential pressure ranges from 40 to 70 PSI. Readings consistently under 40 PSI mean your pressure regulator may be set too low or you have supply line problems requiring professional diagnosis.
How often should you flush your water heater to prevent pressure loss?
You should flush your water heater annually to prevent sediment buildup that restricts hot water flow and reduces pressure. Drain the tank through the bottom valve until water runs clear, which typically takes 10 to 20 minutes and prevents mineral accumulation that causes hot water pressure problems.
When should galvanized steel pipes be replaced to avoid pressure problems?
Galvanized steel pipes should be evaluated for replacement at 40 to 50 years old, as internal corrosion and mineral scaling progressively narrow the pipe diameter and reduce pressure. Homes built before 1970 with original galvanized plumbing should schedule professional pipe inspection to plan repiping before emergency failures occur.
How do you test for hidden leaks causing low pressure?
You test for hidden leaks causing low pressure by turning off all fixtures and checking your water meter. If the meter continues moving when nothing is running, you have a leak diverting water before it reaches your faucets, which requires professional leak detection using acoustic sensors or thermal imaging.
Can hard water cause low pressure throughout your house?
Hard water can cause low pressure throughout your house by depositing calcium, magnesium, and lime inside pipes that gradually narrow the diameter over years. This mineral buildup occurs faster in hot water lines and older galvanized pipes, requiring annual flushing or whole-house water softener installation to prevent future accumulation.
What does it mean if only hot water has low pressure?
If only hot water has low pressure while cold water flows normally, it means the problem is in your water heater or hot water lines. Common causes include sediment buildup in the tank bottom, a partially closed water heater valve, or mineral deposits that accumulate faster in heated water.
How much does it cost to fix whole-house low water pressure?
Fixing whole-house low water pressure costs $150 to $600 for common issues like valve adjustments and pressure regulator replacement, but corroded pipe replacement ranges from $500 to $2,000 per section. Whole-house repiping for severe deterioration typically costs $4,000 to $15,000 depending on home size and pipe material selected.