
Most homeowners underestimate wet drywall ceiling removal costs by thousands of dollars because they think it’s just pulling down some soggy material. Actually, you’re paying for skilled labor to safely remove damaged sections, industrial drying equipment to prevent mold, protective barriers to contain the mess, and proper disposal of heavy waterlogged debris. Expect $50 to $65 per square foot for standard removal, with total costs ranging from around $2,500 for a small bathroom ceiling to $13,000 or more for a large living room once you factor in all the hidden work that protects your home.
What You’ll Pay for Wet Drywall Ceiling Removal

Expect to pay between $50 and $65 per square foot for standard wet drywall ceiling removal in most situations. The full range runs from $45 to $100 per square foot depending on your ceiling material, how much got soaked, and what your local contractors charge. A small bathroom ceiling around 50 square feet might cost $2,250 to $3,250, while a larger living room ceiling at 200 square feet could run $9,000 to $13,000.
Removal costs cover more than just pulling down soggy material. You’re paying for skilled labor to carefully tear out damaged sections without harming surrounding areas, disposal fees for hauling away heavy waterlogged debris, industrial drying equipment to prepare the space, protective sheeting to keep the rest of your home clean, and workspace prep that protects floors and furniture. The actual process takes coordination and attention to detail you won’t see in the final invoice.
Materials represent the smallest slice of your total cost. A single drywall sheet runs $13 to $24, and a small patch kit costs around $16. Labor dominates the budget at $45 to $90 per square foot or $60 to $90 per hour because removal requires careful work to avoid further damage, moisture barrier installation, proper debris bagging and hauling, thorough workspace cleanup, and structural inspection to check for hidden problems. That expertise and time drive the cost.
Real world pricing depends heavily on room size. A small bedroom ceiling might fall in the $2,500 to $4,000 range, while a medium sized room could hit $5,000 to $8,000, and a large open space or multiple rooms easily reaches $10,000 to $15,000 or more once you factor in all the removal work, drying time, and disposal.
| Project Size | Square Footage | Labor Cost Range | Materials Cost | Total Removal Cost Range |
|---|---|---|---|---|
| Small Room | 50-75 sq ft | $2,250-$4,500 | $200-$400 | $2,450-$4,900 |
| Medium Room | 100-150 sq ft | $4,500-$9,000 | $400-$750 | $4,900-$9,750 |
| Large Room | 200-300 sq ft | $9,000-$18,000 | $800-$1,500 | $9,800-$19,500 |
| Whole Ceiling | 400+ sq ft | $18,000-$30,000+ | $1,500-$3,000+ | $19,500-$33,000+ |
Cost Factors That Affect Wet Ceiling Removal Pricing
How much water got into your ceiling makes the biggest pricing difference. A small isolated leak that dampened one section runs far less than widespread saturation from a major pipe burst. Visible water stains on the surface might look manageable, but hidden moisture trapped above the drywall often means pulling down much more material than you first thought. Contractors charge based on what actually needs removal once they inspect the full extent, not just what you can see from below.
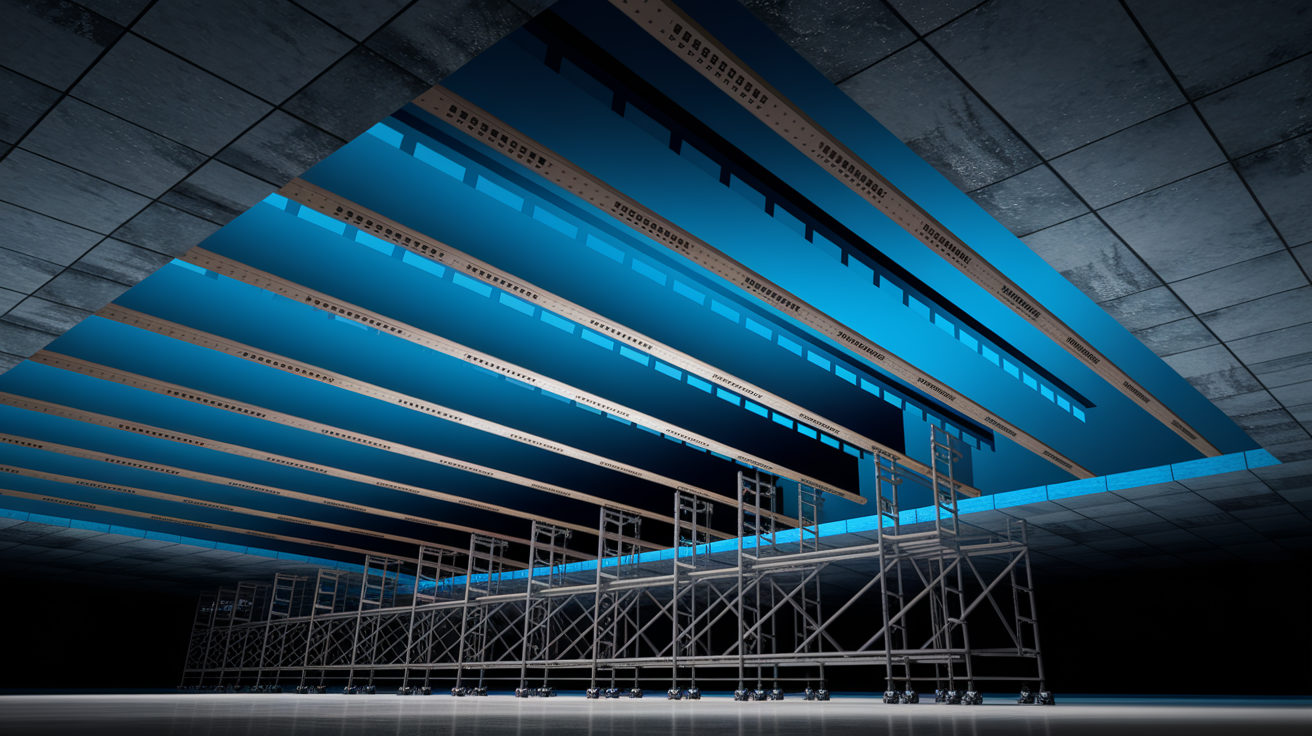
Ceiling height changes everything about accessibility and labor time. Standard 8 foot ceilings let contractors work efficiently with basic ladders and tools. Vaulted or cathedral ceilings require scaffolding rentals, specialized equipment, and extra labor hours for safe access. That scaffolding setup alone can add several hundred dollars before removal work even starts, and working overhead at 12 or 15 feet slows the process considerably compared to a standard height ceiling.
Your ceiling material determines labor intensity and pricing. Standard drywall comes in at the lower end of the cost range because it’s relatively straightforward to remove. Popcorn texture ceilings cost more because that textured finish needs careful handling and creates more cleanup work. Plaster ceilings run higher still since they’re harder to remove without damaging surrounding areas. Drop tile systems vary widely depending on tile size and type, with two foot tiles having different labor requirements than smaller acoustic tiles.
Structural complications push costs up fast when water has weakened the ceiling framework. Sagging spots signal serious problems that cost $500 to $1,500 to address even before you replace the drywall. Ceiling joist damage adds another $150 to $750 once you discover the framing needs repair or reinforcement. These structural fixes become non negotiable once water has compromised the support system, and you won’t know the full extent until removal work reveals what’s behind the damaged ceiling surface.
Geographic location creates significant pricing swings across different markets. Seattle contractors might quote $399 to $1,599 for repairs that would cost $225 to $464 in other regions based on national averages. Urban areas with higher costs of living command premium rates for skilled trades compared to rural locations. Local labor rates, permit requirements, and disposal fees all shift based on where your home sits, so a project in a major metro area almost always costs more than the same work in a smaller town.
Mold Remediation and Wet Ceiling Removal Costs

Acting within 24 to 48 hours after water damage prevents mold growth and saves you $500 to $3,000 or more in remediation expenses. Wet drywall acts like a sponge and can’t be dried out like carpet or wood. It requires complete replacement. But that quick removal stops mold spores from taking hold. Once you hit the 24 hour mark with standing moisture, mold starts growing fast, and by 48 hours you’re looking at contamination that needs professional remediation on top of the removal work.
Mold remediation adds $500 to over $3,000 to your ceiling removal costs when growth has already started. That’s separate from the actual ceiling work. Small contained areas cost less to treat, but widespread spore contamination throughout a room or into adjacent spaces pushes costs toward the higher end. Black mold requires even more careful handling with containment barriers, specialized protective equipment, and disposal procedures that increase labor time and material costs.
Professional mold testing and air quality assessment often become necessary before work begins, especially if you smell that musty odor or see visible growth. Testing confirms what you’re dealing with and creates documentation for insurance claims and safe work protocols. The testing itself runs a few hundred dollars typically, but it tells contractors exactly what containment and protection measures they need during removal.
Industrial drying equipment runs for 2 to 4 days after removing wet material to pull moisture from the space completely. High powered dehumidifiers and air movers prevent new mold growth in the exposed framing and surrounding areas. That drying phase adds project time and equipment rental costs, but skipping it risks mold developing behind your new ceiling within weeks. Proper drying also includes moisture readings to verify the space is actually ready for reconstruction, not just hoping everything dried enough.
Asbestos Testing Costs for Older Ceiling Materials
Popcorn ceilings and textured finishes installed before the 1980s require asbestos testing before any removal work can begin. That’s a legal requirement, not optional. Testing runs separately from removal costs and adds project delay while you wait for lab results, typically 3 to 5 business days. The test itself might cost $200 to $500 depending on how many samples the inspector needs to collect and analyze.
If testing comes back positive for asbestos, you’re looking at certified abatement instead of standard removal. Certified technicians charge $4 to $20 per square foot for proper asbestos removal, disposal, and containment. That’s significantly more than regular drywall removal because it requires specialized licensing, protective gear, containment barriers, and disposal at approved facilities. A 200 square foot ceiling could cost $800 to $4,000 just for safe asbestos removal before you even start installing new material.
When asbestos isn’t present, you skip those costs entirely and proceed with standard removal pricing. But you can’t skip the testing if your home was built before 1980 and has textured ceiling finishes. Removing asbestos without proper certification creates serious health hazards and legal liability. Most reputable contractors won’t touch potentially contaminated materials without test results confirming it’s safe to proceed with normal removal methods.
Disposal Fees and Debris Removal Pricing

Wet drywall creates disposal challenges that dry material doesn’t. Waterlogged ceiling sections weigh considerably more than dry drywall, meaning more trips to the landfill or a larger dumpster rental. Some landfills charge extra for water damaged construction debris or have specific disposal requirements, especially if there’s potential mold contamination. Your contractor needs to bag and haul this material properly, which takes time and adds weight based disposal fees.
Most contractor quotes include debris removal as part of the package price. That covers protective bagging, hauling away all the torn out material, and disposal fees at the landfill or transfer station. But some contractors itemize disposal separately on estimates, so check whether your quote includes this or adds it as a line item. For smaller projects, debris removal might represent $200 to $400 of the total. Larger jobs could see $800 to $1,500 in disposal costs alone.
Bigger projects involving multiple rooms or whole house ceiling damage require dumpster rental instead of contractor hauling. A residential dumpster for ceiling removal debris typically runs $300 to $600 for a week’s rental, depending on size and your location. That sits in your driveway and gets filled as work progresses. The alternative is paying contractors to make multiple dump runs in their trucks, which can actually cost more once you factor in their time and fuel for the trips.
Permit Costs and Inspection Requirements

Building permits become required when wet ceiling removal exposes structural damage that needs repair. Replacing ceiling joists, fixing damaged support beams, or working around exposed electrical wiring typically triggers permit requirements in most jurisdictions. Permit fees vary by location but generally run $100 to $500 for ceiling repair projects, depending on the scope of structural work involved.
Permit application adds timeline to your project. You’ll need approved plans before work begins, which can take anywhere from a few days to a couple weeks depending on your local building department’s backlog. Some municipalities offer expedited permit review for water damage situations, but you’ll pay an additional rush fee, sometimes double the standard permit cost. That delay matters when you’re trying to prevent further damage or when temporary ceiling support is already in place.
Inspection requirements come with permitted work and sometimes add costs if problems are found during review. Your municipality typically requires an inspection once framing repairs are complete but before you close up the ceiling with new drywall. If the inspector finds work that doesn’t meet code, you’ll need to correct it and schedule a re inspection. Some areas charge for follow up inspections beyond the first visit, adding $50 to $150 each time an inspector returns to verify corrections.
DIY Wet Ceiling Removal Versus Hiring Professionals

DIY wet ceiling removal looks appealing when you’re watching the budget, but hidden risks outweigh the labor savings in most situations. You’re working with potentially contaminated material, unknown structural damage, and mold exposure without the protective equipment and experience professionals use daily. One mistake compromising electrical wiring or missing hidden moisture areas creates expensive problems that erase any savings. A small isolated leak with no structural damage and a standard 8 foot ceiling represents the only scenario where DIY makes practical sense.
Professionals bring warranty protection covering their workmanship for one to two years. That matters when dealing with water damage because hidden moisture problems sometimes appear months later. Contractors also carry proper safety equipment, handle mold exposure correctly, assess structural integrity while removing damaged material, and complete most repairs in 3 to 6 hours versus the days an inexperienced homeowner might spend on the same work. For simple repairs covering 2 square feet, you might pay $100 to $170 for professional work, but water damaged material requires complete removal, not simple patching, which changes the scope entirely.
Most ceiling repairs get completed in a single visit when professionals handle the work. They protect your home properly, remove material efficiently, and assess next steps based on what they find. Larger jobs requiring industrial drying time or painting might extend to a second day, but the actual removal work moves quickly compared to DIY attempts. That speed matters when you’re trying to prevent mold growth or minimize how long you’re living with an open ceiling.
When professional help becomes necessary:
- Extensive water damage covering more than a few square feet
- Suspected or visible mold growth anywhere in the affected area
- High, vaulted, or cathedral ceilings requiring scaffolding or specialized access equipment
- Structural sagging, soft spots, or ceiling sections pulling away from joists
- Suspected asbestos in popcorn or textured ceilings from pre 1980s construction
- Insurance claim documentation requiring contractor reports, photos, and moisture readings
Replacement Expenses Beyond Removal Costs

Fixing the water source before starting ceiling work isn’t optional, it’s critical. Removing water damaged drywall while water still drips from above wastes time and money. The new ceiling you just installed gets damaged immediately, forcing you through the removal and replacement cycle again. Stop the intrusion first, then address ceiling repairs. That sequence saves you from repeat removal costs and wasted material expenses.
Water source repairs run separately from ceiling work and vary dramatically by cause. Simple roof leak patches start around $150 for minor repairs but climb over $1,000 for complex flashing work or multiple problem areas. Plumbing failures cost $500 to $2,500 depending on pipe accessibility and whether you’re fixing a small leak or replacing failed supply lines behind walls. Burst pipes, failed HVAC condensation lines, and leaking bathroom fixtures each carry different repair costs. Your ceiling contractor can identify the water source during inspection, but fixing it usually requires a different specialist.
New drywall installation after removal runs $1,200 to $3,500 for a typical room as a complete project. Medium repairs covering moderate damage areas cost $599 to $799 and include removal, drywall replacement, and insulation checks. Large area replacement spans $899 to $1,599 and involves hanging new sheets, taping seams, mudding, sanding, and basic finishing. These costs assume standard flat ceilings with no complex architectural details or structural repairs needed.
Finishing work adds labor time and cost beyond basic installation. Taping and mudding seams requires multiple coats with drying time between applications. Sanding creates dust that needs containment and cleanup. Texture matching on older ceilings takes skill and additional materials. Popcorn texture application costs more than smooth finishes, and matching vintage plaster ceiling details requires specialized expertise that increases labor rates.
Painting expenses depend on whether you’re blending patches or repainting entire ceilings. Patch blending costs $150 to $600 depending on area size and how well the new paint matches your existing ceiling. Full ceiling repaints run $3 to $4 per square foot including materials and labor. Water stains often bleed through standard paint, requiring stain blocking primer that adds material cost. Insulation inspection and replacement becomes necessary when moisture has compressed or contaminated the material above your ceiling, adding another expense layer to the full project.
Common water sources requiring separate repair:
- Roof leaks from damaged shingles, failed flashing, or ice dam damage
- Burst pipes from freezing conditions or age related failures
- Plumbing failures at fixture connections, supply lines, or drain pipes
- HVAC condensation line clogs or disconnected drain pans
- Bathroom or kitchen fixture leaks from failed seals or loose connections
Insurance Coverage for Wet Ceiling Removal

Homeowners insurance typically covers wet ceiling removal when the damage comes from sudden, accidental events like burst pipes or appliance malfunctions. A washing machine supply line that fails and floods your ceiling usually qualifies for coverage. Same with a sudden pipe freeze that bursts overnight or a water heater that ruptures without warning. These “sudden and accidental” scenarios trigger coverage under most standard policies, though you’ll still pay your deductible before insurance picks up remaining costs.
Insurance doesn’t cover damage from slow leaks, deferred maintenance, or gradual deterioration. That dripping pipe you ignored for months until the ceiling finally gave way falls on the homeowner. Same with roof leaks that developed slowly over time or condensation problems from poor ventilation. Natural flooding from storms, groundwater, or sewer backups typically isn’t covered under standard homeowners policies either. You’d need separate flood insurance for those situations. The key distinction is whether the water damage happened suddenly or gradually over time.
Documentation requirements make or break insurance claims for ceiling damage. Take photos of the damage immediately, including close ups of ceiling stains, sagging areas, and water source if visible. Get your contractor to document moisture readings, damage extent, and recommended repairs in writing. Save all estimates and invoices related to the claim. Insurance adjusters need this paper trail to process your claim efficiently. Multiple contractor quotes help support your claim amount and show you’re getting fair pricing rather than inflating costs.
You’re paying out of pocket when insurance doesn’t apply or when damage falls below your deductible. Many homeowners carry $1,000 to $2,500 deductibles, meaning smaller ceiling repairs might not reach the threshold for filing a claim. Sometimes it makes financial sense to pay directly rather than filing a claim that could affect future premiums. Maintenance related damage always comes from your pocket since no insurance covers problems that developed from neglected upkeep.
Timeline for Wet Ceiling Removal Projects

Industrial drying equipment runs 2 to 4 days before actual removal work begins. That timeline isn’t optional if you want to prevent mold growth and protect the framing structure. High powered dehumidifiers and air movers pull moisture from soaked drywall and the space above your ceiling. Contractors take moisture readings to confirm everything has dried adequately before starting removal. Rushing this phase to save time creates mold problems that cost far more to fix later than the few days spent drying properly.
Actual removal work duration depends on damage extent and access challenges. Small isolated areas might take 3 to 6 hours for complete removal, disposal, and workspace cleanup. Moderate damage covering a full room ceiling usually requires a full day, sometimes extending into a second day depending on ceiling height and material type. Extensive damage across multiple rooms or whole house situations can stretch removal work over several days as contractors systematically pull down all compromised material and prepare spaces for reconstruction.
Total project timeline combines drying, removal, and replacement phases into a complete schedule. Minor damage situations wrap up in 1 to 2 days total once drying finishes. Moderate to severe repairs take 3 to 7 days or more including the full drying phase, removal work, and basic ceiling replacement without painting. Complex projects involving structural repairs, mold remediation, or waiting for permit inspections can extend two weeks or longer from start to final completion.
| Damage Extent | Drying Time | Removal Time | Total Timeline |
|---|---|---|---|
| Minor (under 50 sq ft) | 2-3 days | 3-6 hours | 3-4 days |
| Moderate (50-200 sq ft) | 3-4 days | 1-2 days | 4-7 days |
| Severe (200+ sq ft or structural) | 3-5 days | 2-4 days | 7-14+ days |
Getting Accurate Contractor Quotes for Ceiling Removal
Getting three or more quotes gives you cost comparison data and helps verify the scope matches what’s actually needed. Some contractors quote high knowing homeowners feel desperate during water damage situations. Others might quote low and add change orders once work starts. Multiple quotes reveal the realistic price range for your specific project and protect you from both extremes. That comparison also shows you which contractors provide detailed breakdowns versus vague package pricing that hides what you’re actually paying for.
Contractors need specific information to quote accurately rather than ballpark figures. Take clear photos of all visible damage from multiple angles. Measure room dimensions and ceiling height to provide square footage estimates. Note your home’s age since that affects potential asbestos concerns and ceiling material type. Tell them your ceiling finish, whether it’s smooth drywall, textured, popcorn, or plaster. Share when the water damage occurred and whether you’ve started any drying efforts. More detail up front means fewer surprises when work begins.
Comparing quotes fairly requires looking beyond the bottom line number. Check whether pricing is itemized by task (removal, disposal, drying) or bundled as a package rate. Verify what warranty coverage comes with the work, typically one to two years on workmanship. Ask about timeline commitments and whether delays trigger any cost adjustments. Confirm the payment schedule, whether it’s deposit plus final payment or progress based billing for larger projects. Those details matter as much as the total cost when choosing who handles your ceiling removal.
What to ask contractors during the quote process:
- Current licensing and insurance verification, including policy numbers and expiration dates
- Mold handling procedures if growth is suspected or confirmed during removal
- Disposal methods and whether fees are included in the quoted price or itemized separately
- Warranty terms covering workmanship defects, callbacks, and timeline for honoring guarantees
- Moisture testing approach including equipment used and acceptable moisture levels before reconstruction
- Payment schedule structure, deposit requirements, and timing for final payment
Cost Saving Strategies for Wet Ceiling Removal
A hybrid approach splits the work between professional removal and homeowner handled tasks that don’t require specialized skills. Contractors handle the critical removal, moisture assessment, and disposal while you purchase materials directly, saving markup costs. Drywall sheets run $13 to $24 each when you buy them yourself versus contractor supply pricing. You can also handle basic prep work like moving furniture, protecting floors with plastic sheeting, and post project cleanup that doesn’t involve water damaged debris. That combination reduces labor hours you’re paying for without compromising the quality of actual removal work.
Timing flexibility saves you significant money when the situation allows waiting for standard business hours. Emergency, weekend, and holiday service calls typically carry 50 to 100 percent premium markup over regular rates. A ceiling removal quoted at $3,000 during business hours might cost $4,500 to $6,000 for immediate after hours response. If the water source is already stopped and no active leaking is happening, waiting until Monday morning instead of calling Sunday afternoon cuts your cost dramatically. Balance urgency against premium charges, but don’t delay when mold growth risk is high or structural safety is compromised.
Multiple quotes do more than provide cost comparison. They help identify fair pricing and verify whether contractors are proposing appropriate scope. One contractor quoting $6,000 while two others quote $3,500 and $3,800 suggests the high bid might be inflated or includes unnecessary work. Conversely, one extremely low quote compared to others raises questions about whether that contractor understands the full scope or plans to cut corners. The cluster of quotes in a similar range represents fair market pricing for your specific project.
Financing options help spread larger project costs over time when immediate payment strains your budget. Some contractors offer financing up to $250,000 with funding available within 1 to 3 days of approval. That turns a $8,000 ceiling removal project into manageable monthly payments instead of a single large expense. Interest rates and terms vary, but having the option prevents delaying necessary water damage repairs because funds aren’t immediately available. Just factor interest costs into your total project budget when comparing financing versus paying cash.
Final Words
Wet drywall ceiling removal cost breaks down to $45-$100 per square foot depending on damage extent, ceiling type, and regional labor rates.
Materials stay cheap, but skilled removal work, proper disposal, and structural safety drive most of your budget.
The real total includes fixing what caused the leak in the first place. That roof patch or plumbing repair isn’t optional.
Act fast. Waiting 24 hours can add $500 to $3,000 in mold remediation you didn’t budget for.
Get three quotes, ask about warranties, and make sure disposal fees are clear before work starts. Your ceiling’s repairable, and now you know what to expect.
FAQ
Can a wet drywall ceiling be saved?
A wet drywall ceiling cannot be saved once it’s been saturated because drywall acts like a sponge and holds moisture, which leads to mold growth, structural weakness, and sagging that makes the material unsafe and unsalvageable.
How much does it cost to remove wet drywall?
Wet drywall removal costs $45 to $100 per square foot on average, with most homeowners paying $50 to $65 per square foot for standard ceiling work that includes labor, disposal fees, and drying time before replacement begins.
Will insurance cover ceiling water damage?
Insurance will cover ceiling water damage if it results from sudden, accidental events like burst pipes or appliance failures, but it won’t cover damage from slow leaks, poor maintenance, or flooding, which require separate flood insurance policies.
What is the average cost to repair a ceiling with water damage?
The average cost to repair a ceiling with water damage ranges from $1,200 to $3,500 for a typical room, including removal of damaged material, new drywall installation, finishing work, and painting, though costs vary based on damage severity and ceiling size.
How long does wet ceiling removal take?
Wet ceiling removal takes 2 to 4 days for drying using industrial equipment, plus 3 to 6 hours for actual removal work on small areas, though moderate to severe damage projects can extend to 3 to 7 days total including all phases.
Do I need a permit to remove a wet ceiling?
You need a permit to remove a wet ceiling when the damage involves structural repairs like joist replacement, exposes electrical work requiring updates, or when your local building codes require permits for ceiling alterations beyond simple patch repairs.
When is professional help required for wet ceiling removal?
Professional help is required for wet ceiling removal when you’re dealing with extensive water damage, suspected mold growth, high or vaulted ceilings, structural sagging, asbestos concerns in pre-1980s homes, or when you need documentation for insurance claims.
Does wet ceiling removal cost include fixing the water source?
Wet ceiling removal cost does not include fixing the water source like roof leaks or plumbing failures, which are separate expenses ranging from $150 to $2,500 depending on the problem, and must be addressed before ceiling work begins.
How much does mold remediation add to ceiling removal costs?
Mold remediation adds $500 to $3,000 or more to ceiling removal costs when growth is present, which is why acting within 24 to 48 hours of water damage is critical to prevent mold development and these extra expenses.
Should I get multiple quotes for wet ceiling removal?
You should get multiple quotes from at least three contractors for wet ceiling removal to compare pricing, verify scope of work, confirm warranty terms, and ensure you’re getting fair market rates rather than inflated emergency service pricing.