
Mold can start growing on wet drywall in as little as 24 hours, but here’s what most homeowners don’t realize: by the time you see visible spots, the problem is already weeks old and much deeper than the surface. The paper backing on drywall is basically mold food, and once it gets wet, spores don’t just sit there waiting. They activate, germinate, and colonize faster than most people expect. The difference between a quick cleanup and tearing out walls often comes down to what you do in the first 48 to 72 hours after water hits that drywall.
Critical Timeline and Early Warning Signs for Wet Drywall
Mold growth follows a predictable timeline once drywall becomes saturated. The clock starts ticking the moment water touches drywall, and honestly, the difference between a simple cleanup and a costly remediation often comes down to how quickly you respond within that first 48 to 72 hours.
Hour-by-Hour and Day-by-Day Mold Development:
-
0-12 Hours (Spore Activation) – Mold spores already present in your home settle on damp drywall surfaces and begin absorbing moisture. No visible changes yet, but the biological process has started. This is your easiest intervention window. Standard drying methods are highly effective.
-
12-24 Hours (Germination Begins) – Spores start germinating as they absorb enough moisture to activate. Microscopic filaments begin forming. The drywall may still look normal, but the paper backing is providing food while trapped moisture fuels growth. Quick action now prevents what comes next.
-
24-48 Hours (Active Growth Starts) – Mold colonies begin establishing themselves, spreading roots deeper into the paper and gypsum. Intervention is still highly effective at this stage, but you’re working against active colonization. Most DIY drying efforts need to move fast or give way to professional equipment.
-
48-72 Hours (Critical Window Closes) – Colonization becomes established throughout the saturated area. Mold penetrates beyond surface paper into the gypsum core. At this point, drying alone often isn’t enough. The material itself may need replacement because colonies are too deeply rooted to remove.
-
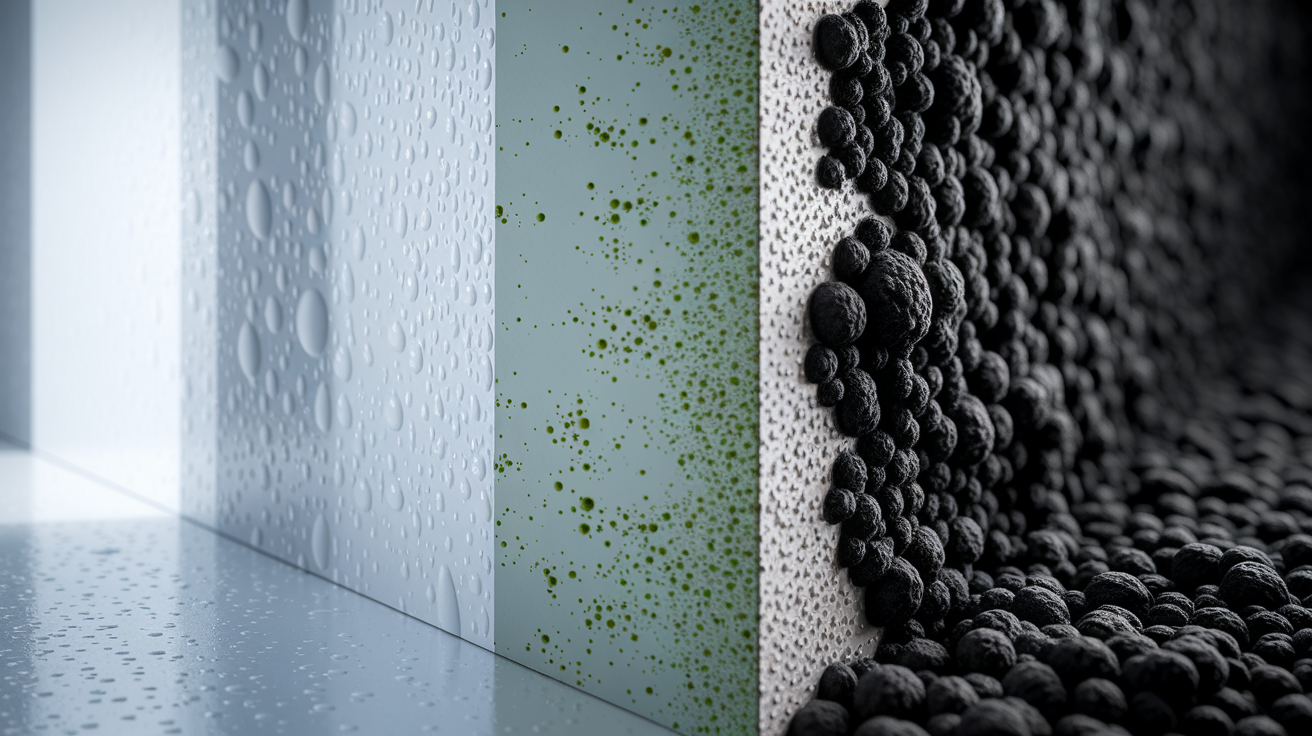
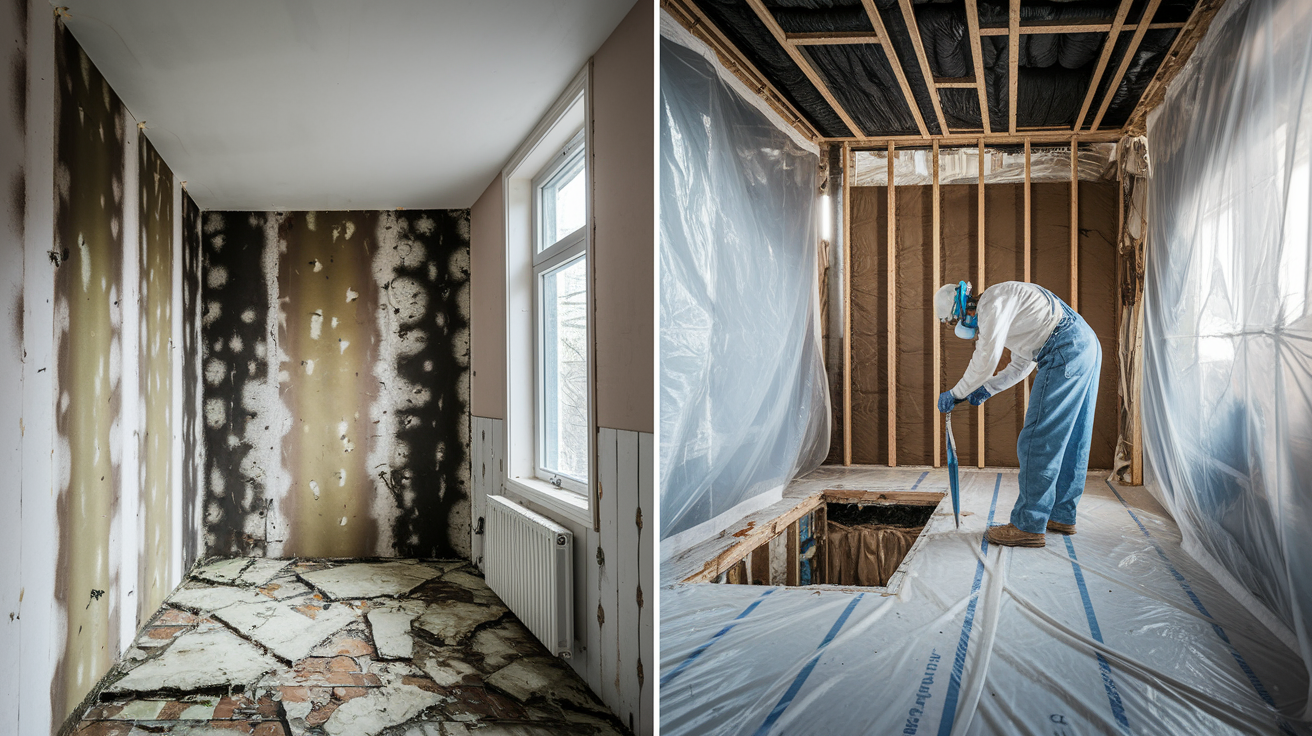
3-21 Days (Visible Growth Appears) – You’ll start seeing discoloration: green, black, or brown spots. Texture changes become obvious with fuzzy or slimy patches. By day 20-21, visible mold is unmistakable, though microscopic colonies existed much earlier. What you see on the surface represents a much larger problem behind it.
Seven specific early warning signs to look for before mold becomes visible: discoloration in unusual patterns (often circular or spreading outward from a water source), musty odors that smell like wet towels or soil, texture changes where the wall feels soft or appears fuzzy, bulging drywall that indicates trapped moisture behind the surface, water stains with dark edges even after the area feels dry, peeling paint or wallpaper as moisture pushes coatings away from the wall, and cracking or crumbling at joints and seams where water has compromised the gypsum’s structural integrity.
The 48 to 72 hour critical intervention window matters because it’s the point of no return for the material itself. Within this timeframe, aggressive drying can still prevent colonization and save the drywall. Once you pass 72 hours, mold has usually penetrated deeply enough that removal and replacement become necessary. The paper backing is fully colonized, the gypsum core is compromised, and trying to clean the surface won’t address the growth inside the wall. What starts as a $300 drying job becomes a $3,000 removal and reconstruction project.
Microscopic colonies and health risks exist long before visible mold appears. People with respiratory issues, allergies, or weakened immune systems can experience symptoms within 1 to 12 days of exposure, well before you see anything on the wall. Waiting for visible confirmation means you’re already weeks into an established infestation. Immediate response isn’t about overreacting. It’s about catching the problem while it’s still controllable.
Common Water Damage Sources Leading to Wet Drywall
Diverse water sources create mold risk in homes. Understanding where wet drywall comes from helps you recognize situations that need immediate attention in your own space.
Common causes that lead to saturated drywall:
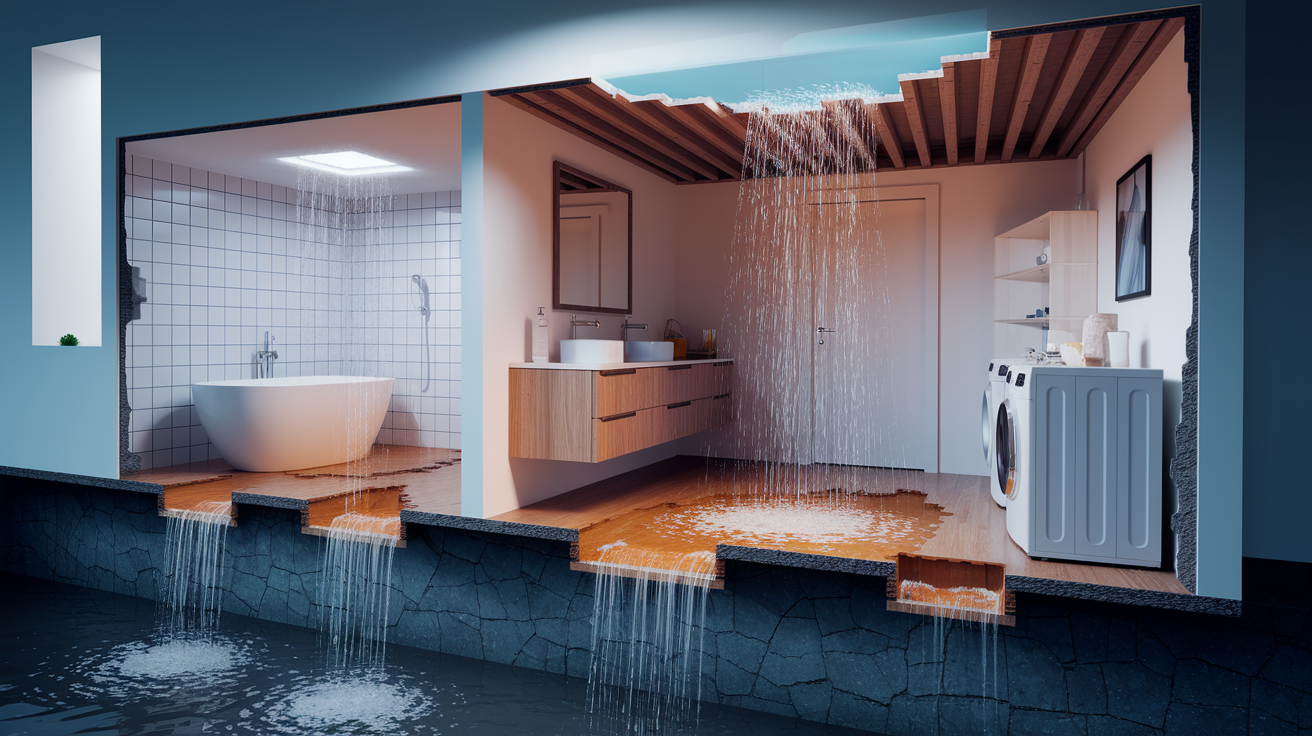
Burst pipes from freezing temperatures or age-related failures. Roof leaks during storms when shingles fail or flashing separates. Plumbing failures including supply line cracks, loose connections, and slow drain leaks. Appliance malfunctions such as water heater ruptures and washing machine hose breaks. Flooding from natural disasters, rapid snowmelt, or sump pump failures. Sewage backups that push contaminated water into living spaces. HVAC condensation issues when drain lines clog or drip pans overflow. Foundation moisture intrusion through cracks or failed waterproofing.
These water sources fall into two broad categories: sudden catastrophic events and slow chronic leaks. Burst pipes and appliance failures dump large volumes of water quickly. You’ll know immediately that you have a problem. The drywall gets soaked fast, but at least you can respond right away. Chronic leaks are more insidious. A slow drip behind a wall or under a sink might take weeks to show visible signs, but the drywall has been wet the entire time. By the time you notice a stain or smell something musty, mold is already established. Even minor persistent moisture triggers the same colonization process as a major flood. It just happens more gradually and often goes undetected until the damage is extensive.
Often overlooked sources cause significant problems because homeowners don’t think of them as “water damage.” Bathroom exhaust fans that aren’t vented to the outside push humid air into wall cavities and attics, condensing on cool surfaces and soaking insulation and drywall from behind. Poor window seals allow rain to seep into the wall assembly around the frame. Condensation in poorly insulated walls happens when warm interior air meets cold exterior sheathing, creating moisture inside the wall cavity where you can’t see it. These situations don’t create standing water or visible leaks, but they saturate drywall just the same.
Seasonal water damage patterns follow predictable cycles. Winter brings frozen pipe risks when temperatures drop suddenly or heating fails in unoccupied homes. Spring snowmelt overwhelms drainage systems and finds entry points through foundations. Summer humidity drives condensation problems in air conditioned spaces where cool surfaces meet warm, moist air. Fall storms test roof integrity before winter. Knowing your home’s seasonal vulnerabilities helps you watch for early signs and respond before saturation reaches the critical 48 hour mark.
Environmental Factors That Speed Up Mold Growth Timeline

Which environmental conditions accelerate or slow mold development on wet drywall depends on temperature, humidity, ventilation, saturation level, and water source type working together to either create ideal growth conditions or limit colonization.
| Factor | Accelerates Growth | Slows Growth |
|---|---|---|
| Temperature | 77°F to 86°F (warm indoor conditions) | Below 60°F or above 95°F (limits spore activity) |
| Humidity | Relative humidity above 60% (moisture stays available) | Below 50% (air pulls moisture from materials) |
| Ventilation | Stagnant air (no moisture removal, no drying) | Active air circulation (continuous moisture evaporation) |
| Saturation Level | Complete saturation (water trapped in material) | Surface moisture only (easier to evaporate) |
| Water Source | Contaminated water with organic matter (adds nutrients) | Clean water only (fewer nutrients for mold) |
Temperature and humidity thresholds create the ideal conditions mold needs to spread at its fastest rate, approximately 1 square inch per day. The 77 to 86°F range is common in most homes year round, which is why mold grows so readily indoors. You’re basically maintaining perfect growing conditions just by keeping your house comfortable. Relative humidity above 60% means there’s enough moisture in the air to keep drywall damp even after visible water is gone. The paper backing stays moist, the gypsum core holds water, and evaporation slows to the point where drying never catches up with colonization. In a humid basement or poorly ventilated bathroom, wet drywall can stay above the critical 12% moisture threshold for days even without additional water exposure.
Stagnant air and complete saturation create the fastest growth conditions because moisture has nowhere to go. When air doesn’t move, evaporation essentially stops. The space around the wet drywall becomes saturated with water vapor, and without fresh, drier air replacing it, the material just sits there soaking. Complete saturation (where water has penetrated through the paper, into the gypsum, and potentially into the insulation and framing behind it) means you’re dealing with a massive volume of trapped moisture that takes days or weeks to dry even under ideal conditions. This is why fans and dehumidifiers matter so much. Moving air pulls moisture away from surfaces and carries it to the dehumidifier where it’s removed from the space entirely. Cross ventilation with outdoor air works only if outside humidity is lower than inside.
Moisture meters measure the water content in materials as a percentage. Readings above 12% require immediate action because that’s the threshold where mold growth accelerates dramatically and material integrity begins to fail. Dry drywall typically reads 5 to 8%. Anything above 12% means the material is holding enough moisture to support active colonization. Above 17%, you’re looking at saturation levels that almost certainly require replacement rather than drying. Professional restoration teams use moisture meters to map the extent of damage, monitor drying progress, and verify that materials have returned to safe moisture levels before reconstruction begins.
Why Drywall Is Particularly Vulnerable to Mold

Drywall construction creates perfect conditions for rapid mold colonization because of how the material is made and what it’s made from. Understanding this vulnerability explains why the 48 hour window is so critical and why other building materials don’t face the same aggressive timeline.
Standard drywall consists of a gypsum core sandwiched between two layers of heavy paper. The gypsum itself is a soft mineral that’s ground, mixed with water and additives, and formed into panels. It’s naturally porous, full of tiny air pockets and spaces that absorb and hold moisture readily. The paper facing is where the real problem starts. That paper backing and any cellulose content in the board provide perfect organic food sources for mold spores. Mold doesn’t actually “eat” the gypsum, but it thrives on the paper, which is why you often see growth concentrated along seams, edges, and the surface rather than uniformly throughout the panel.
The combination of food and moisture retention makes drywall an ideal colonization site. When water touches the surface, the paper absorbs it immediately and the gypsum core wicks moisture inward through capillary action. The paper stays damp far longer than the surface appears wet. You might touch the wall and think it feels dry, but moisture is trapped in the gypsum and the back paper facing. This creates a humid micro environment right where spores need it most. The high absorption rate means even minor water exposure (a small leak, condensation, or a quick bathroom flood that’s mopped up) can saturate the material enough to start colonization. Once water gets into the core, it doesn’t evaporate easily because there’s no air movement inside the wall cavity.
Water trapped in drywall causes physical damage that indicates deeper moisture problems you need to address. Bulging happens when the gypsum absorbs so much water it swells and pushes outward from the studs. Cracking appears at joints and seams as the material expands unevenly. Deterioration shows up as soft spots where you can push your finger into the wall, or crumbling at edges where the gypsum’s structural bonds have broken down. These signs tell you the material has been wet long enough to compromise its integrity, which also means it’s been wet long enough for mold to colonize throughout the affected area.
Compared to other building materials, drywall is among the most vulnerable. Wood studs and framing can dry out if you catch them early and provide ventilation. Concrete and masonry are porous but lack the organic content mold needs, so growth stays surface level and is easier to remove. Tile and vinyl are non porous and resist water entirely. Drywall combines high absorption, organic food sources, and poor drying characteristics in a single material that’s used on nearly every interior wall and ceiling in modern homes. That’s why water damage in a home almost always means dealing with wet drywall and the mold timeline that comes with it.
Immediate Drying Actions Within the Critical 48 Hour Window

Taking immediate action after drywall gets wet is your best opportunity to prevent mold establishment and save the material. The 24 to 48 hour window is critical. Waiting even a single day can mean the difference between successful drying and necessary replacement.
Immediate actions in order of priority:
-
Locate and stop the water source – Find where water is coming from and shut it off. Turn off the supply valve for a leaking pipe, tarp a roof leak, or stop an overflowing appliance. Nothing else matters if water keeps flowing. If you can’t identify the source, leak detection services use specialized equipment to find hidden problems before you start drying efforts.
-
Remove standing water with wet vacuums – Use a wet/dry shop vacuum to extract pooled water from floors and carpets. Work from the outside edges toward the center to prevent spreading. Empty the vacuum frequently. Standing water contains contaminants and needs to go outside immediately.
-
Move wet items away from walls – Pull furniture, boxes, and belongings at least 6 inches away from affected walls. Wet items in contact with drywall prevent air circulation and transfer moisture back into the wall as you’re trying to dry it.
-
Remove baseboards if water soaked – Baseboards trap moisture between themselves and the drywall. If they’re wet, pull them off carefully to expose the bottom edge of the wall and allow air to reach behind them. This also lets you check if water has wicked up into the wall cavity.
-
Position fans for cross ventilation – Set up multiple fans to create airflow across wet surfaces and through the room. Aim fans at walls from 3 to 4 feet away at a slight angle so air moves across the surface rather than straight into it. Create a flow pattern where air enters from one side of the room and exhausts from another.
-
Run dehumidifiers continuously – Start dehumidifiers immediately and run them 24/7. Empty collection buckets every 8 to 12 hours or connect a drain hose if your unit allows it. The goal is to drop room humidity below 50% as quickly as possible.
-
Open windows if outdoor humidity is lower – Check outdoor humidity with a weather app or hygrometer. If outside air is drier than inside, open windows to accelerate moisture removal. Close them if outdoor humidity is higher than 60%.
-
Document damage for insurance – Take photos of water sources, affected areas, wet materials, and moisture readings if you have a meter. Note the date and time. Document your mitigation efforts as you go. Insurance claims often require proof of timely response.
Proper fan placement and air circulation techniques make the difference between effective drying and just moving air around. Place fans so they create a sweeping motion across the entire wet surface rather than concentrating on one spot. Position at least two fans per affected room, one pushing air toward the wet wall, another pulling air away toward a doorway or window. If you have access to high velocity fans or air movers (rental centers stock them), aim them at 45 degree angles toward the wall from different positions to create turbulent airflow that accelerates evaporation. Don’t point fans directly at the wall from 6 inches away. This creates dead zones around the fan where air doesn’t move. Change fan positions every 12 hours to target areas that aren’t drying as quickly.
Dehumidifiers remove moisture that fans evaporate into the air. Running fans without a dehumidifier just circulates humid air and slows drying. Target humidity levels below 60% initially, then push toward 40 to 50% as drying progresses. Refrigerant dehumidifiers work best in temperatures above 65°F and can remove 50 to 70 pints per day in residential units. Empty them regularly or they’ll shut off automatically when full, stopping your progress. Place dehumidifiers in the center of affected rooms, not against walls, so they can pull air from all directions. Close doors to concentrate drying efforts in smaller spaces rather than trying to dehumidify your entire home at once.
Monitor progress by checking walls daily. They should feel cooler and drier to the touch after 24 hours of aggressive drying. Water stains should stop spreading. Musty odors should not develop. If you’re not seeing improvement after 48 hours of continuous fans and dehumidification, or if the affected area is larger than 10 square feet, DIY efforts aren’t sufficient. Water damage repair services bring industrial equipment that removes moisture in 3 to 5 days rather than the 1 to 2 weeks DIY methods require, and that time difference often determines whether your drywall survives or requires replacement.
Testing and Detection Methods for Hidden Moisture

Surface dryness can be deceptive because the outer layer of drywall may feel dry while moisture remains trapped in the gypsum core, behind the paper backing, or in wall cavities where air never reaches it. Verification is essential before you assume the problem is solved.
Detection tools and methods for confirming complete drying:
Pin type moisture meters use two metal probes that penetrate the surface to measure electrical resistance, which changes based on moisture content. They’re accurate for measuring moisture in drywall, wood, and other porous materials. Readings above 12% indicate action is needed. Ideal for spot checking specific areas where you suspect moisture remains.
Pinless moisture meters use electromagnetic sensors that detect moisture up to ¾ inch deep without penetrating the surface. They’re faster for scanning large areas and won’t damage finished surfaces, but they’re less precise than pin meters. Good for identifying general problem zones before using a pin meter for exact readings.
Infrared cameras detect temperature differences that indicate moisture presence. Wet areas appear cooler than dry surroundings because evaporation creates a cooling effect. Infrared scanning reveals moisture patterns behind walls, in cavities, and under flooring without removing materials. Professional restoration contractors use these to map hidden moisture that visual inspection misses.
Hygrometers for ambient humidity measure relative humidity in the air, not in materials. They help you understand if your dehumidification efforts are working and whether the environment still supports mold growth. Target readings below 60%, ideally 40 to 50% during drying.
Professional mold testing through lab analysis of air samples or surface swabs identifies mold species and spore concentrations. Testing is most useful after drying is complete to verify you’ve eliminated the moisture that supports growth. Some insurance policies require documented testing before and after remediation.
Moisture meter readings provide objective data instead of guessing based on how something feels. The 12% moisture threshold is critical because it represents the point where mold growth accelerates dramatically and material integrity begins to fail. Dry drywall reads 5 to 8% under normal conditions. Readings of 10 to 12% indicate elevated moisture that needs monitoring. Above 12%, you’re in the danger zone for active mold growth. Above 17%, the material is considered saturated and usually requires replacement regardless of drying efforts. When using a pin meter, take multiple readings at different heights and locations on each affected wall. Moisture often concentrates at the bottom where water pooled, or at the top where it wicked upward before evaporating.
Infrared scanning detects temperature differentials that indicate hidden moisture in wall cavities and behind surfaces where you can’t reach with meters. Moisture evaporates continuously from wet materials, creating a cooling effect that shows up as darker (cooler) areas on thermal images. This technique reveals moisture patterns you wouldn’t find otherwise: water that’s traveled horizontally through wall cavities from a leak on the other side of the room, saturation in insulation behind seemingly dry drywall, and moisture in ceiling cavities from roof leaks that haven’t yet stained through. Professional inspectors scan entire rooms systematically, marking areas that need further investigation with pin meters or exploratory holes to confirm what the thermal pattern suggests. This prevents unnecessary removal of dry materials while ensuring wet areas aren’t overlooked.
Post drying verification testing confirms complete moisture removal before you repair, repaint, or consider the problem resolved. Wait 72 hours after turning off drying equipment, then test moisture levels again. Materials sometimes reabsorb moisture from humid air or from adjacent wet areas that are drying more slowly. A second round of testing catches these situations before you seal the wall and trap remaining moisture. If readings are back in the 5 to 8% range and holding steady for 3 days, the material is safe to repair. Anything above 10% means drying isn’t complete and mold risk remains.
When to Remove and Replace Wet Drywall
The 48 hour threshold is a decision point where you evaluate whether drying efforts are working or whether the material has been compromised beyond salvage. Some situations require immediate replacement regardless of timing.
| Scenario | Salvageable | Must Replace |
|---|---|---|
| Wet less than 48 hours with clean water | Yes, if aggressive drying brings moisture below 12% and no visible mold | No, proceed with drying and monitoring |
| Wet more than 48 hours | Unlikely. Mold colonization has likely begun even if not visible | Yes, removal recommended to prevent health risks |
| Visible mold present | No. Surface cleaning doesn’t remove colonies inside material | Yes, affected sections plus 12 inches beyond visible growth |
| Contaminated water source (sewage, floodwater) | No. Health hazard cannot be mitigated by drying | Yes, immediate removal required for any contact |
| Physical damage (bulging, cracking, crumbling) | No. Structural integrity is compromised | Yes, material has failed and won’t hold fasteners or finish |
| Odor persists after drying | No. Musty smell indicates active mold growth inside material | Yes, hidden colonization requires removal to eliminate |
Contaminated water categories determine replacement requirements regardless of how quickly you respond. Clean water comes from supply lines, rainwater, or condensation. It contains no sewage or chemical contamination. Gray water includes discharge from washing machines, dishwashers, or sinks. It may contain detergents, food particles, or biological matter but not raw sewage. Black water comes from sewage backups, toilet overflows, or flooding that’s mixed with soil and contaminants. Clean water exposure under 48 hours can often be dried and saved. Gray water requires more aggressive antimicrobial treatment and faster drying, but material can sometimes be salvaged if response is immediate. Black water contamination requires complete removal of any material it contacted. No exceptions. The health risks from bacteria, parasites, and pathogens in sewage affected drywall cannot be eliminated by drying or surface cleaning. The porous nature of drywall means contaminants penetrate throughout the material and can’t be fully removed.
Physical deterioration signs indicate compromised structural integrity that makes the material unsafe to leave in place. Bulging shows the gypsum core has absorbed so much water it’s swelling and pushing away from the studs. The paper facing can’t hold it flat anymore. Cracking appears when saturated gypsum expands and contracts unevenly, breaking bonds within the material. Crumbling means the gypsum has essentially dissolved in areas where water was concentrated. If you can push your finger into the wall or the surface feels spongy, the material has failed. None of these conditions improve with drying. The drywall might eventually dry out in terms of moisture content, but the physical damage is permanent. It won’t hold screws, won’t accept paint properly, and poses a collapse risk if the damage is extensive enough.
Proper removal techniques prevent spore spread during demolition, which is critical if mold is already present. Cut drywall removal area in clean rectangles from stud to stud to make patching easier. Don’t just tear out damaged sections in irregular shapes. Remove material at least 12 inches beyond the highest point of visible water staining or suspected moisture. Water wicks upward and outward through drywall beyond where stains appear, so cutting at the stain line leaves wet material in place. Mist the surface lightly with water from a spray bottle before cutting to reduce dust and airborne spores. Use a utility knife to score cut lines, then cut through with a drywall saw. Let cut pieces fold inward rather than pulling them away from the wall to minimize debris. Bag removed material immediately in heavy contractor bags and seal them before carrying through the house. Remove insulation from wall cavities if it’s wet or shows any signs of mold. Insulation can’t be salvaged once it’s contaminated.
DIY Prevention Strategies After Water Exposure
Taking immediate action with practical prevention steps reduces mold risk during the critical window after drywall gets wet, even if you can’t bring in professional equipment right away.
DIY prevention actions you can implement immediately:
-
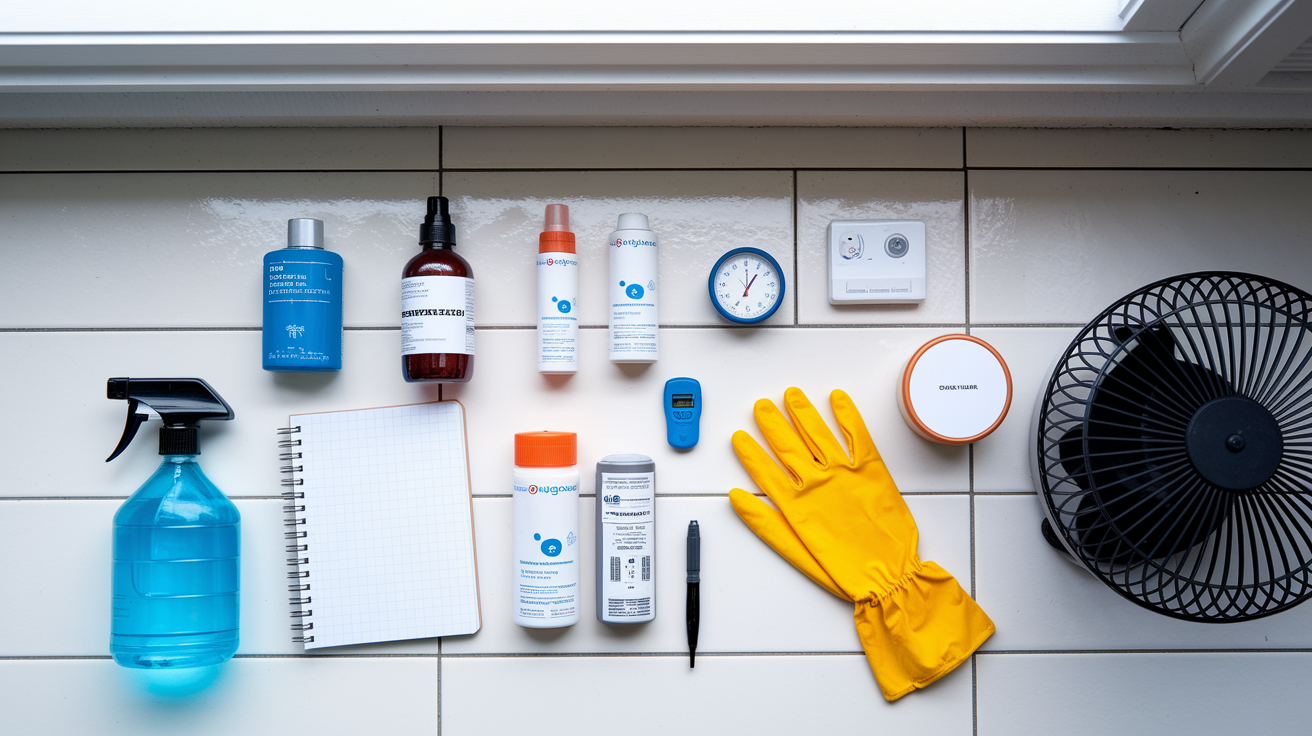
Apply antimicrobial spray to affected areas – Use diluted bleach solution (1 cup bleach per gallon of water) or commercial mold prevention spray on surface areas where water contacted drywall. This slows spore germination temporarily. Spray lightly. Don’t soak the material further. Wear gloves and ensure ventilation. This buys time but doesn’t replace proper drying.
-
Maintain indoor humidity below 60% – Run dehumidifiers continuously in affected rooms. Monitor humidity with a simple hygrometer from any hardware store. Close doors to concentrate dehumidification. If you can get humidity to 50% or lower, you’re creating conditions where mold growth slows dramatically.
-
Ensure continuous air circulation for 72+ hours – Keep fans running without interruption for at least three days. Change positions every 12 hours to target areas that aren’t drying as fast. Don’t turn equipment off overnight. Mold growth doesn’t pause when you’re sleeping.
-
Inspect and address minor leaks immediately – Check under sinks, around toilets, behind appliances, and in basements weekly if you’re in a home prone to moisture problems. Small drips that seem insignificant can saturate drywall over days or weeks. Fix them before they become mold problems.
-
Improve bathroom and kitchen ventilation – Run exhaust fans during and for 30 minutes after showers. Vent range hoods to the outside, not into the attic. Leave bathroom doors open after use to allow humid air to disperse. These spaces generate moisture daily and need active ventilation to prevent long term drywall saturation.
-
Conduct weekly moisture checks in vulnerable areas – Use a pin meter to test basements, exterior walls, areas under sinks, and anywhere you’ve had previous water issues. Catch problems early when moisture readings start climbing before they reach critical levels.
Antimicrobial treatments like diluted bleach solution or commercial mold preventatives slow spore germination and buy additional time when you can’t get drying equipment in place immediately, but they don’t replace proper moisture removal. Bleach kills surface mold on non porous materials but doesn’t penetrate into drywall to kill colonies inside. Mold prevention sprays create a temporary chemical barrier that inhibits germination for 24 to 48 hours, giving you breathing room to arrange equipment rental or professional help. Neither treatment addresses the underlying problem: moisture in the material. If the drywall stays wet, mold will eventually establish regardless of surface treatments. Think of antimicrobials as a way to extend your 48 hour window by maybe 12 to 24 hours, not as a solution by themselves.
Humidity control targets prevent mold establishment even when materials are still drying. If you can get room humidity below 60% (ideally 50% or lower), mold growth slows to the point where you gain days instead of hours to complete drying. The air itself becomes a drying agent, pulling moisture from materials continuously. Dehumidifiers work by condensing water vapor out of the air, lowering the humidity percentage and the total moisture load in the space. Empty collection buckets frequently so the unit doesn’t shut off. If you’re running multiple dehumidifiers, stagger their positions throughout affected areas rather than clustering them in one room. Moisture is distributed throughout your home, not just where the visible water was.
Containment during drying prevents cross contamination by stopping moist air and potential airborne spores from spreading to unaffected areas. Hang plastic sheeting in doorways of affected rooms, sealing edges with painter’s tape. This creates a barrier that keeps humid air and any disturbed spores contained while you dry and remove materials. Don’t run HVAC in affected areas. Turn off vents or close them to prevent your heating and cooling system from distributing contaminated air throughout the house. If you must move through the contained area, minimize door openings and keep the barrier sealed. Containment is especially important if you’re removing drywall or insulation that may already have microscopic mold colonies. Any disturbance releases spores into the air, and you want those spores contained, not circulated.
Monitor progress with daily visual inspections during the drying period. Look for changes in water stain patterns. They should stop spreading and may fade slightly as moisture evaporates. Feel the walls at different heights. They should feel progressively drier and cooler each day as moisture content drops. Sniff for musty odors. They should not develop if drying is outpacing mold growth. Check moisture meter readings every 24 hours and track the trend. Readings should drop steadily. If readings plateau above 12% or start climbing again, your drying efforts aren’t adequate and you need more equipment or professional help.
Professional Remediation: When to Call Experts and What to Expect
The EPA’s 10 square foot guideline and the 48 hour wetness threshold are clear decision points where professional intervention becomes necessary rather than optional. Understanding what professionals provide helps you recognize when DIY efforts aren’t sufficient and what value expert remediation delivers.
Situations requiring professional remediation services:
Mold coverage exceeds 10 square feet. The EPA recommends professional help when mold covers an area larger than roughly 3 feet by 3 feet. This threshold accounts for health risks from spore exposure during removal and the likelihood that visible mold indicates hidden colonization in larger areas.
Drywall wet for more than 48 hours. Once material has been saturated beyond the critical window, colonization has likely begun even if mold isn’t visible yet. Professional assessment determines whether aggressive drying can still save the material or if removal is necessary.
Contaminated water source (sewage). Any contact with black water requires professional remediation with proper protective equipment and disposal procedures. This isn’t a DIY situation under any circumstances.
Persistent musty odors after DIY drying. If you’ve run fans and dehumidifiers for 3 to 5 days and still smell dampness or mildew, moisture is trapped somewhere you can’t reach or mold has already established. Professionals use moisture mapping to find hidden wet areas and confirm complete drying.
Visible mold growth already present. Surface cleaning doesn’t remove mold that’s penetrated into materials. Professional remediation includes containment, proper removal, and verification testing to ensure complete elimination.
Vulnerable occupants in home. Infants, elderly residents, immunocompromised individuals, or anyone with respiratory conditions face elevated health risks from mold exposure. Professional intervention reduces exposure during remediation and ensures complete removal. If someone develops symptoms within 1 to 12 days of water damage, immediate professional assessment is essential.
Structural damage visible. Bulging, sagging ceilings, or compromised framing requires professional evaluation to determine the extent of damage and ensure safe repairs.
Health symptoms appearing. Respiratory irritation, persistent coughing, skin rashes, or worsening allergies within days of water damage indicate mold exposure is already occurring. Professional remediation addresses both the source and the contamination to prevent ongoing exposure.
Professional drying techniques use industrial grade equipment that achieves complete moisture removal in 3 to 5 days versus the 1 to 2 weeks DIY methods typically require. Water damage repair services deploy truck mounted or trailer mounted dehumidifiers that remove 150 to 300 pints of moisture per day, three to six times what residential units handle. High velocity air movers create airflow patterns that reach into wall cavities and behind materials where household fans can’t. Moisture extraction systems pull water directly from saturated materials using vacuum pressure rather than waiting for evaporation. Professional restoration teams use moisture meters to map the full extent of water damage, identifying hidden wet areas in cavities, under flooring, and in adjacent rooms where water migrated. They document moisture readings at the start and throughout the drying process, providing objective proof that materials have returned to safe levels below 12%. This documentation supports insurance claims and confirms the job is complete rather than guessing based on how things feel.
Professional remediation procedures when mold is already present involve containment with negative air pressure systems that prevent spores from spreading during removal. Plastic barriers seal off affected areas while HEPA filtration units pull air from the work zone and exhaust it outside after removing 99.97% of particles including mold spores. Workers use proper protective equipment: respirators, disposable coveralls, gloves, and eye protection to prevent exposure during demolition. Complete removal protocols address all affected materials: drywall, insulation, carpeting, and any porous materials showing contamination. Removed materials are bagged and sealed in the work zone before transport to prevent spore release. HEPA vacuuming of all surfaces in the remediation area captures remaining spores before reconstruction begins. This level of containment and protection isn’t practical for homeowners and isn’t safe without proper training and equipment.
Professional certifications to look for include IICRC (Institute of Inspection Cleaning and Restoration Certification) credentials in water damage restoration and mold remediation. IICRC certified technicians have completed industry training in proper procedures, safety protocols, and standards for determining when materials can be saved versus when removal is required.
Final Words
Wet drywall starts developing mold within 12 to 24 hours, and you’ve got a 48 to 72-hour window to dry it completely before colonies take hold.
After that, you’re looking at removal and replacement instead of simple drying.
The wet drywall mold timeline is predictable, and that works in your favor if you act fast. Get the water stopped, get air moving, and get moisture levels checked with a meter.
If you’re past the critical window or see visible growth, bring in professionals who can handle it safely and completely.
The difference between a quick fix and a gut job comes down to how fast you respond.
FAQ
How quickly can mold grow on wet drywall?
Mold can grow on wet drywall within 24 to 48 hours after initial water exposure. Spores begin germinating and attaching to damp drywall surfaces in as little as 12 hours, with active colonization establishing between 24 and 48 hours if moisture remains present.
What are the 10 warning signs of mold toxicity?
The 10 warning signs of mold toxicity include respiratory issues (coughing, wheezing), persistent headaches, chronic fatigue, skin irritation, sinus congestion, eye irritation, difficulty concentrating, memory problems, joint pain, and digestive issues. These symptoms often appear within 1 to 12 days of exposure, particularly in vulnerable individuals.
Will drywall always mold if it gets wet?
Drywall will not always mold if it gets wet, but it requires drying within 48 hours to prevent mold infestation. Complete drying within this critical window, combined with proper ventilation and humidity control below 60%, can prevent mold establishment on water-exposed drywall.
How fast does mold start growing after water damage?
Mold starts growing after water damage within 12 to 24 hours when spores germinate on damp surfaces. Active growth and colonization establish between 24 and 48 hours, with visible mold appearing on surfaces between 3 and 21 days depending on environmental conditions.
Can you save drywall that got wet?
You can save drywall that got wet if you dry it completely within 48 hours using fans, dehumidifiers, and proper ventilation. Drywall exposed to clean water for less than 48 hours is typically salvageable, but contaminated water sources or prolonged wetness require complete replacement.
What moisture level requires drywall replacement?
A moisture level above 12% in drywall requires immediate action and potential replacement. Readings consistently above this threshold after 48 hours of drying efforts indicate that moisture has penetrated too deeply for the material to be salvaged without mold risk.
Does bleach prevent mold on wet drywall?
Bleach can temporarily slow mold development on wet drywall and buy additional time for proper drying, but it does not prevent mold establishment. Antimicrobial treatments are supplementary measures that must accompany complete moisture removal within the 48-hour critical window.
When should I call a professional for wet drywall?
You should call a professional for wet drywall when mold coverage exceeds 10 square feet, drywall stays wet beyond 48 hours, water comes from contaminated sources like sewage, or visible mold growth already appears. Vulnerable occupants or persistent odors also warrant professional assessment.
How long does professional drywall drying take?
Professional drywall drying takes 3 to 5 days using industrial dehumidifiers, air movers, and moisture extraction systems. Professionals achieve complete drying significantly faster than DIY methods, which can take weeks, reducing the window for mold establishment and structural damage.
What temperature accelerates mold growth on drywall?
Temperatures between 77°F and 86°F accelerate mold growth on drywall when combined with humidity above 60% and poor ventilation. These optimal conditions allow mold to spread at approximately 1 square inch per day in favorable environments with adequate moisture.