
You probably think leak detection means cutting holes in walls until someone finds wet drywall. That’s the old way. Modern leak detection uses technology to pinpoint the exact spot where water is escaping before anyone damages your property. Professionals combine acoustic listening, thermal cameras, pressure testing, and video inspection to locate hidden leaks behind walls, under slabs, and beneath floors without guesswork. The right method depends on where your plumbing sits, what type of leak you’re dealing with, and what your building materials are blocking.
Warning Signs of Hidden Leaks in Your Property

Water damage causes twice the property damage that break-ins and fires do combined. Catching leaks early protects your home from one of the most common and expensive threats it faces. Most leaks start small and stay hidden behind walls, under floors, or beneath slabs for weeks or months before you notice anything wrong. By the time you see a stain or feel a soft spot, the damage has usually spread far beyond the actual leak location because gravity carries water away from where it’s escaping. Understanding water damage prevention requires recognizing the early signals that something’s not right with your plumbing system.
Your water bills and meter readings can reveal hidden leaks before any visible damage appears. An unexplained increase in your monthly water bill, especially when your usage habits haven’t changed, often means water is escaping somewhere in your system. You can test this yourself by turning off every faucet, appliance, and fixture in your home, then checking your water meter. If the meter continues moving with everything closed, water is flowing somewhere it shouldn’t be. Track your consumption patterns over a few billing cycles. A sudden spike or a gradual upward trend both point toward hidden leaks that need attention.
Visible signs show up on surfaces throughout your home once leaks have been active long enough to saturate building materials. Look for brown or yellow water stains on ceilings and walls, particularly beneath bathrooms or near plumbing fixtures. Wet spots on floors, warped or buckling flooring, peeling paint or wallpaper, and sagging or bowing drywall all indicate water where it doesn’t belong. These stains and soft spots might seem minor at first, but they represent moisture that’s been accumulating for a while.
Secondary indicators often appear before obvious water damage becomes visible. Mold or mildew growing on walls that aren’t in shower areas signals persistent moisture problems. A musty or sour smell, especially in areas near plumbing, means water has been sitting in wall cavities or under flooring long enough to support microbial growth. You might hear the sound of running water when all fixtures are turned off. Cracks in your foundation, separated joints where walls meet floors, or unexplained increases in humidity levels inside your home can all trace back to hidden leaks.
The location where you notice damage often sits far from where water is actually escaping. Water travels along framing, through insulation, and across horizontal surfaces before it finally shows up as a stain or puddle somewhere else. That ceiling spot in your living room might be coming from a leak in the bathroom above, or from a roof penetration ten feet away from where the drip appears.
Primary warning signs that indicate hidden leaks:
- Unexplained increases in water bills over multiple billing cycles
- Water meter continues moving with all fixtures and appliances turned off
- Brown, yellow, or rust colored stains on ceilings or walls
- Discoloration on walls, especially near baseboards or where walls meet floors
- Soft, warped, or buckling flooring that feels spongy underfoot
- Mold or mildew growth on walls outside of normal moisture areas like showers
- Persistent musty or damp odors in areas near plumbing lines
- Sound of running or dripping water when all fixtures are closed
Overview of Professional Leak Detection Technologies
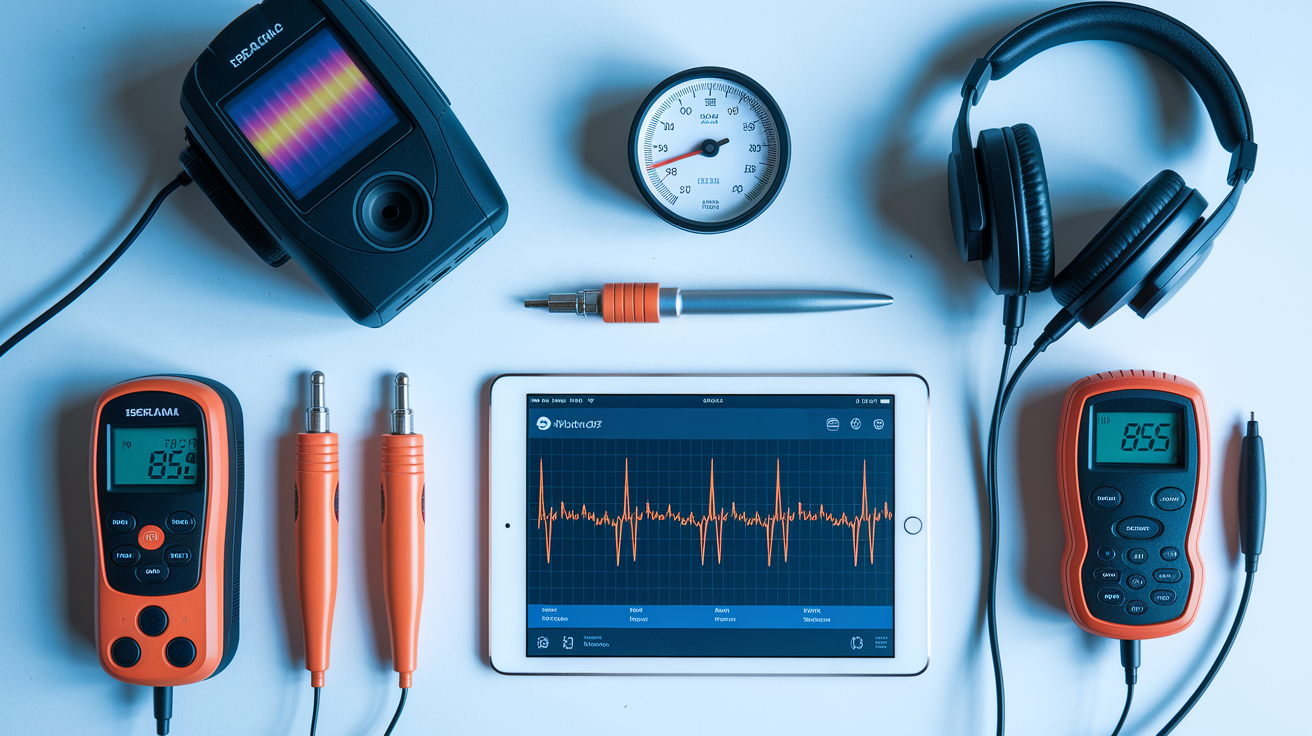
Professional leak detection combines multiple technologies to locate hidden leaks without damaging your property through exploratory cutting or digging. Technicians use acoustic listening equipment, pressure analysis, thermal scanning, tracer introduction, video inspection, and smart monitoring systems to pinpoint where water is escaping. Each method targets different leak types and locations. Most detection projects use two or three methods together to confirm findings before anyone cuts into walls or breaks through concrete. The goal is accuracy. Finding the exact leak location the first time eliminates unnecessary property damage and keeps repair costs down.
Acoustic detection uses electronic equipment to amplify the sounds that water makes when it escapes from pressurized pipes. Even pinhole leaks create high frequency sounds as water rushes out under pressure, though these frequencies often sit beyond what human ears can detect and get blocked by drywall, insulation, and soil. Professional acoustic devices use sensitive microphones and digital amplifiers to pick up these sounds, then filter out ambient noise from traffic, footsteps, and other sources. Technicians move the listening equipment along pipe routes, listening for the characteristic signature of escaping water.
Pressure testing isolates sections of your plumbing system and pressurizes them to specific levels, then monitors for pressure drops that indicate water is escaping somewhere in that isolated section. Hydrostatic tests fill lines with water up to a specific level, like slab height, and observe whether the water level holds steady or recedes over a 20 minute period. A pressure drop or falling water level confirms a leak exists in that section. Technicians then use additional methods to pinpoint the exact location within the failing section.
Thermal imaging uses infrared cameras to detect temperature variations caused by moisture accumulation and evaporative cooling. Wet building materials and active leaks create temperature differences that show up as distinct patterns on thermal camera displays. Water evaporation pulls heat from surrounding surfaces, making wet areas appear cooler than dry ones. This temperature signature reveals hidden moisture behind walls, under floors, and in ceiling cavities without any invasive investigation.
Tracer methods introduce detectable substances into plumbing systems, then track where these substances escape. Non-toxic gases like helium or hydrogen are injected into isolated pipe sections, and sensitive detectors scan surfaces to identify where gas emerges at leak points. Fluorescent or colored dyes work similarly in drain and sewer systems, revealing leak locations when UV lights or visual inspection show where dye is escaping. Theatrical smoke under slight pressure reveals cracks and failed connections in sewer vents and drain lines.
Video inspection sends waterproof cameras through the interior of pipes to provide direct visual confirmation of pipe condition and leak locations. Cameras enter through existing access points like cleanouts, toilet drains, and roof vents, traveling through pipe interiors to record what’s happening inside. Technicians can see cracks, corrosion, joint separation, and active water infiltration on camera displays, providing visual evidence before recommending repairs.
Smart sensors continuously monitor your plumbing system, tracking flow patterns, pressure fluctuations, and usage data to detect abnormalities that suggest leaks. These systems compare current behavior against historical patterns and alert you to continuous flow when fixtures are closed, unusual pressure drops, or consumption spikes that indicate hidden problems before visible damage occurs.
| Detection Method | How It Works | Best Application |
|---|---|---|
| Acoustic/Ultrasonic | Amplifies high frequency sounds created by pressurized water escaping through leak points | Pressurized water lines, slab leaks, underground pipes |
| Pressure Testing | Isolates system sections and monitors for pressure drops indicating escaping water | Confirming leak presence, isolating problem sections, sewer lines |
| Thermal Imaging | Detects temperature variations from moisture and evaporative cooling | Wall cavities, ceiling leaks, radiant floor heating, roof leaks |
| Tracer Gas/Dye | Introduces detectable substances that escape at leak points | Systems difficult to access, pool leaks, sewer line cracks |
| Video Inspection | Cameras travel through pipe interiors providing visual assessment | Drain lines, sewer systems, identifying damage type and severity |
| Smart Monitoring | Continuous sensors track flow, pressure, and usage patterns for anomalies | Whole home protection, early warning, preventing damage |
Acoustic and Ultrasonic Leak Detection Technology

Acoustic detection remains the most common method professionals use to locate hidden leaks in pressurized water lines. The technology relies on a basic principle: water escaping under pressure creates sound, and electronic equipment can amplify these sounds to levels technicians can hear and analyze through building materials and soil.
Water moving through your pipes creates audible sounds you’ve probably noticed when someone turns on a faucet upstairs or uses an outdoor hose bib through an exterior wall. Leaks create similar sounds, but usually much quieter. Even pinhole sized leaks generate sound as pressurized water rushes out, though these frequencies often sit beyond human hearing range and get blocked by drywall, insulation, concrete, and dirt. Professional acoustic equipment bridges this gap using three key components: highly sensitive microphones that detect faint vibrations, digital amplifiers that boost these signals to audible levels, and filters that eliminate ambient sounds like footsteps, passing vehicles, and people talking. The result is equipment that can hear water escaping through a leak point from several feet away, through multiple layers of building materials.
Technicians move listening devices along suspected pipe routes, paying attention to changes in sound intensity and frequency. The equipment often provides visual feedback through bar graphs and numeric volume displays, helping technicians identify where sounds strengthen as they move closer to leak locations. Digital leak detectors provide readouts that change as the microphone gets nearer or farther from the source, creating a sound map that guides the search.
The correlation technique takes acoustic detection further by using multiple sensors placed at different points along a pipe section. These sensors detect the same leak sound, but at slightly different times because sound waves travel at a known speed through pipe materials. Sophisticated software analyzes the timing difference between sensors, calculating the precise distance between each sensor and the leak location. This triangulation method produces highly accurate results, often pinpointing leaks within inches. “We placed sensors 30 feet apart on the main water line and the correlation software calculated the leak at 12.4 feet from the first sensor. When we opened up that spot, the crack was exactly where the system said it would be.”
Multiple factors affect how well acoustic detection works and how accurately it can locate leaks. Pipe material matters because metal pipes transmit sound differently than PVC or PEX. Depth underground affects how much sound reaches the surface. The surface material above the leak, whether concrete, asphalt, or dirt, either dampens or conducts sound to different degrees. Leak size influences volume and frequency patterns. Pooled water around a leak sometimes muffles sounds or creates confusing echoes. Underground voids, other utility lines nearby, and environmental conditions all influence what technicians hear through their equipment.
Step by step acoustic leak detection process:
- Technician conducts preliminary visual inspection and reviews symptoms
- Suspected pipe section is identified based on visible signs and system layout
- Listening device is placed at multiple points along the suspected line
- Technician moves equipment systematically, noting changes in sound intensity
- Highest intensity location is marked as the probable leak zone
- Correlation sensors are placed if available for triangulation confirmation
- Exact leak location is marked on the surface for access and repair
- Pressure may be adjusted in the line to enhance leak sound for final verification
Pressure Testing and Flow Rate Monitoring for Leak Detection

Pressure testing reveals leaks by monitoring how plumbing systems behave when isolated and pressurized. The approach works because leaking water lowers system pressure over time, and the rate of pressure loss indicates whether a leak exists and roughly how significant it is. Technicians isolate the section they want to test, pressurize it to a specific level, and watch gauges for pressure drops. If pressure holds steady, the system is sound in that section. If pressure falls, water is escaping somewhere.
The hydrostatic pressure test is commonly used for drain and sewer lines, particularly in slab foundation homes where leaks are expensive to access and repair. Technicians insert inflatable test balls into the main sewer cleanout, positioning them to block flow at specific points in the line. Once the test balls are inflated to seal the pipe, the system is filled with water up to slab level. For the next 20 minutes or so, technicians observe the water level. If the system can’t reach slab level or if the water level drops during observation, it confirms a leak exists somewhere in the isolated section. The test doesn’t pinpoint the exact location, but it proves a problem exists and narrows down which section needs further investigation with cameras or acoustic equipment.
Flow rate analysis tracks water consumption patterns to detect continuous flow that indicates hidden leaks. Smart water meters monitor usage in real time, recording every gallon that passes through your main line. When all fixtures are closed and no appliances are running, flow should stop completely. If the meter shows continuous flow during these periods, even small amounts like a gallon every few minutes, something is leaking. This monitoring catches slow leaks that might not create audible sounds or visible damage for months. “Your meter shows consistent flow of about two gallons per hour when everything’s turned off. That’s enough to waste over 1,400 gallons per month, but not enough to create an obvious puddle anywhere. We’ll need to isolate sections to find where it’s going.”
Static leak isolation combines the hydrostatic pressure test with video camera inspection to pinpoint leaks within the tested section. After the pressure test confirms a leak exists, technicians use camera inspection to visually examine the entire isolated section. They position inflatable test balls at different points to divide the line into smaller segments, testing each segment until they isolate the leak to a specific area. The camera then identifies the exact failure point visually, showing whether it’s a crack, joint separation, or corrosion hole.
| Detection Method | How It Works | Typical Application |
|---|---|---|
| Hydrostatic Testing | Isolates line section with test balls, fills with water, observes for level drop | Slab foundation sewer lines, confirming drain leaks |
| Pressure Monitoring | Pressurizes isolated water line sections and monitors gauge for pressure loss | Supply lines, confirming leak presence, testing repairs |
| Flow Analysis | Tracks continuous water movement through meter when fixtures are closed | Early leak detection, identifying total system water loss |
| Static Isolation | Combines pressure testing with camera inspection using test balls to segment lines | Pinpointing exact leak locations in drain and sewer systems |
Thermal Imaging and Infrared Leak Detection Methods

Infrared cameras detect leaks by identifying temperature variations that moisture creates behind walls, under floors, and in ceiling spaces. Wet areas register cooler than surrounding dry surfaces because water evaporation pulls heat from building materials. This evaporative cooling creates a thermal signature that shows up clearly on infrared camera displays as darker or color coded zones, depending on how the camera is configured.
Thermal imaging works without any physical contact with surfaces and without drilling, cutting, or opening walls for initial investigation. Technicians scan wall surfaces, ceilings, and floors with handheld infrared cameras, watching the display for temperature anomalies that indicate moisture presence. The wet area appears as a distinct shape on the screen, often spreading beyond the actual leak point because moisture migrates through insulation and across building materials before it evaporates. The coolest spot on the thermal scan usually sits closest to where water is entering the building envelope, helping narrow the search to specific wall cavities or ceiling areas.
Moisture sensors work alongside thermal imaging to confirm that temperature differences actually represent water rather than other causes like drafts, insulation gaps, or thermal bridging through framing. These sensors measure humidity levels in the air and moisture content in building materials like drywall, wood, and concrete. Technicians press sensor probes against surfaces that showed cool spots on the thermal scan. High moisture readings confirm water presence and justify further investigation at that location. Some moisture meters use pins that penetrate surface materials slightly to measure electrical resistance, which changes based on moisture content. Others use non-invasive electromagnetic sensors that detect moisture without breaking surface finish.
Modern thermal and moisture detection provides accurate leak location information without any property damage during the detection phase. You get clear answers about where problems exist before anyone cuts into walls, drills through slabs, or excavates landscaping. That non-invasive nature saves money and stress. If the scan doesn’t show problems, you haven’t opened up walls for nothing. When it does show moisture, you know exactly which section needs access.
Scenarios where thermal imaging works especially well:
- Roof leaks tracking moisture down through insulation and ceiling materials
- Radiant floor heating system leaks beneath tile or hardwood
- Wall cavity leaks from supply lines or condensation issues
- Foundation moisture infiltration and below grade waterproofing failures
- HVAC condensation drainage problems and duct leakage
Tracer Gas and Dye Testing Detection Techniques

Tracer methods work by introducing detectable substances into plumbing systems, then tracking where these substances escape to reveal leak locations. These techniques excel in situations where acoustic equipment faces limitations from depth, pipe material, or ambient noise conditions.
Tracer gas detection uses non-toxic gases, typically helium or hydrogen in controlled concentrations, that are lighter than air and easy to detect with specialized sensors. Technicians isolate the pipe section they want to test, then inject the tracer gas under slight pressure. The gas travels through the pipe until it reaches the leak point, where it escapes into surrounding soil or building cavities. On the surface, technicians use gas detectors that can sense extremely small concentrations of the tracer gas. They systematically scan the ground, walls, or floors above the suspected leak area. When the detector registers the tracer gas, it confirms that location sits directly above or adjacent to where the pipe is leaking. This method works particularly well for deep burial situations where acoustic signals struggle to reach the surface, and for pipes surrounded by materials that dampen sound transmission. “We injected helium into the pool return line and found it escaping at a spot six feet from the equipment pad. The pipe was buried four feet deep under a concrete deck, way too deep for reliable acoustic detection.”
Dye testing works for drain, sewer, and pool systems where you can introduce colored or fluorescent dyes into the water flow. Technicians add the dye at a cleanout or other access point, then flush it through the system. For drain and sewer leaks, they watch for dye appearing on the ground surface, in crawl spaces, or seeping through foundation walls. Fluorescent dyes show up brilliantly under UV light, revealing leak paths that would be invisible under normal lighting. In pool leak detection, dye is carefully dispensed near suspected crack locations in the pool shell or around fittings and lights. Still water allows the dye to follow the path of least resistance, streaming toward leak points rather than dispersing randomly. The visual confirmation dye provides eliminates guesswork about whether suspected cracks are actually leaking.
Smoke testing introduces non-toxic theatrical smoke into sewer and vent systems under slight pressure. The smoke behaves like air and water vapor, finding any path to the outside environment. Technicians block the downstream end of the line they’re testing, then pump smoke into the upstream end. They watch manholes, vent stacks, cleanout caps, and the ground surface for smoke emergence. Smoke reveals cracked pipes, failed joints, improperly sealed cleanout covers, and illegal connections that allow sewage odors to enter buildings or groundwater to infiltrate sewer systems. “We pumped smoke into the building sewer and it started coming up through landscaping rocks fifteen feet from the foundation. Turned out there was a separated joint where tree roots had pushed the pipes apart.”
Application selection depends on what kind of system you’re testing and what access points are available. Tracer gas excels for pressurized water lines buried deep or running under structures. Dye works best for drain systems and pools where you can see water flow patterns. Smoke testing is the standard for finding sewer system integrity problems and vent system leaks that compromise building safety.
Video Camera Inspection for Internal Pipe Assessment

Video camera inspection provides direct visual evidence of pipe condition and leak locations by sending waterproof cameras through the interior of plumbing systems. The cameras travel through pipes like a submarine exploring underwater terrain, recording everything they pass. Technicians insert cameras through existing access points like cleanouts, toilet drains after removing the fixture, or roof vent stacks. The camera head is small enough to navigate through standard pipe sizes, mounted on semi-rigid cable or crawler units for larger diameter pipes.
What you see through camera inspection removes all the guesswork about what’s happening inside pipes that have been buried or enclosed in walls for decades. Cracks show up as dark lines or gaps with light coming through from outside the pipe. Corrosion appears as rough, pitted surfaces or holes eaten completely through pipe walls, sometimes with mineral deposits or rust staining around edges. Joint separation is visible where pipe sections have pulled apart, creating gaps that allow water infiltration in supply lines or leak sewage in drain systems. Root intrusion shows as fibrous masses entering through cracks or joints, sometimes completely blocking the pipe. Scale buildup and mineral deposits coat pipe interiors, narrowing the flow path. Active leak points in drain lines show clear water seeping or spraying into the pipe from cracks or failed joints.
Camera inspection pairs naturally with other detection methods to provide confirmation before repair work begins. Pressure testing might confirm a leak exists somewhere in a 40 foot sewer line section under your slab, but the camera shows you exactly where, and more importantly, what kind of damage exists. That information determines whether you need spot repair, partial replacement, or full line replacement. “Pressure test showed the kitchen drain line was leaking. Camera showed us three separate cracks within a six foot section. At that point, replacing the whole section made more sense than trying to repair each crack individually.”
Modern inspection cameras include several features that improve detection accuracy. Recording capability means you get video documentation of pipe condition, useful for insurance claims and getting repair bids from multiple contractors. Distance measurement markers on the camera cable tell technicians exactly how far the camera has traveled from the entry point, translating to precise measurements for locating problems from above ground. Some camera heads include transmitter units that send radio signals through soil and building materials. Technicians use handheld receivers on the surface to detect these signals, marking the camera’s exact location. This combination shows you precisely what’s wrong and exactly where the problem sits.
What video inspection identifies inside pipes:
- Cracks and fractures in pipe walls
- Corrosion damage including holes and thinning pipe walls
- Joint failures where sections have separated or seals have deteriorated
- Root intrusion from landscaping and trees
- Scale and mineral buildup reducing flow capacity
- Structural collapse or bellied sections where pipes have settled
Smart Technology and Automated Leak Detection Systems

Smart leak detection systems use networked sensors and continuous monitoring to catch leaks in early stages, often before any visible damage appears or unusual water bills arrive. These systems represent a shift from reactive leak response to proactive leak prevention, watching your plumbing continuously rather than only investigating after something goes obviously wrong.
IoT sensors installed at key points throughout your plumbing system monitor water flow, pressure levels, temperature, and in some cases moisture in areas around fixtures and water heaters. These small devices connect wirelessly to a central hub that aggregates data and analyzes patterns. The sensors detect abnormal flow that continues when you’re not using water, pressure drops that suggest leaks in pressurized lines, and even temperature changes that indicate hot water escaping from supply lines. The system processes this information constantly, comparing current readings against your home’s normal patterns. When something falls outside normal parameters, the system logs the event and alerts you through a mobile app notification.
Smart water meters track every gallon flowing through your main supply line in real time, recording usage patterns down to the minute. These meters distinguish between normal daily usage, the larger flows when showers and washing machines are running, and the small continuous flows that indicate hidden leaks. By comparing current water consumption against historical data from previous weeks and months, smart meters identify anomalies that warrant investigation. A smart meter might notice that your overnight water usage, which is typically zero gallons, has increased to two gallons per hour every night for the past week. That pattern indicates a toilet running, a dripping faucet, or a slow leak somewhere in the system.
AI and machine learning algorithms analyze the data streams from sensors and meters to distinguish between normal usage variations and genuine leak signatures. These systems learn your household patterns over time. They know that water usage spikes on weekends when everyone is home, that the irrigation system runs for 30 minutes every Tuesday and Thursday morning, and that the washing machine uses 20 gallons per load. This learning process reduces false positives. The system won’t alert you every time someone takes a longer shower, but it will notice unusual continuous flow at 3 a.m. when the household is asleep. Some advanced systems even predict potential failures by detecting gradual changes in pressure or flow patterns that suggest pipes are degrading or fixtures are beginning to fail.
Integration with mobile apps and cloud platforms puts plumbing system information in your hands wherever you are. You receive instant alerts when the system detects problems, see real time water usage data, review historical consumption graphs, and in some cases remotely shut off water supply through motorized valves. This connectivity provides peace of mind when you’re away from home and enables fast response to problems before minor leaks become major disasters.
| Smart Technology | What It Monitors | Detection Capability |
|---|---|---|
| Smart Meters | Total water consumption, flow rates, usage timing | Continuous flow during no use periods, consumption pattern changes |
| Flow Sensors | Water movement through specific pipes or fixtures | Abnormal flow in specific branches, fixture level leak detection |
| Pressure Sensors | System pressure at key points | Pressure drops indicating leaks, pressure spikes risking pipe failure |
| Moisture Detectors | Humidity and water presence near fixtures | Water accumulation around water heaters, under sinks, near supply lines |
| Integrated Systems | Combined flow, pressure, and moisture data with AI analysis | Comprehensive leak detection with predictive failure warnings |
Leak Detection Methods for Specific Applications

Leak detection strategy changes based on what kind of system you’re investigating, where pipes are located, and what access constraints exist. A standardized approach doesn’t work when you’re dealing with pipes embedded in concrete versus drain lines in a crawl space versus pool plumbing buried in landscaping.
Slab leak detection presents some of the most challenging scenarios because supply lines and sometimes drain lines run through or under concrete foundation slabs. These leaks combine difficult access with high potential for structural damage from water undermining foundation support. Detection for slab leaks uses a combination approach: line tracing equipment that maps pipe routes under the concrete, static pressure testing to confirm which line is leaking, and acoustic listening devices that pinpoint where along that line the leak exists. Technicians start by tracing the path of water lines through the slab using electromagnetic line tracers that follow metallic pipes or tracer wires installed with plastic pipes. Once they’ve mapped pipe locations, pressure testing isolates which specific line is losing water. Then acoustic sensors scan the slab surface along the confirmed leaking line, listening for the characteristic sound of pressurized water escaping into surrounding soil or the void space under the slab. “Slab leaks are among the most difficult repairs, so we triple check the location before recommending that anyone break through the concrete. The combination of line tracing, pressure testing, and acoustic confirmation gives us accuracy within a few inches.”
Swimming pool leak detection adapts techniques for the unique challenges of pool plumbing and shell integrity. Pool systems include supply lines, return lines, drain lines, and sometimes spa and water feature connections, all running underground through landscaping and under pool decking. Leak detection starts with measuring water loss rates to distinguish evaporation from actual leaks. Dye testing around fittings, lights, and visible cracks in pool shells reveals leak paths through the water’s stillness. Pressure testing on isolated plumbing lines confirms which specific line is leaking when multiple systems run under the same areas. Acoustic equipment adapted for pool applications listens through decking and soil for leaks in buried lines. “Pool return line was losing pressure, so we isolated it and ran a pressure decay test. Then we used acoustic equipment to scan the line route from the equipment pad to where it entered the pool. Found the leak at a joint that had separated from ground settlement.”
Irrigation system detection accounts for multiple zone valves, underground distribution lines branching to various yard sections, and variable pressure conditions as different zones activate and deactivate. Technicians test one zone at a time, isolating it at the valve and pressurizing that section independently. Visual inspection looks for wet spots, areas of unusually lush growth, and sunken ground that indicate water escaping underground. Acoustic detection scans along identified pipe routes, listening for pressurized flow between the valve and sprinkler heads.
HVAC condensate and hydronic heating system leak detection uses specialized approaches for these lower pressure water systems. Condensate leaks from air conditioning units typically don’t create acoustic signatures loud enough for standard leak detection, so inspection focuses on following drain line paths with cameras, checking for blockages and drainage slope failures. Hydronic heating systems require pressure testing of boiler loops and radiant floor tubing, combined with thermal imaging that shows where hot water is escaping into building materials rather than delivering heat where intended.
Application specific detection considerations:
- Slab foundation constraints limiting access without breaking through concrete
- Pool water loss calculations distinguishing leak rates from normal evaporation
- Irrigation zone isolation testing one branch at a time
- HVAC system access limitations around ductwork and equipment
- Underground utility conflicts where other lines complicate excavation
- Soil permeability affecting how water migrates from leak points
- Surface material variations that affect acoustic transmission and access difficulty
The Step by Step Professional Leak Detection Workflow

Professional leak detection follows a systematic approach designed to efficiently locate problems while minimizing property damage and false starts. The workflow moves from general investigation to increasingly precise location methods, confirming findings before anyone cuts into walls or breaks through concrete.
Complete professional leak detection workflow:
-
Initial consultation and symptom review with the homeowner, gathering information about when problems started, what signs are visible, what areas show damage, and whether water bills have increased
-
Preliminary visual inspection examining areas where symptoms appear, checking for obvious leak sources like dripping fixtures or failed supply line connections, and looking at water meter behavior with all fixtures closed
-
System isolation and preparation deciding which lines need testing based on symptom location and system layout, shutting off branch lines to isolate problem sections, and preparing access points for equipment
-
Primary detection method application using acoustic sensors, thermal cameras, or pressure testing based on system type and suspected problem areas, scanning systematically to identify general leak zones
-
Secondary confirmation method applying a different detection technology to verify findings from the primary method, comparing results to ensure both methods point to the same location
-
Pressure alteration for pinpointing adjusting pressure in confirmed leaking lines to enhance acoustic signatures or create pressure waves that make exact leak locations more distinct on listening equipment
-
Marking exact location transferring identified leak position from equipment readings to physical marks on walls, floors, or ground surface, measuring from reference points to ensure accuracy
-
Verification before access cutting using cameras through nearby cleanouts or access points if possible, conducting final acoustic scans with equipment pressed directly against the marked surface, and confirming all detection methods align before recommending property access
Multiple methods often work together to build confidence before invasive work begins. Slab leak detection might use line tracing to map pipe routes, pressure testing to confirm which line is failing, and acoustic listening to pinpoint the exact spot along that line. This layered approach eliminates the risk of cutting into the wrong location based on a single detection method that could be influenced by unusual conditions. “We traced the hot water line under the slab, then ran a pressure test that confirmed it was losing water. Acoustic scan along the traced route showed a strong signal eight feet from where the line entered the slab. We marked that spot, verified it with a second acoustic scan from a different approach angle, and that’s where the repair crew went in. Hit it exactly.”
The verification step happens before any cutting or excavation begins because replacing drywall, patching concrete, or restoring landscaping adds cost to every repair. Confirming the leak location through multiple scans and sometimes through camera inspection where access points exist protects you from paying for exploratory demolition that doesn’t find anything or misses the actual problem. Technicians take responsibility for location accuracy by checking and rechecking before they recommend where to access pipes.
This methodical workflow minimizes property damage and reduces overall repair costs compared to the old approach of cutting into walls or floors at multiple points until the leak is found. Accurate detection focuses repair work on one specific location, limiting how much restoration is needed after plumbing repairs are complete.
Cost Considerations and Factors Affecting Detection Pricing
Professional leak detection typically costs homeowners between $170 and $200 for the detection service itself, covering the technician’s time, equipment use, and the investigation process that identifies leak locations. That detection fee doesn’t include repair work or the cost of accessing pipes through walls, floors, or slabs. Understanding what influences total project cost helps you set realistic budgets and make informed decisions about how to proceed once leaks are located.
Property type influences detection complexity and pricing because residential systems differ significantly from commercial building plumbing networks. A single family home usually has straightforward pipe routing and fewer branch lines to investigate compared to a commercial building with multiple tenant spaces, complex distribution systems, and sometimes inaccessible pipe chases. Commercial detection takes longer and requires more sophisticated equipment, pushing costs higher. System complexity matters even in residential properties where older homes may have accumulated changes and repairs over decades, creating routing mysteries that take extra time to sort through.
Leak location dramatically affects total project cost beyond the detection fee. Pipes running behind drywall in accessible locations are relatively straightforward to access, requiring drywall cutting, repair completion, and painting the patched area. Total costs for detection, repair, and restoration might run $500 to $1,000 depending on pipe repair complexity. Slab leaks underneath your foundation represent a completely different cost scale. Slab leak repair options include three main approaches: cutting into the slab from above using a jackhammer to create an access hole, then repairing the pipe and repouring concrete over the repair; tunneling underneath the slab from outside the foundation to reach the pipe from below without breaking through the floor; or trenchless pipe replacement that inserts
Final Words
Understanding how does leak detection work gives you the insight to recognize when professionals use the right methods for your situation.
Acoustic sensors listen for leaks beyond what you can hear. Pressure tests reveal drops that point to escaping water. Thermal cameras spot cool zones where moisture hides.
These technologies work together to locate problems without tearing your home apart.
When you notice warning signs—unexplained bills, wet spots, or musty smells—you’ll know there’s a systematic process that can pinpoint the source fast.
That means less guesswork, less damage, and repairs that actually fix the root cause.
FAQ
How accurate is leak detection?
Professional leak detection is highly accurate when technicians combine multiple detection methods and interpret results based on environmental factors. Acoustic sensors, thermal imaging, and pressure testing together typically pinpoint leak locations within a few inches, though accuracy depends on pipe depth, material type, ambient noise levels, and soil conditions. Experienced technicians account for these variables to minimize exploratory damage and maximize detection precision.
How do leak detection sensors work?
Leak detection sensors work by monitoring specific indicators that reveal escaping water. Acoustic sensors amplify high-frequency sounds created when pressurized water escapes through pipe cracks, using microphones and digital filters to detect frequencies beyond human hearing range. Flow sensors track water movement through pipes and alert when continuous flow occurs with all fixtures closed, indicating a hidden leak somewhere in the system.
Does home insurance cover leak detection?
Most home insurance policies cover leak detection costs when investigating sudden pipe failures or burst pipes, but coverage excludes detection for gradual leaks or maintenance issues. Insurers typically consider neglected maintenance or slow deterioration as homeowner responsibility rather than covered sudden damage. Review your specific policy and document leak symptoms promptly, since delayed response to known issues may be classified as negligence and denied.
How much does a plumber charge to diagnose a leak?
Professional leak detection typically costs homeowners between $170 and $200 for the diagnostic service, which covers the investigation and location marking but doesn’t include repair work or property access costs. Total project costs increase significantly based on leak location difficulty—accessible wall pipes cost less than slab leaks requiring concrete cutting, tunneling, or trenchless pipe replacement methods that add thousands to the final bill.