
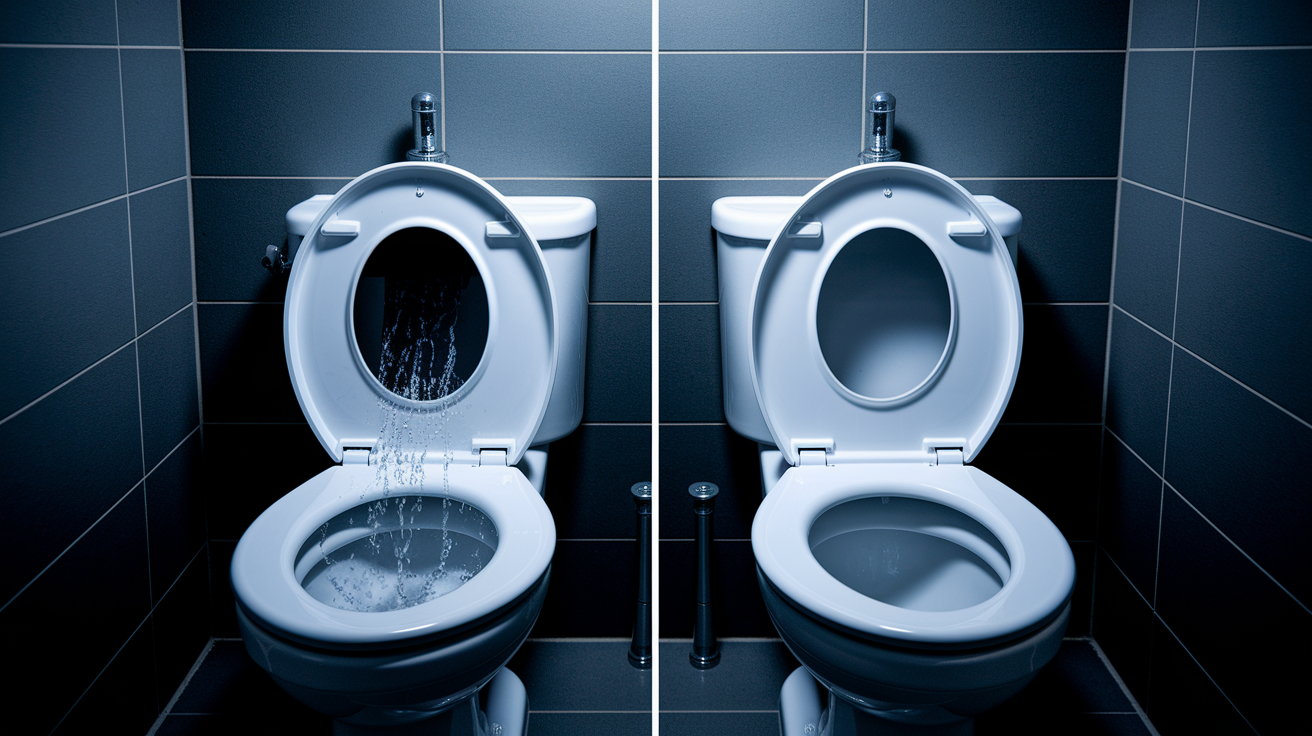
You’d probably guess that flushing the toilet is the most complicated part of the system. Actually, it’s the refill afterward. Most people never think about how the tank knows when to stop filling, but that small valve attached to your water supply does something remarkable: it turns itself on, measures the exact water level, and shuts off automatically. When this simple mechanical system starts to fail, you’ll hear running water, see slow refills, or find puddles around the base. Here’s how the fill valve really works and when it’s time to swap it out.
Inside the Fill Valve: Operation Mechanism and Components

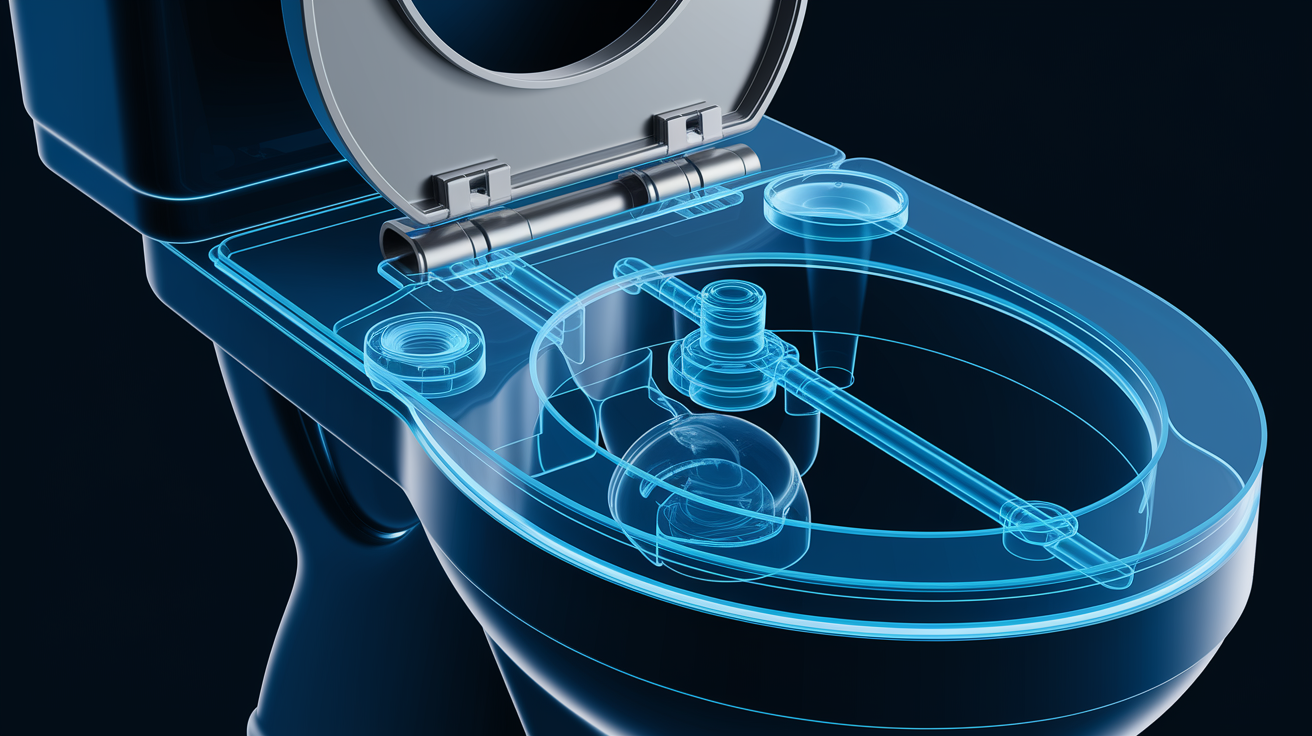
The fill valve automatically refills your toilet tank after each flush. Opens when water level drops, closes when the tank’s full. A float mechanism rises and falls with the water, triggering the valve to open for refilling and shut off at the preset level so you don’t get overflow. This self-regulating system keeps your toilet ready for the next use without you doing anything.
The fill valve sits inside the toilet tank, usually on the left side, and connects directly to the water supply pipe that enters through the tank bottom. Three main components work together: the float mechanism (either a float cup that slides vertically or a float ball on a horizontal arm), the valve body with an inlet control that regulates water flow, and the refill tube, a small flexible line that directs water through the overflow tube into the bowl. This setup creates a complete system where mechanical movement translates directly into water control.
Here’s the complete operation cycle from start to finish:
- Resting state: Tank is full, float sits at maximum height, valve remains closed with no water flowing
- Flush initiated: You push the handle, the flapper opens at the tank bottom, water rushes into the bowl and drains from the tank
- Float drops: As water level falls, the float descends with it and triggers the valve mechanism to open
- Water flows: The supply line delivers fresh water through the opened inlet valve into the tank
- Simultaneous bowl refill: The refill tube sends a small stream of water into the bowl via the overflow tube, maintaining the water barrier that blocks sewer gases from entering your bathroom
- Automatic shutoff: The float rises back to its preset height, typically about 1 inch below the top of the overflow tube, signaling the valve to close and stop water flow
Most toilets complete this refill cycle in 60 to 90 seconds under normal water pressure. The automatic shutoff prevents tank overflow even if you walk away, while the bowl refill through the overflow tube keeps that protective water seal in place. It’s a simple mechanical system with no electronics, which explains why it’s worked reliably in millions of homes for decades.
Types of Fill Valves and Float Systems

While all fill valves perform the same basic function, their internal mechanisms and float systems vary significantly. This affects reliability, how easy they are to adjust, and which toilets they work best in. Understanding these differences helps when you’re replacing a valve or troubleshooting a specific problem.
Float Cup Fill Valve (Modern Standard)
The float cup design uses a vertical cup shaped float that slides up and down along the valve shaft as water level changes. You’ll find this type in most toilets manufactured after the mid 1990s. The cup design keeps everything compact and centered on the valve body, making it easy to install even in tanks with limited space. Height adjustment is straightforward. Most models use a simple clip or adjustment screw that you can reach without removing the valve. Float cup valves fit nearly every standard gravity fed toilet regardless of manufacturer. The main weakness shows up in areas with hard water or debris in the supply lines, where mineral deposits and sediment can clog the small openings and cause the float to stick.
Float Ball Fill Valve (Ballcock System)
The float ball system uses a round hollow ball, either plastic or metal, attached to a horizontal float arm that extends across the tank. This is what you’ll see in toilets from the 1980s and earlier. Buoyancy lifts the ball as water rises, causing the arm to pivot upward and mechanically close the valve. You adjust the water level by either bending the float arm slightly downward (to lower the level) or upward (to raise it), or by turning an adjustment screw where the arm connects to the valve body. The design takes up more horizontal space than modern systems, and the exposed arm and ball can interfere with other tank components. These valves still work fine, but they’re gradually being replaced during renovations because newer designs are more compact and reliable.
Float-less (Pressure Sensing) Fill Valve
Instead of a traditional float ball or cup, this design uses a pressure sensitive diaphragm that senses water level through pressure changes at the valve base. As water rises in the tank, increasing pressure signals the valve to close, with no moving float traveling through the water. This eliminates debris accumulation on the float mechanism and creates more consistent shutoff timing. The valve operates more quietly than float based systems and resists the sticking problems that affect traditional designs in hard water areas. The tradeoff is higher cost, typically $10 to $15 more than standard float cup valves, and slightly more complex installation since you need to set the pressure sensitivity correctly for your specific tank size.
Plunger/Piston Fill Valve
The plunger design uses a vertical piston that moves up and down to control water flow, typically found in smaller capacity toilets or older commercial installations. The mechanism is straightforward. Water pressure and the float position drive the plunger movement that opens and closes the inlet. This design works well in tight spaces where a horizontal float arm won’t fit. The moving plunger surfaces can wear over time, and the small water passages are prone to clogging from mineral deposits. You won’t see this type often in modern residential toilets, though it’s still used in some compact and specialty applications.
Float cup systems have become the standard in modern toilet installations because they balance reliability, cost, and ease of adjustment better than the alternatives. A basic float cup valve costs $8 to $15 and fits most gravity fed toilets regardless of who manufactured them. Float-less valves offer the best performance in problem water conditions but cost more. Float ball systems still work fine in older toilets, but when replacement time comes, most pros swap them for float cup designs. The universal fit of replacement valves means you’re not locked into finding parts that match your original toilet manufacturer. Any quality valve will work as long as it fits your tank opening size.
Key Fill Valve Components and Their Functions

The fill valve is an assembly of multiple specialized parts working together, each serving a critical function in the refill and shutoff process. When one component fails, it affects the entire system’s ability to regulate water properly.
Understanding component names and functions helps when you’re buying replacement parts or trying to figure out which specific piece is causing a problem. Instead of replacing the entire valve, sometimes you can swap out just a worn seal or clogged diaphragm.
- Inlet valve/diaphragm: Controls water entry from the supply line, opening and closing based on float position. This is the core shutoff mechanism that responds to the float signal
- Float mechanism: Senses water level changes and triggers the shutoff signal to the inlet valve, either through mechanical arm movement or vertical sliding action
- Refill tube: Small flexible tube directing water from the valve to the overflow tube and into the bowl during tank refill, maintaining the sewer gas barrier
- Overflow tube: Large central safety tube preventing tank overflow and receiving refill tube water for bowl replenishment. Typically 1 to 1.5 inches in diameter
- Supply line coupling: Threaded connection point where the external water supply pipe attaches to the valve base, creating the inlet for fresh water
- Shutoff valve: External valve located on the wall or floor below the toilet that controls water supply to the fill valve, used during repairs and emergencies
- Anti-siphon device: Prevents contaminated tank water from backflowing into your household water supply if pressure drops suddenly
- Seals (washers, gaskets, o-rings, rubber seals): Create watertight barriers at all connection points and moving parts throughout the valve assembly
Seal deterioration from mineral deposits and age is the most common failure point across all valve types. This typically shows up as leaks at the supply line coupling where the external pipe connects, or as continuous water seepage around the valve base inside the tank. When seals fail, no amount of adjustment will stop the problem. You need new rubber components or a full valve replacement.
Common Fill Valve Problems and Troubleshooting
Most toilet issues you’ll run into trace back to fill valve problems, either from worn components or incorrect adjustment.
Toilet Running Continuously
A constantly running toilet indicates worn valve components, the float set too high allowing water to escape into the overflow tube, or a leaking flapper forcing the valve to work continuously to maintain tank level. Here’s a simple test to figure out which: add a few drops of food coloring to the tank water and wait 15 minutes without flushing. If color appears in the bowl, your flapper is leaking and the fill valve is just doing its job trying to keep up. If no color appears but the toilet still runs, the fill valve itself is the problem. The fix for high float setting is straightforward: adjust the float downward so water stops about 1 inch below the overflow tube top. If adjustment doesn’t stop the running, the valve components are worn and need replacement.
Slow or No Tank Refilling
When your tank takes forever to refill or doesn’t refill at all, start with the simplest cause. Check that the shutoff valve below the toilet is fully open (turned counterclockwise all the way). If that’s not it, you’re looking at a clogged inlet valve from mineral deposits and debris buildup, a broken float mechanism that’s stuck in the “up” position and never signals the valve to open, or genuinely low water pressure affecting your whole house. Pull the valve cap off and look for white crusty deposits or small debris blocking the inlet. Sometimes you can flush these out with a quick burst of water, but if buildup is significant, replacement makes more sense than trying to clean every passage.
Noisy Fill Valve Operation
Hissing or buzzing sounds during tank refill point to trapped air in the valve assembly, loose or worn internal parts vibrating as water flows past them, inconsistent water flow from pressure fluctuations, or a damaged diaphragm that’s allowing water to leak through gaps instead of flowing smoothly. The sound often starts quietly and gets louder over time as components wear. A temporary fix is to slightly close the shutoff valve to reduce flow rate and pressure, which sometimes stops the vibration. If you need professional help with persistent plumbing issues, that’s a sign the valve has reached the end of its functional life and adjustment won’t solve it.
When to Repair or Replace Your Fill Valve

Simple adjustments like changing float height or tightening loose connections can solve many fill valve issues, especially if the valve is relatively new and the problem just started. Turn the adjustment screw or move the float clip to change water level, or hand tighten the supply line coupling if you notice minor seepage. These quick fixes work when the core components are still in good shape.
Worn internal components usually require full valve replacement rather than repair because the small seals, diaphragms, and springs inside aren’t designed to be serviced individually in most modern valves. By the time one component fails, others are typically close behind since they’ve all been exposed to the same water conditions and pressure cycles.
Replace your fill valve when you see these indicators:
- Toilet runs persistently despite multiple float adjustment attempts and flapper replacement
- Visible water leaking at the supply line coupling or pooling around the valve base inside the tank
- Tank refills too slowly or fails to refill completely even with the shutoff valve fully open
- Valve technology is outdated, especially float ball systems older than 10 to 15 years that waste more water
- Multiple components show wear simultaneously: corroded adjustment mechanisms, deteriorated seals, and stiff float movement
- Noisy operation continues after cleaning debris and adjusting water pressure
Fill valves typically last 5 to 7 years under normal conditions, though hard water and high pressure can cut that timeline to 3 to 4 years. Preventative replacement makes sense when you start seeing the early signs rather than waiting for complete failure. A valve that’s struggling uses more water and risks causing bigger problems if it fails while you’re away from home. The $10 to $20 cost and 30 minutes of work beat dealing with water damage from an undetected leak.
DIY Fill Valve Replacement Guide

Fill valve replacement is a manageable DIY project for most homeowners, even if you’ve never worked on a toilet before. The connections are straightforward and don’t require specialized plumbing skills.
You’ll need an adjustable wrench, pliers, a bucket, several towels or a large sponge, and a new universal fill valve from any hardware store. Optional but helpful is Teflon tape for the supply line threads, though most modern connections don’t require it. Make sure the replacement valve matches your tank size. Most residential toilets use a standard height valve, but compact and tall tanks need specific sizes.
Follow these steps from start to finish:
- Turn the shutoff valve clockwise until it stops. The valve is located on the wall or floor behind or beside the toilet where the supply line connects
- Flush the toilet and hold the handle down to drain as much water as possible from the tank
- Use a sponge or towels to soak up the remaining water at the tank bottom so you’re working in a dry space
- Place the bucket under the supply line connection, then use the wrench to disconnect the supply line from the bottom of the tank. Expect some water to drip out
- Unscrew the plastic lock nut holding the old valve in place (it’s under the tank where the valve shaft goes through) and lift the entire valve assembly out
- Install the new valve following the manufacturer’s instructions for height adjustment and positioning. The top of the valve should match the recommended level for your overflow tube
- Reconnect the supply line to the new valve’s threaded shank, hand tighten first, then give it a quarter turn with the wrench. Don’t overtighten or you’ll crack the plastic coupling
- Turn the water back on slowly, watching for leaks at the supply line connection, then adjust the float so water stops about 1 inch below the overflow tube top, and test with several flushes
| Task Element | Details |
|---|---|
| Estimated Time | 30 to 45 minutes |
| Skill Level | Beginner to Intermediate |
| Valve Compatibility | Universal fit for most standard gravity fed toilets |
Fill Valve Interaction with Other Tank Components
The fill valve works as one part of the larger toilet flushing system, coordinating with the flush valve and flapper to complete the flush and refill cycle. When you press the handle, the flapper lifts off the flush valve opening at the tank bottom, releasing water into the bowl to create the flush. The fill valve stays idle during this process. Once the tank empties and the flapper drops back down to seal the flush valve, that’s when the fill valve activates to begin the refill process. This timing prevents the two valves from working against each other.
Gravity and tank capacity determine flushing power. The weight and volume of water rushing through the flush valve creates the siphon action that clears the bowl. The fill valve controls only the refill process after that flush completes. Tanks typically hold 1.6 gallons in modern low flow toilets or 3.5 gallons in older models. As long as the fill valve brings water up to the correct level, you’ll get consistent flush performance.
The overflow tube serves a dual role in this system. First, it’s a safety mechanism that prevents tank overflow if the fill valve fails to shut off. Excess water simply drains into the bowl instead of spilling onto your bathroom floor. Second, it’s the delivery point for the refill tube, which sends a small stream of fresh water into the bowl during tank refilling. This bowl refill restores the water barrier in the trap that blocks sewer gases from coming up through the toilet.
A leaking flapper creates a cycle of water loss that makes the fill valve run continuously. Water seeps past the flapper seal into the bowl, the tank level drops slightly, the float descends just enough to trigger the fill valve, and water flows in to compensate. The tank never quite empties, but it never stays full either. The fill valve ends up working constantly to replace water that’s slowly leaking away. This is why you need to confirm the flapper is sealing properly before assuming the fill valve is the problem.
Fill Valve Materials and Durability Factors
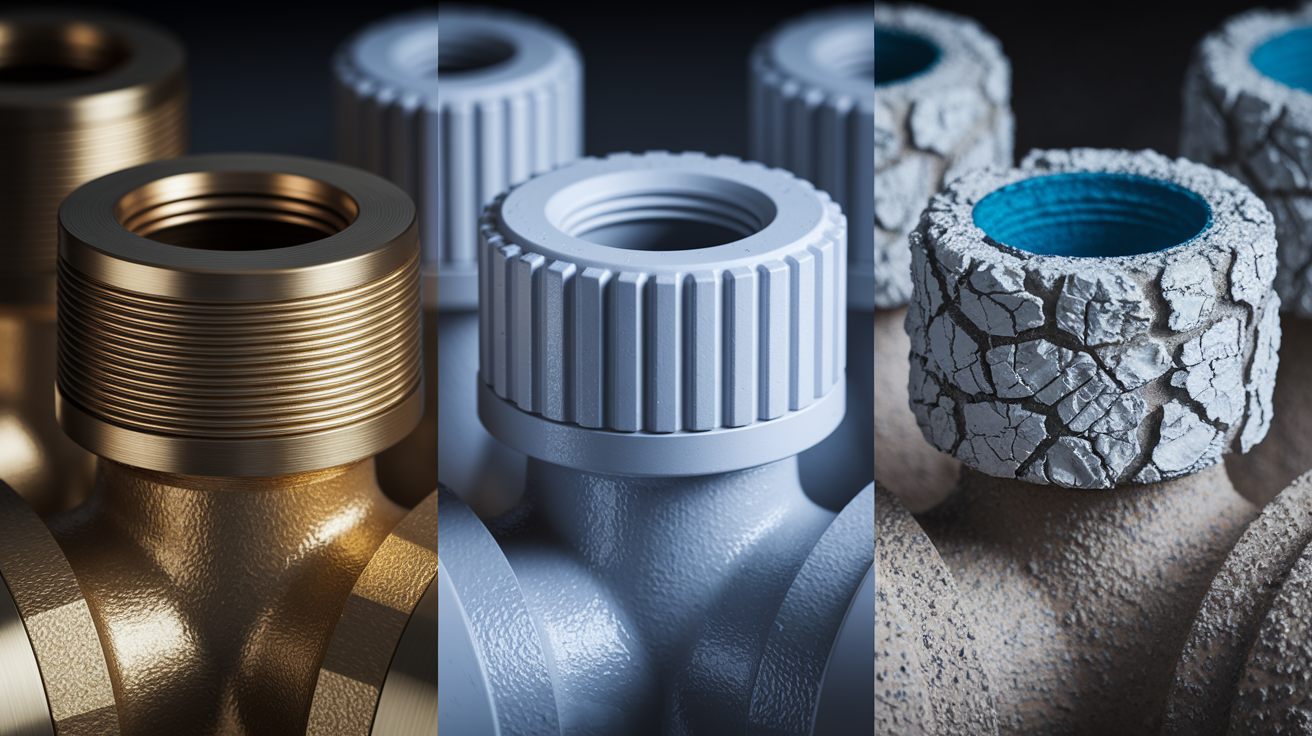
Most fill valve bodies and floats use durable plastic that’s lightweight and completely resistant to corrosion from constant water exposure. The plastic won’t rust, pit, or degrade from minerals in the water, which explains why these components rarely fail outright. Connection points often feature brass components, particularly the threaded shank where the supply line attaches, because brass provides strength and durability at high stress connection points. Rubber seals, gaskets, and o rings provide the flexibility needed to create watertight barriers as components move and shift, but these rubber parts wear faster than the plastic or brass structures around them.
Water quality affects how long a fill valve lasts more than any other factor. Mineral deposits from hard water build up on moving parts, causing floats to stick and valves to close improperly. The calcium and lime coat internal passages, narrowing the flow channels and reducing pressure. Debris and sediment in the supply lines settle in the inlet valve, blocking the small openings that control water flow. Rubber seals and diaphragms deteriorate faster in hard water because minerals make the rubber stiff and brittle. A valve that would last 7 years with clean water might only last 4 years in an area with high mineral content and sediment problems.
Water pressure impacts valve longevity through constant stress on the diaphragm and seals. High pressure, anything above 80 psi, forces water past seals more aggressively and wears the diaphragm faster as it flexes repeatedly under extra force. You’ll notice faster seal deterioration and more frequent leaks at the supply line coupling. Low pressure extends fill time beyond the normal 60 to 90 seconds, which doesn’t necessarily damage the valve but signals a supply problem worth investigating. Pressure fluctuations cause premature component failure because the valve components never quite settle into a consistent operating pattern. Constant variation in force and flow wears parts unevenly.
Water Conservation and Fill Valve Efficiency

Correct water level setting ensures adequate flush power without waste. The standard target is 1 inch below the top of the overflow tube. This level provides enough volume and weight for a complete flush while preventing water from constantly trickling into the overflow tube. Too low and you get weak flushes that need a second attempt, wasting water. Too high and water continuously escapes through the overflow, wasting gallons without you noticing.
A running or leaking fill valve can waste hundreds of gallons monthly because the loss is constant. A valve that allows a slow continuous trickle into the overflow tube wastes about 200 gallons per month. A valve with a leaking seal at the base or supply line coupling can lose 400 to 600 gallons depending on the leak size. Unlike a dripping faucet you see and hear, a faulty fill valve often runs silently inside the tank where you won’t notice it without specifically checking.
Modern dual flush systems and low flow toilets depend on properly functioning fill valves to maintain their water saving performance. These toilets use precise water volumes, typically 1.1 gallons for liquid waste and 1.6 gallons for solid waste, so the fill valve must deliver consistent levels. An improperly adjusted float or worn valve undermines the entire efficiency design.
Five ways to maximize water conservation with your fill valve:
- Adjust the float to the manufacturer recommended level marked on the overflow tube or in the installation manual
- Replace old float ball valves with modern efficient float cup models that use less water and close more reliably
- Fix running toilets immediately rather than ignoring the sound or slight water movement
- Use adjustable fill valves that let you fine tune water level to the minimum needed for effective flushing
- Consider anti siphon valves that prevent backflow waste while meeting current plumbing codes
Final Words
The fill valve is a simple but critical system that keeps your toilet working reliably after every flush.
When the float drops, the valve opens. Water flows in. The float rises to the preset height and signals the valve to close.
Understanding how the mechanism works makes troubleshooting easier. You’ll know when to adjust the float height, clean out debris, or swap in a new valve.
Most fill valve problems show clear signs: continuous running, slow refills, or noisy operation. Catching them early protects your home from water waste and potential damage.
FAQ
How do you know if your toilet fill valve is bad?
You know your toilet fill valve is bad when your tank takes longer to refill than normal, you notice water leaking from the tank, the toilet runs continuously, the toilet fails to flush properly, or you hear a loud humming noise coming from the tank. These five signs typically indicate worn internal components, damaged seals, or mineral buildup inside the valve assembly that’s preventing normal operation.
How much would a plumber charge to replace a toilet fill valve?
A plumber would typically charge between $150 and $300 to replace a toilet fill valve, depending on your location, the valve type needed, and any additional repairs discovered during the service. This cost usually includes the valve itself (around $15-30), labor for diagnosis and installation (30-60 minutes), and testing to confirm proper operation. Some plumbers charge a flat service call fee plus parts.
Where does the water come from that fills up the toilet tank?
The water that fills up the toilet tank comes from your home’s main water supply through a dedicated supply line that connects to the fill valve inside the tank. This supply line branches off from your household plumbing system and runs to a shutoff valve located behind or below your toilet, then continues up to the fill valve inlet at the bottom of the tank.
Can I replace a toilet fill valve myself?
You can replace a toilet fill valve yourself if you have basic DIY skills and about 30 to 45 minutes available. The process requires simple tools (adjustable wrench, pliers, bucket, and towels), involves shutting off the water supply, draining the tank, disconnecting the old valve, and installing a universal replacement valve following the manufacturer’s instructions. Most homeowners successfully complete this beginner-to-intermediate level repair without professional help.
How long does a toilet fill valve typically last?
A toilet fill valve typically lasts between five and seven years before needing replacement. The actual lifespan depends on water quality, mineral content, water pressure consistency, and how frequently the toilet is used. Hard water with high mineral content and pressure fluctuations can shorten the valve’s life, while regular maintenance and proper adjustment can extend it.
What causes a fill valve to fail prematurely?
A fill valve fails prematurely when mineral deposits and debris clog the inlet valve, hard water damages rubber seals and gaskets faster than normal, high water pressure stresses the diaphragm and internal components, or sediment buildup restricts water flow. Water quality issues account for most early failures, particularly in areas with hard water or older plumbing systems that introduce rust and sediment.
How do you adjust the water level in a toilet tank?
You adjust the water level in a toilet tank by locating the adjustment mechanism on your fill valve and moving the float up or down to change the shutoff height. For float cup valves, squeeze the adjustment clip and slide the float along the valve shaft. For float ball systems, bend the float arm slightly or turn the adjustment screw. The correct level sits approximately one inch below the top of the overflow tube.
What’s the difference between a float cup and float ball fill valve?
The difference between a float cup and float ball fill valve is the float mechanism design and space requirements. A float cup uses a compact cup-shaped float that slides vertically on the valve shaft and is found in modern toilets, while a float ball uses a round hollow ball attached to a horizontal pivoting arm and appears in older toilet models. Float cup systems take up less space and offer easier height adjustment.
Why does my toilet make a hissing noise after flushing?
Your toilet makes a hissing noise after flushing because air is trapped inside the fill valve, internal parts are loose or worn, water flow is inconsistent, or the diaphragm is damaged and allowing water to leak through. This noise indicates the valve isn’t operating smoothly and may need cleaning, adjustment, or replacement. Persistent hissing that doesn’t stop suggests a more serious valve problem requiring attention.
Can a bad fill valve cause a toilet to not flush properly?
A bad fill valve can cause a toilet to not flush properly when the tank doesn’t refill completely, leaving insufficient water volume for adequate flushing power. If the valve is clogged, broken, or adjusted too low, the tank won’t reach the water level needed for proper flush action. A toilet requires proper tank capacity to create the gravity and siphon action necessary for effective waste removal.
Are toilet fill valves universal or brand-specific?
Toilet fill valves are universal and do not need to be purchased from your toilet’s original manufacturer. Standard replacement valves fit most gravity-fed toilets regardless of brand, though valve sizes range from two to four inches depending on your specific toilet model. Check your tank dimensions and select an adjustable universal valve that matches your toilet’s requirements for proper fit and function.
How often should you replace a toilet fill valve?
You should replace a toilet fill valve every five to seven years as preventative maintenance, or immediately when you notice persistent running, visible leaks, slow refilling, or noisy operation that doesn’t resolve with adjustment. Replacing the valve before complete failure prevents water damage, reduces water waste, and ensures reliable toilet operation. Older float ball systems over ten to fifteen years old benefit from upgrading to modern float cup technology.