
That drip you hear every few minutes isn’t background noise. It’s your water bill climbing while a broken fill valve runs constantly. The good news? Most toilet fill valve problems come from buildup or a simple adjustment, not a total failure. You don’t need a plumber for basic fixes. This guide walks you through debris flushing, float adjustments, and testing your flapper so you can stop the running, cut the noise, and fix it yourself in under an hour.
Why Your Fill Valve Won’t Stop Running and How to Fix It
A toilet that keeps refilling is telling you one of two things: the fill valve won’t shut off when it should, or the flapper isn’t sealing right at the bottom of the tank. When your flapper fails, water leaks slowly into the bowl. That triggers the fill valve to run over and over to keep the tank full. When the fill valve itself breaks down, it just won’t stop letting water in, even when the tank’s already at the right level.
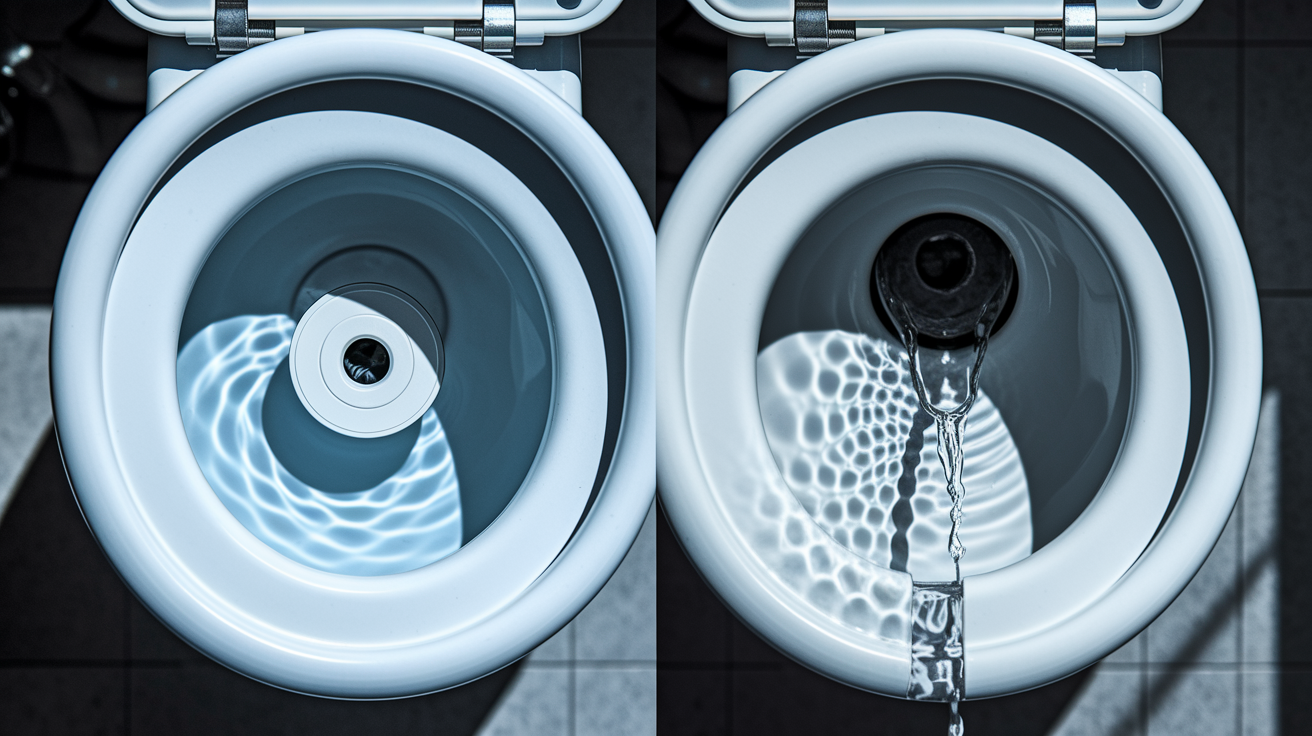
The fastest way to figure out which problem you’re dealing with? Lift the tank lid and watch the water level. If water rises high enough to drain into the overflow pipe (that tall tube standing in the middle of the tank), you’ve got a fill valve problem. The valve is letting in too much water or not shutting off. If the water level stays below the overflow tube but drops slowly over time, your flapper is leaking. That slow drain causes constant refilling as the fill valve tries to maintain the water level.
Here are the most common symptoms that point to a fill valve running constantly:
- Hissing sound coming from the tank between flushes
- Whistling noise that starts and stops every few minutes
- Water continuously flowing into the tank or overflow tube
- Noticeable increase on your water bill with no other explanation
- Water level that’s either too high (touching or going into the overflow tube) or drops slowly between uses
This is absolutely fixable. Most repairs take 30 to 60 minutes once you know which part is causing trouble. You don’t need specialized tools or plumbing experience for the basic fixes. The sections ahead walk through cleaning your current fill valve, adjusting water level properly, testing your flapper, and replacing components when needed. Most homeowners handle these repairs themselves and save the cost of a service call.
Comprehensive Troubleshooting and Adjustment Guide
Many fill valve issues come from mineral deposits, calcium buildup, or sediment that gets stuck in the valve mechanism rather than actual mechanical failure. Hard water areas see this constantly. A tiny piece of debris can prevent the valve from closing all the way, which keeps water flowing. Before you replace anything, try cleaning the valve using the debris flushing method.
Here’s the debris flushing procedure:
- Turn off the water supply line at the shut off valve under the toilet (turn clockwise until it stops).
- Flush the toilet to drain most of the water from the tank.
- Lift the float cup straight up on the fill valve shaft.
- Twist the fill valve cap counterclockwise about 1/8th of a turn while holding the valve body steady with your other hand.
- Turn the shut off valve back on full force and let water run for 10 to 15 seconds directly into the tank.
- Replace the cap by twisting clockwise, lower the float cup, and test by flushing.
Once you’ve cleaned the valve, you might need to adjust the float to get the water level right. The rule is simple: water should sit about 1 inch below the top of the overflow tube when the tank finishes filling. If it’s higher than that, it’ll drain into the overflow and trigger constant refilling. To adjust, find the adjustment screw on top of the fill valve or along the side. Turn it clockwise to lower the water level, counterclockwise to raise it. Make small adjustments, a quarter turn at a time, and flush to see the result. Keep tweaking until the water stops exactly where you want it, with that full inch of clearance below the overflow tube.
If you have an older toilet with a float ball (the hollow ball on a metal arm), adjustment works differently. Bend the float arm down slightly to lower the water level, or adjust the clip position on the pull rod that connects to the float ball. Test after each small change.
Even after you’ve cleaned and adjusted everything, some problems keep showing up. The fill valve might be installed at the wrong height, causing water to leak onto the floor around the base or overflow into the tube. The float cup might hit the tank wall as it rises and falls, preventing proper shut off. The refill tube (the small flexible tube) might not be clipped onto the overflow tube correctly. Your adjustment screw might not be set right. Or your home’s water pressure could be too high for the valve to handle.
Here are quick fixes to try for persistent issues:
- Recheck that the mounting nut under the tank is snug but not overtightened
- Verify there’s a full 1 inch clearance from the final water level to the top of the overflow tube
- Make sure the float cup moves freely up and down without scraping or catching
- Confirm the refill tube is clipped securely onto the overflow tube, not just hanging loose
- Readjust the water level using the adjustment screw, going lower if needed
- Try partially closing the shut off valve to reduce incoming water pressure and see if that stops the running
When everything’s working correctly, you shouldn’t hear anything. No hissing sound. No whistling noise. Just silence between flushes. After you flush, the tank should refill completely and then stop within 2 to 3 minutes. If you still hear water running after that, keep troubleshooting. This whole diagnostic and adjustment process usually takes 15 to 30 minutes once you get the hang of it.
Diagnosing Flapper vs Flush Valve Problems

If your overflow tube test showed that the water level drops slowly rather than overflowing into the tube, the problem is down at the bottom of the tank. Either the flapper seal isn’t closing properly against the flush valve, or the flush valve itself is damaged. This is a different issue than a malfunctioning fill valve, but it causes the same annoying symptom: the fill valve runs constantly to replace water that’s leaking away.
To confirm a flapper leak, do the water level marking test. Use a pencil to mark the current water level on the inside wall of the tank. Don’t flush. Just wait 10 to 15 minutes. Come back and check whether the water has dropped below your mark. If it has, water is leaking past the flapper and draining into the bowl. That slow leak makes the fill valve kick on every few minutes to bring the level back up. The flapper is the most common culprit when this happens.
Testing and Replacing the Flapper
Lift the flapper and look at the rubber seal around the edges. If it’s deteriorated, cracked, warped, or covered in mineral buildup, it won’t seal properly. Check the chain too. If it’s too short, it holds the flapper slightly open. If it’s too long, it can get caught under the flapper when it closes. Adjust the chain so there’s about half an inch of slack when the flapper is seated.
This inspection only takes about 15 minutes. If you see any damage or the flapper just looks old and worn, replacing it is the first solution to try. It’s the easiest fix and solves the problem most of the time.
When the Flush Valve Assembly Needs Replacement
If you replace the flapper and the toilet still runs constantly, the flush valve assembly itself is likely the problem. The flush valve is the large opening at the bottom of the tank where the flapper seals. Over time, the plastic or rubber components crack, warp, or corrode. The overflow tube can develop cracks. The rubber gasket where the flush valve connects to the tank can deteriorate. Tank bolts can rust through their washers.
Here are specific flush valve problems that mean you need to replace the whole assembly:
- Cracked overflow tube leaking water inside the tank
- Damaged or warped tank to bowl gasket causing leaks at the connection
- Corroded tank bolts that no longer seal properly even with new washers
- Warped or pitted flush valve seat where the flapper is supposed to seal
- Flush valve installed at the wrong height, causing water on the floor after reassembly
For a 2 inch flush valve system, the replacement part is typically the K 507A 008. For a 3 inch system, you’d use the 540AKR. If you’re doing a complete overhaul, Everything Kits include the flush valve, flapper, tank bolts, washers, and gaskets all in one package. You’ll find them sized for both 2 inch and 3 inch systems.
Replacing a flush valve is more involved than swapping a flapper. You have to drain and remove the entire tank from the bowl, replace the valve and gasket, then reinstall everything. If you’ve never done it before or you’re not confident working with those connections, this might be the point where professional help makes sense. A small mistake can cause a bigger leak.
Tools and Replacement Parts Needed for Fill Valve Repair
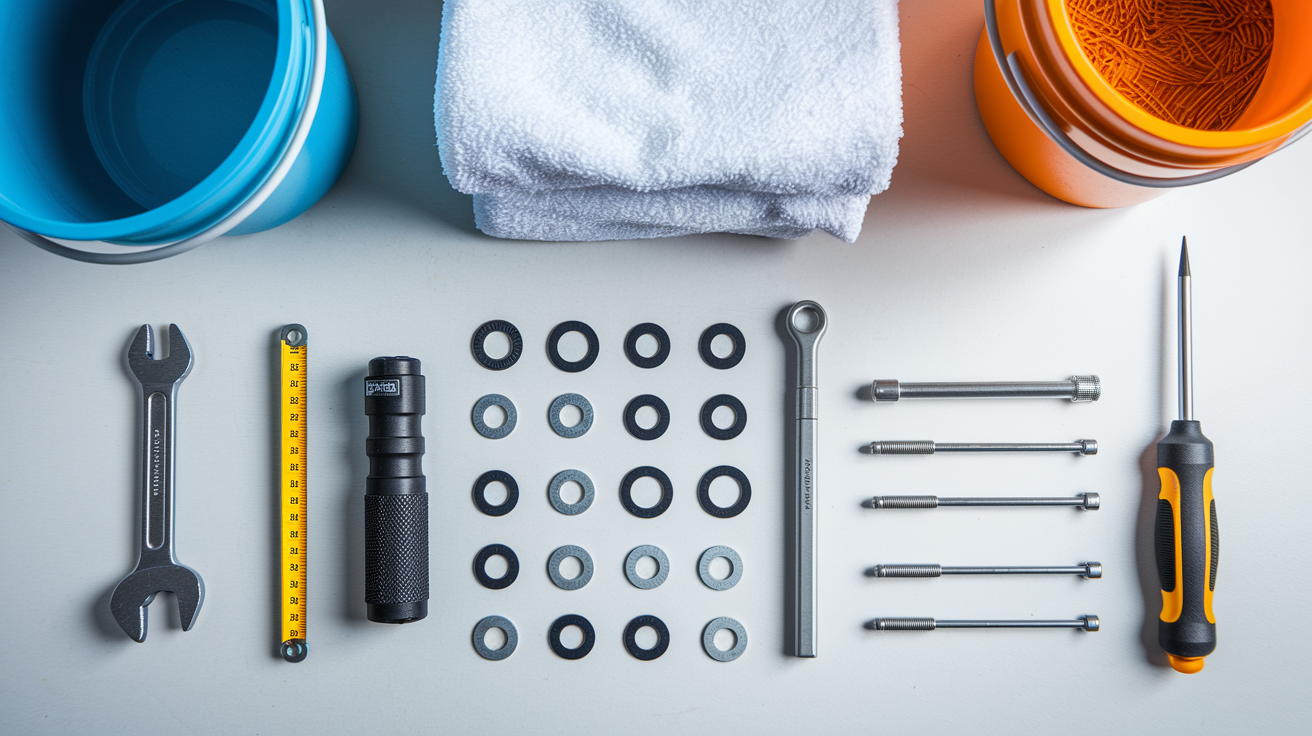
Before you start any repair, gather your tools and verify you’re buying the right replacement parts. Understanding compatibility prevents extra trips to the store and makes sure everything works together after installation.
Here’s what you’ll need for most fill valve and flapper repairs:
- Adjustable wrench for loosening the mounting nut and water supply line
- Bucket to catch water when disconnecting lines
- Towels for cleanup and protecting the floor
- Flashlight to see inside the tank clearly
- Screwdriver for adjusting clips or removing tank bolts if needed
- Measuring tape to check flush valve size and water level height
- Replacement fill valve, flapper, or complete kit depending on diagnosis
Understanding the main components helps you diagnose problems accurately and buy the correct parts. Here’s what each part does and what typically goes wrong:
| Component | Function | Common Issue |
|---|---|---|
| Fill Valve | Controls water flow into tank and shuts off at set level | Debris prevents closure; won’t shut off |
| Float Cup/Float Ball | Rises with water level and signals fill valve to close | Sticks against tank wall; incorrect adjustment |
| Overflow Tube | Prevents tank overflow by draining excess into bowl | Water level set too high; tube cracked |
| Shut Off Valve | Controls water supply to toilet for repairs | Corroded; won’t fully close when needed |
| Refill Tube | Directs water into bowl during tank refill | Not clipped onto overflow tube; loose |
| Adjustment Screw | Raises or lowers float height to control water level | Set incorrectly; water level too high or low |
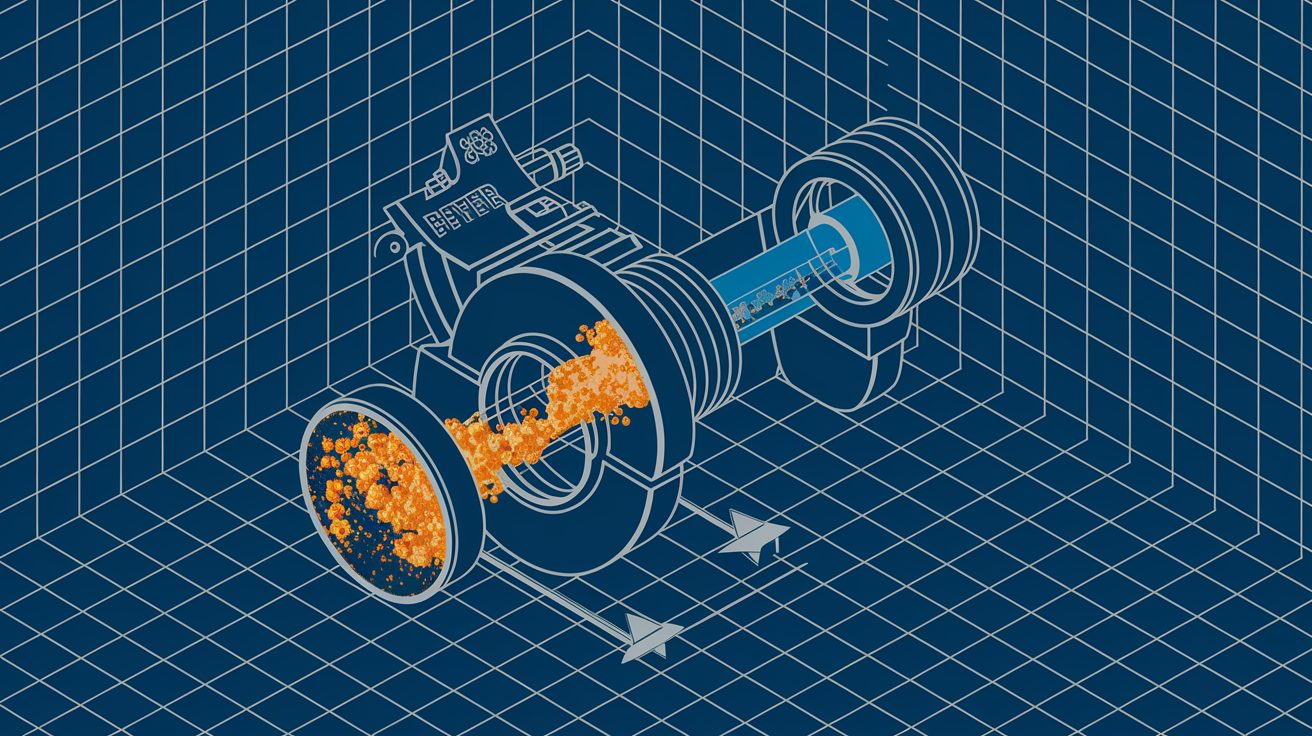
These components work together in sequence. When you flush, the flapper opens and water drains into the bowl. As the tank empties, the float cup or float ball drops, which opens the fill valve. Water flows in through the fill valve and also through the refill tube into the overflow tube to refill the bowl. As the tank fills, the float rises. When it reaches the height set by the adjustment screw, it signals the fill valve to shut off. Modern fill valves use either a piston valve mechanism or a diaphragm valve design, but both operate on the same principle: the float position controls when water stops flowing.
To buy the right parts, you need to know whether you have a 2 inch or 3 inch flush valve system. Measure across the opening at the bottom of the tank where the flapper seals. Here’s what fits what:
| Toilet Type | Fill Valve | Flapper Option | Complete Kit |
|---|---|---|---|
| 2 inch flush valve | 400H PerforMAX | 502 flapper | 2 inch Everything Kit |
| 3 inch flush valve | 400H PerforMAX | 513A or 5403 flapper | 3 inch Everything Kit |
| Universal option | 400H PerforMAX | 523A Super Flapper | Either kit based on measurement |
The 400H PerforMAX fill valve is a reliable replacement that works with most toilets. The 523A Super Flapper is the only convertible flapper that adjusts to work with both 2 inch and 3 inch flush valves, which gives you flexibility if you’re not sure about your measurements. Everything Kits simplify the process by including all the parts you need for a complete repair in one package.
Most major brands like American Standard, Kohler, and TOTO use standard sizing, so universal parts from Fluidmaster and Korky usually work fine. That said, some premium or older models have proprietary parts, so brand compatibility does matter in certain cases. Modern fill valves also include an anti siphon feature that prevents tank water from back flowing into your home’s water supply, which is a safety requirement in most areas. Check that any replacement valve you buy has this feature.
Complete Fill Valve Replacement Instructions

Start by carefully removing the tank lid and setting it on a towel or soft surface where it won’t get knocked over. Tank lids are heavy and break easily if dropped.
Follow these steps to replace the fill valve completely:
- Turn off the shut off valve underneath the toilet by turning the handle clockwise until it stops completely.
- Flush the toilet and hold the handle down to drain as much water as possible from the tank.
- Use a bucket to scoop or sponge out any remaining water at the bottom of the tank.
- Disconnect the water supply line from the threaded shank at the bottom of the tank using an adjustable wrench.
- Unscrew the mounting nut that holds the old fill valve in place (it’s under the tank on the same threaded shank).
- Lift the old fill valve straight up and out of the tank.
- Insert the new fill valve into the same hole, making sure any rubber gasket sits flat against the bottom of the tank.
- Hand tighten the mounting nut from underneath until it’s snug, but don’t overtighten or you could crack the porcelain.
- Adjust the fill valve height so the top of the overflow tube will be about 1 inch above the final water level when adjusted.
- Reconnect the water supply line to the threaded shank and hand tighten, then snug it gently with the wrench.
After installation, turn the shut off valve back on slowly and watch for leaks around the mounting nut and supply line connection. If you see drips, tighten the connections slightly. Don’t crank them down hard.
Now adjust the water level using the adjustment screw on the fill valve. Turn it clockwise to lower the water level, counterclockwise to raise it. Let the tank fill completely, then check the level. You want the water to stop about 1 inch below the top of the overflow tube. Flush a couple of times and recheck. Small adjustments matter. If the water level is too high, it’ll drain into the overflow tube and you’ll be right back where you started. If it’s set too low, you might not get a strong flush.
Check that the refill tube is properly clipped onto the overflow tube so water flows into the bowl as the tank refills. Make sure the float cup moves up and down smoothly without hitting the tank wall or other components. That kind of interference prevents the valve from shutting off correctly.
Flush the toilet three or four times to test everything. Listen for the fill valve to stop completely within 2 to 3 minutes. There should be no hissing sound or whistling noise once the tank is full. If everything’s quiet and the water level holds steady, you’re done. The whole process takes about 30 to 45 minutes for most people, a bit less once you’ve done it before.
Repair Costs: DIY Parts Versus Professional Plumber

Knowing what parts and labor actually cost helps you decide whether to tackle the repair yourself or call someone in. The price difference is significant, but so is your comfort level with the work.
| Repair Type | DIY Parts Cost | Professional Cost (Parts + Labor) | Time Required |
|---|---|---|---|
| Fill valve only | $8–$25 | $150–$250 | 30–45 minutes |
| Flapper only | $5–$15 | $125–$200 | 15–30 minutes |
| Fill valve + flapper | $15–$35 | $175–$275 | 45–60 minutes |
| Complete Everything Kit | $20–$40 | $200–$300 | 60–90 minutes |
| Flush valve assembly | $15–$35 | $250–$400 | 90–120 minutes |
| Full tank rebuild | $30–$60 | $300–$500 | 2–3 hours |
For parts alone, you’re looking at fairly low costs. A quality fill valve from Fluidmaster or Korky runs about $10 to $20. A flapper is usually $5 to $12. An Everything Kit with fill valve, flapper, tank bolts, and gaskets costs $20 to $40 depending on whether you need the 2 inch or 3 inch version. A complete flush valve assembly costs $15 to $35. These are standard retail prices at most hardware stores.
Professional labor charges are where costs jump. Most plumbers charge $150 to $300 for straightforward fill valve or flapper replacement, which includes the service call, diagnosis, parts, and labor. If the job involves replacing the flush valve or rebuilding the entire tank, expect $250 to $500 because it takes more time and requires removing the tank from the bowl. Emergency or after hours calls cost more.
The DIY approach saves you about 70 to 80 percent compared to hiring a professional for basic repairs. That’s real money, especially if you’re dealing with multiple toilets or a tight budget. But professional help makes sense in certain situations. If you’ve tried the DIY fixes and the problem keeps coming back, a plumber can diagnose issues you might be missing. If you have physical limitations that make it hard to work in tight spaces or lift a heavy tank, don’t risk injury. If you have an American Standard or TOTO toilet with proprietary parts, a plumber familiar with those brands can save you trial and error headaches. And if you just don’t have the time or patience to troubleshoot, paying for professional work buys you peace of mind.
One thing to keep in mind: a permanent repair that’s done right matters more than saving a few dollars on a temporary patch. If you’re not confident in your ability to do it correctly, or if the problem involves something beyond a simple valve or flapper swap, the cost of a professional is worth it to avoid bigger damage down the road.
Preventing Future Fill Valve Problems and Extending Component Life

Regular maintenance catches small problems before they turn into constant running, water waste, and surprise increases on your water bill. A little attention every few months saves you money and extends the life of every component in your tank.
Here are the prevention steps that make the biggest difference:
- Inspect all tank components every 6 months for wear, cracks, or buildup
- Perform the debris flushing cleaning procedure once a year to clear sediment
- Check for mineral deposits and calcium buildup every 3 months if you have hard water
- Verify that the float adjustment is still correct and water level is 1 inch below the overflow tube, checking seasonally
- Test the flapper seal once a year using the water level marking method to catch slow leaks early
- Replace flappers proactively every 3 to 5 years even if they seem fine, since rubber deteriorates over time
- Listen for any hissing sound or whistling noise between flushes, which means something isn’t sealing
- Monitor your water bill for unexplained increases that could indicate a hidden leak
Most toilet components have predictable lifespans when maintained properly. Flappers typically last 3 to 5 years before the rubber starts breaking down. Fill valves usually go 5 to 7 years before internal parts wear out or mineral buildup becomes too much to clean. Flush valves can last 7 to 10 years or longer if the water quality is good and the tank doesn’t get a lot of harsh chemical cleaners. Knowing these timelines helps you replace parts before they fail completely.
Watch for early warning signs that need immediate attention. If you hear constant refilling sounds even when no one’s using the toilet, something’s leaking. If you see water continuously flowing into the overflow tube, the fill valve isn’t shutting off or the water level is set too high. A damp exterior on the tank means a crack or a failing seal. A water bill that jumps without any change in how much you’re using points to a hidden leak, often a slow flapper leak that wastes gallons every day. Catching these signs early prevents the small problems from becoming emergency repairs or major water damage.
Final Words
A toilet fill valve running constantly wastes water, drives up your bill, and signals a problem that won’t fix itself.
Most of the time, it’s either debris in the fill valve, a worn flapper, or a simple adjustment issue. The good news? You can troubleshoot and fix most of these problems in under an hour with basic tools.
Start with the overflow test to pinpoint whether it’s the fill valve or the flapper. Clean out sediment, adjust the float, or swap the parts if needed.
If you stay on top of simple maintenance and catch the early signs, you’ll avoid the bigger headaches down the road. Your toilet will run quietly, refill cleanly, and you’ll stop hearing that hissing sound for good.
FAQ
What is the most common cause of a constantly running toilet?
The most common cause of a constantly running toilet is a worn flapper that doesn’t seal properly against the flush valve, allowing water to leak into the bowl and triggering constant refilling by the fill valve.
Why is my toilet still running after the valve is turned off?
Your toilet may still run after turning off the shut-off valve because there’s residual water in the tank draining through a leaking flapper, or the fill valve itself has internal damage that prevents complete closure even without incoming water pressure.
Why is my toilet still running after replacing fill valve and flapper?
A toilet that still runs after replacing both the fill valve and flapper likely has a damaged flush valve assembly with a cracked overflow tube, warped valve seat, or the new fill valve installed at incorrect height causing overflow issues.
Why does my fill valve sound like it is constantly running?
A fill valve sounds like it’s constantly running because mineral deposits, calcium buildup, or sediment inside the valve prevent the diaphragm from sealing completely, creating a hissing sound or whistling noise as water flows continuously through the valve mechanism.
How do I know if the problem is the fill valve or the flapper?
You can determine if the problem is the fill valve or flapper by checking if water drains into the overflow tube. If water level rises and overflows, it’s a fill valve problem. If water level drops without overflowing, the flapper isn’t sealing properly.
Can I clean a fill valve instead of replacing it?
Yes, you can clean a fill valve by turning off water, lifting the float cup, twisting the cap counterclockwise one-eighth turn, and running water full force for 10-15 seconds to flush out debris, which often resolves running issues without replacement.
How long should a fill valve last before needing replacement?
A fill valve should last 5-7 years under normal conditions before needing replacement, though hard water damage and mineral deposits can shorten lifespan, while regular debris flushing maintenance can extend it beyond typical expectations.
What water level should my toilet tank maintain?
Your toilet tank water level should sit 1 inch below the top of the overflow tube. Adjust the fill valve’s adjustment screw clockwise to lower or counterclockwise to raise water level, testing after each quarter-turn.
How much does it cost to fix a running toilet yourself?
DIY toilet repair costs range from $5-15 for a flapper only, $8-25 for a fill valve only, or $20-40 for a complete Everything Kit with all components, compared to professional plumber costs of $150-300 including labor.
When should I call a professional instead of fixing it myself?
Call a professional plumber when you encounter complex flush valve replacement requiring tank removal, recurring problems after multiple DIY attempts, physical limitations preventing access, or when dealing with specialized brand-specific components requiring expert knowledge.