
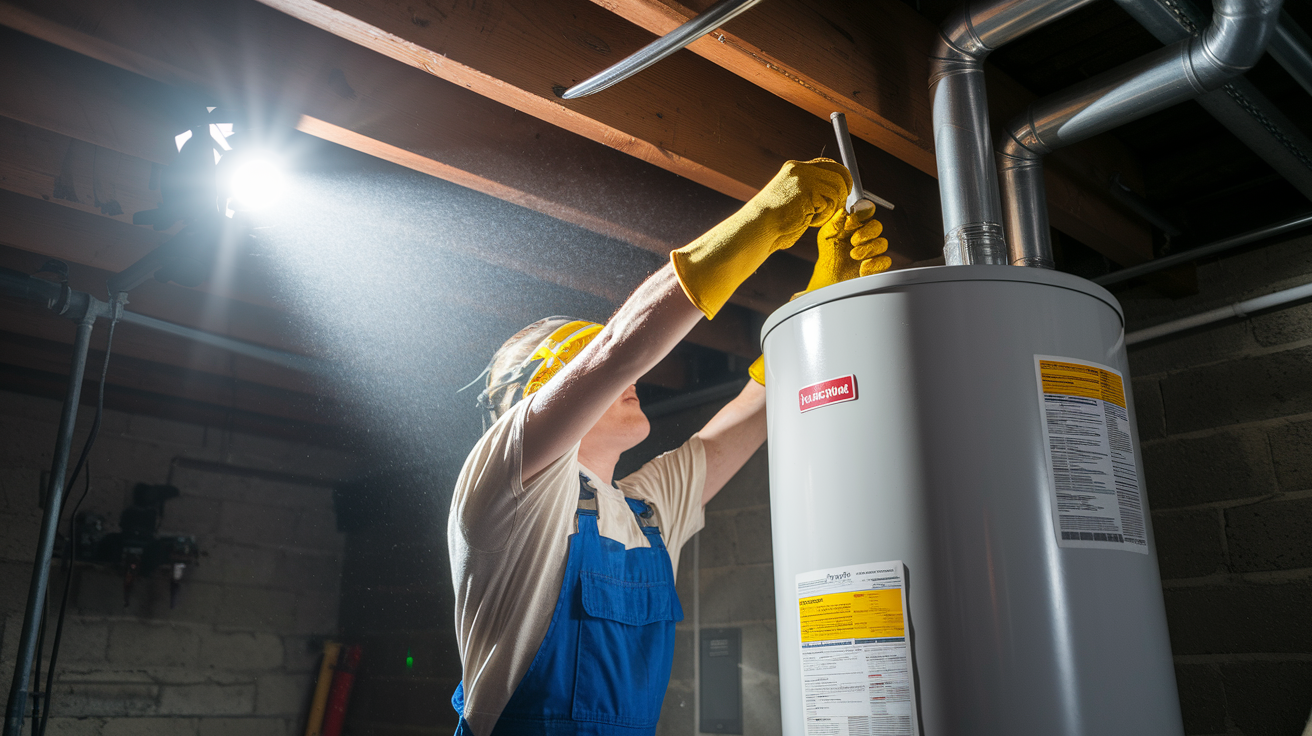
Most people don’t realize a seized anode rod can destroy an entire water heater. One stripped hex head or rounded-off bolt means you’re looking at a full tank replacement instead of a $40 part swap. The right tools make the difference between a smooth afternoon project and an expensive disaster. This guide covers every wrench, socket, and specialty item you need to pull off anode rod replacement without damaging your tank, stripping threads, or making three trips to the hardware store.
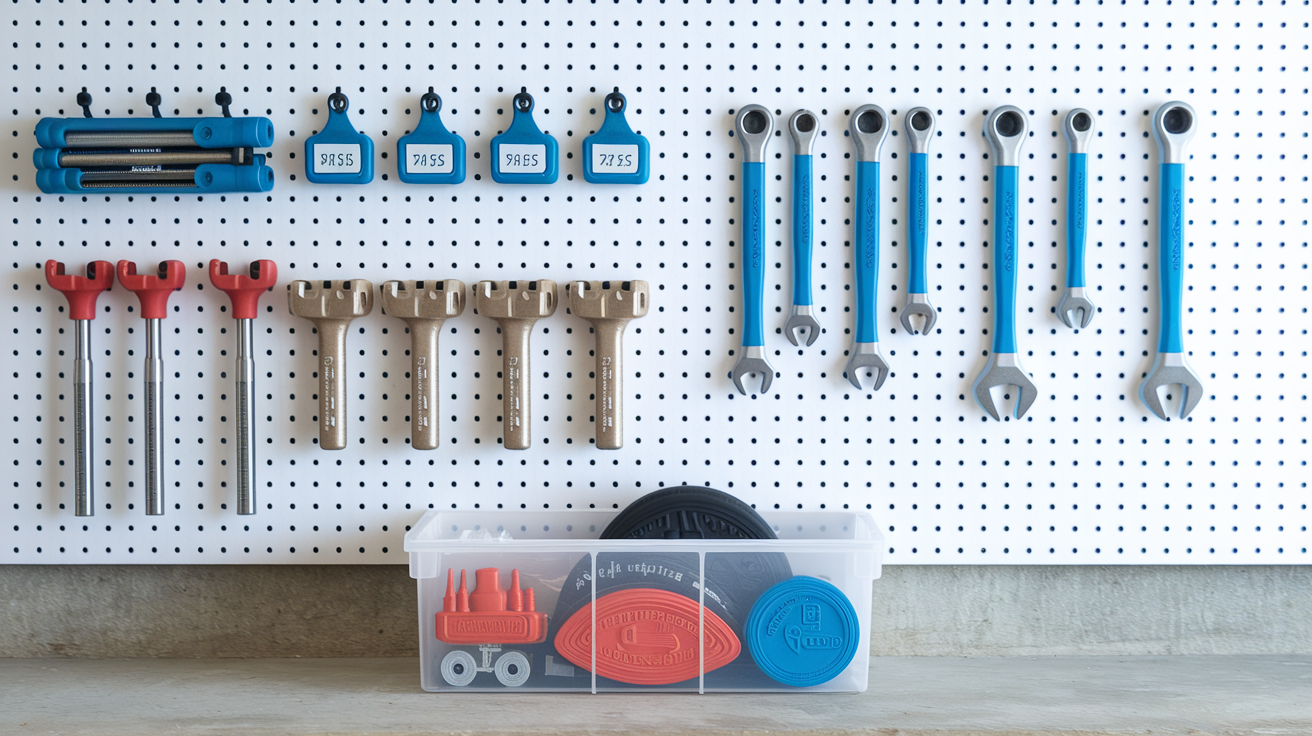
Complete Tool Checklist for Anode Rod Replacement

Getting your tools ready before you start turns anode rod replacement from a hassle into something you can actually knock out in an afternoon. If you’ve got everything lined up, you won’t be making frustrated runs to the hardware store with a half-drained water heater sitting in your basement. Most of this stuff is already hanging around your garage anyway. The specialized pieces cost way less than calling someone out to do it for you.
Essential Hand Tools
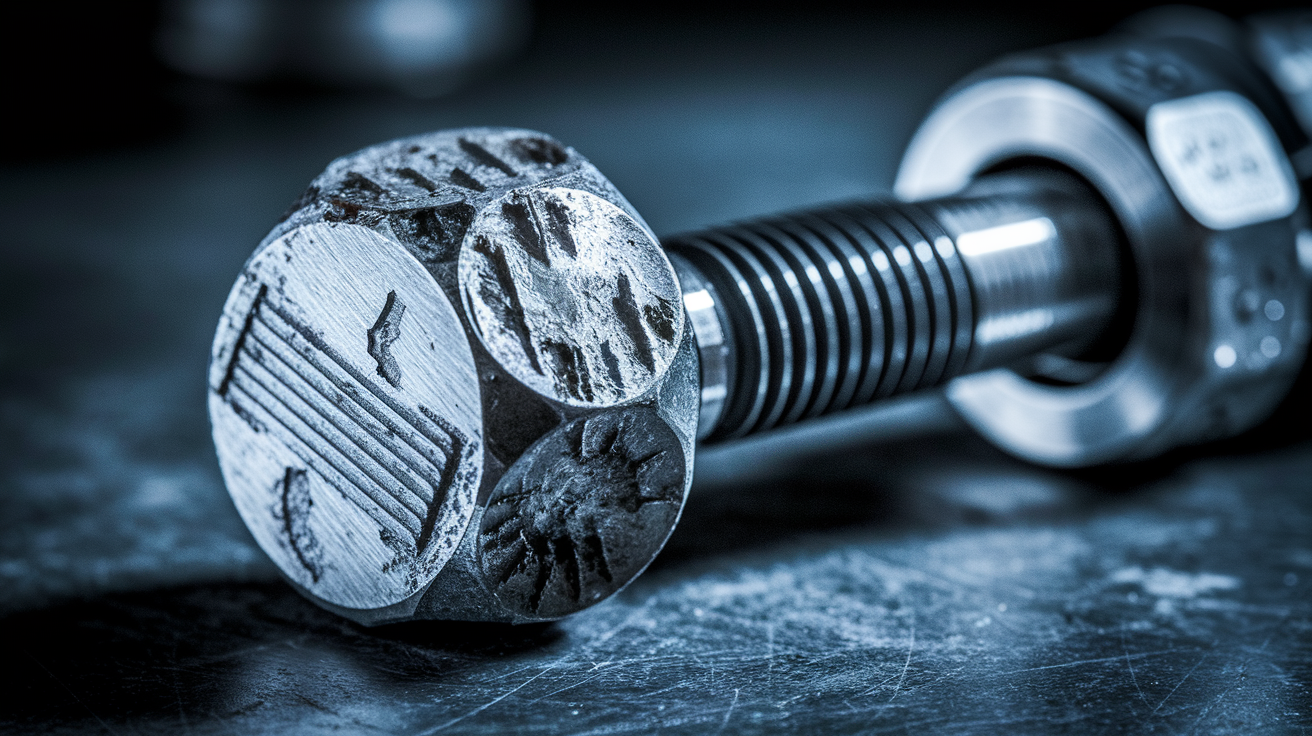
You’ll need a 1-1/16 inch or 15/16 inch 6-point deep socket. The 6-point design grips all six sides evenly instead of just the corners, which keeps you from rounding things off and making the whole job impossible. Deep sockets matter because some hex heads sit below the tank surface where regular sockets can’t reach.
A 1/2-inch drive breaker bar, at least 18-24 inches long, gives you the leverage to break loose corroded threads without straining yourself. Longer is better here. It’s physics doing the work, not you.
Keep a heavy-duty ratchet wrench on hand as a backup to the breaker bar. Once you’ve broken that initial seal, the ratchet handles final tightening and removal more smoothly.
An adjustable wrench or pipe wrench helps you deal with water supply valves, drain valves, and the pressure relief valve when you’re shutting everything down and firing it back up.
Flathead screwdriver for opening the drain valve and operating the temperature and pressure relief valve before you start.
A cheater pipe (just a 2-3 foot length of metal pipe) slides over your breaker bar to give you extra leverage when you run into a really stubborn rod. Simple black iron pipe works fine.
Heavy-duty ratchet strap wrapped around the tank body lets a helper brace it so the whole unit doesn’t spin when you’re trying to turn the rod.
Rubber mallet for tapping corroded connections. The vibration helps break the seal and lets penetrating oil work deeper into the threads.
Tape measure confirms you’ve got enough overhead clearance to pull the rod out and helps you buy the right replacement length.
Flashlight or work light because water heaters live in dark corners. You need to see what you’re doing and catch problems before they get worse.
Deep sockets become necessary when the hex head sits flush with or below the tank surface, which is pretty common on newer models.
Power Tool Options
If your water heater’s eight years old or more, an impact wrench saves you from wrestling with seized threads. A 1/2-inch-drive model delivering 300+ foot-pounds of torque breaks loose rods that would defeat you otherwise. You can go corded electric, pneumatic (needs an air compressor), or cordless battery. Pneumatic gives you the most consistent power but adds setup. Make sure you use an impact-rated 6-point deep socket, not a regular chrome socket that’ll shatter under the hammering force. Most rental places charge around $30 for the day, which beats the alternative of struggling for hours with manual tools.
Water Management and Preparation Equipment
Grab a garden hose long enough to run from the drain valve to a floor drain, utility sink, or outside. A standard 5-gallon bucket catches spillage during actual rod removal since whatever water’s sitting above the hex head will drain out once you pull it free. Keep several absorbent towels around for cleanup. You’ll also want a container for the old rod, which is going to be covered in corrosion, mineral buildup, and rust.
Installation Materials and Chemicals
Wrap 5-6 layers of Teflon tape around the new rod’s threads before installation to seal everything up tight. Some people like pipe thread compound instead, or use both for extra security. Penetrating oil like WD-40, Liquid Wrench, or PB Blaster is essential for loosening corroded threads. Apply it generously around the hex head and let it soak for 15-30 minutes before you try removal. The chemicals break down rust and mineral deposits that’ve basically glued the rod threads to the tank opening.
Safety and Shutdown Equipment
Work gloves protect your hands from sharp edges on corroded parts. Safety goggles keep rust particles and water spray out of your eyes. Wear closed-toe shoes in case you drop something heavy. Make sure your workspace has decent lighting. The shutdown itself doesn’t need special tools, just access to your electrical breaker panel or gas control valve, plus the cold water supply valve feeding the tank.
Penetrating Oils and Corrosion Treatment for Seized Anode Rods

Mineral deposits and corrosion create chemical bonds between the rod threads and tank opening over time. Hard water speeds this up by adding calcium and magnesium to the mix. Penetrating oil dissolves these bonds chemically instead of you forcing them mechanically, which risks damaging the tank threads or rounding off the hex head.
Here’s how to do it right:
Clean debris from the hex head. Wipe away dust, rust flakes, or mineral buildup so the oil can actually reach the metal threads.
Saturate threads with penetrating oil. Spray WD-40, Liquid Wrench, or PB Blaster around the entire perimeter where the hex head meets the tank. Don’t be stingy. You want it seeping down into the threads.
Wait 15-30 minutes for penetration. The chemicals need time to work into the corrosion and break things down. Rushing this step just makes everything harder.
Reapply and tap the hex head gently with a rubber mallet. A second application plus light tapping helps the oil penetrate deeper. The vibration spreads it along the thread surfaces.
Wait another 10 minutes before trying removal. Let that second application do its job before you start applying torque.
Really seized rods, especially on water heaters that’ve never had the anode replaced, benefit from an overnight soak. Apply the oil before bed and let it sit for 8-12 hours before attempting removal the next day.
If multiple applications over 24 hours still don’t free things up, you can try heat as a last resort. Briefly apply propane torch heat to the hex head for 60-90 seconds to expand the metal. The heat breaks the corrosion bond through thermal expansion. Keep the flame away from plastic water lines, gas connections, and the water heater cover. Let the metal cool slightly before trying removal with your impact wrench. This method requires careful attention to safety and works best with good ventilation.
Safety Equipment and Personal Protection for Water Heater Work
Personal protective equipment makes the job safer and more comfortable. Work gloves protect against sharp edges on corroded metal that can slice skin easily. Safety goggles keep rust particles, mineral dust, and water spray out of your eyes. Closed-toe shoes protect your feet if you drop heavy tools or the old rod. Wear old clothing you don’t mind getting wet or stained with rust.
The shutdown sequence before starting work protects you from burns, electrical shock, and pressure injuries. Turn off the electrical breaker for electric heaters or rotate the gas control valve to “off” for gas units. Close the cold water supply valve feeding into the top of the tank. Open the pressure relief valve to release built-up pressure and allow air into the system. If your heater’s been running recently, wait 2+ hours for cooling time before touching anything. Hot water causes serious burns, and the metal tank surface stays hot longer than you’d think.
Workspace safety matters as much as personal protection. Clear a 5-foot radius around the heater so you’ve got room to maneuver tools and position yourself for leverage. Set up good lighting since water heaters usually sit in dim basement corners or utility closets where you can’t see thread condition or potential leaks. If you need a ladder to reach the top of a tall heater, make sure it’s stable on level ground. Open windows or run a fan if you’re using penetrating oils in an enclosed space. The fumes get overwhelming.
Having a helper available makes several steps easier and safer. They can brace the tank with a ratchet strap during removal attempts to prevent spinning, hand you tools when your hands are occupied, and provide extra muscle for stubborn rods.
Specialized Tools for Low Clearance and Flexible Anode Rod Installation
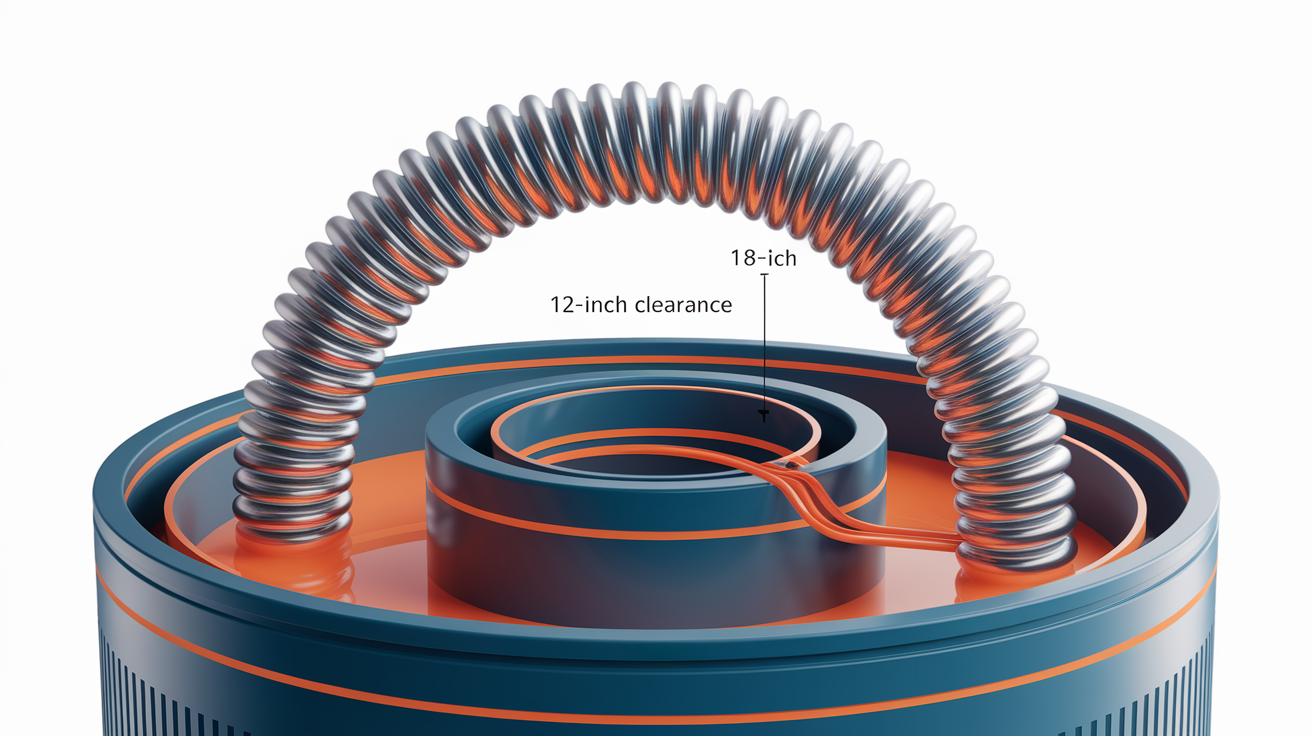
Standard rigid anode rods measure 42-44 inches and require equivalent overhead clearance for vertical removal and installation. This makes them impossible to use in basement installations with low floor joists, crawlspace heaters under ductwork, or ceiling-mounted units in tight utility closets. Measure the distance from the top of your water heater to the nearest obstruction to see whether you’re dealing with a clearance problem.
Flexible anode rods solve the tight space challenge. These segmented rods feature hinged joints that let them bend during installation, requiring only 12-18 inches of overhead clearance while providing the same corrosion protection as rigid models. The individual segments connect with threaded couplings that lock together once inserted through the tank opening. Performance stays identical since the sacrificial metal still attracts corrosive elements regardless of the rod’s flexibility.
Specialized tools for flexible rod installation differ slightly from rigid rod work. Check the hex head size before assuming it matches the standard 1-1/16 inch measurement. Some flexible rods use different sizes. Needle-nose pliers help guide individual segments through the tank opening and align the threaded couplings for proper connection. Installation requires more patience than rigid rods since you’re working with multiple pieces that need careful threading to avoid cross-threading the couplings.
Measure your overhead clearance before purchasing a replacement rod, even if you think you’ve got enough space. Consider upgrading to a flexible rod even with adequate clearance. It makes future replacements way easier and reduces the physical demands of the job.
Complete Step-by-Step Tool Application During Replacement
Expect the complete project to take 1-2 hours if you’ve gathered your tools and read through the process beforehand.
Turn off power/gas. Flip the electrical breaker to “off” or rotate the gas control valve clockwise to shut off fuel supply. No tools needed.
Close water supply. Use an adjustable wrench to turn the cold water supply valve clockwise until fully closed.
Relieve pressure. Lift the lever on the temperature and pressure relief valve with a flathead screwdriver or by hand. You’ll hear air enter the system and see some water discharge through the overflow pipe.
Drain tank. Attach a garden hose to the drain valve at the tank bottom using an adjustable wrench for a tight connection. Open a hot water faucet somewhere in the house to allow air into the system and speed drainage. Drain 10-15% of the tank (a few gallons) to prevent major spillage during rod removal while keeping enough water weight to prevent the tank from spinning.
Apply penetrating oil. Spray WD-40, Liquid Wrench, or PB Blaster around the hex head and wait 15-30 minutes for penetration into the corroded threads.
Position bucket. Place your 5-gallon bucket directly under the hex head to catch water that’ll spill when the rod comes free.
Remove old rod. Fit your 1-1/16 inch 6-point deep socket over the hex head. Attach your breaker bar or impact wrench and turn counterclockwise. Use steady pressure instead of jerking motions. If using a breaker bar with cheater pipe, have a helper stabilize the tank with a ratchet strap to prevent spinning.
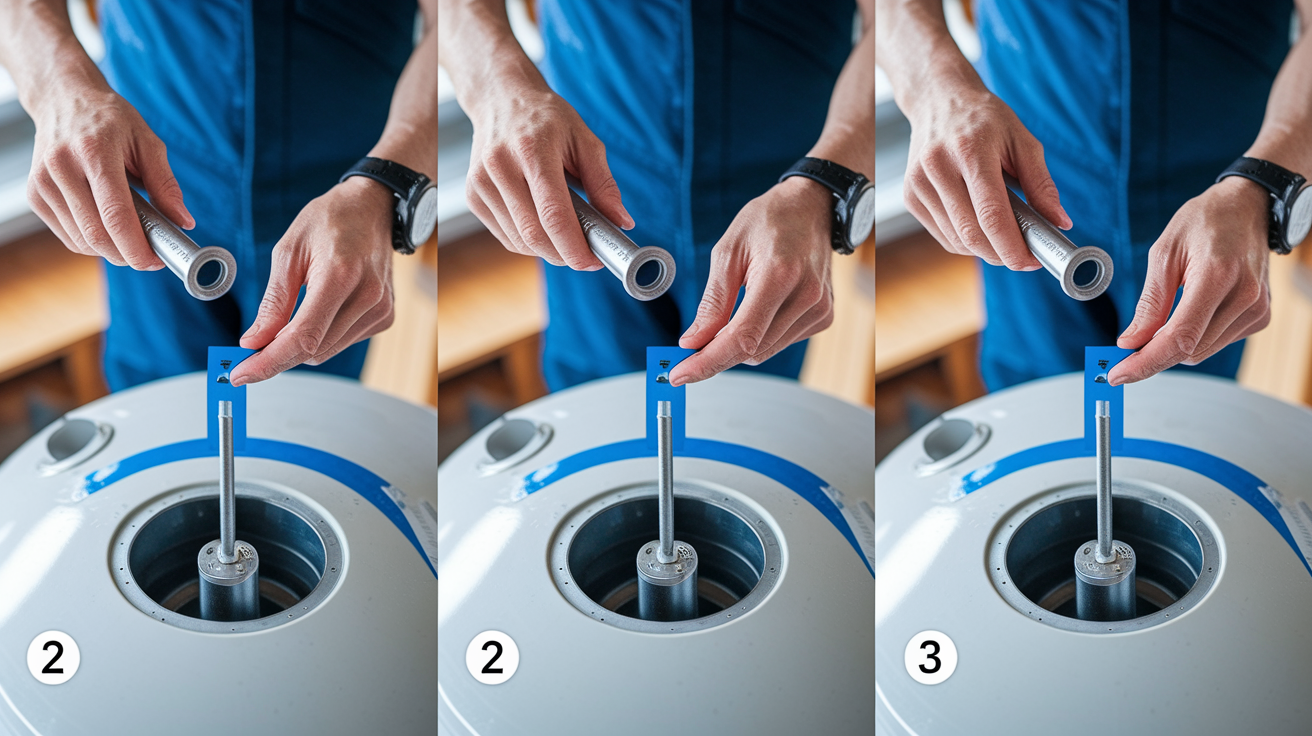
Apply sealant. Wrap 5-6 layers of Teflon tape clockwise around the new anode rod threads for a watertight seal.
Install new rod. Thread the new rod into the opening by hand initially, then tighten with your socket and ratchet in a clockwise direction. Don’t overtighten. You’re threading into a steel tank, not cast iron.
Refill system. Close the drain valve, remove the garden hose, and open the cold water supply valve. Keep a hot water faucet open to purge air from the system as the tank refills. You’ll hear gurgling and sputtering until water flows smoothly.
After refilling, check for leaks around the hex head where the new anode rod threads into the tank. Look for water seepage or dripping. Inspect the connection while the tank is under pressure. Wipe the area dry and watch for several minutes to confirm a watertight seal.
Only restore power or gas after confirming everything is sealed and the tank is completely full. For electric heaters, air pockets can cause element burnout. Test your hot water at a faucet before considering the job complete. You should have normal water flow and pressure within 20-30 minutes as the fresh water heats.
For guidance on long-term care, check out Water Heater Maintenance: A Complete Guide to understand how this replacement fits into your overall maintenance schedule.
Troubleshooting Tool Solutions for Common Anode Rod Problems
| Problem | Tool Solution | Technique |
|---|---|---|
| Rounded hex head | Impact-rated socket with tight fit | File away damaged corners first to create flat surfaces, then use impact wrench with fresh socket |
| Seized threads | Penetrating oil plus 24-hour soak | Apply penetrating oil generously, wait overnight, reapply before removal attempts |
| Spinning tank | Ratchet strap around tank body | Helper braces unit with heavy-duty strap while you apply counterclockwise torque |
| Insufficient clearance | Flexible rod with needle-nose pliers | Install segmented rod one piece at a time, using pliers to guide and align threaded couplings |
| Extreme corrosion | Propane torch brief heat application | Heat hex head for 60-90 seconds, cool with wet cloth, retry with impact wrench after thermal expansion breaks bond |
Take an escalation approach to difficult removals instead of immediately jumping to aggressive methods. Start with hand tools and penetrating oil for your first 3-4 attempts. If those fail after proper soak times, move up to an impact wrench, which solves most stubborn situations. Consider the heat method only as a final resort, and use proper safety precautions around gas lines, plastic components, and flammable materials.
Some situations tell you that tools alone won’t solve the problem. A cracked hex head means the metal has failed structurally and requires professional extraction techniques or tank replacement. Active leaking around the threads during removal attempts suggests the tank opening threads are damaged. A tank that keeps spinning despite proper stabilization with straps might have internal corrosion or loose mounting, requiring expert assessment. When you run into these scenarios, additional reading from Common Water Heater Problems and Solutions can help you understand whether repair or replacement makes more sense.
Tool Storage and Maintenance for Future Anode Rod Replacements
Inspecting your anode rod every three years and replacing it every five years makes investing in dedicated tools worthwhile instead of repeatedly renting. Organized storage keeps everything together for quick access when inspection time arrives. Store your anode rod tools in a labeled section of your main toolbox or dedicate a small plastic bin specifically for water heater maintenance.
Tool maintenance after each use extends their working life and keeps them ready for next time. Clean your sockets of rust particles and mineral deposits that accumulated during removal. Apply light machine oil to socket surfaces and breaker bar joints to prevent corrosion from stored moisture. Inspect your breaker bar for stress cracks near the drive end where force concentrates. Wipe down your impact wrench and check that chuck springs move freely. Hang tools on a pegboard or store them in foam cutouts so you can immediately spot if something’s missing.
Create a simple reminder system that doesn’t rely on memory alone. Mark your water heater installation date directly on the unit with a permanent marker. Many people forget or never knew when their heater was installed. Set phone calendar reminders for 3-year inspection intervals with notes about what to check. Keep a spare anode rod and roll of Teflon tape stored with your tools so you’re never waiting on parts delivery when inspection reveals replacement is needed. Note the date of each replacement on a small label stuck to the side of the water heater for future reference.
Proper tool care means you’re ready for the next service without scrambling to find or replace equipment. Many of these tools also work for other plumbing projects like replacing water supply lines, shutoff valves, or working on outdoor faucets, so the investment serves multiple purposes beyond just anode rod maintenance.
Final Words
Having the right tools before you start makes anode rod replacement a manageable DIY project instead of a frustrating ordeal.
The tools needed for anode rod replacement aren’t exotic or expensive. Most homeowners already own many of them, and the few specialized items pay for themselves the first time you skip a service call.
Measure your overhead clearance, check your socket size, and lay everything out within reach. When you’re prepared, the actual work goes smoothly.
Your water heater will thank you with years of reliable service.
FAQ
What size socket do you need to change an anode rod?
The most common socket size for changing an anode rod is 1-1/16 inch, though some water heaters use a 15/16 inch socket. Always use a 6-point deep socket rather than a 12-point socket to prevent rounding off the hex head corners during removal.
How much does a plumber charge to change an anode rod?
A plumber typically charges between $200 and $400 to change an anode rod, including labor and the replacement rod. DIY replacement costs approximately $30 to $40 for materials and takes 1 to 2 hours for someone with basic home repair skills.
What size wrench for water heater anode?
The wrench size for a water heater anode rod depends on the socket needed. Use a 1/2-inch drive breaker bar or heavy-duty ratchet wrench that fits either a 1-1/16 inch or 15/16 inch deep socket, with 18 to 24 inches minimum length for proper leverage.
Can I use an impact wrench to remove an anode rod?
You can use an impact wrench to remove an anode rod, and it’s particularly helpful for stubborn or seized rods. A 1/2-inch drive impact wrench with 300+ foot-pounds of torque and an impact-rated 6-point deep socket makes removal significantly easier on units 8 or more years old.
How long does it take to replace a water heater anode rod?
Replacing a water heater anode rod takes 1 to 2 hours for most homeowners. The timeline includes shutting off fuel and water, draining several gallons from the tank, removing the old rod, installing the new rod with sealant, refilling the system, and checking for leaks.
What tools are needed for anode rod replacement?
The essential tools for anode rod replacement include a 1-1/16 inch 6-point deep socket, 1/2-inch drive breaker bar, adjustable wrench, garden hose, bucket, Teflon tape, penetrating oil, work gloves, and safety goggles. A cheater pipe or impact wrench helps with particularly stubborn rods.
How do you remove a stuck anode rod?
To remove a stuck anode rod, apply penetrating oil like WD-40 or Liquid Wrench to the hex head and wait 15 to 30 minutes for penetration. Use an impact wrench or breaker bar with a cheater pipe for extra leverage, and consider a 24-hour oil soak for severely seized threads.
How much water should you drain before removing an anode rod?
You should drain 10 to 15 percent of the tank water, which equals several gallons, before removing an anode rod. This prevents spillage during rod removal while keeping enough tank weight to prevent the unit from spinning, and turning on a hot water faucet speeds drainage.
Do I need overhead clearance to replace an anode rod?
Standard rigid anode rods require 44 inches of overhead clearance for vertical removal and installation. If your water heater has low ceiling clearance, use a flexible or segmented anode rod that needs only 12 to 18 inches of clearance while providing equivalent corrosion protection.
What kind of tape do you put on an anode rod?
You should wrap 5 to 6 layers of Teflon tape around the threads of a new anode rod before installation to create a watertight seal. Pipe thread compound can be used as an alternative or supplement to Teflon tape for additional sealing protection.
How often should you check your water heater anode rod?
You should check your water heater anode rod every 3 years and replace it when more than 6 inches of core wire is visible or the rod is less than half an inch thick. Most anode rods need replacement every 3 to 5 years depending on water quality.
Can you use a 12-point socket on an anode rod?
You should not use a 12-point socket on an anode rod because it’s more likely to round off the hex head corners, especially on corroded rods. Always use a 6-point deep socket that fits tightly on the hex head to prevent damage during removal attempts.